# Self Custody Labs
> Independent, vendor-neutral guides to Bitcoin self-custody: cold storage,
> hardware wallets, seed phrases, multisig, running your own node, and privacy.
> No affiliate links and no sponsored placement. Every page below is also
> available as Markdown by appending .md to its URL.
Site: https://selfcustodylabs.com
Full corpus in one file: https://selfcustodylabs.com/llms-full.txt
Generated: 2026-08-23
# Learn Bitcoin Self-Custody
> Comprehensive educational content about Bitcoin self-custody. From fundamentals to advanced concepts. Everything you need to truly own your Bitcoin.
Source: https://selfcustodylabs.com/docs/learn/
Last updated: 2026-08-02
Publisher: Self Custody Labs (https://selfcustodylabs.com)
---
Welcome to the complete learning resource for Bitcoin self-custody. Whether you're just getting started or deepening your knowledge, this section covers everything you need.
---
## 🌱 New to Bitcoin? Start Here
### [Start Here: Your Self-Custody Journey](https://selfcustodylabs.com/docs/learn/fundamentals)
Begin with the fundamentals. Understand what Bitcoin is, why self-custody matters, and find the right path for your situation.
**What you'll learn:**
- [What is Bitcoin?](https://selfcustodylabs.com/docs/learn/fundamentals/what-is-bitcoin): The basics of digital money
- [What is Self-Custody?](https://selfcustodylabs.com/docs/learn/fundamentals/what-is-self-custody): Why keys matter
- [Choose Your Setup](https://selfcustodylabs.com/docs/learn/fundamentals/choosing-your-path): Find the right approach for you
- [Before You Deposit](https://selfcustodylabs.com/docs/wallet-setup/before-you-deposit): Critical safety checklist
**Time:** 1-2 hours of reading to build a solid foundation
---
## 📚 Core Concepts
Once you understand the basics, dive deeper into how Bitcoin actually works:
### 🔑 [Keys & Cryptography](https://selfcustodylabs.com/docs/learn/keys/intro)
The foundation of Bitcoin ownership. Learn how private keys, seed phrases, and derivation paths work together to secure your Bitcoin.
- What makes a key "random enough"
- How 12/24 words become your master key
- Extended keys (xpub/xprv) and derivation paths
- The role of passphrases
### 👛 [Wallets](https://selfcustodylabs.com/docs/learn/wallets/hardware-wallets)
Wallets don't hold Bitcoin; they hold keys. Understand the different types and their trade-offs.
- Hardware wallets and their security model
- Software wallets: hot vs. cold
- Air-gapped wallets for maximum security
- Multisig: multiple keys for one wallet
### 💸 [Transactions](https://selfcustodylabs.com/docs/learn/transactions/understanding)
How Bitcoin actually moves. From UTXOs to broadcast, understand the transaction lifecycle.
- What is a UTXO?
- Creating and signing transactions
- Transaction types and fees
- Broadcasting to the network
### 🕵️ [Privacy](https://selfcustodylabs.com/docs/learn/privacy/why-privacy-matters)
Privacy isn't optional. It's essential security. Learn how Bitcoin transactions can be traced and how to protect yourself.
- Why privacy matters for security
- How chain analysis works
- Practical privacy protection
### 🖥️ [Nodes](https://selfcustodylabs.com/docs/learn/nodes/what-is-node)
Running your own node means trusting no one. Understand what nodes do and why they matter.
- What is a Bitcoin node?
- Why run your own node
- Node vs. SPV wallets
---
## 🎯 Learning Paths
Choose your path based on where you are:
### Complete Beginner
1. [What is Bitcoin?](https://selfcustodylabs.com/docs/learn/fundamentals/what-is-bitcoin)
2. [What is Self-Custody?](https://selfcustodylabs.com/docs/learn/fundamentals/what-is-self-custody)
3. [Private Keys](https://selfcustodylabs.com/docs/learn/keys/intro)
4. [Hardware Wallet Setup](https://selfcustodylabs.com/docs/wallet-setup/hardware-wallet/)
### Ready for Self-Custody
1. [Choose Your Setup](https://selfcustodylabs.com/docs/learn/fundamentals/choosing-your-path)
2. [Hardware Wallet Setup](https://selfcustodylabs.com/docs/wallet-setup/hardware-wallet/)
3. [Backup Verification](https://selfcustodylabs.com/docs/wallet-setup/backup-verification/)
4. [Before You Deposit](https://selfcustodylabs.com/docs/wallet-setup/before-you-deposit)
### Enhancing Security
1. [DIY Seed Generation](https://selfcustodylabs.com/docs/learn/keys/random/)
2. [Passphrase Security](https://selfcustodylabs.com/docs/learn/keys/passphrase/)
3. [Run Your Own Node](https://selfcustodylabs.com/docs/bitcoin-node/)
4. [UTXO Management](https://selfcustodylabs.com/docs/learn/privacy/utxo-management/)
### Maximum Security
1. [Why Privacy Matters](https://selfcustodylabs.com/docs/learn/privacy/why-privacy-matters)
2. [Multisig Setup](https://selfcustodylabs.com/docs/learn/wallets/multisig/)
3. [Air-Gapped Computing](https://selfcustodylabs.com/docs/learn/wallets/air-gapped-wallets/)
4. [Operational Security](https://selfcustodylabs.com/docs/security/operational-security/)
---
## 📖 Quick Reference
| Resource | Description |
|----------|-------------|
| [Glossary](https://selfcustodylabs.com/docs/reference/glossary/) | 100+ Bitcoin terms defined |
| [Address Types](https://selfcustodylabs.com/docs/reference/address-types/) | Legacy, SegWit, Taproot explained |
| [FAQ](https://selfcustodylabs.com/docs/reference/faq/) | Common questions answered |
---
## Ready for Hands-On?
Once you've built your knowledge foundation:
→ **[View All Guides](https://selfcustodylabs.com/guides/)**: Step-by-step tutorials for wallet setup, security, privacy, and more
→ **[Hardware Wallet Setup](https://selfcustodylabs.com/docs/wallet-setup/hardware-wallet/)**: Get started with self-custody today
---
# Start Here: Bitcoin Self-Custody
> New to Bitcoin self-custody? Start here. Learn what self-custody means, assess your needs, and find the right path for your situation.
Source: https://selfcustodylabs.com/docs/learn/fundamentals/
Last updated: 2026-08-02
Publisher: Self Custody Labs (https://selfcustodylabs.com)
---
**Tip: Welcome**
You're about to learn how to truly own your Bitcoin. Not a balance on someone else's computer, actual, sovereign ownership that no one can take from you.
This is both powerful and serious. Take your time.
## What is Self-Custody?
When you buy Bitcoin on an exchange, you don't actually *own* it yet. You own a promise, an IOU from a company that says they'll give you Bitcoin when you ask.
**Self-custody** means taking possession of your Bitcoin by controlling your own private keys. It's the difference between:
| Exchange Account | Self-Custody |
|------------------|--------------|
| Company holds your Bitcoin | You hold your Bitcoin |
| They can freeze your account | No one can freeze your funds |
| You need their permission to withdraw | You don't need anyone's permission |
| If they get hacked, you lose funds | Your security is in your hands |
| "Not your keys, not your coins" | Your keys, your coins |
Self-custody is how Bitcoin was designed to work. It's also a responsibility: there's no customer support, no password reset, and no reversing mistakes.
→ **Deep dive:** [What is Self-Custody?](https://selfcustodylabs.com/docs/learn/fundamentals/what-is-self-custody) explains this in full detail.
## Before You Continue: A Word of Caution
**Danger: This is Serious**
Self-custody means **you are responsible** for your Bitcoin. If you:
- Lose your seed phrase → Your Bitcoin is gone forever
- Show your seed phrase to someone → They can steal everything
- Make a backup mistake → You might not be able to recover
There is no "forgot password" button. No customer support. No second chances.
**This isn't meant to scare you away; it's meant to make you take this seriously.**
The good news: millions of people successfully self-custody their Bitcoin. With the right knowledge and care, you can too.
## Who Is This Site For?
Self Custody Labs is for anyone serious about Bitcoin security:
| Your Situation | Where to Start |
|----------------|----------------|
| **Brand new to Bitcoin** | Read [What is Bitcoin?](https://selfcustodylabs.com/docs/learn/fundamentals/what-is-bitcoin) first |
| **Own Bitcoin on an exchange** | Learn [what self-custody is](https://selfcustodylabs.com/docs/learn/fundamentals/what-is-self-custody), then [set up a hardware wallet](https://selfcustodylabs.com/docs/wallet-setup/hardware-wallet/) |
| **Already have a hardware wallet** | [Verify your backup](https://selfcustodylabs.com/docs/wallet-setup/backup-verification/), consider [running a node](https://selfcustodylabs.com/docs/bitcoin-node/) |
| **Significant holdings** | Explore [multisig](https://selfcustodylabs.com/docs/learn/wallets/multisig/) and [advanced setups](https://selfcustodylabs.com/docs/learn/wallets/air-gapped-wallets/) |
| **Privacy-focused / high-risk** | Start with [Why Privacy Matters](https://selfcustodylabs.com/docs/learn/privacy/why-privacy-matters) |
## Assess Your Threat Model
Not everyone needs the same level of security. A good setup depends on:
1. **How much Bitcoin are you protecting?**
- Small amounts → Software wallet may be fine
- Meaningful savings → Hardware wallet recommended
- Life-changing amounts → Consider multisig
2. **What are you protecting against?**
- Casual hackers → Hardware wallet handles this
- Targeted attackers → Air-gapped setups, multisig
- State-level threats → Maximum operational security
3. **What's your technical comfort?**
- Non-technical → Start simple, learn gradually
- Technical → Can jump to advanced setups
→ **Deep dive:** [Assess Your Threat Model](https://selfcustodylabs.com/docs/learn/fundamentals/threat-models) - A guide to help you decide what level of security you need.
## Choose Your Path
### 🌱 Path 1: Complete Beginner
You're new to Bitcoin and want to understand it before holding any.
**Your journey:**
1. [What is Bitcoin?](https://selfcustodylabs.com/docs/learn/fundamentals/what-is-bitcoin): The fundamentals
2. [What is Self-Custody?](https://selfcustodylabs.com/docs/learn/fundamentals/what-is-self-custody): Why keys matter
3. [Why Holding Your Own Bitcoin Matters](https://selfcustodylabs.com/docs/learn/fundamentals/holding-bitcoin): Exchange risks
4. [Private Keys Explained](https://selfcustodylabs.com/docs/learn/keys/intro): The foundation
5. [Seed Phrases](https://selfcustodylabs.com/docs/learn/keys/seed): How keys become words
**Time investment:** 2-3 hours of reading
---
### 🔐 Path 2: Ready to Self-Custody
You understand the basics and want to set up your first secure wallet.
**Your journey:**
1. [Hardware Wallets Explained](https://selfcustodylabs.com/docs/learn/wallets/hardware-wallets): Why they're important
2. [Hardware Wallet Setup Guide](https://selfcustodylabs.com/docs/wallet-setup/hardware-wallet/): Step-by-step setup
3. [Backup Verification](https://selfcustodylabs.com/docs/wallet-setup/backup-verification/): Test before you trust
4. **[Before You Deposit](https://selfcustodylabs.com/docs/wallet-setup/before-you-deposit)**: Critical checklist
**Time investment:** 2-4 hours (including setup)
---
### 🛡️ Path 3: Security Enhancement
You're already self-custodying but want stronger security.
**Your journey:**
1. [DIY Seed Generation](https://selfcustodylabs.com/docs/learn/keys/random/): Create verifiable randomness
2. [Passphrase Security](https://selfcustodylabs.com/docs/learn/keys/passphrase/): Add another layer
3. [Run Your Own Node](https://selfcustodylabs.com/docs/bitcoin-node/): Don't trust, verify
4. [UTXO Management](https://selfcustodylabs.com/docs/learn/privacy/utxo-management/): Privacy and fee optimization
**Time investment:** 1-2 days of projects
---
### 🏰 Path 4: Maximum Security
You have significant holdings or elevated threat concerns.
**Your journey:**
1. [Why Privacy Matters](https://selfcustodylabs.com/docs/learn/privacy/why-privacy-matters): Understand the stakes
2. [Multisig Setup](https://selfcustodylabs.com/docs/learn/wallets/multisig/): Eliminate single points of failure
3. [Air-Gapped Computing](https://selfcustodylabs.com/docs/learn/wallets/air-gapped-wallets/): Offline signing
4. [CoinJoin](https://selfcustodylabs.com/docs/learn/privacy/coinjoin/): Break transaction history links
**Time investment:** Multiple days/weeks
---
## The Self-Custody Mindset
Before you dive into guides, internalize these principles:
### 1. Verify, Don't Trust
Don't take anyone's word for it (including this site). Verify addresses on your hardware wallet screen. Run your own node. Check multiple sources.
### 2. Move Slowly
There's no rush. A mistake with Bitcoin can be permanent. Read guides twice. Test with small amounts. Ask questions before acting.
### 3. Assume Compromise
Treat every device as potentially compromised. Air-gap when possible. Verify firmware. Don't trust, verify.
### 4. Separate Concerns
Don't keep all your eggs in one basket. Geographic distribution. Different wallet types for different purposes. Backup redundancy.
### 5. Practice Recovery
A backup you've never tested isn't a backup. Verify your seed restores correctly *before* depositing significant funds.
## Ready to Begin?
**New to Bitcoin?**
→ [What is Bitcoin?](https://selfcustodylabs.com/docs/learn/fundamentals/what-is-bitcoin)
**Ready to set up a wallet?**
→ [Hardware Wallet Setup Guide](https://selfcustodylabs.com/docs/wallet-setup/hardware-wallet/)
**Want to browse all guides?**
→ [View All Guides](https://selfcustodylabs.com/guides/)
---
## Questions?
Self-custody can feel overwhelming at first. That's normal. Take it one step at a time.
If something in our guides is unclear, you can:
- Check the [Glossary](https://selfcustodylabs.com/docs/reference/glossary) for term definitions
- Review the [FAQ](https://selfcustodylabs.com/docs/reference/faq/) for common questions
- Reach out via [Nostr](https://primal.net/p/nprofile1qqspxh8lqez8f9kt2cv7626rfax0phl8lu8tgt0jjjkwa6n8lhmt9qgxf4ey5) or [X](https://x.com/selfcustodylabs)
Your questions help us improve these guides for everyone.
---
# What is Bitcoin?
> Understand what Bitcoin is, how it works, and why it matters. A beginner's introduction to digital money that no one controls.
Source: https://selfcustodylabs.com/docs/learn/fundamentals/what-is-bitcoin/
Last updated: 2026-04-14
Publisher: Self Custody Labs (https://selfcustodylabs.com)
---
By the end of this page you'll understand what Bitcoin actually is, how a Bitcoin transaction moves from one person to another, why the supply is capped, and why holding it yourself is the part that really matters.
Bitcoin is digital money that no single person, company, or government controls. It was launched in 2009 by someone using the name Satoshi Nakamoto, whose real identity has never been confirmed. Instead of being issued by a central bank, Bitcoin runs on a worldwide network of computers that anyone is free to join. No authority can print more of it, freeze your account, or reverse a transaction after it happens.
That last point is worth pausing on, because it's the feature that makes Bitcoin feel strange the first time you use it. When you send bitcoin, it leaves your hands for good. There's no customer service line, no chargeback, no "wait, can we undo that?" The upside is the same as the downside: nobody else can undo it either.
## How Bitcoin is different from the money you already use
The money in your bank account is created by central banks, and there is no ceiling on how much of it can exist. Banks and payment companies sit in the middle of every transfer, which is why your card can be declined, your account can be frozen, and a wire can be clawed back days later. It's a system built on trusted institutions, and it works well right up until the moment you need to do something those institutions don't want you to do.
Bitcoin inverts almost all of that. New coins are created by mathematical rules that no one can rewrite, the total supply is permanently capped at 21 million, and there's no company standing between you and the person you're paying. Transfers move directly from one participant to another, they can't be censored by a middleman, and once they're confirmed they stay confirmed. This is why people describe Bitcoin as "permissionless" money. You don't need anyone's approval to use it.
## How a Bitcoin transaction actually works
The easiest way to understand Bitcoin is to picture it as a shared notebook. Imagine millions of people around the world each keeping an identical copy of the same ledger, and every time someone spends bitcoin, the entry gets written into every copy at once. Nobody can secretly tear out a page, because everyone else would immediately notice that their copy no longer matches. That shared notebook is what people mean when they say **blockchain**.
Here's what happens when Maya, who lives in Mexico City, wants to send a little bitcoin to her cousin Daniel in Buenos Aires.
```
HOW A BITCOIN TRANSACTION WORKS:
─────────────────────────────────────────────────────────
1. Maya decides to send 0.1 BTC to Daniel
2. Her wallet creates a transaction and signs it
with her private key, which is her proof
that she actually owns those coins
3. The signed transaction is broadcast to the
Bitcoin network, reaching thousands of
computers around the world within seconds
4. Miners check that the transaction follows
every rule, then bundle it into a block
5. The block is added to the blockchain,
becoming a permanent part of the public record
6. Daniel now owns 0.1 BTC, and he can verify
this himself without asking anyone for permission
```
Notice what's missing from that sequence: a bank, a card network, a wire service, a foreign exchange desk. Maya and Daniel don't need any of them, because the network itself is doing the job those institutions normally do. That's the core invention.
## Miners, blocks, and why the chain can't be rewritten
Miners are specialized computers that compete to add the next page to that shared notebook. Think of mining as a global lottery where the only way to win a ticket is to burn real electricity on a hard math problem. Whichever miner solves the problem first gets to publish the next block of transactions and is rewarded with newly created bitcoin. That reward is how new coins enter circulation.
This competition matters because it's what makes the history tamper-proof. To rewrite an old block, an attacker would have to redo all the lottery work for that block and every block that has been added since, faster than the rest of the world is adding new ones. In practice this is so expensive that it has never happened to Bitcoin. The deeper a transaction sits in the chain, the more settled it becomes.
## Why the supply is fixed at 21 million
Bitcoin's software will only ever allow 21 million coins to exist, and that rule is enforced by every participant on the network rather than by a policy decision somebody could quietly change. Roughly 19.5 million of those coins have already been mined, and the rate of new issuance gets cut in half every four years. The final fraction of a bitcoin is expected to be mined sometime around the year 2140.
The reason this matters is simple. When a central bank prints more money, every unit you hold quietly becomes a smaller slice of the pie. Bitcoin can't do that to you, because the pie is a fixed size and everyone can verify it. That's why people sometimes call it "digital gold": you can't mine past a known ceiling, and the scarcity is baked into the rules rather than promised by a company.
## Why Bitcoin matters to you
The first reason is that Bitcoin lets you move money to anyone in the world without asking for permission. If you've ever tried to send a wire to another country, you know how much friction sits in that process. With Bitcoin, geography more or less disappears. New York, Lagos, Manila, Buenos Aires: the network works the same way in all of them, and it doesn't observe bank holidays.
The second reason is protection from the slow erosion of inflation. Because no one can expand the supply, the bitcoin you hold today is the same fraction of the total that it will be ten years from now. You may not need this protection if you live somewhere with a stable currency, but for people in countries where inflation regularly runs double digits, it's not an abstract benefit at all.
The third reason is ownership that actually belongs to you. Bank accounts, brokerage accounts, and even real estate can be frozen, seized, or restricted by someone with enough authority. When you hold your own Bitcoin keys, there is no such authority. If you control the keys, you control the coins, and nobody else gets a say.
## What Bitcoin is not
A lot of what people "know" about Bitcoin is wrong, and it's worth clearing up the biggest misconceptions before they steer you somewhere unhelpful.
**Warning: Common Misconceptions**
**Bitcoin is anonymous.** Actually, Bitcoin is pseudonymous. Every transaction is public and permanently recorded, and specialists can often trace coins between addresses. Real privacy takes deliberate effort, which is why we wrote a whole [privacy section](https://selfcustodylabs.com/docs/learn/privacy/why-privacy-matters) for it.
**Bitcoin is only for criminals.** Cash is used for far more crime than Bitcoin is, because the public blockchain is actually a poor hiding place. Once a coin is linked to an identity, its entire history becomes an investigator's roadmap.
**Bitcoin has no real value.** Its value comes from a combination of utility and scarcity. It lets anyone move money across borders without permission, and its supply is fixed forever. Whether that's worth something is a judgment each person makes for themselves.
**Bitcoin is too volatile to be useful.** Its price swings have gotten smaller as the network has grown, and many people treat it as long-term savings rather than a way to buy groceries. Volatility looks different when your time horizon is ten years instead of ten days.
## Units and satoshis
One bitcoin is divisible into 100 million smaller pieces, because the protocol stores amounts with eight decimal places. The smallest unit is called a **satoshi**, named after Bitcoin's creator, and you'll often see people abbreviate it as "sat". You'll also see millibitcoin and microbitcoin in some wallets, though most people today talk only about bitcoin and sats.
| Unit | Value in BTC | Symbol |
|------|--------------|--------|
| **Bitcoin** | 1.0 | BTC |
| **Millibitcoin** | 0.001 | mBTC |
| **Microbitcoin** | 0.000001 | μBTC |
| **Satoshi** | 0.00000001 | sat |
At current prices a single satoshi is worth a fraction of a cent, which means Bitcoin is practical at any size, from buying a coffee to settling a real estate deal. You're never forced to transact in whole coins.
## How people get bitcoin
There are a handful of realistic ways to acquire bitcoin, and they differ mainly in how much effort they take and how much you trust the counterparty.
1. Buy it from an exchange, which is a platform that lets you trade traditional currency for bitcoin. For most people this is the simplest starting point because the process looks a lot like opening a brokerage account.
2. Accept it as payment for goods or services you already sell. This is how a lot of freelancers and small businesses build a stack without ever touching an exchange.
3. Trade peer-to-peer with someone you know or meet through a reputable platform, which cuts out the exchange entirely at the cost of doing a little more work to verify the other side.
4. Earn it from an employer who pays in bitcoin. More companies do this than you might expect, especially in software and content work.
5. Mine it yourself by running specialized hardware. This is technically possible for anyone, but the upfront cost and electricity bills mean it's really a business rather than a hobby.
**Danger: Important warning**
When you buy bitcoin on an exchange, the exchange holds the coins for you. This arrangement is called **custodial** storage, because someone else is the actual custodian of your money. If that exchange is hacked, goes bankrupt, or decides to freeze your account, you can lose access to your bitcoin even though your balance "belongs" to you on paper. This is exactly why self-custody exists, and it's why we recommend moving your bitcoin off the exchange as soon as you're comfortable doing it.
## Why self-custody is the point
Owning bitcoin on an exchange is a lot like having a gift card from a store. The card says you have a balance, but you're really only trusting the store to honor it. Self-custody means holding your own private keys, which is the actual mechanism that authorizes a Bitcoin transaction. Once you hold the keys, no exchange failure can take your coins, no account freeze can stop you from spending them, and no third party can say no on your behalf.
This is what people mean by the phrase "not your keys, not your coins". It sounds like a slogan, but it's a literal description of how Bitcoin works under the hood. Learning to do self-custody well takes a little patience and a little care, because the flip side of having no third party is that there's no one to call when you make a mistake. The upside is that you end up with an asset that truly answers to you alone.
## Where to go next
The logical next step is learning how self-custody actually works in practice, because understanding what Bitcoin is without owning it yourself is like reading about swimming without ever getting in the water. Start with [What is Self-Custody?](https://selfcustodylabs.com/docs/learn/fundamentals/what-is-self-custody) to see why holding your own keys matters, and then read [Private Keys Explained](https://selfcustodylabs.com/docs/learn/keys/intro) when you're ready to see how that ownership works at the level of the keys themselves.
---
# What is Bitcoin Self-Custody?
> Learn what Bitcoin self-custody means: controlling your own private keys, seed phrases, and taking full ownership of your Bitcoin without third parties.
Source: https://selfcustodylabs.com/docs/learn/fundamentals/what-is-self-custody/
Last updated: 2026-08-23
Publisher: Self Custody Labs (https://selfcustodylabs.com)
---
Bitcoin self-custody means holding the private keys to your own bitcoin yourself, so that no bank, exchange, or company can freeze it, block a payment, or lose it on your behalf. If you hold the keys, you hold the coins. If someone else holds the keys, what you hold is a promise.
By the end of this page you'll understand what self-custody really means, why the phrase "not your keys, not your coins" is a literal description rather than a slogan, and how to start thinking about which approach fits your situation.
Most people who say they "own" Bitcoin don't actually control it. They have a balance on an exchange's website, which is a number on someone else's computer that they can see for as long as that company chooses to honor the promise behind it. The moment the company decides otherwise, or gets hacked, or goes under, the number on the screen turns into a line in a bankruptcy filing.
Self-custody is the alternative. You are in full control of your bitcoin, with no bank, no exchange, and no company standing between you and your money. The mechanism that makes this possible is something called a private key, and when you hold that key yourself, you hold the coins themselves.
The contrast with traditional money is worth stating plainly, because it's the thing that makes self-custody feel unfamiliar at first. With a bank account, your money is legally controlled by the bank, which means they can freeze it, delay a transfer, block a payment, or comply with a court order, all without asking you first. With self-custodied Bitcoin none of that is possible, because there is nobody in the middle to ask. Your coins answer to you and only you, which is what people mean when they use the phrase "financial sovereignty". It's not a philosophy. It's a practical reality that millions of people rely on every day.
## Private keys and seed phrases
At the heart of self-custody is a deceptively simple concept. A private key is a very large, randomly generated number, and that number is the proof that you own a particular piece of bitcoin. Anyone who knows the number can spend the coins. That's how powerful it is, and that's how dangerous it is.
Because a private key is an impossibly long string of characters that no human could remember or reliably transcribe, early Bitcoin developers came up with a friendlier format. Your wallet generates a **seed phrase**, which is typically twelve or twenty-four ordinary English words that together encode everything needed to rebuild your private keys. You can think of the seed phrase as a master key that happens to be written as a sentence, which makes it possible to back up with a pencil and paper rather than a USB stick.
The seed phrase is the real thing you have to protect, because whoever holds it holds your bitcoin. Lose it and your coins are gone forever. Show it to the wrong person and your coins will be gone within minutes. There is no "forgot password" link in Bitcoin, no customer support line, and no insurance claim, because there is no company running any of that on your behalf. The responsibility is entirely yours.
This sounds alarming the first time you hear it, and that reaction is healthy. It's also liberating, because for the first time in history ordinary people can hold wealth that no authority can take from them. The rest of this site exists to help you carry that responsibility well.
## Ways to self-custody bitcoin
Self-custody is not one-size-fits-all. The right approach depends on how much bitcoin you're protecting and how much effort you're willing to invest in protecting it, and it almost always makes sense to start simple and grow into more serious setups over time. The three common options break down like this.
| Option | Best for | Security | Cost |
|--------|----------|----------|------|
| **Software wallet** | Learning, small amounts, everyday spending | Basic | Free |
| **Hardware wallet** | Meaningful savings, most serious users | Strong | ~$80 to $180 |
| **Air-gapped setup** | Large holdings, maximum security | Highest | $150+ |
The simplest option is a **software wallet**, which is an app that runs on your phone or computer. These are free, easy to use, and perfect for learning the ropes or holding small amounts. Think of a software wallet as cash in your pocket, because it's convenient for everyday use but not where you'd want to keep your life savings.
A step up from that is a **hardware wallet**, which is a small dedicated device built for one job: protecting your keys. Hardware wallets store your private keys offline, sign transactions internally on the device itself, and never expose the secret material to your computer, even when the computer is infected with malware. Imagine a little vault that only opens long enough to approve a single transaction before locking itself again. For anyone holding a meaningful amount of bitcoin, a hardware wallet is the minimum level of security we recommend.
The most serious option is an **air-gapped setup**, in which the device that holds your keys has never touched the internet and never will. Keys are generated offline, transactions are signed offline, and data moves between machines through QR codes or SD cards. This is the territory of people who are protecting enough bitcoin that the extra friction is worth it, and it's a place you grow into rather than start from.
You don't have to pick your final setup today. Most people begin with a software wallet, upgrade to a hardware wallet once their holdings grow, and only explore air-gapped setups as their confidence and their balance justify the work. If you'd like the technical backdrop for any of this, the deep dive on [Private Keys and Seed Phrases](https://selfcustodylabs.com/docs/learn/keys/intro) walks through how keys actually function.
## Freedom comes with responsibility
**Danger: The hard truth**
If you lose your seed phrase and your wallet breaks, your bitcoin is gone forever. No customer support will help you. No "forgot password" link will rescue you. No court order will retrieve your coins from the blockchain, because the blockchain is not a company that can be sued.
This can feel overwhelming the first time you sit with it. We've all been raised on systems that catch our mistakes: banks that reverse fraudulent charges, companies that reset forgotten passwords, institutions that quietly protect us from our own errors. Bitcoin offers none of that, and pretending otherwise would be doing you a disservice.
What Bitcoin offers instead is something rarer, which is genuine ownership. The same features that stop anyone from helping you recover lost funds are the features that stop anyone from taking your funds without your consent. You can't have one without the other, because they come from the same design. This is why learning how to back up a seed phrase, store it safely, and test your recovery matters every bit as much as buying the coins in the first place. Self-custody isn't only about holding keys, it's about holding them well.
## The exchange problem
When your bitcoin sits on an exchange, the balance you see on the screen is not actually your bitcoin. It's a promise from the exchange that they will give you some bitcoin if you ask for it, which is an entirely different thing from owning the coins yourself. The exchange controls the keys, which means the exchange can freeze your account, delay your withdrawal, comply with an order from a regulator, or lose your money in a hack. You hold an IOU. They hold the coins.
History has demonstrated this risk repeatedly, and not at shady backwater platforms either. **Mt. Gox** was the largest Bitcoin exchange in the world in 2014 when it collapsed with roughly 850,000 BTC missing. **QuadrigaCX** took about 190 million dollars of customer funds to the grave in 2019 when its founder died and nobody else knew the keys. **FTX** was considered a blue-chip exchange right up to the moment in 2022 when billions of dollars in customer funds turned out to have been quietly misappropriated. In each of these cases, people who believed they owned bitcoin discovered that what they actually owned was a claim against an insolvent company.
Self-custody eliminates this counterparty risk entirely, because there is no counterparty. Nobody can freeze what nobody else can touch, and nobody can run off with what nobody else holds.
## When self-custody makes sense
There is no magic threshold where self-custody "kicks in", but there are a few useful reference points. If you're experimenting with a tiny amount of bitcoin purely to learn how wallets and transactions work, keeping it on a reputable exchange for a short time is a reasonable starting point, because the stakes are low and the friction of a mistake is contained. Once you're holding somewhere in the hundreds of dollars, it's time to learn how to move it into your own wallet, because the amount is now large enough that a platform failure would actually hurt. Once you're past roughly a thousand dollars, a hardware wallet starts to look less like a luxury and more like the obvious choice, because the cost of the device is small compared to what it's protecting.
The honest rule is simpler than any table, though. If losing your bitcoin would upset you, it's worth protecting properly, regardless of the exact dollar amount. Self-custody is the tool for that job.
## Your next steps
Now that you understand what self-custody is and why it matters, the question is how to actually do it. If you're ready to set up your own wallet, start with [Choose Your Setup](https://selfcustodylabs.com/docs/learn/fundamentals/choosing-your-path) to figure out which approach fits your situation, and then work through the [Hardware Wallet Setup](https://selfcustodylabs.com/docs/wallet-setup/hardware-wallet/) guide when you're ready to turn the theory into a working device.
If you'd like more background before you start clicking buttons, two pages on this site are worth your time. [Assess Your Threat Model](https://selfcustodylabs.com/docs/learn/fundamentals/threat-models) helps you figure out how much security you actually need, because the right answer for someone holding a few hundred dollars is not the right answer for someone holding their retirement. [Why Holding Your Own Bitcoin Matters](https://selfcustodylabs.com/docs/learn/fundamentals/holding-bitcoin) goes deeper on exchange risk if the previous section left you wanting more evidence.
**Tip: Recommended reading order**
If you'd like to follow the full learning path in order, start with [Private Keys](https://selfcustodylabs.com/docs/learn/keys/intro) to see the foundation of Bitcoin ownership, then [Seed Phrases](https://selfcustodylabs.com/docs/learn/keys/seed) for how those keys become words you can write down. From there move on to [Wallets](https://selfcustodylabs.com/docs/learn/wallets/software-wallets) for the tools that manage your coins day to day, then [Transactions](https://selfcustodylabs.com/docs/learn/transactions/understanding) to see how bitcoin actually moves between people. Finish with [Privacy](https://selfcustodylabs.com/docs/learn/privacy/why-privacy-matters) and [Bitcoin Nodes](https://selfcustodylabs.com/docs/learn/nodes/what-is-node) to understand why running your own node is the final piece of verifying things for yourself.
When you're ready for hands-on work, the practical guides cover [DIY Seed Generation](https://selfcustodylabs.com/docs/learn/keys/random/) for creating a seed with dice, [Bitcoin Node Setup](https://selfcustodylabs.com/docs/bitcoin-node/) for running your own node, and [Multisig Setup](https://selfcustodylabs.com/docs/learn/wallets/multisig/) for eliminating single points of failure entirely.
---
# Why Holding Your Own Bitcoin Matters
> Understand the difference between holding Bitcoin yourself vs on an exchange. Learn why 'not your keys, not your coins' is essential for true ownership.
Source: https://selfcustodylabs.com/docs/learn/fundamentals/holding-bitcoin/
Last updated: 2026-04-14
Publisher: Self Custody Labs (https://selfcustodylabs.com)
---
By the end of this page you'll understand why the phrase "not your keys, not your coins" is more than a slogan, what actually happens when your bitcoin sits on an exchange, and when the right moment is to move your coins into a wallet you control.
**Warning: The golden rule**
"Not your keys, not your Bitcoin." If you don't control the private keys, you don't truly own the coins, no matter what the balance on your screen says.
This phrase exists because a huge number of people buy bitcoin on an exchange and then leave it there, assuming the balance they see is the coins they bought. It isn't. The exchange is holding the actual coins behind the scenes, and what you're holding is a promise from that exchange to give you some bitcoin whenever you ask. As long as the promise holds, the two things look identical from the outside. The moment it doesn't, the difference between them becomes the only thing that matters.
Imagine a safe filled with gold bars. The safe is your wallet, the gold is your bitcoin, and the key is your private key. If someone else is holding that key, what you really have is their word that they'll let you open the safe whenever you show up at the door. Self-custody means you're the one holding the key, and nobody gets to decide for you whether the safe opens today.
## What actually happens when you leave bitcoin on an exchange
When your coins sit on an exchange, the exchange is the real holder of the private keys, which means the exchange is the real owner of the coins in every way that counts. Your withdrawal can be paused at any time, for any reason the exchange decides is good enough, because they are the ones signing the on-chain transaction, not you. Your account can be frozen by a compliance team, a court order, or a routine fraud review that takes a few weeks to clear. Your funds can be lost in a hack you had no way to prevent, or disappear into a bankruptcy proceeding that takes years to unwind. None of this requires bad intent on anyone's part. It's how custodial platforms work by design.
History has made this point repeatedly, and not with obscure backwater platforms. The five collapses below were all large, well-known exchanges trusted by millions of customers at the moment they failed.
| Exchange | Year | What happened | Amount lost |
|----------|------|---------------|-------------|
| **Mt. Gox** | 2014 | Hacked and mismanaged over years | ~850,000 BTC |
| **QuadrigaCX** | 2019 | Founder died, allegedly taking the keys | ~$190 million |
| **Celsius** | 2022 | Froze withdrawals and filed for bankruptcy | ~$4.7 billion |
| **FTX** | 2022 | Customer funds misappropriated as fraud | ~$8 billion |
| **BlockFi** | 2022 | Bankruptcy following the FTX collapse | Significant |
Mt. Gox was the largest Bitcoin exchange in the world when it imploded and the loss was so large it still weighs on the market a decade later. QuadrigaCX's founder, according to the bankruptcy proceedings, was the only person with access to the keys, and when he died the coins went with him. FTX was a blue-chip platform with celebrity endorsements and a stadium naming deal right up to the moment its customer funds turned out to have been quietly moved to a sister company and gambled away. Celsius and BlockFi were both large lending platforms that froze customer withdrawals and filed for bankruptcy in the same cascade.
The customers of every single one of those platforms had one thing in common, which is that none of them were holding their own keys. If they had been, none of those collapses would have touched their coins.
## The trade-off you're actually making
Plenty of people still use exchanges for convenience, and there's nothing irrational about that when you're starting out, because moving your first few dollars of bitcoin into a proper wallet feels harder than it should. The real trade-off is worth naming plainly so you can make the choice with your eyes open.
Exchange custody is convenient, in the sense that somebody else handles the keys, the backups, the security, and the mistakes. It's also somebody else's responsibility, which sounds like a win until you remember that "somebody else's responsibility" is another way of saying "you have no recourse when they fail". Your balance can be frozen, your account can be seized, and your coins are exposed to every hack and every bankruptcy that touches the platform. Self-custody flips all of that. You take on the learning curve and the responsibility in exchange for coins that cannot be frozen, cannot be seized through the exchange, and carry no counterparty risk because there is no counterparty.
Convenience means giving up control. Ownership means taking responsibility. True Bitcoin ownership begins the moment you withdraw your coins to a wallet you control.

## Why this matters for Bitcoin as a whole
Bitcoin was designed from the start to work without trusted intermediaries, which is the entire point of the system. That design choice wasn't an accident or a technical flourish. It was the motivating idea of the original whitepaper.
**Note: Satoshi Nakamoto, 2008**
"A purely peer-to-peer version of electronic cash would allow online payments to be sent directly from one party to another without going through a financial institution."
When people leave their bitcoin on exchanges, the system quietly re-creates the thing it was built to avoid. The intermediaries have different names and different logos, but the structure is the same: a small number of companies sit between users and their money, and those companies can be regulated, compromised, or pressured like any other bank. Self-custody is what keeps Bitcoin aligned with the original idea, because it's the mechanism that makes "peer-to-peer electronic cash" an actual description rather than a nice phrase.
## What about exchange insurance
Some exchanges advertise insurance policies, and the marketing copy often sounds reassuring enough that people assume their funds are as safe as money in a bank account. That assumption is worth examining carefully before you rely on it.
Exchange insurance policies almost always cover only a fraction of total customer holdings, because insuring the full balance sheet of a platform holding billions of dollars in bitcoin would cost more than any exchange is willing to pay. The policies typically cover specific events such as an external hack of the exchange's hot wallet, and they typically exclude the things that have actually destroyed exchanges in practice, such as internal fraud, mismanagement, and bankruptcy. When a claim does succeed, the process can take years to resolve, and the payout is almost always denominated in dollars at the price the coins had on the day of the incident, not in the bitcoin you originally held. In other words, even the best-case outcome leaves you without any of the bitcoin you thought you owned. Insurance is not a substitute for self-custody. It's a partial cushion for one particular kind of failure, and the other kinds of failure are the ones that have cost people the most.
## What about losing your own keys
This is a fair concern, and it's the one objection to self-custody that deserves a serious answer rather than a pep talk. People do lose access to their bitcoin through poor key management, usually by storing a seed phrase somewhere fragile and then losing the paper, or by writing it down incorrectly and never testing that the backup actually works.
The answer isn't to hand your keys to someone else and hope they do a better job. The answer is to learn the small handful of backup practices that turn self-custody from "risky" into "safer than an exchange". Write down your seed phrase carefully, word by word, on something durable (a metal backup plate is the standard recommendation because paper burns and ink fades). Store the backup somewhere only you can reach it, and consider keeping a second copy in a physically separate location so a single fire or flood can't take both at once. Most importantly, test your backup by restoring from it on a fresh wallet before you put any significant amount of bitcoin into the original, because an untested backup is a guess. The [Backup Verification Guide](https://selfcustodylabs.com/docs/wallet-setup/backup-verification/) walks through this process step by step. With these practices in place, self-custody is genuinely safer than leaving your coins on even the best-run exchange.
## When to move to self-custody
There's no universal threshold where self-custody suddenly becomes mandatory, but there are a few useful reference points that help most people find the right moment. If you're holding a tiny amount purely to learn how Bitcoin works, leaving it on a reputable exchange for a short time is a defensible starting point because the learning benefit is real and the potential loss is small. Once you're past a few hundred dollars, it's time to start learning self-custody in earnest, because the amount is now large enough that a platform failure would actually hurt. Once you reach an amount you would genuinely be upset to lose, self-custody stops being optional and becomes the right answer, and once you're holding a life-changing amount, the only responsible move is to hold it yourself with a hardware wallet and a tested backup.
The best time to learn self-custody is before you need it, not after. Waiting for an exchange collapse to teach you the lesson is the one way to learn it that will actually cost you money.
## How to get started
If you're ready to take control of your bitcoin, the next steps are straightforward and they build on each other.
1. Read [Assess Your Threat Model](https://selfcustodylabs.com/docs/learn/fundamentals/threat-models) to figure out what level of security actually fits your situation, because the right answer for someone holding pocket money is not the right answer for someone holding their retirement.
2. Work through [Choose Your Setup](https://selfcustodylabs.com/docs/learn/fundamentals/choosing-your-path) to pick the approach that matches your threat model without over-engineering it.
3. Follow the [Hardware Wallet Setup](https://selfcustodylabs.com/docs/wallet-setup/hardware-wallet/) guide, which is the standard recommendation for anyone holding a meaningful amount of bitcoin.
4. Run through the [Backup Verification](https://selfcustodylabs.com/docs/wallet-setup/backup-verification/) process and actually test your recovery, because a backup you haven't tested is a backup you're guessing about.
5. Before you move any significant amount of money onto your new wallet, go through the [Before You Deposit checklist](https://selfcustodylabs.com/docs/wallet-setup/before-you-deposit) once, because catching a problem here is vastly cheaper than catching it after the fact.
## Where to go next
The most natural next step is [Choose Your Setup](https://selfcustodylabs.com/docs/learn/fundamentals/choosing-your-path), because it turns the ideas on this page into a concrete decision about which tools you're going to use. If you'd rather see the technical foundation first, [Private Keys Explained](https://selfcustodylabs.com/docs/learn/keys/intro) shows how ownership actually works at the level of the keys themselves, and the [Hardware Wallet Setup](https://selfcustodylabs.com/docs/wallet-setup/hardware-wallet/) guide is waiting for you whenever you're ready to move from theory to a device in your hand.
---
# Choose Your Self-Custody Setup
> Interactive decision tree to help you choose the right Bitcoin self-custody setup based on your holdings, technical comfort, and security needs.
Source: https://selfcustodylabs.com/docs/learn/fundamentals/choosing-your-path/
Last updated: 2026-08-21
Publisher: Self Custody Labs (https://selfcustodylabs.com)
---
By the end of this page you'll have a clear picture of which self-custody setup fits your situation, which hardware wallet is worth your money, and what the first concrete action is when you finish reading.
**Info: Why this page exists**
Different situations call for different setups, and the goal here is to help you land in the sweet spot between over-engineering a tiny stack and under-protecting a serious one. Think of this as a fitting room rather than a one-size-fits-all recommendation.
The simplest way to pick a setup is to start with one question: how much bitcoin are you actually protecting today, plus how much do you realistically expect to protect in the next year or two? The answer determines everything else, because security has a cost in money, time, and mental overhead, and it only makes sense to pay that cost in proportion to what's at stake. The four tiers below are the common landing spots, and the right one for you is the one that matches your real holdings rather than the one that sounds most impressive.
Your technical comfort and your patience matter too, but less than you'd think. If you're new to Bitcoin, start simple and upgrade later rather than forcing yourself through an advanced setup on day one. If you're already comfortable with technology, most of these setups are accessible with a weekend of careful work. And if you're the kind of person who wants everything done correctly the first time, build in the extra patience for testing each step, because a setup you trust is worth far more than one you rushed through.
Here's the whole page in one glance. Find the row that matches your situation and jump to the matching section below for the full picture.
| Tier | Holdings | Core tool | Rough setup cost |
|------|----------|-----------|------------------|
| **Starter** | Under ~$1,000 | Mobile software wallet | Free |
| **Standard** | ~$1,000 to ~$50,000 | Hardware wallet + metal backup | ~$100 to $200 |
| **Enhanced** | ~$50,000 to ~$500,000 | Hardware wallet + passphrase + own node | ~$300 to $500 |
| **Maximum** | Over ~$500,000 | Multisig across multiple devices | $500+ |
## Starter setup: under about one thousand dollars
This tier is for the learning phase, small amounts, and people who are brand new to self-custody. The goal here is to get the mechanics under your fingers without spending any money on hardware, because the best way to learn Bitcoin is to actually move a small amount around and see how wallets, addresses, and backups behave in practice.
At this tier a mobile software wallet running on your phone is a reasonable starting point. Two good Bitcoin-only options are [BlueWallet](https://bluewallet.io/) and Muun, both of which are free and designed to be approachable. Your backup is a paper copy of the seed phrase stored somewhere only you can reach, and you'll connect to whatever public node the wallet ships with by default, because running your own node at this stage adds complexity without much benefit.
The upside of this setup is that it costs nothing, gets you running in about ten minutes, and lets you make beginner mistakes on an amount of money that won't hurt if things go sideways. The downside is that your keys live on a phone connected to the internet, your wallet is talking to public nodes that can see your balance if they correlate requests, and the whole arrangement is not built to hold meaningful savings. Treat this tier as a training ground, not a final destination.
Your action items, in order, are to install BlueWallet from the official source, create a new wallet from inside the app, write down the seed phrase carefully on paper, store that paper somewhere safe, and then send a small test amount from an exchange to make sure everything works end to end. Once your holdings grow past about a thousand dollars, or once you want better security regardless of the amount, it's time to move up to the standard setup. If you'd like a deeper read on the tools involved, [Software Wallet Basics](https://selfcustodylabs.com/docs/learn/wallets/software-wallets) walks through the category in more detail.
## Standard setup: roughly one thousand to fifty thousand dollars
This is the tier most serious self-custody users actually live in, and it's the default recommendation for anyone holding meaningful savings. The defining feature of this tier is a hardware wallet, which is a small dedicated device that holds your private keys offline and signs transactions internally, so your keys never touch an internet-connected computer even when that computer is infected with malware.
Reasonable hardware wallets in this range include the Trezor Safe 5, the BitBox02 Nova, and the Blockstream Jade or Jade Plus, which cost somewhere between about eighty and a hundred ninety dollars depending on the model. You'll pair that with a metal seed backup plate (usually twenty to fifty dollars) so your recovery phrase can survive a fire or a flood, and you'll drive the whole thing from a free desktop application such as Sparrow Wallet. You can start out using Sparrow's default public nodes and add your own node later when you're ready, because the hardware wallet itself is doing the heavy security lifting regardless.
The strengths of this tier are significant. Your keys never leave the device, every transaction is verified on a screen you physically control, malware on your computer cannot silently sign anything, and the whole setup is the industry standard that most experienced users land on. The trade-offs are the upfront cost of the device and the plate, a short learning curve while you get used to the workflow, and the fact that a single device plus a single seed is still a single point of failure, which is the thing the next tier starts to address.
Your action items here are to buy the hardware wallet from the manufacturer's official store rather than a third-party marketplace (because tampered devices are a real risk), walk through the [Hardware Wallet Setup Guide](https://selfcustodylabs.com/docs/wallet-setup/hardware-wallet/), transfer your seed onto a metal backup plate, run through [Backup Verification](https://selfcustodylabs.com/docs/wallet-setup/backup-verification/) to confirm the backup actually works, and finish with the [Before You Deposit Checklist](https://selfcustodylabs.com/docs/wallet-setup/before-you-deposit) before you move any serious amount onto the wallet. When your holdings climb past roughly fifty thousand dollars, or when your threat model justifies the extra work, it's time to consider the enhanced tier.
## Enhanced setup: roughly fifty thousand to five hundred thousand dollars
At this point the amount of bitcoin you're protecting justifies a real investment in privacy, verification, and a second layer of security on top of the seed phrase itself. The enhanced setup builds on everything in the standard tier and adds three things: a passphrase, your own node, and a habit of managing the coins you're holding rather than accepting whatever the wallet defaults to.
A premium hardware wallet such as a Jade Plus, a Trezor Safe 7, or a Passport Prime (roughly a hundred and fifty to two hundred and fifty dollars, more for the Passport) sits at the center of the setup, paired with a metal seed backup and a passphrase you generate yourself and store separately. At this tier you should also generate the seed itself from your own dice rolls rather than trusting the device's random number generator; the [2026 Coldcard incident](https://selfcustodylabs.com/docs/learn/wallets/coldcard-entropy-incident/) showed exactly what that trust can cost. The passphrase is sometimes called the "25th word" and it turns your seed phrase into a two-factor secret: anyone who finds the seed alone still can't spend your coins without the passphrase. You'll run your own Bitcoin full node on dedicated hardware (roughly a hundred to three hundred dollars for a small device and a disk), connect Sparrow Wallet to that node so every balance check and transaction broadcast stays private, and start learning UTXO management and coin control so you can shape your transactions rather than having them shaped for you.
The benefits add up to a setup with no third-party dependencies in any meaningful sense. Your keys are protected by two separate secrets. Your wallet queries go to your own node over your own internet connection instead of to a public server that could log them. You can verify every rule of the Bitcoin network yourself without trusting anyone else's summary. The cost of all this is real complexity: the passphrase creates a second thing you can lose, the node is a piece of hardware you need to keep running, and coin control takes time to learn. These are all worth it at this tier, but they wouldn't be worth it at a smaller scale.
Your action items, in order, are to follow the [Hardware Wallet Setup](https://selfcustodylabs.com/docs/wallet-setup/hardware-wallet/) guide if you haven't already, generate your seed with verifiable entropy using the [DIY Seed Guide](https://selfcustodylabs.com/docs/learn/keys/random/), add a passphrase using the [DIY Passphrase Guide](https://selfcustodylabs.com/docs/learn/keys/passphrase/), set up your own node using the [Bitcoin Node Guide](https://selfcustodylabs.com/docs/bitcoin-node/), learn [UTXO Management](https://selfcustodylabs.com/docs/learn/privacy/utxo-management/) so you can control how your coins move, and read [Why Privacy Matters](https://selfcustodylabs.com/docs/learn/privacy/why-privacy-matters) to understand the threats this setup is designed to defend against. Once your holdings exceed roughly half a million dollars, or once your threat model requires that no single key can ever lose you everything, it's time to look at multisig.
## Maximum setup: large holdings and serious threat models
This tier is for people holding large amounts of bitcoin, public figures with elevated targeting risk, anyone worried about a hostile jurisdiction, and families planning to pass bitcoin across generations. The defining feature here is multisig, which means your wallet requires multiple independent keys to authorize a transaction rather than a single one. A common configuration is two-of-three, where any two of three keys can spend, and a more paranoid version is three-of-five for the same reason.
The components of a maximum setup are multiple hardware wallets from different manufacturers (so a single manufacturer compromise can't take everything at once), metal backups of each seed plus the wallet descriptor that tells software how the multisig is constructed, all of it geographically distributed so a single fire, flood, or burglar can't reach every copy. You'll run your own Bitcoin full node over Tor for maximum privacy, use an air-gapped computer for any particularly sensitive signing operations, and adopt serious coin-control and mixing practices such as CoinJoin. Expect to spend somewhere between two hundred fifty and five hundred dollars on devices, another hundred or two on backups, and a similar amount on the node itself. Transaction fees will be a bit higher than with single-signature wallets because multisig transactions are larger on-chain.
The payoff is a setup with no single point of failure. Theft of one device doesn't lose your coins. Loss of one backup doesn't lose your coins. Compromise of one manufacturer doesn't lose your coins. The price is real complexity, coordination whenever you want to spend, and the need to genuinely understand what you're doing rather than following a checklist you don't quite grasp. This is why the honest first step at this tier is to master the standard setup before reaching for multisig, because you cannot safely run an advanced setup that you don't fully understand.
Your path, in order, is to make sure you're completely comfortable with the standard setup, then study [Multisig Concepts](https://selfcustodylabs.com/docs/learn/wallets/multisig) to understand what you're building, then follow the [Multisig Setup Guide](https://selfcustodylabs.com/docs/learn/wallets/multisig/) to implement it, then work out a plan for geographically distributing the backups, then consider an [Air-Gapped Computer](https://selfcustodylabs.com/docs/learn/wallets/air-gapped-wallets/) for the most sensitive signing operations, and finally implement [CoinJoin](https://selfcustodylabs.com/docs/learn/privacy/coinjoin/) if privacy is part of your threat model. If the idea of coordinating all of this solo feels like too much, collaborative custody services such as Unchained and Casa exist specifically to share part of the burden with a professional, and that is a legitimate option rather than a cop-out.
## Choosing a hardware wallet
If you've decided the standard or enhanced tier is where you want to be, the next question is which device to actually buy. Six options come up repeatedly as of August 2026, and each has a clear audience.
| Device | Price | Best for | Key features |
|--------|-------|----------|--------------|
| **Blockstream Jade** | $79 | Budget | Open source, QR air-gap capable, dice entropy support |
| **Trezor Safe 5** | $169 | Beginners | Secure element, open-source firmware, approachable setup |
| **BitBox02 Nova** | ~$185 | Simplicity | Swiss build, clean backup flow, Bitcoin-only edition available |
| **Jade Plus** | $149 | Verifiable security | QR air-gap, anti-exfil signing, multi-source entropy |
| **Keystone 3 Pro** | $149 | Air-gap preference | QR-code based, large screen for transaction verification |
| **Trezor Safe 7** | $249 | Transparency | Auditable secure element, touchscreen, open source |
If you'd rather have a short recommendation instead of a full menu, most beginners are well served by the BitBox02 Nova Bitcoin-only or the Trezor Safe 5. If your priority is the strongest practical security, a Jade Plus with a [dice-generated seed](https://selfcustodylabs.com/docs/learn/keys/random/) is the current answer. And if your priority is verifying everything yourself, the Trezor Safe 7's fully auditable stack (or building your own SeedSigner) is the one to pick. Notice that the Coldcard, the long-time default answer for security, is missing: after the [2026 entropy incident](https://selfcustodylabs.com/docs/learn/wallets/coldcard-entropy-incident/) we no longer recommend it for new purchases. [Hardware Wallets Explained](https://selfcustodylabs.com/docs/learn/wallets/hardware-wallets) goes deeper on how the category works if you want to understand the trade-offs in more detail before you choose.
## Still not sure
If you're stuck on the choice, the most useful thing anyone can tell you is that the standard setup with any reputable hardware wallet is the right answer for the vast majority of people reading this page. Don't overthink the brand decision, because any of the devices mentioned above is dramatically safer than leaving your coins on an exchange, and the differences between them matter far less than the difference between holding your own keys at all and not. Security is iterative, which means you can start somewhere defensible today and refine your setup over time as your holdings or your threat model change.
The biggest risk is not choosing the "wrong" wallet. It's leaving your bitcoin on an exchange while you try to make a perfect choice.
## Common questions
People ask a handful of the same questions at this stage, and the short answers are worth having in one place.
**Can I use multiple setups at once?** Yes, and many people do. A common pattern is a mobile software wallet for spending money and small amounts, combined with a hardware wallet for savings. Mixing tiers this way gives you convenience where you need it and security where it matters.
**Should I wait for a better wallet to come out?** No. Start securing your bitcoin now with the best setup you can reasonably implement today, because the cost of waiting is real exposure to exchange risk, and you can always migrate to a newer device later by sending your coins to a fresh wallet.
**Is a specific wallet I've heard of safe?** If it's one of the devices mentioned on this page, yes, it's reputable. The thing that actually matters for safety is whether you set it up correctly and verified your backup, not which of the major brands you picked.
**What about paper wallets?** Not recommended. They were an early answer to the self-custody problem and they solve some things, but they introduce more failure modes than they prevent (key exposure during generation, change-address confusion when spending, degradation over time), and hardware wallets have since superseded them for every practical purpose.
## Where to go next
The best next step depends on which tier you chose. If you landed on starter, install [BlueWallet](https://bluewallet.io/) today and move a small test amount of bitcoin into it before reading any further. If you landed on standard, buy a hardware wallet from the manufacturer's official store and work through the [Hardware Wallet Setup Guide](https://selfcustodylabs.com/docs/wallet-setup/hardware-wallet/). If you landed on enhanced, do the standard setup first and then move on to the [Bitcoin Node Guide](https://selfcustodylabs.com/docs/bitcoin-node/) once the hardware wallet is running smoothly. And if you landed on maximum, start by reading [Multisig Concepts](https://selfcustodylabs.com/docs/learn/wallets/multisig) carefully before you buy anything, because this is the one tier where understanding has to come before implementation.
---
# Assess Your Threat Model
> Determine what level of Bitcoin security you actually need. Match your setup to your real risks. Not everyone needs maximum security, but some people do.
Source: https://selfcustodylabs.com/docs/learn/fundamentals/threat-models/
Last updated: 2026-08-21
Publisher: Self Custody Labs (https://selfcustodylabs.com)
---
By the end of this page you'll know which category of attacker you're actually defending against, how much security is enough for your situation, and how to avoid the two expensive mistakes people make at this stage: under-protecting a meaningful stack, and over-engineering a tiny one.
**Info: Why this matters**
Security is a trade-off, not a dial you turn up to maximum. Under-protecting a significant amount is obviously dangerous, but over-complicating a small amount is also dangerous, because complexity you can't manage is its own failure mode, and locking yourself out of your own wallet hurts every bit as much as losing it to an attacker. The goal of this page is to match your setup to the threats you actually face.
## What a threat model actually is
A threat model is a short honest conversation you have with yourself about three things, and the answers determine everything else about your setup. The first question is what you're protecting, which covers both how much bitcoin you hold today and how important privacy is for you personally. The second is who you're protecting it from, which ranges from random opportunistic attackers who spray phishing emails at millions of addresses all the way up to targeted adversaries who have decided they want your coins specifically. The third is what you're willing to do about it, which means how much time, money, and mental overhead you're ready to spend on the defense.
If any of those answers changes significantly, your threat model changes, which means you should reassess. Someone who holds a few hundred dollars and tells nobody has a completely different model from someone who holds a meaningful percentage of their net worth and posts about Bitcoin on a public profile, and the right setups for those two people look nothing alike.
## The threat spectrum
Most people fit into one of four broad tiers, and the rest of this page uses those tiers as a reference point. The short version is in the table; the detailed reasoning for each level follows below.
| Level | Attacker | Typical defense |
|-------|----------|-----------------|
| **1. Opportunistic** | Random hackers, phishing, exchange hacks | Hardware wallet and proper backup |
| **2. Targeted digital** | Sophisticated attackers who know you hold Bitcoin | Hardware wallet, passphrase, own node |
| **3. Physical** | Criminals willing to use force or threats | Multisig and geographic distribution |
| **4. State-level** | Governments and intelligence agencies | Beyond the scope of this guide |
### Level 1: opportunistic threats
At this level the attacker is not targeting you specifically. They're running automated phishing campaigns, spreading malware across millions of machines, and waiting for an exchange to get hacked so they can sweep up the debris. They're looking for easy victims, and they will move on the moment you stop being one. Think of it as a burglar trying doorknobs up and down the street rather than someone who studied your house for a week.
The defense at this level is straightforward. A reputable hardware wallet protects your keys from the malware on your computer. A tested backup protects you from hardware failure. Keeping your bitcoin off exchanges protects you from the next collapse. And basic operational security, which really only means not pasting your seed phrase into websites or photographing it, closes off the remaining easy attacks. The overwhelming majority of Bitcoin users are at this level, and the overwhelming majority of what they need is a hardware wallet plus a proper backup.
### Level 2: targeted digital threats
At this level the attacker knows you specifically hold bitcoin and has decided it's worth some effort to take it from you. They'll invest hours or days in researching you, they'll try to social-engineer your phone carrier into a SIM swap so they can take over your accounts, they'll send you personalized phishing messages that mention real details from your life, and they'll be patient. They're not trying every door on the street; they're watching yours.
Defending against this requires a step up in operational discipline. A hardware wallet is still the foundation, but now you add a passphrase on top of the seed phrase so that even a seed recovery by an attacker isn't enough to spend your coins. Running your own Bitcoin node means your balance checks and transactions don't go through third-party servers that could be correlated with your identity. UTXO management and coin control keep your transaction history from painting a map of your holdings across the blockchain. And the most underrated defense at this level is declining to discuss your holdings publicly, because every person who knows you own bitcoin is a potential leak point.
### Level 3: physical threats
At this level the attacker is willing to show up at your door. They might be a criminal who heard about you from someone you trusted, a home invader who guessed right, or the much-discussed "five-dollar wrench attack" where the theory of perfect cryptographic security runs into the reality of a baseball bat. The defining feature of this tier is that the attacker doesn't need to hack anything; they only need to convince you, by whatever means, to unlock the wallet yourself.
The defense here is to make sure that even you, under duress, cannot move all of your coins in a single sitting. Multisig achieves this because spending requires multiple keys, and if those keys live in physically separate locations, a single raid on your home cannot produce all of them. Geographic distribution of the backups makes the problem even harder for the attacker. A duress wallet, which is a small decoy wallet with a plausible balance, gives you something to hand over under threat while your real coins sit in a setup the attacker doesn't know exists. And at this tier the operational security rule about not publicly associating yourself with Bitcoin is no longer an optional polish, because public association is how attackers pick their targets in the first place.
### Level 4: state-level threats
At this level the attacker is a government, a regulator, or an intelligence agency, and they have legal authority to compel you, vast surveillance resources to watch you, and the physical means to seize any device you own. They can issue subpoenas, freeze bank accounts that touch bitcoin, and in some jurisdictions jail you for refusing to disclose a passphrase. This is genuinely beyond the scope of a self-custody guide, and honestly it's beyond the scope of any static document, because the right defense depends entirely on which state, under which laws, for which reasons. If this is your threat model, what you need is specialized legal counsel and operational security advice from people who do this for a living, not a checklist from a website.
## Assessment: how much are you actually protecting
The single most useful question for matching a setup to a situation is how much value is at stake. Everything else, including how technically capable you are and how public your association with Bitcoin is, refines the answer, but the starting point is the amount. Think in terms of future value as well as current value, because a small stack today can be a significant one a decade from now, and the setup you build now should still make sense as the holdings grow.
| Amount | What's appropriate |
|--------|--------------------|
| **Under $1,000** | Software wallet is acceptable while learning |
| **$1,000 to $10,000** | Hardware wallet recommended |
| **$10,000 to $100,000** | Hardware wallet required, passphrase recommended |
| **$100,000 to $1,000,000** | Multisig strongly recommended |
| **Over $1,000,000** | Multisig required, consider a professional security review |
The other three questions sharpen the answer. The more people know you hold bitcoin, the larger your potential attacker pool becomes: if nobody knows, your risk is lower; if close friends or family know, it's moderate; if you've posted about it publicly or you have a following, your risk climbs meaningfully; and if you're a public figure with real visibility, you should treat targeted attacks as a present concern rather than a hypothetical one. Your jurisdiction matters too, because standard security is usually enough if you live in a stable country with functioning property rights, but capital controls, authoritarian regimes, and active conflict zones all push you toward privacy, geographic distribution, and operational security that you wouldn't otherwise need. And your technical comfort puts a ceiling on the setup you can safely run, because the rule that beats every other rule on this page is "don't implement security you don't understand", since complexity you can't manage is a risk rather than a protection.
## Recommended setups by profile
Four profiles cover the vast majority of readers, and each one corresponds loosely to one of the threat levels above. Use the summary table to see them side by side, then read the profile that matches your situation for the reasoning.
| Profile | Fits | Core setup | Estimated cost | Complexity |
|---------|------|------------|----------------|------------|
| **A. Casual holder** | Small amounts, learning, low profile | Hardware wallet + backup | $70–150 | Low |
| **B. Serious holder** | Meaningful savings, privacy-conscious | Hardware wallet + passphrase + own node | $200–400 | Medium |
| **C. High-value holder** | Significant holdings, some public exposure | Multisig + geographic distribution + Tor | $500–1,000+ | High |
| **D. Maximum security** | Very large holdings, public figures, hostile jurisdictions | 3-of-5 multisig + air-gapped signing + legal planning | $2,000+ plus professional services | Very high |
### Profile A: casual holder
This profile fits people holding a small amount of bitcoin, still learning the ropes, and not publicly associated with Bitcoin in any meaningful way. The recommended setup is a reputable hardware wallet (Trezor, BitBox, or Blockstream Jade all work fine at this level), a seed backup written on either paper or a metal plate, and a tested recovery so you know the backup actually restores to the same wallet. A passphrase is optional at this profile and often adds more risk of self-lockout than security benefit, and running your own node is a nice-to-have rather than a requirement. The whole setup costs around seventy to a hundred and fifty dollars and can be done in an afternoon.
### Profile B: serious holder
This profile fits people holding meaningful savings in bitcoin, where "meaningful" means an amount you would genuinely be upset to lose. Some people in your life probably know you're interested in Bitcoin, and you care about privacy. The recommended setup is a hardware wallet (ideally a Bitcoin-only device such as the BitBox02 Nova Bitcoin-only or the Jade Plus), a seed generated with [your own dice entropy](https://selfcustodylabs.com/docs/learn/keys/random/) rather than the device's RNG alone (the [2026 Coldcard incident](https://selfcustodylabs.com/docs/learn/wallets/coldcard-entropy-incident/) is why that now belongs at this profile), a metal seed backup because paper is too fragile at this level, a passphrase on top of the seed, your own Bitcoin node so that wallet queries don't leak to third parties, and a habit of UTXO management so you control how your coins move. CoinJoin is optional and depends on how much privacy matters to you specifically. Budget two to four hundred dollars and a weekend of careful work.
### Profile C: high-value holder
This profile fits people with significant holdings who are at least partially known to hold bitcoin and who have reason to worry about targeted attacks. The recommended setup is a two-of-three multisig at minimum, built from hardware wallets made by different manufacturers so that a single vendor compromise cannot take everything, with the keys geographically distributed so a single fire or burglary cannot reach them all. Metal seed backups live in separate locations, your Bitcoin node runs over Tor for privacy, and your day-to-day operational security is tighter than most people bother with, including strict limits on who knows what you hold. CoinJoin and related privacy tools are part of the picture at this level rather than optional polish. Budget five hundred to a thousand dollars or more, and expect the complexity to require real commitment.
### Profile D: maximum security
This profile fits very large holdings, public figures with elevated targeting risk, and anyone operating in a hostile jurisdiction. The setup moves to a three-of-five multisig for additional redundancy, adds air-gapped signing devices for the most sensitive operations, considers open-source firmware such as Libreboot or Coreboot for the signing machines, and distributes keys across multiple jurisdictions so no single legal system can reach them all. A professional security audit becomes genuinely useful at this level, legal and estate planning is essential because people in this profile have real heirs and real tax exposure, and collaborative custody services (Unchained, Casa) are worth considering for a portion of the holdings to share the operational burden with professionals. Budget two thousand dollars or more in hardware alone, plus whatever the professional services cost, and expect the ongoing complexity to be a meaningful part of your life.
## Common mistakes
People tend to fail in the same handful of ways at this stage, and naming them in advance is the cheapest way to avoid them.
The first mistake is **over-engineering a small stack**. Setting up a three-of-five multisig across three countries for five hundred dollars of bitcoin creates more ways to fail than it prevents, because every additional moving part is another thing that can break and the value at stake doesn't justify the complexity. The better answer is to start simple and upgrade security as the holdings grow.
The second mistake is the mirror of the first: **under-engineering a large one**. Holding half a million dollars on a single hardware wallet with the seed phrase tucked into a desk drawer is a single point of failure for life-changing money, and one bad day (a fire, a burglary, a careless relative, a lost device) can take it all. Multisig with geographic distribution exists specifically to solve this, and at this amount it's no longer optional.
The third mistake is **security theater**, which looks like obsessing over Faraday bags and exotic hardware while saving the seed phrase to iCloud. Exotic threats are fun to think about and they make the setup feel serious, but they matter nothing at all if the basics are broken. Master the fundamentals first, because the fundamentals are what attackers actually target.
The fourth mistake is **complexity beyond competence**, which means implementing a setup (usually multisig) without fully understanding how to recover it. If you can't walk through a full recovery from scratch, on paper, right now, then the setup is a risk rather than a protection, because the day you need it you'll be stressed, rushed, and working without internet access.
## Upgrading over time
Your threat model is not fixed, and your setup should grow with you. Reassess whenever your holdings increase significantly, your public profile changes, your jurisdiction situation shifts, your technical capability improves, or you have any kind of security incident or close call. The path almost everyone walks, in order, is to start with a hardware wallet, add a passphrase once the workflow is comfortable, set up their own node as a privacy upgrade, move to multisig when the holdings justify the complexity, and layer on privacy measures as needed along the way. You don't have to reach the end of that path, and most people shouldn't.
## Your action items
Once you've read through this page, the concrete next steps are short and in order.
1. Identify which profile (A, B, C, or D) actually matches your situation today, rather than the one that sounds most impressive.
2. Audit your current setup against the recommendations for that profile, noting every place where you're above or below spec.
3. Make a plan to close the gaps one at a time, starting with the cheapest and highest-impact change.
4. Implement each change in isolation and test it end to end before moving on, because a setup you haven't verified is a setup you're guessing about.
5. Put a reminder in your calendar to reassess in six months, and any time one of the trigger events above (holdings, profile, jurisdiction, capability, incident) actually happens.
## Where to go next
If the audit you've done shows you need a hardware wallet, start with the [Hardware Wallet Setup Guide](https://selfcustodylabs.com/docs/wallet-setup/hardware-wallet/) because that's the foundation every profile above A depends on. If you're ready to add a passphrase on top of an existing hardware wallet, the [DIY Passphrase Guide](https://selfcustodylabs.com/docs/learn/keys/passphrase/) walks through it safely. If running your own node is the next upgrade, the [Bitcoin Node Setup](https://selfcustodylabs.com/docs/bitcoin-node/) guide covers both the hardware and the software side. If your assessment pushed you into profile C or D, read [Multisig Setup](https://selfcustodylabs.com/docs/learn/wallets/multisig/) carefully before you buy anything, because this is the tier where understanding has to come before implementation. And if your threat model raised privacy as a central concern, [Why Privacy Matters](https://selfcustodylabs.com/docs/learn/privacy/why-privacy-matters) explains what you're actually defending against.
---
# Bitcoin Keys: Private Keys, Seeds, Derivation Paths
> Learn how Bitcoin keys work: private keys, seed phrases (BIP39), extended keys (xpub/xprv), and derivation paths. The foundation of Bitcoin ownership.
Source: https://selfcustodylabs.com/docs/learn/keys/
Last updated: 2026-08-02
Publisher: Self Custody Labs (https://selfcustodylabs.com)
---
Everything in Bitcoin self-custody comes back to one thing: **keys**. Your keys are your Bitcoin. This section explains how they work, from the ground up.
## The Big Picture
Here's what you need to understand: Bitcoin doesn't know who you are. It doesn't care about your name, your identity, or your bank account. The only thing that matters is whether you can prove you control the keys to a specific address.
```
THE KEY HIERARCHY
═══════════════════════════════════════════════════════════════
Random Number (Entropy)
│
▼
Seed Phrase ──────────► 24 words you write down
(BIP39) "abandon ability able..."
│
▼
Master Private Key ─────► One key that rules them all
(xprv) Controls everything below
│
▼
Derivation Path ────────► Rules for generating child keys
(BIP32/44/84) m/84'/0'/0'/0/0
│
▼
Individual Keys ────────► Specific keys for specific addresses
│
▼
Addresses ────────────► Where Bitcoin is sent
bc1q...
```
**You don't need to understand every detail.** But knowing the general flow helps you understand:
- Why your seed phrase is so important (it's the root of everything)
- Why you can generate unlimited addresses from one seed
- Why losing your seed means losing everything
- Why different wallets can restore the same Bitcoin
## What You'll Learn
This section covers the key concepts in order, building from simple to complex:
### 1. [Private Keys](https://selfcustodylabs.com/docs/learn/keys/intro)
The foundation. A private key is just a very large random number that gives you control over Bitcoin at a specific address. Understand this, and everything else makes sense.
### 2. [Seed Phrases](https://selfcustodylabs.com/docs/learn/keys/seed)
How that random number becomes 24 memorable words. The BIP39 standard that makes backups human-friendly, and why word order matters.
### 3. [Extended Private Keys (xprv)](https://selfcustodylabs.com/docs/learn/keys/xprv)
How one seed generates unlimited keys. The "master key" concept that lets you create as many addresses as you need from a single backup.
### 4. [Extended Public Keys (xpub)](https://selfcustodylabs.com/docs/learn/keys/xpub)
The "watch-only" side of your wallet. How you can share the ability to *see* your Bitcoin without sharing the ability to *spend* it.
### 5. [Derivation Paths](https://selfcustodylabs.com/docs/learn/keys/derivation-path)
The roadmap your wallet follows to generate specific keys. Why `m/84'/0'/0'/0/0` matters, and when it doesn't.
### 6. [Passphrases](https://selfcustodylabs.com/docs/learn/keys/passphrase)
An optional 25th word that creates hidden wallets. Extra security, but with serious trade-offs to understand.
### 7. [Randomness](https://selfcustodylabs.com/docs/learn/keys/random) *(Technical)*
Why the quality of your random number matters enormously. The difference between "random enough" and actually random.
### 8. [Number Systems](https://selfcustodylabs.com/docs/learn/keys/number-systems) *(Technical)*
Binary, decimal, hexadecimal: the number formats you'll encounter. Reference material for when you need it.
## Key Concepts to Remember
Before diving in, here are the essential principles:
**Tip: Principle 1: Keys Are Everything**
Your Bitcoin exists on the blockchain. Your private key is the only proof that you're allowed to move it. No key = no Bitcoin.
**Tip: Principle 2: Seeds Are Keys**
Your seed phrase isn't a "backup" of your key. It *is* your key in a different format. Anyone with your seed phrase controls your Bitcoin completely.
**Tip: Principle 3: One Seed, Many Keys**
A single seed phrase can generate billions of addresses. You don't need a new seed for each transaction; your wallet handles this automatically.
**Tip: Principle 4: Public ≠ Private**
Extended public keys (xpubs) let others see your balances without being able to spend. Useful, but still sensitive: they reveal your entire transaction history.
## How Deep Do You Need to Go?
**For most users:**
- Understand that your seed phrase IS your Bitcoin
- Know that you can restore your wallet anywhere with the same seed
- Learn proper seed backup practices
**For serious self-custody:**
- Understand derivation paths (matters for recovery)
- Know the difference between xpub and xprv
- Consider passphrases for additional security
**For maximum understanding:**
- Learn how randomness affects security
- Understand the math behind key derivation
- Be able to verify seed generation independently
---
## Ready to Begin?
Start with the foundation:
→ **[Private Keys Explained](https://selfcustodylabs.com/docs/learn/keys/intro)**: What keys are and why they matter
Or if you want the practical summary:
→ **[Seed Phrases](https://selfcustodylabs.com/docs/learn/keys/seed)**: The 24 words that control your Bitcoin
---
# Understanding Bitcoin Private Keys
> Learn what Bitcoin private keys are, how they work, and why they're essential for controlling your Bitcoin. The foundation of self-custody explained.
Source: https://selfcustodylabs.com/docs/learn/keys/intro/
Last updated: 2026-08-02
Publisher: Self Custody Labs (https://selfcustodylabs.com)
---
**Warning**
Private keys are essential because they give you full control over your funds, and losing or exposing them can result in loss of access or theft. I recommend following this section step by step, as it's a foundational concept, and doing so will give you a much clearer understanding.
Now, take a look at this image before and while you read each section.
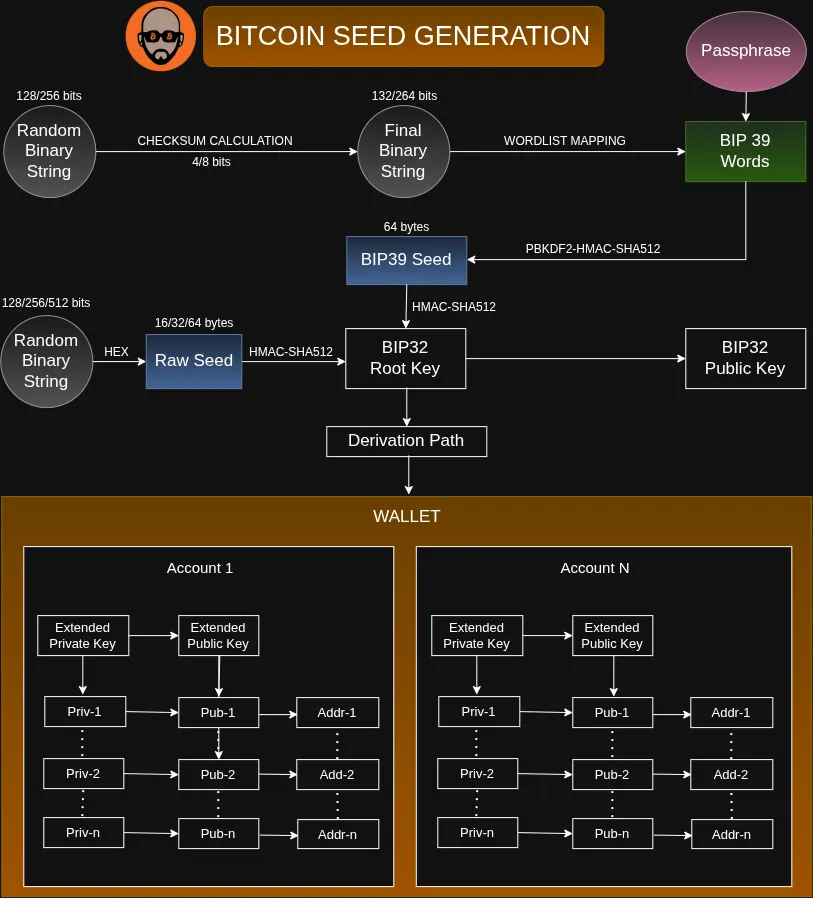
## What is a Private Key?
A private key is a secret code that allows you to access and control the Bitcoin stored in a specific address. Bitcoin addresses have two keys:
- **Public Key:** This is like your bank account number, shared openly to receive Bitcoin.
- **Private Key:** This is the secret counterpart. It acts like a password to access and spend your Bitcoin.
Your private key proves ownership of your funds. If you lose it, you lose access to your Bitcoin, so it's critical to keep it safe and secure.
## How Does a Private Key Work?
The private key signs transactions, confirming your ownership of the Bitcoin you're trying to spend. The public key is derived from the private key, but it’s virtually impossible to reverse-engineer, ensuring your private key stays secret.
## Storing Private Keys – A Challenge
Storing private keys securely is tricky. If stored online, they can be stolen. If kept offline, they could be lost or damaged. This is why managing private keys can be difficult for many users.
This is where the [seed phrase](https://selfcustodylabs.com/docs/learn/keys/seed) comes in (a human-readable way to store and recover your private key). We'll explore this in the next section.
## Key Takeaways
- A **private key** is the secret that controls your Bitcoin
- The **public key** (and address) is derived from your private key
- **Losing your private key** means losing your Bitcoin forever
- **Exposing your private key** means anyone can steal your funds
- Modern wallets use [seed phrases](https://selfcustodylabs.com/docs/learn/keys/seed) to make key management easier
---
---
# Bitcoin Seed Phrases Explained (BIP39)
> Understand how BIP39 seed phrases work: converting private keys to memorable words. Learn the 2048-word list and how seeds protect your Bitcoin.
Source: https://selfcustodylabs.com/docs/learn/keys/seed/
Last updated: 2026-08-23
Publisher: Self Custody Labs (https://selfcustodylabs.com)
---
A seed phrase is a list of 12 or 24 ordinary words that encodes every private key in your Bitcoin wallet, and it is the only thing you need to restore that wallet on any device, from any manufacturer, years later.
It is arguably the most important thing in Bitcoin self-custody. These words *are* your Bitcoin: whoever has them controls your funds, and whoever loses them loses the funds. Understanding how they work is essential before you entrust real money to them.
## What is a Seed Phrase?
A seed phrase (also called a recovery phrase or mnemonic) is a series of **12 or 24 words** that serve as a human-readable backup of your Bitcoin wallet. When you set up a new wallet, it generates these words for you. They look something like this:
```
reward symptom rude hamster wide weekend camera reward
pride roof weather keep ritual ocean rib wing
board potato whisper weasel chunk rival obvious clean
```
These words aren't random: they're drawn from a specific list of **2048 carefully chosen words** defined by the [BIP39 standard](https://github.com/bitcoin/bips/blob/master/bip-0039.mediawiki). Each word maps to a number, and together they encode your private key in a format that humans can reliably write down and read back.
**Warning: Critical Understanding**
Your seed phrase **is** your Bitcoin. Anyone who sees these words can take everything. Never photograph them, type them into a computer (except your hardware wallet), or store them digitally.
## Why Words Instead of Numbers?
Bitcoin private keys are enormous numbers, so large that writing them down accurately is nearly impossible for humans. A single digit wrong means your Bitcoin is gone forever.
Consider what a private key actually looks like in its raw form:
```
101110001011101110010010111100111011010001011111101010111111001...
(264 bits total)
```
No human can reliably copy that. Even converting to decimal doesn't help much: you'd have 24 groups of numbers between 0-2047 to transcribe perfectly.
**Words solve this problem.** Instead of writing "1477, 1764, 1511..." you write "reward, symptom, rude..." Words are:
- Easier to read and write accurately
- Self-correcting (you'll notice if you wrote "reword" instead of "reward")
- Harder to confuse (the word list was designed to avoid similar-looking words)
## How Seed Phrases Work
When your wallet generates a seed phrase, here's what happens under the hood:
1. **Generate randomness**: The wallet creates a large random number (128 bits for 12 words, 256 bits for 24 words). This step is the one you can't watch happen, and when a Coldcard firmware bug quietly weakened it, [attackers brute-forced $116M worth of seeds in 2026](https://selfcustodylabs.com/docs/learn/wallets/coldcard-entropy-incident/). It's why generating this number yourself [with dice](https://selfcustodylabs.com/docs/learn/keys/random/) matters.
2. **Add checksum**: A small verification code is appended (4-8 bits)
3. **Split into chunks**: The binary is divided into 11-bit segments
4. **Map to words**: Each 11-bit number (0-2047) maps to a word from the BIP39 list
When you restore a wallet:
1. Each word is converted back to its 11-bit number
2. The numbers are combined into the original binary
3. The checksum is verified (this catches typos!)
4. Your private key is reconstructed
This is why **word order matters**: the words encode a specific number, and scrambling them creates a completely different (and likely invalid) key.
## Why This Matters for You
Understanding seed phrases isn't just academic; it has practical implications:
**Your seed phrase IS your Bitcoin.** The hardware wallet, the app, the computer: these are all replaceable. Your seed phrase is what matters. If your house burns down but you have your seed phrase stored elsewhere, you've lost nothing.
**Your seed phrase is NOT a password.** There's no "forgot my seed phrase" button. No company can help you recover it. This is the trade-off for true ownership: complete control, but also complete responsibility.
**Different wallets, same seed.** Because BIP39 is a standard, you can restore your seed phrase in almost any Bitcoin wallet: Trezor, Ledger, Coldcard, Sparrow, or dozens of others. You're not locked into any vendor.
## The Checksum: Built-in Error Detection
The last word of your seed phrase isn't fully random. It contains checksum bits that verify the rest of the phrase is valid. This means if you make a typo when restoring, most wallets will immediately tell you the phrase is invalid rather than creating a different (empty) wallet.
However, the checksum only catches most errors, not all. Always verify your backup by testing recovery before depositing significant funds.
---
## Technical Deep Dive: The Conversion Process
*This section explains exactly how words become keys. It's educational but not required for using Bitcoin safely; skip it if you prefer.*
### Step 1: Binary to 11-Bit Chunks
A 256-bit random number plus 8-bit checksum = 264 bits total. Divided into 24 chunks of 11 bits each:
```
10111000101 11011100100 10111100111 01101000101 ...
```
### Step 2: Convert to Decimal
Each 11-bit binary number becomes a decimal from 0-2047:
```
1477, 1764, 1511, 837, 2005, 1992, 261, 1477, ...
```
### Step 3: Map to Words
Each number corresponds to a word in the [BIP39 word list](https://github.com/bitcoin/bips/blob/master/bip-0039/english.txt):
| Decimal | Word |
|---------|------|
| 1477 | reward |
| 1764 | symptom |
| 1511 | rude |
| 837 | hamster |
| ... | ... |
**Note:** The official word list on GitHub numbers words 1-2048 instead of 0-2047. When looking up words manually, subtract 1 from the decimal value.
### Final Result
```
reward symptom rude hamster wide weekend camera reward
pride roof weather keep ritual ocean rib wing
board potato whisper weasel chunk rival obvious clean
```
The alphabetical ordering of the word list means words starting with 'A' represent lower numbers, while words near the end represent higher numbers. This becomes intuitive once you've worked with seed phrases for a while.
---
## Ready to Create Your Own Seed?
Now that you understand how seed phrases work, you can take full control by generating your own using true randomness from dice rolls.
**Tip: Next Step: DIY Seed Generation**
Learn how to create your own Bitcoin seed phrase with verifiable entropy in our **[DIY Seed Generation Guide](https://selfcustodylabs.com/docs/learn/keys/random/)**. This hands-on guide walks you through every step, from rolling dice to calculating checksums.
---
# Extended Private Key (XPRV)
> Practical guide: Extended Private Key (XPRV). Covers Why the Extended Private Key Matters, Security Considerations, Generating and Testing an Extended Private.
Source: https://selfcustodylabs.com/docs/learn/keys/xprv/
Last updated: 2026-01-16
Publisher: Self Custody Labs (https://selfcustodylabs.com)
---

The extended private key is derived from the binary private key (along with an optional passphrase) using mathematical functions that most users don’t need to understand in detail.
**Warning**
Adding a passphrase significantly changes the resulting extended private key. Likewise, modifying the derivation path alters the generated keys and addresses. It’s generally best to stick with the default derivation path provided by your wallet software, but make sure to write it down for future reference.
## Why the Extended Private Key Matters
The extended private key is responsible for generating all Bitcoin addresses in a wallet and granting the ability to spend from them. The key structure works as follows:
- The extended private key produces multiple individual private keys (standard private keys).
- Each individual private key generates a public key.
- Each public key creates a unique Bitcoin address.
Additionally, the extended private key is used to derive the extended public key, which we’ll cover next.
## Security Considerations
Each individual private key does not reveal the extended private key. While I’m not a cryptography expert, my understanding is that an individual private key might theoretically reveal the next private key in sequence, though this is uncertain. To stay safe, never share any private key with anyone.
However, it is certain that a public key cannot reveal its corresponding private key, nor can it reveal any other private key in the wallet. This is crucial to understand for security.
## Generating and Testing an Extended Private Key
You can generat a test wallet using [Ian Coleman’s BIP39 tool](https://iancoleman.io/bip39/), a great resource for experimenting with dummy wallets.
**Danger**
Never use Ian Coleman’s BIP39 tool to generate a real wallet on an internet-connected computer!
Here’s an example of an extended private key:
```text
xprv9yVYaFXM2uUDeaj3STkiHS8svtqoASkVZ8hdTYuBdgVQGKjr76ks922e4r6826YvdQtQdu71ZA2qK8fYE85jXvTPdBFwgQ2d8rk7hhXV5wu
```
## Understanding Prefixes and Address Types
- Keys starting with `“x”` generate **legacy** (P2PKH) addresses, which begin with `“1”`.
- Keys starting with `“y”` generate **P2SH** (Pay to Script Hash) addresses, which begin with `“3”`.
- Keys starting with `“z”` generate **native SegWit** (Bech32) addresses, which begin with `“bc1q”`.
- Keys starting with uppercase “X”, “Y”, or “Z” are used for multisignature wallets.
Understanding the extended private key is essential because it underpins all wallet addresses and transactions. Proper handling ensures security and smooth Bitcoin management.
---
---
# Extended Public Key (XPUB)
> Practical guide: Extended Public Key (XPUB). Covers Security Considerations, Identifying Extended Public Keys, Final Thoughts.
Source: https://selfcustodylabs.com/docs/learn/keys/xpub/
Last updated: 2026-01-16
Publisher: Self Custody Labs (https://selfcustodylabs.com)
---

The purpose of the extended public key (xpub) might not be immediately obvious. Looking at the bottom section of the diagram, you’ll see that possessing the extended public key allows wallet software to generate **all** the same Bitcoin addresses as the extended private key, **in the same order**. This means the wallet will look identical in terms of addresses and transaction history. But what’s the key difference?
- A wallet created with the **extended private key** has the power to **spend** Bitcoin.
- A wallet created with the **extended public key** can **only view** transactions and addresses, it **cannot spend** Bitcoin.
**Tip: Watch only Wallet**
This type of public-key-only wallet is often called a **watch-only wallet**. You can safely use it on an insecure or internet-connected computer without risking your private keys. It allows you to monitor your balance and generate addresses to receive payments.
## Security Considerations
Even though an extended public key cannot be used to spend Bitcoin, you should still **protect it**. Anyone who has access to your xpub can:
- View your entire transaction history.
- See your current Bitcoin balance.
- Track your future transactions.
It’s similar to handing someone your **bank statement**, they can’t take your money, but they can see how much you have and where it moves. To maintain financial privacy, **keep your xpub secure** and only share individual addresses when necessary.
## Identifying Extended Public Keys
Extended public keys look like this:
```text
xpub6CUtym4EsH2Ws4oWYVHiea5cUvgHZuULvMdEFwJoC22P984zee57gpM7v9AhiLh3mVS4Ai5YTYxGibMUpZpdmpkrVAGjT9ydvurTtFm5Azy
```
Instead of starting with **“xprv”**, extended public keys start with:
- **“xpub”** for legacy (P2PKH) wallets
- **“ypub”** for P2SH (Pay-to-Script-Hash) wallets
- **“zpub”** for native SegWit (Bech32) wallets
- **“Xpub”**, **“Ypub”**, and **“Zpub”** for multisignature wallets (uppercase letters indicate multisig setups)
## Final Thoughts
Guard your **financial privacy** carefully, and protect your **Bitcoin private keys** even more. While an xpub alone cannot spend funds, it still reveals sensitive information about your wallet’s activity, so treat it with care.
---
---
# Derivation Path
> Practical guide: Derivation Path. Covers The BIP32 Standard, Anatomy of a Derivation Path, Common Derivation Paths.
Source: https://selfcustodylabs.com/docs/learn/keys/derivation-path/
Last updated: 2026-01-16
Publisher: Self Custody Labs (https://selfcustodylabs.com)
---
A derivation path determines how your private keys are derived from your seed phrase and which addresses are generated from those keys.
## The BIP32 Standard
The BIP32 (Bitcoin Improvement Proposal) standard defines how hierarchical deterministic (HD) wallets work. HD wallets use a tree-like structure where every branch can produce a new keypair (private and public key). This means you only need to back up the seed phrase, and the wallet can regenerate all keys and addresses from that phrase.
## Anatomy of a Derivation Path
A typical derivation path looks like this:
```text
m / 44' / 0' / 0' / 0 / 0
```
Here’s what each part means:
- `m` - The master node (your seed phrase). This is the root of the tree.
- `44'` - The purpose or protocol. The apostrophe ('), known as the hardened separator, indicates that these keys are hardened for security.
- `0'` - The coin type. **For Bitcoin, this is always 0** (but for other cryptocurrencies, it would be a different number).
- `0'` - The account. A wallet can have multiple accounts, each with its own address.
- `0` - The change type (0 for external addresses, 1 for internal addresses like change).
- `0` - The address index. This is used to generate a new address each time.
## Common Derivation Paths
Here are some of the most common derivation paths used in Bitcoin wallets:
**BIP44**
#### BIP-44 (Universal Path for Multiple Coins)
BIP-44 is the most widely used standard for creating wallets that manage multiple cryptocurrencies. It’s designed to support multi-asset wallets and has a clear, structured path for generating different addresses.
Standard Path:
```text
m / 44' / 0' / 0' / 0 / 0
```
- `44'`: Indicates the wallet follows BIP-44 for multi-asset support.
- `0'`: This specifies the Bitcoin coin type.
- `0'`: Refers to the first account in the wallet.
- `0`: The external addresses (i.e., the ones used to receive funds).
- `0`: The first address in the external address list.
Addresses starts with `1`:
```text
137oszRjc8tdUVWr5nSp6fzSND938PStMZ
```
**BIP49**
#### BIP-49 (Pay-to-Script-Hash with SegWit)
BIP-49 defines a path for creating P2SH (Pay-to-Script-Hash) addresses, a type of Bitcoin address that begins with 3. This path is used for SegWit transactions, improving transaction efficiency and lowering fees.
Standard Path:
```text
m / 49' / 0' / 0' / 0 / 0
```
- `49'`: Indicates SegWit addresses that start with 3 (P2SH).
- `0'`: Specifies Bitcoin as the coin type.
- `0'`: Refers to the first account.
- `0`: External addresses.
- `0`: The first address for receiving.
Addresses starts with `3`:
```text
33S43b6qmVHVTjwp75M7XoTTPEvKVh8zqH
```
**BIP84**
#### BIP-84 (Native SegWit with Bech32)
BIP-84 is used to generate native SegWit addresses, which start with bc1q and are more efficient than older types of Bitcoin addresses. These addresses have a lower transaction fee and are fully compatible with the SegWit protocol.
Standard Path:
```text
m / 84' / 0' / 0' / 0 / 0
```
- `84'`: Specifies **native SegWit** addresses (starting with bc1q).
- `0'`: The coin type for Bitcoin.
- `0'`: The first account.
- `0`: External addresses.
- `0`: The first address.
Addresses starts with `bc1`:
```text
bc1q6khgephuq2hyvrn49zrvsxztmtjg4ze7sxkpp4
```
**BIP86**
#### BIP-86 (Taproot with Bech32m)
BIP-86 is used to generate Taproot addresses, which start with `bc1p`. These addresses improve privacy and efficiency by leveraging Schnorr signatures and Merkelized Abstract Syntax Trees (MAST).
Standard Path:
```text
m / 86' / 0' / 0' / 0 / 0
```
- `86'`: Specifies **Taproot** addresses (starting with bc1p).
- `0'`: The coin type for Bitcoin.
- `0'`: The first account.
- `0`: External addresses.
- `0`: The first address.
Addresses start with `bc1p`:
```text
bc1ps3yjzpnxeg9yx43f9zmrl9njhvlwh4pm5peuu5ucqqp7f4362cvqeesncf
```
---
# Bitcoin Passphrase (25th Word): Diceware Generation
> Learn what a Bitcoin passphrase is, when to use it, and how to generate a strong one with dice and the EFF word list. Full 3-step DIY guide.
Source: https://selfcustodylabs.com/docs/learn/keys/passphrase/
Last updated: 2026-08-02
Publisher: Self Custody Labs (https://selfcustodylabs.com)
---
A passphrase is an additional security layer. Unlike your seed phrase (which consists of predefined words from the [BIP39](https://github.com/bitcoin/bips/blob/master/bip-0039/english.txt) word list), a passphrase can be any combination of characters.
Your wallet (collection of addresses) is derived from both the seed phrase and passphrase. Without the passphrase, an attacker who finds your seed will generate the wrong wallet.
For example, if you use the seed with the passphrase `Martha`, the attacker will only see Wallet A (which has no funds) when accessing the seed without the passphrase. However, you store your Bitcoin in `Wallet B`, which is only accessible with the passphrase Martha.
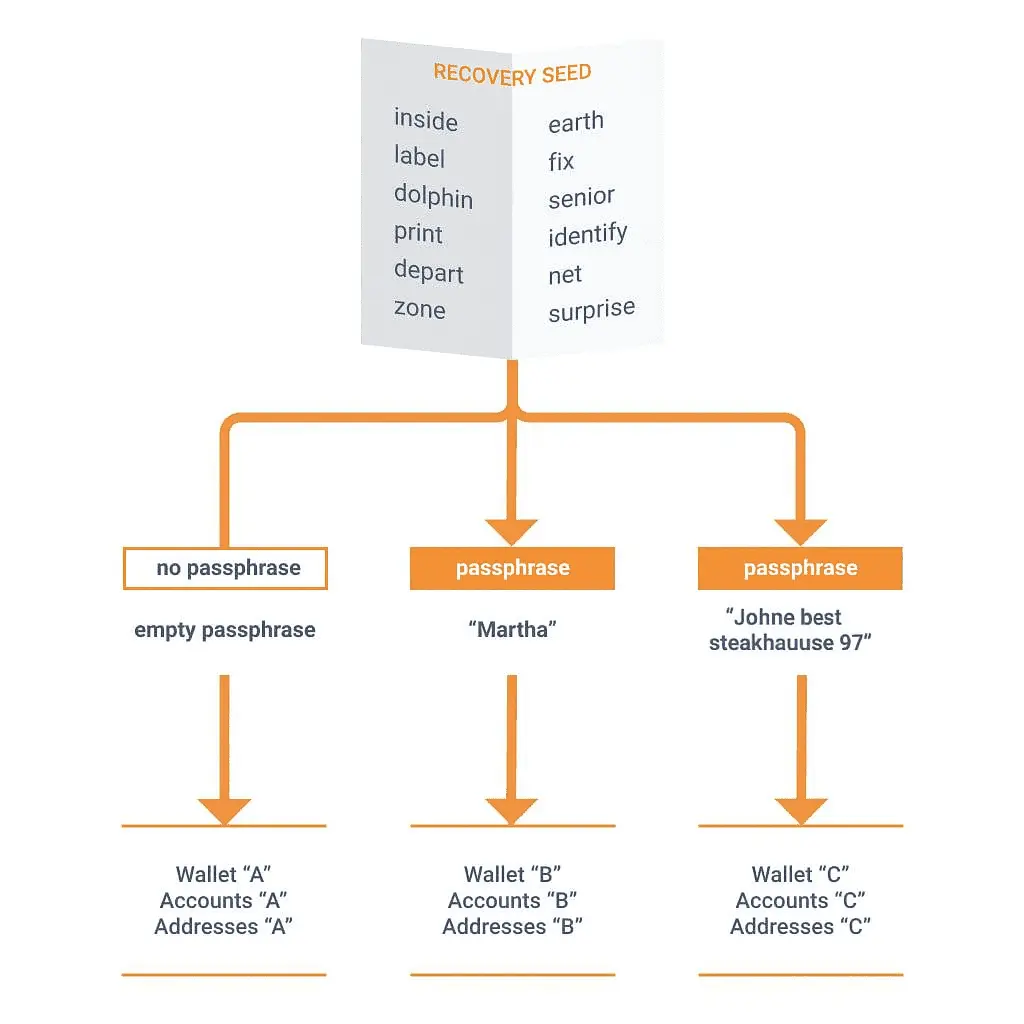
You can also use `Wallet A` without a passphrase as a **decoy wallet**, storing a small amount of Bitcoin in it. If you're ever forced to reveal your wallet under pressure, you can show this decoy without exposing your main holdings. And remember, never share the full extent of your Bitcoin holdings with anyone, even those you trust, as accidental leaks can make you a target.
## Risks of Using a Passphrase
Adding a passphrase to your seed offers strong security benefits, especially if you're storing a significant amount of Bitcoin. However, it also comes with risk:
- **Risk of Losing Access** – If you forget or mistype your passphrase, there's no way to recover it, and you'll lose access to your funds.
- **More Complexity** – Managing and securely storing an extra secret can be tricky, increasing the chance of mistakes.
- **Potential for Mistakes** – Even a small typo creates an entirely new wallet, making it easy to lock yourself out.
- **Not All Wallets Support It** – Some hardware and software wallets don't support passphrases, limiting compatibility.
- **Social Engineering Risk** – If someone knows you use a passphrase, they may assume you have hidden funds and pressure you to reveal them.
## How Much Security?
Human-chosen passwords are predictable. Even when we try to be random, we follow patterns that attackers can exploit.
| Human-chosen | Dice-generated |
|--------------|----------------|
| `Bitcoin2024!` | `cruelty postal clammy plasma` |
| `MyD0g$Name` | `stardust article corrode unmasked` |
| Predictable patterns | True randomness |
| Vulnerable to guessing | Measurable security |
With dice, every word is equally likely. No patterns. No bias. Just math. Each word from the EFF list (7,776 words) adds **~12.9 bits of entropy**:
| Words | Entropy | Attempts to Crack |
|-------|---------|-------------------|
| 4 words | ~51 bits | 2.3 quadrillion |
| 5 words | ~64 bits | 18 quintillion |
| 6 words | ~77 bits | 151 sextillion |
For Bitcoin passphrases, **4-6 words** provides excellent security while remaining memorable.
**Info: What You'll Do**
The rest of this guide walks you through generating a cryptographically strong passphrase using dice rolls and the EFF word list.
**Time required:** 30 minutes
**Difficulty:** Beginner
**Estimated cost:** $5-10 (casino dice) or $0 (use any dice)
**Requirements:** 5 six-sided dice, pen and paper
## Step 1: Choose Your Word List
**Tip: Word List**
You can find the word list here: [eff_large_wordlist.txt](https://www.eff.org/files/2016/07/18/eff_large_wordlist.txt).
The EFF list is the same size as the original Diceware list, with **7,776 words (6⁵)**. It provides the same level of security for each word you choose but improves usability, making it easier to type and remember.
To create this list, EFF:
- Selected words between 3 and 9 characters long, prioritizing common and easy-to-recognize words.
- Removed offensive, sensitive, or emotionally charged words using public filter lists (e.g., one by Luis von Ahn).
- Eliminated hard-to-spell words and homophones (words that sound the same but have different meanings).
- Made sure no word is a prefix of another, reducing typing errors.
The final result is a 7,776-word list suitable for dice-generated passphrases. On average, words in the list are 7.0 characters long, compared to 4.3 characters in Reinhold's original Diceware list. EFF prioritized familiar, meaningful words over very short ones.
The security of passphrases generated with this list is identical to those made with Diceware; the difference is in usability, not security. For most cases, EFF recommends generating a **six word passphrase**, which provides 77 bits of entropy. Each additional word increases security by 12.9 bits; one extra bit doubles the number of guesses required to brute-force the passphrase.
## Step 2: Roll Dice for Your Words
Now it's time to generate your own passphrase using real dice. Using casino-grade dice ensures the highest level of randomness (entropy). If you want to save money, any standard six-sided dice will work. Even slight imperfections wash out when you roll multiple times.
For this method, **five dice** are enough to generate each word.

Before rolling, remember that:
- Each word is generated by rolling one die five times or five dice once, providing **12.9 bits of entropy** per word.
- A six-word passphrase gives **77 bits of entropy**, which is strong security.
- For even stronger security, consider **seven or eight words** (90.3 or 103.2 bits of entropy, respectively).
### How to Generate Your Passphrase
- Roll five dice at once.
- Record the five-digit number they form (e.g., `52465`).
- Look up the matching word in the EFF Long Word List (e.g., **52465 = running**).
- Repeat this process until you have **at least six words** for a secure passphrase.
Your final numbers might look like this:
```text
52465 16663 55321 66621 22166 23234
```
Which translates to your final passphrase:
```text
running cope snowfield yippee darling diaphragm
```
Your passphrase is now ready to use.
## Step 3: Back Up Your Passphrase
Just like your Bitcoin seed phrase, your passphrase is a critical key to your funds. If you lose it or it gets compromised, your Bitcoin is gone forever. That's why proper storage is essential.
While paper and digital backups can degrade, get lost, or be destroyed, metal seed storage provides a durable, fireproof, and waterproof solution for long-term security.
**Danger: Never co-locate**
Never store your passphrase in the same place as your seed phrase. If both are found together, a thief can access your Bitcoin instantly. Keep them separate to ensure defense in depth.
### Memorize Your Passphrase
**Warning**
This method is only recommended if you have multiple secure backups.
You can also memorize your passphrase. Try writing your passphrase down several times and gradually commit it to memory. If needed, use a **mnemonic technique** (e.g., creating a mental story from the words) to make it easier to remember.
## Important Warnings
**Danger: Critical**
- **Never lose your passphrase**: Without it, your Bitcoin is gone forever.
- **A passphrase creates a completely different wallet**: Even a typo generates different addresses.
- **Store separately from your seed**: Different locations for defense in depth.
---
# Generate Your Own Bitcoin Seed Phrase with Dice
> Generate a BIP39 Bitcoin seed phrase from dice rolls. True randomness, verifiable checksum, fully offline, no need to trust the wallet RNG.
Source: https://selfcustodylabs.com/docs/learn/keys/random/
Last updated: 2026-08-21
Publisher: Self Custody Labs (https://selfcustodylabs.com)
---
Most wallets generate seed phrases for you, but that requires trust: you are trusting that the wallet's random number generator is actually random, hasn't been backdoored, and wasn't compromised somewhere in the supply chain. This guide shows you how to generate a 24-word BIP39 seed phrase from dice rolls, entirely offline, with randomness you can verify yourself.
**Danger: Fund Loss Warning**
**Mistakes in seed generation can result in permanent, irreversible loss of all Bitcoin.**
Common fatal errors:
- **Using a compromised computer**: If your "air-gapped" machine was ever connected to the internet, it may have malware that captures your seed.
- **Insufficient randomness**: Using weak entropy (like mental "random" numbers) makes your seed guessable.
- **Transcription errors**: A single wrong word means a completely different (empty) wallet.
- **Improper backup storage**: Paper burns, fades, and water-damages easily.
**There is no recovery.** No customer support. No password reset. If you lose access to your seed or generate it insecurely, your Bitcoin is gone forever.
**Do not proceed unless you fully understand these risks.**
**Info: What You'll Do**
In this guide you will:
- Generate true randomness using physical dice rolls
- Convert your binary entropy into decimal numbers
- Calculate the checksum that completes the final word
- Look up all 24 BIP39 seed words
- Verify the finished seed in an offline wallet
- Securely back up your seed phrase on metal
**Time required:** 2–4 hours
**Difficulty:** Intermediate
**Estimated cost:** $10–30 (casino dice) + $20–50 (metal backup plate)
**Requirements:** [Air-gapped computer](https://selfcustodylabs.com/docs/learn/wallets/air-gapped-wallets) or Raspberry Pi Zero, casino dice
**Tip: Prerequisites**
Before starting, make sure you understand:
- [What seed phrases are](https://selfcustodylabs.com/docs/learn/keys/seed) and how they protect your Bitcoin
- [Private keys](https://selfcustodylabs.com/docs/learn/keys/intro) and how they relate to seeds
- [Number systems](https://selfcustodylabs.com/docs/learn/keys/number-systems): binary, decimal, and hex
## Why Generate Your Own Seed?
When a wallet generates a seed phrase for you, you are trusting three things at once:
| Risk | Description |
|------|-------------|
| **Weak randomness** | Software may not use proper entropy |
| **Backdoors** | Wallets could have security flaws or intentional vulnerabilities |
| **Supply chain attacks** | Pre-generated seeds have been found in compromised hardware wallets |
This stopped being theoretical in July 2026. A five-year-old Coldcard firmware bug had been silently generating seeds from a predictable software generator instead of the hardware one, and attackers brute-forced roughly **$116 million** out of 5,200+ wallets: air-gapped devices, never hacked, never touched. Seeds generated from **dice rolls were completely unaffected**, because the dice bits bypassed the broken generator. The full story: [the Coldcard entropy incident](https://selfcustodylabs.com/docs/learn/wallets/coldcard-entropy-incident/).
By generating your own seed with physical dice, you:
- **Verify the randomness yourself**: no trust required
- **Eliminate software vulnerabilities**: dice can't be hacked
- **Understand what you're protecting**: knowledge is security
## Who Is This Guide For?
| Situation | Recommendation |
|-----------|----------------|
| Learning with small amounts | **Use your device's dice-roll feature** instead of the full manual process |
| Moderate holdings, want to learn | **Yes**: Practice on testnet first and understand the risks |
| Significant holdings, high security needs | **Yes**: Verifiable entropy is worth the effort |
| Don't trust hardware wallet RNG | **Yes**: 2026 proved this instinct right |
| Not comfortable with technical processes | **Careful**: A mistake here loses everything; use the device's dice feature with the cross-check below instead |
Before July 2026 we said most people should just use their hardware wallet's seed generation. The [Coldcard entropy incident](https://selfcustodylabs.com/docs/learn/wallets/coldcard-entropy-incident/) retired that advice: device randomness is now a fallback, not a default. If the full manual process below is more than you want, the middle path (your device's dice-roll feature plus an independent cross-check) captures most of the benefit.
### Using your hardware wallet's dice feature
Most current devices (BitBox02, Trezor Safe, Jade, Keystone, Coldcard) can mix dice rolls into seed generation. Two rules make it trustworthy:
1. **Roll enough.** 50 rolls contribute ~128 bits, enough to protect you even if the device's generator is completely broken. For a 24-word seed, use 99 rolls (~256 bits). This is exactly why dice-rolled Coldcard seeds survived the incident untouched.
2. **Cross-check the result.** A buggy or malicious device could silently ignore your rolls. Catch it by re-deriving the seed from the same rolls on an independent device (a [SeedSigner](https://selfcustodylabs.com/docs/seedsigner/) or [Krux](https://selfcustodylabs.com/docs/reference/hardware-wallet-comparison/#seedsigner--krux-diy), or this guide's manual process on an air-gapped computer) and comparing all 24 words. If they match, the device honored your entropy.
## Critical Environment Requirements
**Warning: Before You Begin**
Your seed generation environment **must** meet ALL of these requirements:
- [ ] **Air-gapped computer**: A machine that has NEVER connected to the internet and NEVER will
- [ ] **Fresh operating system**: Booted from a verified, read-only medium (like a Tails USB)
- [ ] **No wireless hardware**: Wi-Fi and Bluetooth physically removed or disabled in BIOS
- [ ] **No cameras or microphones**: Cover or disconnect them
- [ ] **Private location**: No one can see your screen or your seed words
- [ ] **No electronic devices nearby**: Phones, smartwatches, etc. can capture keystrokes or screens
**If any of these are not met, your seed may be compromised before you even finish generating it.**
## What You'll Need
### Casino dice
Casino-grade dice are precision-machined with flush, filled pips, so every face weighs the same. Cheaper pipped dice have material drilled out for each pip, which makes some faces very slightly more likely than others.
That bias is small and not fatal here: across 256 bits, a fraction-of-a-percent bias per face costs a negligible amount of entropy. Casino dice simply remove the question, and they are cheap.
**Note: More dice is about speed, not fairness**
Rolling several dice at once does **not** cancel out a die's bias. Each die still produces its own slightly biased bit. Using 5–10 dice per throw is purely a speed optimization: it collects 5–10 bits per throw instead of 1.

### Air-gapped computer
An air-gapped computer is a device that has never been connected to the internet and is physically incapable of doing so. This is crucial for securely generating and handling your private key. Suitable options:
- **Raspberry Pi Zero 1.3**: Highly recommended because it lacks built-in Wi-Fi and Bluetooth, reducing attack surfaces. Harder to find these days, but worth the hunt.
- **Laptop or PC**: A machine with the Wi-Fi and Bluetooth modules physically removed and the Ethernet port permanently disabled. Even if stolen, an attacker cannot put it back online to extract the private key.
You genuinely need a computer for this process. Step 1, 2, and 4 can be done with paper and pen, but **Step 3 computes a SHA-256 hash, which cannot be done by hand.**
### Paper and pen
Used only as a temporary record of the process. Must be destroyed (burned) after you have transferred the seed phrase to a durable medium.
### Metal seed storage
Once your seed phrase is created, it should be permanently stored on a fireproof, waterproof, tamper-resistant metal plate. This protects your seed from fire, water, and the slow degradation of paper over time.
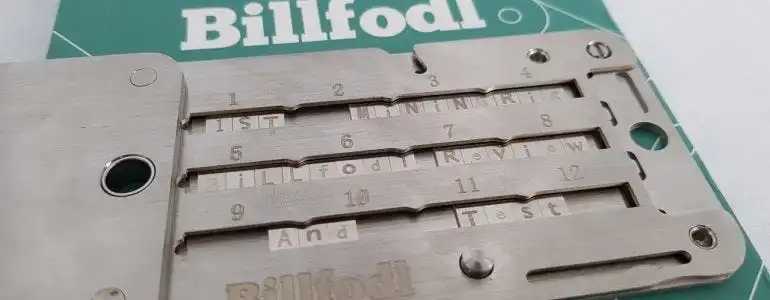
## How the Numbers Fit Together
Before you start rolling, it helps to see where the process is going. A 24-word BIP39 seed is **264 bits**, and those bits come from two different places:
| Where it comes from | Bits | Step |
|---|---|---|
| Dice rolls (your entropy) | 256 | Step 1 |
| Checksum, calculated from those 256 bits | 8 | Step 3 |
| **Total** | **264** | 264 ÷ 11 = **24 words** |
You will write your 256 dice bits into a grid of 24 rows, 11 bits per row. That fills 23 rows completely (23 × 11 = 253) and leaves **3 bits** in row 24. Row 24 stays unfinished until Step 3, when the checksum supplies its last 8 bits.
This is why the steps must be done in order: **row 24 does not have a value until Step 3.**
## Step 1: Roll Dice for Entropy
Your goal is to generate a large, truly random binary number by rolling dice.
### Assign binary values
Before rolling, decide how each die is converted into a binary value. This mapping gives an equal probability of 0 or 1:
- If the die lands on **1, 2, or 3**, it is assigned a value of **0**.
- If the die lands on **4, 5, or 6**, it is assigned a value of **1**.
### Roll and record
You need **256 individual die results**, one per bit. With 5 dice that is about 52 throws; with 10 dice, about 26. Stop once you have 256 bits and discard any extras from the final throw.
Roll the dice and record the results from left to right. Consistency is key: always read in the same order. If it is unclear which die is further to the left, re-roll those dice.
**Warning**
It is crucial that the data is truly random. If it lacks randomness, there is a risk that someone else could reproduce the exact same sequence. This would allow them to regenerate your private key and potentially access all of your Bitcoin.
### Format the output
Write your 256 bits into 23 rows of 11 binary digits, plus a 24th row that will hold only 3 digits for now.
- For readability, separate each full row into three groups: 4-4-3 (e.g., `1011 1000 101`).
- Keep the numbers aligned in columns and leave space to the right of each row for the calculations in Step 2.
- **Leave the rest of row 24 blank.** Its final 8 digits are filled in by the checksum in Step 3.
|#||||||||||||
|-|-|-|-|-|-|-|-|-|-|-|-|
|**1)**|1|0|1|1|1|0|0|0|1|0|1|
|**2)**|1|1|0|1|1|1|0|0|1|0|0|
|**3)**|1|0|1|1|1|1|0|0|1|1|1|
|**4)**|0|1|1|0|1|0|0|0|1|0|1|
|**5)**|1|1|1|1|1|0|1|0|1|0|1|
|**6)**|1|1|1|1|1|0|0|1|0|0|0|
|**7)**|0|0|1|0|0|0|0|0|1|0|1|
|**8)**|1|0|1|1|1|0|0|0|1|0|1|
|**9)**|1|0|1|0|1|0|1|0|1|0|0|
|**10)**|1|0|1|1|1|0|1|1|1|0|1|
|**11)**|1|1|1|1|1|0|0|0|1|0|1|
|**12)**|0|1|1|1|1|0|0|1|1|1|0|
|**13)**|1|0|1|1|1|0|1|0|1|0|0|
|**14)**|1|0|0|1|1|0|0|0|1|1|1|
|**15)**|1|0|1|1|1|0|0|0|1|1|1|
|**16)**|1|1|1|1|1|0|1|1|1|0|1|
|**17)**|0|0|0|1|1|0|0|0|1|0|1|
|**18)**|1|0|1|0|1|0|0|0|1|1|0|
|**19)**|1|1|1|1|1|0|1|0|1|0|0|
|**20)**|1|1|1|1|1|0|0|0|1|0|0|
|**21)**|0|0|1|0|1|0|0|0|1|0|1|
|**22)**|1|0|1|1|1|0|1|0|1|0|1|
|**23)**|1|0|0|1|1|0|0|0|1|0|1|
|**24)**|0|0|1|||||||||
You have now generated your 256 bits of entropy: 23 full rows of 11 bits, plus 3 bits in row 24.
**Do not roll dice for the remaining 8 bits.** They are not random data. They are the checksum, and they must be *calculated* from the 256 bits above so your wallet can detect typos later.
## Step 2: Convert Binary to Decimal
Convert **rows 1 through 23** to decimal. Each 11-bit row becomes one number, which you will use in Step 4 to look up a seed word.
**Caution: Row 24 is not ready yet**
Row 24 still has only 3 of its 11 bits, so it has no value at this stage. You will complete and convert it in Step 3. Skip it for now.
Do the conversion **manually** on your air-gapped computer or with paper and pen. Never use an online tool. Copying your binary string into a web calculator could expose your seed.
With 11 binary digits, the smallest number is 0 (`00000000000`) and the largest is 2047 (`11111111111`). Each result will therefore fall in the range 0–2047.
You can convert in either of two ways.
### Method A: air-gapped shell
In a bash terminal, to convert the first row, `10111000101`, type:
```bash
echo $((2#10111000101))
```
This will output **1477**. Replace the binary digits in the command with each 11-digit row and run the calculation.
### Method B: paper and pen
At the top-left of your page, write the powers of two from left to right, aligned with the binary digits below: `1024, 512, 256, 128, 64, 32, 16, 8, 4, 2, 1`.
For each binary digit in the row:
- If the digit is 1, write down the power of two above it.
- If the digit is 0, skip it.
Add up all the numbers you wrote down. **The sum is the decimal equivalent of the binary number.**
For example, to convert the first row, `10111000101`:
```text
1024 + 0 + 256 + 128 + 64 + 0 + 0 + 0 + 4 + 0 + 1 = 1477
```
Repeat this for rows 1 through 23. You will have 23 decimal numbers, each in the range 0–2047.
|#|1024|512|256|128|64|32|16|8|4|2|1|TOT|
|-|-|-|-|-|-|-|-|-|-|-|-|-|
|**1)**|1|0|1|1|1|0|0|0|1|0|1|**1477**|
|**2)**|1|1|0|1|1|1|0|0|1|0|0|**1764**|
|**3)**|1|0|1|1|1|1|0|0|1|1|1|**1511**|
|**4)**|0|1|1|0|1|0|0|0|1|0|1|**837**|
|**5)**|1|1|1|1|1|0|1|0|1|0|1|**2005**|
|**6)**|1|1|1|1|1|0|0|1|0|0|0|**1992**|
|**7)**|0|0|1|0|0|0|0|0|1|0|1|**261**|
|**8)**|1|0|1|1|1|0|0|0|1|0|1|**1477**|
|**9)**|1|0|1|0|1|0|1|0|1|0|0|**1364**|
|**10)**|1|0|1|1|1|0|1|1|1|0|1|**1501**|
|**11)**|1|1|1|1|1|0|0|0|1|0|1|**1989**|
|**12)**|0|1|1|1|1|0|0|1|1|1|0|**974**|
|**13)**|1|0|1|1|1|0|1|0|1|0|0|**1492**|
|**14)**|1|0|0|1|1|0|0|0|1|1|1|**1223**|
|**15)**|1|0|1|1|1|0|0|0|1|1|1|**1479**|
|**16)**|1|1|1|1|1|0|1|1|1|0|1|**2013**|
|**17)**|0|0|0|1|1|0|0|0|1|0|1|**197**|
|**18)**|1|0|1|0|1|0|0|0|1|1|0|**1350**|
|**19)**|1|1|1|1|1|0|1|0|1|0|0|**2004**|
|**20)**|1|1|1|1|1|0|0|0|1|0|0|**1988**|
|**21)**|0|0|1|0|1|0|0|0|1|0|1|**325**|
|**22)**|1|0|1|1|1|0|1|0|1|0|1|**1493**|
|**23)**|1|0|0|1|1|0|0|0|1|0|1|**1221**|
|**24)**|0|0|1|–|–|–|–|–|–|–|–|*Step 3*|
## Step 3: Calculate the Checksum
The 8 missing digits in row 24 are calculated from the 256 bits you rolled in Step 1. Together they form a **checksum**: a short verification code that lets your wallet detect if you have made a typo when entering the seed. If the checksum doesn't match, the wallet warns you that something is wrong.
**Info: Two ways to do this**
The method below is **manual**: you hash your bits, then convert two hexadecimal characters by hand. It is the one that shows you what a checksum actually is, and it is worth doing at least once.
If you would rather not do the arithmetic, [a single command](#or-do-it-in-one-command) at the end of this step produces the same result on the same air-gapped machine.
**The safest option is both.** Work it out by hand, then run the command and confirm the two agree. If they disagree, you made a mistake somewhere, stop and find it before going any further.
### Write out your 256 bits as one line
Read your grid from Step 1 straight through, row 1 to row 24, left to right, with no spaces and no line breaks. Rows 1–23 contribute 11 bits each and row 24 contributes its 3 bits, for 256 characters total.
For our example:
```text
1011100010111011100100101111001110110100010111111010101111110010000010000010110111000101101010101001011101110111111000101011110011101011101010010011000111101110001111111101110100011000101101010001101111101010011111000100001010001011011101010110011000101001
```
Count the characters before continuing. If you don't have exactly 256, the hash will be wrong and so will your seed.
### Generate the hash output
On your air-gapped Linux machine, feed that 256-bit string into SHA-256:
```bash
echo 1011100010111011100100101111001110110100010111111010101111110010000010000010110111000101101010101001011101110111111000101011110011101011101010010011000111101110001111111101110100011000101101010001101111101010011111000100001010001011011101010110011000101001 | shasum -a 256 -0
```
Our example output:
```text
52831c8346d7423d26648b51490f2d7ae0ddf172956f241a6bb8bdc0d887c292 ^-
```
**Danger: The `-0` flag is not optional**
`-0` (also written `--01`) puts `shasum` into **BITS mode**, where each `0` and `1` character is treated as an actual bit. BIP39 requires hashing the 256 raw bits, not the text `"1011…"`.
Drop the `-0` and the command still runs and still prints a perfectly normal-looking hash, but it is the hash of 256 ASCII characters instead: `03ab8729…` rather than `52831c83…`. That produces a wrong checksum, a wrong 24th word, and an invalid seed phrase. The `^` in the output above is `shasum` confirming BITS mode was used.
If `shasum` is unavailable, this gives the same result:
```bash
python3 -c "import hashlib; b='YOUR_256_BITS'; print(hashlib.sha256(int(b,2).to_bytes(32,'big')).hexdigest())"
```
Running both and comparing is a good way to catch a mistyped bit string.
The checksum is the first **8 bits** of that hash, which means you only care about the **first two hexadecimal characters**: `52`.
### Convert the first two hex characters to binary
Convert the two hexadecimal digits `5` and `2` into their 4-bit binary equivalents. Hexadecimal is a number system that uses 0–9 plus a–f to represent values 0–15.
|HEX|Decimal|Binary|
|-|-|-|
|0|0|0000|
|1|1|0001|
|2|2|0010|
|3|3|0011|
|4|4|0100|
|5|5|0101|
|6|6|0110|
|7|7|0111|
|8|8|1000|
|9|9|1001|
|a|10|1010|
|b|11|1011|
|c|12|1100|
|d|13|1101|
|e|14|1110|
|f|15|1111|
From the table:
- **5** in binary is **0101** (4 bits)
- **2** in binary is **0010** (4 bits)
Concatenated, the checksum is **`01010010`** (8 bits).
### Complete row 24
Append those 8 bits to the 3 bits already in row 24. It now holds 11 bits and your grid is complete at 264 bits:
|#||||||||||||
|-|-|-|-|-|-|-|-|-|-|-|-|
|**1)**|1|0|1|1|1|0|0|0|1|0|1|
|**2)**|1|1|0|1|1|1|0|0|1|0|0|
|**3)**|1|0|1|1|1|1|0|0|1|1|1|
|**4)**|0|1|1|0|1|0|0|0|1|0|1|
|**5)**|1|1|1|1|1|0|1|0|1|0|1|
|**6)**|1|1|1|1|1|0|0|1|0|0|0|
|**7)**|0|0|1|0|0|0|0|0|1|0|1|
|**8)**|1|0|1|1|1|0|0|0|1|0|1|
|**9)**|1|0|1|0|1|0|1|0|1|0|0|
|**10)**|1|0|1|1|1|0|1|1|1|0|1|
|**11)**|1|1|1|1|1|0|0|0|1|0|1|
|**12)**|0|1|1|1|1|0|0|1|1|1|0|
|**13)**|1|0|1|1|1|0|1|0|1|0|0|
|**14)**|1|0|0|1|1|0|0|0|1|1|1|
|**15)**|1|0|1|1|1|0|0|0|1|1|1|
|**16)**|1|1|1|1|1|0|1|1|1|0|1|
|**17)**|0|0|0|1|1|0|0|0|1|0|1|
|**18)**|1|0|1|0|1|0|0|0|1|1|0|
|**19)**|1|1|1|1|1|0|1|0|1|0|0|
|**20)**|1|1|1|1|1|0|0|0|1|0|0|
|**21)**|0|0|1|0|1|0|0|0|1|0|1|
|**22)**|1|0|1|1|1|0|1|0|1|0|1|
|**23)**|1|0|0|1|1|0|0|0|1|0|1|
|**24)**|0|0|1|**0**|**1**|**0**|**1**|**0**|**0**|**1**|**0**|
Now convert row 24 to decimal using the same method as Step 2. In our example, `00101010010` gives:
```text
0 + 0 + 256 + 0 + 64 + 0 + 16 + 0 + 0 + 2 + 0 = 338
```
You now have all **24 decimal numbers**: 23 from Step 2, plus 338 from row 24.
### Or do it in one command
Everything above, the hash, the hex conversion, and row 24, can also be produced by one command on the same air-gapped machine. `python3` ships with Raspberry Pi OS, Tails, and every mainstream Linux install, and neither command below needs an internet connection or a single package you have to install.
Start by putting your 256 bits into a variable. You can paste them with the 4-4-3 spacing from your grid, because both commands ignore whitespace:
```bash
BITS=1011100010111011100100101111001110110100010111111010101111110010000010000010110111000101101010101001011101110111111000101011110011101011101010010011000111101110001111111101110100011000101101010001101111101010011111000100001010001011011101010110011000101001
```
**Option 1: just the checksum.** This finishes row 24 and leaves the word lookups in Step 4 to you:
Just the Checksum
```bash
python3 -c "
import hashlib,sys
b=''.join(sys.argv[1].split())
if len(b)!=256 or set(b)-{'0','1'}:
sys.exit('ERROR: need exactly 256 binary digits, got %d' % len(b))
cs=format(hashlib.sha256(int(b,2).to_bytes(32,'big')).digest()[0],'08b')
print('checksum bits :',cs)
print('row 24 binary :',b[253:]+cs)
print('row 24 decimal:',int(b[253:]+cs,2))
" "$BITS"
```
For our example this prints:
```text
checksum bits : 01010010
row 24 binary : 00101010010
row 24 decimal: 338
```
**Option 2: all 24 numbers.** This prints every row's decimal value, which lets you check all of Step 2 as well as Step 3:
All 24 Numbers
```bash
python3 -c "
import hashlib,sys,os
b=''.join(sys.argv[1].split())
if len(b)!=256 or set(b)-{'0','1'}:
sys.exit('ERROR: need exactly 256 binary digits, got %d' % len(b))
f=b+format(hashlib.sha256(int(b,2).to_bytes(32,'big')).digest()[0],'08b')
w=open('english.txt').read().split() if os.path.exists('english.txt') else []
for n in range(24):
i=int(f[n*11:n*11+11],2)
print('%2d. %4d %s' % (n+1,i,w[i] if w else ''))
" "$BITS"
```
If you have saved the [official BIP39 word list](https://github.com/bitcoin/bips/blob/master/bip-0039/english.txt) as `english.txt` in the same folder, this also prints the words, giving you an independent check on the lookups you do in Step 4. Without that file it prints the numbers only, which is all you need.
**Tip: Both commands refuse to guess**
If your string is not exactly 256 binary digits, the command stops with an error instead of printing a plausible-looking wrong answer. Miscounting your bits is the most common mistake in this whole process, so let the machine catch it.
### Why several last words can look "valid"
You may have read that a 24-word seed has more than one possible last word. That is true, and it is the most confusing part of this process, so it is worth being exact about it.
Rows 1–23 fix 253 of your 264 bits. The 24th word supplies the remaining 11: the **3 bits you rolled** in row 24, plus the **8 checksum bits**. Because those 3 rolled bits can take 8 different values, exactly **8 of the 2048 BIP39 words** produce a valid checksum. For the example used throughout this guide, they are:
|Row 24's 3 rolled bits|24th word|
|-|-|
|000|believe|
|**001**|**clean** ← what our dice rolled|
|010|gap|
|011|hover|
|100|message|
|101|rule|
|110|soul|
|111|visual|
**You do not choose between them. Your dice already chose.**
The checksum never picks a word off that list. It completes the word your own 3 bits already started. We rolled `001`, so our word is "clean". Had we rolled `110`, the checksum bits would have come out differently too, and the word would have been "soul".
**Danger: The other seven are valid, and no wallet will warn you**
Each of those 8 words produces a perfectly valid BIP39 seed phrase. Pick the wrong one and nothing rejects it: you get a real, valid, completely different wallet that has nothing to do with the dice you rolled. There is no error message, because from the wallet's point of view nothing is wrong.
**Never pick a last word from a list of candidates.** If you rolled all 256 bits, exactly one word is yours, the one your own checksum produced.
**Note: Where the confusion comes from**
Tools that offer you a menu of "valid last words" are built for a different starting point: someone who has 23 words and no entropy committed to row 24 yet. For them any of the 8 really is equally fine, because making that choice *is* how they supply the last 3 bits of entropy. You supplied those bits with dice in Step 1, so the choice is already spent.
The effect is far more visible with 12-word seeds. There the last word carries 7 entropy bits and only 4 checksum bits, so **128 of the 2048 words** are valid last words. That is where most people first run into this idea, and it does not carry over to a dice-rolled seed where every bit of entropy is already fixed.
## Step 4: Look Up BIP39 Words
BIP39 (Bitcoin Improvement Proposal 39) defines a list of **2048 words**, arranged alphabetically. Each word corresponds to a specific position, and each of your 24 decimal numbers points at one word.
- The smallest possible value is 0 (binary `00000000000`), which corresponds to the word **"abandon"**, the first word on the list.
- The largest possible value is 2047 (binary `11111111111`), which corresponds to the word **"zoo"**, the last word on the list.
**Info: Zero-indexed list, one-indexed GitHub**
Computers count from 0. The BIP39 position of "abandon" is 0, not 1. However, the [official BIP39 word list](https://github.com/bitcoin/bips/blob/master/bip-0039/english.txt) on GitHub displays line numbers starting from 1. So a BIP39 position of 1477 maps to **GitHub line 1478**. Always add 1 to your decimal when searching the GitHub file.
For example, the first row's decimal is 1477. On GitHub you will find it on line 1478: the word is **"reward"**.
Look up each decimal value below (remembering to add 1 when searching GitHub) and record the corresponding word for all 24 rows.
|#|BIP39|GitHub|Word|
|-|-|-|-|
|**1)**|**1477**|1478|**reward**|
|**2)**|**1764**|1765|**symptom**|
|**3)**|**1511**|1512|**rude**|
|**4)**|**837**|838|**hamster**|
|**5)**|**2005**|2006|**wide**|
|**6)**|**1992**|1993|**weekend**|
|**7)**|**261**|262|**camera**|
|**8)**|**1477**|1478|**reward**|
|**9)**|**1364**|1365|**pride**|
|**10)**|**1501**|1502|**roof**|
|**11)**|**1989**|1990|**weather**|
|**12)**|**974**|975|**keep**|
|**13)**|**1492**|1493|**ritual**|
|**14)**|**1223**|1224|**ocean**|
|**15)**|**1479**|1480|**rib**|
|**16)**|**2013**|2014|**wing**|
|**17)**|**197**|198|**board**|
|**18)**|**1350**|1351|**potato**|
|**19)**|**2004**|2005|**whisper**|
|**20)**|**1988**|1989|**weasel**|
|**21)**|**325**|326|**chunk**|
|**22)**|**1493**|1494|**rival**|
|**23)**|**1221**|1222|**obvious**|
|**24)**|**338**|339|**clean**|
**Warning: Order is part of the seed**
The words must stay in this exact order. The same 24 words in a different order is a completely different (and empty) wallet. Number every word as you write it down.
You have now created a 24-word Bitcoin mnemonic seed. The next step confirms it is valid.
## Step 5: Verify Your Seed Phrase
Install a software wallet such as Sparrow on your air-gapped computer and enter the 24 words in order.
- **If the wallet accepts the seed**, the checksum inside the phrase is consistent. That is necessary but not sufficient, so continue to the re-derivation check below before you move on.
- **If the wallet rejects the seed**, the checksum is wrong. Do not adjust words at random, and do not swap the last word for another one that happens to be accepted. Go back and re-check, in this order: the 256-bit string you hashed in Step 3 (exactly 256 characters, no typos), that you used the `-0` flag, the two hex characters you converted, row 24's binary, and finally the word lookups.
Keep this wallet offline. It is being used to check the arithmetic, not to hold funds.
### Acceptance alone does not prove the seed is yours
A wallet accepting your phrase proves the 24 words are consistent **with each other**. It does not prove they match the dice you rolled.
As Step 3 explained, 8 different last words all pass that check, and 7 of them open a different wallet. If you picked the wrong one, or mistyped a word into another one that keeps the checksum valid, Sparrow opens a valid wallet without a single warning. The only thing that catches this is comparing the result against your dice grid:
1. Take the 256-bit string from your grid again.
2. Run [Option 2 from Step 3](#or-do-it-in-one-command), or redo the lookups by hand on a clean sheet of paper.
3. Compare all 24 words against what you entered into the wallet, in order, one at a time.
If every word matches, the seed really is the one your dice produced. If any word differs, trust the dice grid and find the mistake before you send any funds to it.
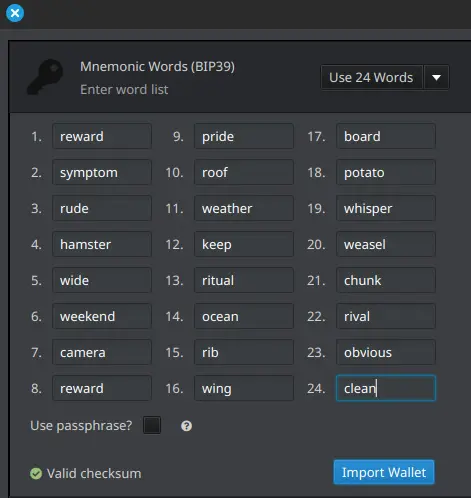
## Step 6: Back Up on Metal
Your Bitcoin seed phrase is the key to your funds. If it is lost or compromised, your Bitcoin is gone forever. Paper and digital backups can degrade, get lost, or be destroyed. A metal seed plate is a durable, fireproof, waterproof backup that can last decades.
### Why metal
- **Fire and water resistance**: Unlike paper, metal plates withstand extreme temperatures and flooding.
- **Durability**: Metal does not degrade over time the way paper and electronic storage do.
- **Tamper resistance**: A sealed metal backup makes unauthorized access visible.
- **Longevity**: A well-engraved or stamped metal seed plate can last a lifetime, keeping your Bitcoin recoverable for decades.
### Finish in this order
1. Stamp or engrave all 24 words onto the metal plate, numbered and in order.
2. Read the metal plate back word by word against your paper and confirm every word and position matches.
3. Only then, **destroy every paper record** of the process: the dice grid, the decimal calculations, and the word list. Burn them.
4. Store the plate in a secure location: a safe, hidden vault, or safety deposit box.
Consider splitting your backup across multiple secure locations, and never store the seed digitally or photograph it.
Your Bitcoin is only as safe as your seed backup. Protect it wisely.
---
---
# Number Systems: Binary, Decimal, Hex
> Understand binary, decimal, and hexadecimal number systems used in Bitcoin private keys. Essential foundation for understanding seed phrases.
Source: https://selfcustodylabs.com/docs/learn/keys/number-systems/
Last updated: 2026-04-14
Publisher: Self Custody Labs (https://selfcustodylabs.com)
---
Before diving into Bitcoin private keys, it’s important to understand how different number systems work.
**Note**
If you’re already familiar with binary, decimal, and hexadecimal, feel free to skip ahead.
### Decimal (Base 10):
- Each digit has 10 possible values (0-9).
- For example, in the number 4.25, the first digit is 4, the second is 2, and the third is 5.
- We count: 0, 1, 2, ..., 9. When we reach 9, we add a new digit to the left and reset the rightmost digit to 0 (e.g., 10).
### Binary (Base 2):
- Each digit has only 2 possible values (0 or 1).
- Counting in binary looks like this: 0, 1, 10, 11, 100, 101, 110, 111, 1000, 1001, 1010, 1011, etc.
- It may seem like a big jump, but that’s because we’re used to decimal counting.
### Hexadecimal (Base 16):
- Each digit has 16 possible values (0-9 and a-f, where a=10, b=11, ..., f=15).
- Just like playing cards where the Jack, Queen, and King represent specific numbers, letters can be used to represent numbers in hex.
- Hex numbers are more compact. For example, the decimal number 2047 is 11111111111 in binary (11 digits) but just 7FF in hex.
|Decimal|Binary|HEX|
|-|-|-|
|0|0000|0|
|1|0001|1|
|2|0010|2|
|3|0011|3|
|4|0100|4|
|5|0101|5|
|6|0110|6|
|7|0111|7|
|8|1000|8|
|9|1001|9|
|10|1010|a|
|11|1011|b|
|12|1100|c|
|13|1101|d|
|14|1110|e|
|15|1111|f|
---
## You've Completed the Keys Section
You now understand the foundation of Bitcoin ownership: how private keys work, how they become seed phrases, how child keys are derived, and the number systems that underpin it all.
---
# Bitcoin Wallets: Hardware, Software, Air-Gapped, Multisig
> Bitcoin wallet types compared: hardware wallets, software wallets, air-gapped setups, and multisig vaults. Pick the right security model for your needs.
Source: https://selfcustodylabs.com/docs/learn/wallets/
Last updated: 2026-08-02
Publisher: Self Custody Labs (https://selfcustodylabs.com)
---
A Bitcoin wallet is not where your coins live. Your coins live on the blockchain. The wallet holds the keys that prove they are yours. Different wallet types make different tradeoffs between convenience, security, and the threats they actually defend against.
## In this section
- **[Software Wallets](https://selfcustodylabs.com/docs/learn/wallets/software-wallets)**: desktop and mobile wallets and their tradeoffs
- **[Hardware Wallets](https://selfcustodylabs.com/docs/learn/wallets/hardware-wallets)**: dedicated signing devices that keep keys offline
- **[Air-Gapped Wallets](https://selfcustodylabs.com/docs/learn/wallets/air-gapped-wallets)**: wallets that never touch the internet
- **[Multisig Wallets](https://selfcustodylabs.com/docs/learn/wallets/multisig)**: vaults that require multiple keys to spend
Pick the model that matches your threat model, not the one that looks coolest. The right wallet for $500 is rarely the right wallet for $50,000.
---
# Software Wallets Explained
> Understand software wallets for Bitcoin: what they are, when to use them, recommended options, and security best practices.
Source: https://selfcustodylabs.com/docs/learn/wallets/software-wallets/
Last updated: 2026-08-03
Publisher: Self Custody Labs (https://selfcustodylabs.com)
---
Remember the first time you downloaded a banking app on your phone? A software wallet feels similar, except there's no bank on the other end. It's just you, your device, and the Bitcoin network.
A software wallet is an app on your phone or computer that lets you hold and use Bitcoin. It creates and stores your private keys on the same device where the app runs. For most people, this is their first real taste of financial sovereignty, the moment you realize you're holding actual Bitcoin that no company or government controls.
That said, software wallets come with an important trade-off. They're incredibly convenient, but because they live on devices connected to the internet, they're also more vulnerable than dedicated hardware solutions. Think of it this way: a software wallet is your Bitcoin checking account, not your savings vault.
Let's understand how they work, when to use them, and how to use them safely.
## How Software Wallets Work
The mechanics are straightforward, even if the implications are profound. When you install a software wallet, you're essentially creating a tiny, personal bank inside your phone or computer, one that only you control.
Here's what happens behind the scenes: the app generates a seed phrase (those 12 or 24 words you'll need to protect carefully), derives your private keys from that seed, and stores everything on your device. When you want to send Bitcoin, the wallet uses those keys to sign the transaction, proving to the network that you're the rightful owner.
```
SOFTWARE WALLET FLOW:
─────────────────────────────────────────────────────────
Your Device (Phone/Computer)
┌─────────────────────────────────────────────────┐
│ Wallet App │
│ ┌─────────────┐ ┌──────────────────────┐ │
│ │ Private Key │───►│ Sign Transaction │ │
│ │ (stored) │ │ │ │
│ └─────────────┘ └──────────┬───────────┘ │
│ │ │
└────────────────────────────────┼───────────────┘
│
▼
Bitcoin Network
```
The key difference from hardware wallets: **your private keys exist on an internet-connected device**, which is why software wallets are also called "hot wallets."
## When to Use a Software Wallet
Software wallets shine in situations where convenience matters more than Fort Knox-level security. If you're just starting your Bitcoin journey, there's no better way to learn. You'll make small mistakes (sending to wrong addresses, fumbling with fees), and it's far better to learn these lessons with $50 than with your life savings.
| Use Case | Why Software Wallet Works |
|----------|---------------------------|
| **Learning Bitcoin** | Low barrier to entry, free to use |
| **Small amounts** | Acceptable risk for pocket money |
| **Daily spending** | Convenient for frequent transactions |
| **Receiving payments** | Quick access to addresses |
| **Lightning Network** | Many Lightning wallets are software-based |
Here's a mental model that helps: think of a software wallet like **cash in your pocket**. You wouldn't walk around with $10,000 in your jeans, but having $100 for coffee and emergencies makes perfect sense. The same logic applies here.
## Security Considerations
### The Uncomfortable Truth About Software Wallets
Let's be honest about what you're dealing with. Your phone or computer is a busy place. It runs dozens of apps, connects to countless websites, and processes files from who-knows-where. Every one of those interactions is a potential doorway for someone who wants your Bitcoin.
This isn't meant to scare you; it's meant to help you make informed decisions. The threats are real but manageable:
- **Malware** can log your keystrokes, hijack your clipboard, or record your screen
- **Phishing** tricks you into downloading fake wallet apps or entering your seed on fraudulent websites
- **Physical theft** means someone walks away with your unlocked phone
- **Software bugs** in the wallet itself could expose your keys
- **Operating system exploits** give attackers access at the deepest level
### When Things Go Wrong
Here's a scenario that plays out more often than anyone likes to admit: someone downloads what they think is a legitimate wallet app. They create a wallet, write down their seed, and deposit some Bitcoin. Weeks later, the Bitcoin vanishes.
What happened? The app was a counterfeit. It looked perfect (same logo, same interface), but it was designed to steal. The moment that seed phrase was generated, it was also sent to the attacker.
If malware gains access to your device, it can read your seed phrase from storage, intercept your PIN or password, replace destination addresses when you copy and paste, and even sign transactions without your knowledge.
**Warning: Rule of Thumb**
Never store more Bitcoin in a software wallet than you'd be willing to carry as cash in your pocket. For most people, that's somewhere between $100 and $1,000, not their retirement savings.
## Recommended Software Wallets
Not all software wallets are created equal. Some prioritize simplicity, others focus on advanced features, and a few put privacy above everything else. After testing dozens of options, here are the ones worth your time.
### Mobile Wallets
For most beginners, a mobile wallet is the natural starting point. Your phone is always with you, and these apps make Bitcoin feel as natural as sending a text message.
| Wallet | Platform | Best For | Key Features |
|--------|----------|----------|--------------|
| **BlueWallet** | iOS, Android | Beginners | Simple, supports hardware wallets, Lightning |
| **Nunchuk** | iOS, Android | Security-focused | Multisig support, hardware wallet integration |
| **Green (Blockstream)** | iOS, Android | Privacy | Tor support, 2FA option, multisig |
| **Phoenix** | iOS, Android | Lightning | Self-custodial Lightning, simple UX |
| **Muun** | iOS, Android | Unified balance | Combines on-chain and Lightning |
**My recommendation for mobile:** Start with BlueWallet if you're new: it strikes the perfect balance between simplicity and capability. Once you're comfortable and want more security features, Nunchuk is an excellent step up.
### Desktop Wallets
Desktop wallets typically offer more features and better visibility into what's happening with your Bitcoin. If you want to understand the technical details (like coin control, fee estimation, and transaction structure), a desktop wallet is invaluable.
| Wallet | Platform | Best For | Key Features |
|--------|----------|----------|--------------|
| **Sparrow** | Win/Mac/Linux | Power users | Coin control, full node support, PSBT |
| **Electrum** | Win/Mac/Linux | Technical users | Advanced features, long track record |
| **Wasabi** | Win/Mac/Linux | Privacy | Built-in CoinJoin, Tor by default |
| **Specter** | Win/Mac/Linux | Node operators | Designed for node integration |
**My recommendation for desktop:** Sparrow Wallet, hands down. It's what I use for teaching and what I recommend to everyone from curious beginners to experienced Bitcoiners. The interface reveals exactly what Bitcoin is doing under the hood, which makes it an incredible learning tool, and it scales beautifully as your needs grow.
## Setting Up a Software Wallet
Setting up a software wallet takes about ten minutes, but those ten minutes deserve your full attention. Find a quiet moment, put your phone on do-not-disturb, and follow these steps carefully.
### The Setup Process
**First, download from official sources only.** This is worth repeating: only download wallet apps from official app stores or the developer's website. Scammers create convincing fake apps with similar names and logos. When in doubt, navigate to the wallet's official website and use the links there. If the wallet provides checksums, verify them: it takes two minutes and could save you everything.
**Next, create your wallet.** Let the app generate a new seed phrase. The moment those words appear on your screen, write them down immediately: on paper, with a pen, in the exact order shown. Never screenshot your seed. Never copy and paste it. Never type it into anything except the wallet app itself. These words are the keys to your Bitcoin; treat them accordingly.
**Secure the backup properly.** Your seed phrase written on paper is vulnerable to fire, water, and curious eyes. Store it somewhere safe, and consider a [metal backup](https://selfcustodylabs.com/docs/learn/keys/random/#step-6-back-up-on-metal) for long-term durability. Whatever you do, keep the backup separate from your device. If someone steals your phone and your seed backup is in the same bag, you've lost everything.
**Set a strong PIN or password.** Most wallets let you add an extra layer of protection. Use it. Don't reuse passwords from other services: if your email password leaks, you don't want it to also unlock your Bitcoin.
**Finally, verify everything works.** Send a small test amount to your new wallet. Watch it arrive. Send a tiny bit back. This confirms your setup is correct before you trust it with anything meaningful.
## Software Wallet Best Practices
Once your wallet is running, these habits will keep you safe:
**Keep the app updated.** Security vulnerabilities are discovered regularly, and updates patch them. An outdated wallet is a vulnerable wallet.
**Simpler is safer.** Use the simplest wallet that meets your needs. More features mean more code, and more code means more potential bugs. You don't need advanced trading features for basic self-custody.
**Enable all available security features.** PIN, biometrics, 2FA if the app offers it: turn it all on. These layers won't stop sophisticated attackers, but they'll stop opportunistic theft.
**Run your own node when possible.** This sounds advanced, but it's increasingly accessible. When your wallet connects to someone else's server, they learn your addresses and balance. Connecting to your own node keeps that information private. (See our [Bitcoin Node Guide](https://selfcustodylabs.com/docs/bitcoin-node) when you're ready.)
**Verify addresses before every transaction.** Clipboard malware can replace the address you copied with an attacker's address. Always double-check the first and last several characters before sending.
And the things to avoid:
**Never store large amounts in a software wallet.** That's what hardware wallets are for.
**Never enter your seed phrase on a computer** unless you're recovering your wallet on that specific wallet app.
**Never use wallets on rooted or jailbroken devices.** The security modifications that allow rooting also create vulnerabilities.
**Never skip updates.** Old versions have known vulnerabilities that attackers actively exploit.
## Connecting to Your Own Node
Here's something most beginners don't realize: when you use a software wallet, it needs to talk to the Bitcoin network somehow. By default, most wallets connect to servers run by the wallet developer or random public nodes scattered around the internet.
This works, but it comes at a cost. Every time your wallet checks your balance or broadcasts a transaction, the server on the other end learns something about you: your addresses, your transaction history, your balance, when you're online. You're trading privacy for convenience.
The solution is running your own Bitcoin node and connecting your wallet to it. Then those queries stay between you and your own infrastructure. It's like the difference between asking a stranger to check your bank balance versus checking it yourself.
| Wallet | Node Connection |
|--------|-----------------|
| Sparrow | Built-in Electrum server support |
| Electrum | Electrum server connection |
| BlueWallet | Electrum server or Umbrel |
| Green | Personal Electrum server |
Don't worry if this sounds complicated right now. Running a node is a project for later, once you're comfortable with the basics. When you're ready, our [Bitcoin Node Guide](https://selfcustodylabs.com/docs/bitcoin-node) will walk you through it.
## When to Graduate to a Hardware Wallet
A software wallet is a fantastic starting point, but at some point, you'll feel the pull toward something more secure. Here are the signs you're ready to upgrade:
**Your Bitcoin holdings exceed a month's expenses.** When the amount at stake becomes meaningful, the inconvenience of a hardware wallet becomes worthwhile.
**You're holding for the long term.** If you're not planning to spend this Bitcoin anytime soon, it deserves better protection than a software wallet provides.
**You want peace of mind.** There's something deeply reassuring about knowing your keys are stored on a device that can't be hacked remotely. Once you experience that peace of mind, it's hard to go back.
**You're ready for more responsibility.** Hardware wallets require more care: maintaining the device, protecting additional backups, following proper security procedures. If that sounds appealing rather than annoying, you're ready.
A software wallet is a great learning tool and a perfectly reasonable choice for everyday spending money. But for significant savings (the Bitcoin you're holding for years or decades), a [hardware wallet](https://selfcustodylabs.com/docs/learn/wallets/hardware-wallets) is essential.
---
## Key Takeaways
Software wallets occupy an important place in your Bitcoin toolkit. They're your on-ramp to self-custody, your spending wallet, and your learning laboratory. Just remember their limitations:
- They're **convenient but less secure** than hardware alternatives
- Use them for **small amounts and daily spending**
- Your keys exist on an **internet-connected device**: that's an inherent risk
- **Never store more than you'd carry as cash** in your pocket
- When your holdings grow, **graduate to hardware wallets** for long-term savings
---
## Continue Learning
→ **Next:** [Hardware Wallets](https://selfcustodylabs.com/docs/learn/wallets/hardware-wallets) (for serious savings)
→ **Setup Guide:** [Hardware Wallet Setup](https://selfcustodylabs.com/docs/wallet-setup/hardware-wallet) (get started with hardware)
→ **Privacy:** [Why Privacy Matters](https://selfcustodylabs.com/docs/learn/privacy/why-privacy-matters) (understand the risks)
---
# Hardware Wallets Explained
> Understand hardware wallets for Bitcoin self-custody: how they work, why they're secure, popular options compared, and how to choose the right one.
Source: https://selfcustodylabs.com/docs/learn/wallets/hardware-wallets/
Last updated: 2026-08-21
Publisher: Self Custody Labs (https://selfcustodylabs.com)
---
There's a moment in every Bitcoiner's journey when the stakes get real. Maybe your holdings crossed a threshold that makes you nervous. Maybe you read about another exchange hack or software wallet exploit. Whatever the trigger, you've arrived at the same conclusion millions have reached before you: it's time for a hardware wallet.
A hardware wallet is a dedicated physical device designed specifically to protect your Bitcoin private keys. Unlike the phone in your pocket or the laptop on your desk, it does exactly one thing, and it does that thing extraordinarily well. Your keys are generated inside the device, stored inside the device, and never leave the device. Even when you connect it to a compromised computer crawling with malware, your keys remain safe.
This isn't security theater. It's a fundamental architectural difference that eliminates entire categories of attacks. But 2026 added an asterisk the industry can no longer ignore: a hardware wallet protects whatever key it holds, but it cannot prove to you that the key was born unpredictable. The [Coldcard entropy incident](https://selfcustodylabs.com/docs/learn/wallets/coldcard-entropy-incident/) made that distinction worth $116 million. Let's understand why hardware wallets exist, how they work, where their guarantees actually end, and how to choose the right one for your situation.
## Why Hardware Wallets Exist
Think about your computer or phone for a moment. How many apps are installed? How many websites have you visited? How many email attachments have you opened? Each of those interactions is a potential entry point for malicious software.
General-purpose devices are designed to do everything, which means they're optimized for nothing in particular, certainly not for protecting secrets worth potentially life-changing amounts of money.
A hardware wallet takes the opposite approach. It does **one job only**: protect your keys and sign transactions securely. No web browser. No email client. No app store. No attack surface.
```
THE SECURITY DIFFERENCE:
─────────────────────────────────────────────────────────
Software Wallet Hardware Wallet
─────────────── ───────────────
Keys on computer/phone Keys on dedicated device
Connected to internet Never touches internet
Vulnerable to malware Isolated from attacks
Signs on same device Signs in secure enclave
```
## How Hardware Wallets Work
The magic of a hardware wallet lies in a simple but profound principle: **your private key never leaves the device**.
When you want to send Bitcoin, here's what actually happens. Your computer (running wallet software like Sparrow) creates an unsigned transaction, essentially a request that says "move X bitcoin from address A to address B." This unsigned transaction is sent to your hardware wallet, which displays the details on its own screen.
This is the critical moment. You look at the hardware wallet's screen (not your computer's screen) and verify the recipient address and amount. If everything looks correct, you press a physical button on the device. The hardware wallet then uses your private key to sign the transaction internally, and sends back only the signature, never the key itself.
```
TRANSACTION SIGNING FLOW:
─────────────────────────────────────────────────────────
Your Computer Hardware Wallet
───────────── ───────────────
1. Create unsigned ───►
transaction 2. Display on screen:
"Send 0.1 BTC to bc1q...?"
3. You verify and press button
4. Device signs internally
◄─── 5. Return ONLY the signature
6. Broadcast signed (private key stays inside)
transaction
Result: Your key was used but never exposed.
```
Here's why this matters: even if your computer is completely compromised (keyloggers recording everything, malware watching your screen, attackers with full access), they still can't steal your Bitcoin. They cannot extract your private key from the hardware wallet. They cannot sign transactions without you physically pressing the button. And they cannot change what you see on the hardware wallet's screen.
The hardware wallet is your last line of defense, and it's a strong one.
## The Randomness Problem
Everything above rests on an assumption so foundational it's easy to miss: **the private key must be unpredictable**. If anyone can guess your key, none of the isolation matters: they don't need your device, your PIN, or your computer. They just need the blockchain.
When a hardware wallet creates a new seed, it pulls randomness from an onboard generator. You press "new wallet," words appear, and you have no way to see whether those words came from high-quality hardware randomness or from something an attacker could reproduce. This is the one moment in a hardware wallet's life where you are trusting it completely and verifying nothing.
That trust failed in practice. For over five years, a firmware bug made Coldcard devices generate seeds from a predictable software generator instead of the hardware one. In July 2026, attackers brute-forced those seeds and drained roughly $116 million from devices that were air-gapped, physically secure, and working exactly as their owners expected. The full story is in our [incident write-up](https://selfcustodylabs.com/docs/learn/wallets/coldcard-entropy-incident/).
Two habits close this gap:
- **Supply the randomness yourself.** Every device we currently recommend can mix your own dice rolls into seed generation, or skip the device entirely and [generate your seed manually with dice](https://selfcustodylabs.com/docs/learn/keys/random/), where every bit is yours and every step is checkable.
- **Verify what the device did with it.** A buggy or malicious device could ignore your rolls. Re-deriving the seed from the same rolls on an independent device (or by hand) and comparing the words catches that; it's covered at the end of the dice guide.
Add a [passphrase](https://selfcustodylabs.com/docs/learn/keys/passphrase/) on top and your funds no longer depend on any single secret being perfect. In July 2026, that layering was precisely the line between drained and untouched.
## Types of Hardware Wallets
Not all hardware wallets are created equal. They fall into two broad categories, each with distinct tradeoffs.
### Standard Hardware Wallets
These devices connect directly to your computer or phone via USB or Bluetooth. You plug them in, your wallet software recognizes them, and you're ready to go.
**Examples:** Trezor, Ledger, BitBox02
The user experience is smooth, almost as convenient as a software wallet. The tradeoff? Your hardware wallet is physically connected to a device that could potentially be compromised. While the security architecture still protects your keys, purists argue that any physical connection is a potential attack vector.
### Air-Gapped Hardware Wallets
These devices never directly connect to anything. Instead, they communicate through alternative channels: QR codes displayed on screen and scanned by cameras, MicroSD cards physically carried between devices, or occasionally NFC.
**Examples:** Jade Plus (QR), Passport Prime (QR), Keystone 3 Pro (QR), Coldcard (SD/QR), [SeedSigner](https://selfcustodylabs.com/docs/seedsigner/) and Krux (DIY)
The workflow is slightly slower. You're literally sneaker-netting data between devices. But the security model is compelling: there's no cable, no Bluetooth radio, no USB port that malware could potentially exploit. The device is truly isolated.
Be precise about what that isolation buys you, though. An air gap stops malware from reaching the device and stops key material from leaking out. It does **nothing** about a key that was predictable from birth: the Coldcard wallets drained in 2026 belonged disproportionately to air-gap enthusiasts, and their discipline was irrelevant because [the seeds themselves were guessable](https://selfcustodylabs.com/docs/learn/wallets/coldcard-entropy-incident/). Air-gapping narrows the attack surface; it doesn't verify the randomness underneath.
For most people, standard hardware wallets provide excellent security. Air-gapped devices are for those who want to eliminate every possible attack vector. Just don't mistake the air gap for a guarantee about entropy.
## Comparing Popular Hardware Wallets
The hardware wallet market has matured significantly and been stress-tested. Here's the August 2026 lineup at a glance (full details, including why some entries carry warnings, in the [hardware wallet comparison](https://selfcustodylabs.com/docs/reference/hardware-wallet-comparison/)):
| Device | Price | Open Source | Air-Gap | Secure Element | Best For |
|--------|-------|-------------|---------|----------------|----------|
| **Trezor Safe 5** | $169 | Full | No | Yes (EAL6+) | Beginners |
| **Trezor Safe 7** | $249 | Full (incl. SE) | No | Dual, auditable | Transparency + UX |
| **BitBox02 Nova** | ~$185 | Full | No | Yes (EAL6+) | Simplicity |
| **Jade / Jade Plus** | $79 / $149 | Full | Yes (QR) | No* | Budget air-gap |
| **Passport Prime** | $556 | Full | Yes (QR) | Yes | Premium air-gap |
| **Keystone 3 Pro** | $149 | Full | Yes (QR) | Yes (3 chips) | QR workflow |
| **[SeedSigner](https://selfcustodylabs.com/docs/seedsigner/) / Krux** | ~$50–80 | Full | Yes (stateless) | No | DIY verification (our favourite) |
| **Coldcard Mk5 / Q** | $189 / $289 | Source-visible | Yes (SD/QR) | Dual | ⚠️ [See incident](https://selfcustodylabs.com/docs/learn/wallets/coldcard-entropy-incident/) |
| **Ledger Nano/Flex/Stax** | $79–399 | SE firmware closed | No | Yes | Not recommended |
*Jade uses a "virtual secure element": a blind oracle server (Blockstream's or self-hosted) rate-limits PIN attempts instead of a dedicated chip.
## Key Features Explained
Reading hardware wallet specifications can feel like comparing cars by their engine displacement, technically accurate but not particularly helpful for making decisions. Here's what actually matters:
### Secure Element
A secure element is a tamper-resistant chip specifically designed to protect secrets. Think of it as a tiny vault inside your hardware wallet. If someone physically steals your device, a secure element makes it dramatically harder to extract your keys; they can't just desolder a memory chip and read it.
**Has secure element:** Trezor Safe series, BitBox02 Nova, Passport Prime, Keystone, Coldcard, Ledger
**No secure element:** Jade (oracle model instead), SeedSigner and Krux (stateless: nothing stored to protect)
Does this matter? For most threat models, yes. If you're worried about sophisticated physical attacks (the kind involving labs and electron microscopes), a secure element adds meaningful protection. Notably, the Trezor Safe 7's TROPIC01 is the first *auditable* secure element (open design, no NDA), closing the old gap between "certified" and "verifiable." Keep it in perspective, though: the 2026 Coldcard incident happened on devices with **two** secure elements. The chips did their job; the firmware never asked them for randomness. A secure element protects stored keys; it can't save a key that was predictable at creation.
### Open Source
Can independent security researchers examine the code running on your device? Open source firmware means anyone can audit it, find bugs, and verify there are no backdoors. Closed source means you're trusting the company's word.
**Fully open source:** Trezor, BitBox02, Jade, Passport, Keystone, SeedSigner, Krux
**Source-visible (restrictive license):** Coldcard
**Closed source where it counts:** Ledger (secure element firmware)
The Bitcoin community generally prefers open source, and for good reason, but 2026 taught the necessary correction: **open source means someone *can* check, not that someone *did*.** The Coldcard entropy bug sat in publicly readable code for over five years, and a researcher who did question it in 2025 was dismissed. Source availability is the entry ticket; what separates vendors now is reproducible builds, independent audits of what actually ships, and how they respond when someone finds something.
### Bitcoin-Only Option
Some devices offer firmware that only supports Bitcoin: no Ethereum, no altcoins, no tokens. Why does this matter? Less code means fewer potential bugs. Every feature is a potential attack surface, and many Bitcoiners prefer devices that do one thing exceptionally well rather than many things adequately.
**Bitcoin-only by design:** Passport, Coldcard, SeedSigner
**Bitcoin-only firmware available:** BitBox02, Trezor Safe series, Keystone, Jade (Bitcoin + Liquid)
### User-Supplied Entropy
Can you mix your own randomness, typically dice rolls, into seed generation, so you're not trusting the device's generator alone? After 2026, treat this as a required feature, and happily every current recommendation supports it (Ledger is the holdout). Fifty rolls contribute enough entropy to protect a 12-word seed even if the device's generator is completely broken; 99 rolls fully cover a 24-word seed. That math is exactly what kept dice-generated Coldcard seeds safe through the incident.
The feature has one blind spot: you can't see whether the device honestly used your rolls. The fix is cheap: re-derive the seed from the same rolls independently and compare words. Our [dice guide](https://selfcustodylabs.com/docs/learn/keys/random/) covers both the full manual process and this cross-check.
## Choosing Your Hardware Wallet
With so many options, analysis paralysis is real. Here's how to cut through the noise based on what actually matters to different types of users.
### For Beginners
**Recommendation: BitBox02 Nova (Bitcoin-only) or Trezor Safe 5**
If this is your first hardware wallet, you want something that won't frustrate you. Both devices have intuitive setup processes, good security (including EAL6+ secure elements), fully open source firmware, and, importantly now, dice-roll support for when you're ready to supply your own entropy.
The learning curve is gentle. You'll be up and running in under an hour, and you won't feel like you need a computer science degree to operate your own wallet.
### For Verifiable Security
**Recommendation: Jade Plus or Passport Prime, seeded with dice**
If you lie awake at night thinking about attack vectors, 2026 clarified which vectors deserve the insomnia. Jade Plus pairs QR air-gap operation with anti-exfiltration signing and multi-source entropy. Blockstream's same-night, show-the-details response to the Coldcard crisis is the vendor behavior you want backing your device. Passport Prime adds a sandboxed OS and an entropy-testing app that lets you probe the randomness yourself, at a much higher price.
Whichever you pick, generate the seed with [your own dice entropy](https://selfcustodylabs.com/docs/learn/keys/random/). The device handles isolation; you handle unpredictability.
### For Full Transparency
**Recommendation: Trezor Safe 7, or build a SeedSigner/Krux**
If verifiability matters more to you than any single feature, the Safe 7 is the first device where even the secure element (TROPIC01) has an auditable design, with no NDA between you and the chip. The DIY route goes further still: SeedSigner and Krux are stateless signers you assemble from commodity parts, running firmware you can build yourself, holding your seed only while you use it. SeedSigner is our favourite signing solution overall, enough that it has its [own section](https://selfcustodylabs.com/docs/seedsigner/) with a full [build guide](https://selfcustodylabs.com/docs/seedsigner/build-guide/). If you enjoyed our [coreboot](https://selfcustodylabs.com/docs/coreboot/) and [libreboot](https://selfcustodylabs.com/docs/libreboot/) guides, this is your category.
### For Mobile Users
**Recommendation: Keystone 3 Pro**
If you primarily use your phone for Bitcoin, Keystone's QR code approach works beautifully with mobile wallets: no cables, no adapters, just point and scan, and the air gap holds the whole time. BitBox02 Nova's Bluetooth support is the convenient wired-free alternative if you're an iPhone user who prefers a pocketable device.
## Security Best Practices
A hardware wallet is only as secure as how you use it. These practices separate "pretty safe" from "actually safe."
**Buy from official sources only.** This is non-negotiable. Pre-compromised hardware wallets have been sold on eBay, Amazon third-party sellers, and crypto-themed websites. The savings aren't worth the risk. Buy directly from the manufacturer or from explicitly authorized resellers.
**Verify your device is genuine.** Every reputable manufacturer includes an authenticity check. Run it. If the device fails or the check doesn't exist, return it immediately.
**Own your entropy.** Use the device's dice-roll option when creating your seed (99 rolls for a 24-word seed), or [generate the seed yourself](https://selfcustodylabs.com/docs/learn/keys/random/) and import it. This is the practice that separated the untouched from the drained in 2026, and it costs twenty minutes.
**Watch your vendor's security advisories.** Update firmware promptly, and know that a firmware update can never repair a seed that was generated weak; only migration to a new seed can. Subscribe to the vendor's advisory channel; the Coldcard victims' first warning was their balance hitting zero.
**Always verify addresses on the device screen.** This is the single most important habit. Malware can display fake addresses on your computer screen, but it can't change what your hardware wallet displays. Before you send Bitcoin anywhere, verify the address on your hardware wallet matches what you intended.
**Use a strong PIN.** Not 1234. Not your birthday. Not your anniversary. A random PIN that you memorize, or better yet, write down and store separately from both the device and your seed backup.
**Keep your seed backup in a different location than your device.** If someone steals your hardware wallet and finds your seed backup in the same drawer, your security model has failed completely.
The things to avoid are equally important:
**Never buy used hardware wallets.** You cannot verify they haven't been compromised. The previous owner could have extracted the keys or modified the firmware. Just don't.
**Never enter your seed phrase on a computer.** The only place your seed phrase should ever be entered is directly into your hardware wallet during recovery. Not in a web form. Not in an app. Not in a "verification tool."
**Never store your device with your seed backup.** Redundancy is the point. If fire destroys your home, you want either the device or the backup to survive, ideally in different locations.
## Hardware Wallet vs. Other Methods
Where do hardware wallets fit in the broader self-custody landscape? Here's an honest comparison:
| Method | Security | Convenience | Cost | Best For |
|--------|----------|-------------|------|----------|
| **Exchange custody** | Low | High | Free | Not self-custody |
| **Software wallet** | Medium | High | Free | Small amounts |
| **Hardware wallet** | High | Medium | $80-200 | Most people |
| **Air-gapped computer** | Very High | Low | $50-200 | Advanced users |
| **Multisig** | Highest | Low | $200-500 | Large holdings |
For most people serious about self-custody, **a hardware wallet hits the sweet spot**. It's dramatically more secure than software wallets, far more practical than air-gapped computers, and doesn't require the complexity of multisig. You get 90% of the security with 30% of the hassle.
## Common Misconceptions
Even experienced Bitcoiners sometimes misunderstand hardware wallets. Let's clear up the most dangerous myths.
### "If I lose my hardware wallet, I lose my Bitcoin"
This is the most common misconception, and it's completely wrong. Your Bitcoin exists on the blockchain, not inside any physical device. The hardware wallet is just a secure container for the keys that control that Bitcoin.
If you have your seed phrase backup, you can recover your wallet on a new device: same brand, different brand, even a software wallet in an emergency. The device is replaceable. The seed phrase is what matters.
### "Hardware wallets are hackproof"
They're highly secure, but "hackproof" doesn't exist in security. Physical attacks, supply chain compromises, and firmware vulnerabilities have all happened, and in 2026 the [Coldcard entropy flaw](https://selfcustodylabs.com/docs/learn/wallets/coldcard-entropy-incident/) proved a hardware wallet can be "hacked" without anyone ever touching it, connecting to it, or infecting anything: the keys it created were simply guessable.
This is why defense in depth matters: your own entropy, a passphrase, strong PINs, verified firmware, addresses verified on device, seed backups stored securely and separately. Each layer compensates for potential failures in others.
### "I don't need to verify addresses on the device"
This misconception has cost people their Bitcoin. Your computer could be compromised by malware that displays one address on screen while your wallet software actually sends to a different address, controlled by the attacker.
The hardware wallet's screen is your source of truth. **Always verify the recipient address on your hardware wallet before confirming any transaction.** This takes five seconds and eliminates an entire category of attacks.
### "Air-gapped means it can't be hacked"
An air gap is a strong defense against malware and key exfiltration. It is not a verdict on the device's internals. The 2026 victims held fully air-gapped devices in safes; their keys were stolen through the blockchain, because weak entropy made them guessable. Isolation and unpredictability are separate properties; you need both.
### "Any hardware wallet is equally secure"
Architecture matters. Firmware transparency matters. And here is 2026's addition: **how a vendor responds to warnings matters most of all**. Coinkite was told about its RNG concern fourteen months before the exploit and dismissed it. Compare vendors on their disclosure history and crisis behavior, not just their spec sheets; our [comparison page](https://selfcustodylabs.com/docs/reference/hardware-wallet-comparison/) now tracks exactly that.
Do your research. Read independent reviews. Check if security researchers have examined the device. The price difference between options is trivial compared to what you're protecting.
## When to Consider Multisig Instead
A single hardware wallet, properly used, is excellent security. But it's still a single point of failure. If your device is compromised, your seed backup is stolen, or you're physically coerced, a single-signature setup can't protect you.
**Consider [multisig](https://selfcustodylabs.com/docs/learn/wallets/multisig) if:**
- **You're storing significant wealth**: think six months of expenses or more
- **You want protection against physical theft**: no single location contains enough keys to spend
- **You want protection against device compromise**: even if one hardware wallet is hacked, attackers still need more keys
- **You're planning for inheritance**: multisig makes it possible for heirs to access funds without giving any single person full control
Multisig is more complex to set up and use, but for substantial holdings you plan to keep long-term, that complexity buys meaningful peace of mind.
---
## Key Takeaways
Hardware wallets represent the single biggest security upgrade most Bitcoiners can make. They isolate your keys from internet threats, require physical confirmation for every transaction, and give you a trusted screen that malware can't compromise.
Remember:
- Your private key **never leaves the device**: only signatures do
- **A device can't prove its own randomness**: supply your entropy with dice, or verify it ([2026 showed why](https://selfcustodylabs.com/docs/learn/wallets/coldcard-entropy-incident/))
- **Verify everything on the device screen**: never trust your computer alone
- **Buy from official sources only**: the few dollars saved aren't worth the risk
- Air-gap for isolation, but know **it says nothing about entropy**
- For significant holdings, **multisig eliminates single points of failure**
---
## Next Steps
Ready to set up your hardware wallet?
→ **Do This First:** [DIY Seed Guide](https://selfcustodylabs.com/docs/learn/keys/random/) (own your entropy, the lesson of 2026)
→ **Practical Guide:** [Hardware Wallet Setup](https://selfcustodylabs.com/docs/wallet-setup/hardware-wallet) (step-by-step instructions)
→ **Context:** [The Coldcard Entropy Incident](https://selfcustodylabs.com/docs/learn/wallets/coldcard-entropy-incident/) (what happened, who's affected)
→ **Advanced:** [Multisig Wallets](https://selfcustodylabs.com/docs/learn/wallets/multisig) (eliminate single points of failure)
---
# Air-Gapped Wallets: Complete Guide
> Understand and build a Bitcoin air-gapped wallet. Concepts, hardware options (laptop, Raspberry Pi, desktop), and a full step-by-step air-gapped computer setup.
Source: https://selfcustodylabs.com/docs/learn/wallets/air-gapped-wallets/
Last updated: 2026-08-21
Publisher: Self Custody Labs (https://selfcustodylabs.com)
---
An air-gapped wallet is a setup where the device holding the private keys is physically isolated from the internet and other networks, ensuring it cannot be remotely accessed or compromised. The main modules such as Wi-Fi and Bluetooth are physically removed.
This is the highest level of self custody security.
## Why Some People Use Air-Gapped Wallets
By keeping the signing device completely offline, air-gapped setups remove entire categories of risk.
They are commonly used by:
- Long term holders
- Privacy focused users
- People protecting significant amounts of Bitcoin
This approach prioritizes security over convenience.
## How Transactions Work
Instead of connecting directly to the internet, air-gapped wallets use:
- QR codes
- SD cards
- USB drives (used carefully)
The online device prepares the transaction.
The offline device signs it.
The signed transaction is then sent to the network.
The private keys never leave the offline device.
## Is This for Everyone?
No, and that's okay.
Air-gapped setups:
- Take more time to learn
- Require more discipline
- Are slower to use
They are not necessary for beginners, but they exist for people who want maximum control and minimal risk.
Think of this as deep cold storage, not a daily wallet.
## Why an Air-Gapped Computer Over a SeedSigner?
[SeedSigner](https://selfcustodylabs.com/docs/seedsigner/) is our favourite purpose-built signing device, so why does this page exist? Because the two solve different problems. Both give you an offline signing device, but they trade off along very different axes.
| Feature | Air-Gapped Computer | SeedSigner |
|---------|---------------------|------------|
| **Encryption** | Store encrypted wallet backups | Stateless, unencrypted only |
| **Verification** | Use multiple wallets to cross-check | Single software |
| **User experience** | Full keyboard, large display | Small screen, camera input |
| **Discretion** | Looks like a normal laptop | Known Bitcoin device |
| **Functionality** | GPG, scripts, advanced tasks | Signing only |
SeedSigner is purpose-built and excellent at signing; our [SeedSigner section](https://selfcustodylabs.com/docs/seedsigner/) covers building and using one. An air-gapped computer is more versatile: you can use it for seed generation from dice rolls, encrypted backups, and cross-verification across multiple wallets. The two are complements, not rivals: many advanced setups use an air-gapped computer to generate and verify seeds, and a SeedSigner for routine signing.
## Use Cases for an Air-Gapped Computer
| Use Case | Description |
|----------|-------------|
| **Seed generation** | Create seeds from dice rolls with the [DIY Seed Guide](https://selfcustodylabs.com/docs/learn/keys/random/) |
| **Hardware wallet verification** | Verify that your hardware wallet honored your dice rolls and generates the correct addresses |
| **Transaction signing** | Sign transactions completely offline |
| **Inheritance planning** | Create encrypted messages for heirs |
**Info: An air gap says nothing about entropy**
Air-gapping protects against malware and key exfiltration; it cannot detect a device that generated a *weak* key. In the [2026 Coldcard incident](https://selfcustodylabs.com/docs/learn/wallets/coldcard-entropy-incident/), fully air-gapped wallets were drained remotely because their seeds were predictable from birth. The "hardware wallet verification" use case above, independently re-deriving what a device produced, is exactly the check that catches this class of failure, and it's the reason an air-gapped computer earns its place next to any hardware wallet.
## Choosing Your Hardware
When building an air-gapped computer, there are a few options to consider.
### Laptop (Recommended)
An older laptop is usually the best choice for an air-gapped setup. The **Lenovo ThinkPad X230** is affordable and easy to modify: you can physically remove the Wi-Fi and Bluetooth modules so that it cannot connect wirelessly.
Why the X230 specifically? It is well-supported by [Libreboot](https://selfcustodylabs.com/docs/libreboot), has removable wireless modules, and is inexpensive on the used market.
### Raspberry Pi Zero 1.3
The original Pi Zero 1.3 has no built-in Wi-Fi, Bluetooth, or Ethernet, so it physically cannot reach the internet. The downside is that it only has 512 MB of memory, making it difficult to run a full desktop OS. If you are comfortable on the command line, [DietPi](https://dietpi.com/) is a good lightweight option.
This is a harder-to-find device and is better suited to users who already know their way around Linux.
### Desktop Computer
A desktop can be an excellent dedicated "seed generator" because of its superior speed. You can assemble it yourself or have a shop build it, but in either case you must make sure the components do not include Wi-Fi, Bluetooth, or Ethernet. Avoiding these features at the hardware level keeps the machine truly isolated.
## Building Your Air-Gapped Computer
When setting up your air-gapped computer (using the Lenovo ThinkPad X230 as an example), focus on four areas: hardware, BIOS firmware, operating system, and disk encryption.
### Step 1: Hardware Isolation
Once you have your laptop, make it impossible to connect to the internet:
- **Remove wireless modules:** Take out the Wi-Fi, Bluetooth, and mobile network (WWAN) modules. This prevents the laptop from connecting wirelessly.
- **Disable the Ethernet port:** Either remove the Ethernet port from the motherboard or physically disable it so the laptop cannot connect, even if stolen.
### Step 2: BIOS (Libreboot)
[Libreboot](https://selfcustodylabs.com/docs/libreboot) is an open-source BIOS/firmware replacement with significant security advantages for an air-gapped computer. It removes proprietary firmware like Intel Management Engine (ME) and AMD Platform Security Processor (PSP), eliminating backdoors that could compromise the device.
For an air-gapped setup, where the whole point is maintaining an isolated, tamper-proof system, Libreboot ensures that no hidden code is running on your hardware. The source code is fully auditable.
If your hardware isn't supported by Libreboot, [Coreboot](https://selfcustodylabs.com/docs/coreboot) supports a wider range of laptops and provides most of the same benefits.
### Step 3: Operating System (Linux Mint)
Linux Mint is a good choice for an air-gapped computer because it balances ease of use and stability. It is lightweight and user-friendly, ideal for minimizing unnecessary services in an offline setup. Built on Ubuntu, it benefits from broad hardware compatibility and a reliable release cadence.
Its default desktop environment is straightforward to navigate, even for users who aren't deeply familiar with Linux.
### Step 4: Disk Encryption (LUKS)
Linux Mint offers full-disk encryption through LUKS (Linux Unified Key Setup), which keeps all data on the device encrypted at rest. During installation, select LUKS to encrypt the entire drive. This protects sensitive data even if the device is physically stolen.
LUKS is widely regarded as one of the most reliable encryption standards on Linux and supports multiple key slots for different passphrases.
### Step 5: Install Your Offline Software
With the base system in place, install the tools you will actually use offline:
- Offline seed tools such as the [Ian Coleman BIP39 tool](https://iancoleman.io/bip39/) and/or a [Bitcoin Seed Tool](https://bitcoiner.guide/seed/).
- An offline wallet such as [Sparrow](https://www.sparrowwallet.com/) or [Electrum](https://electrum.org/) for managing keys and signing transactions.
Once these are installed, you can generate seeds and create PSBTs (Partially Signed Bitcoin Transactions) on a completely isolated Bitcoin computer.
## Related Guides
**Tip: Generate Your Own Seed**
Use your air-gapped computer to create a truly random seed phrase with the **[DIY Seed Generation Guide](https://selfcustodylabs.com/docs/learn/keys/random/)**. Dice rolls plus an air-gapped computer gives you maximum security.
**Info: Firmware Options**
For the best air-gapped security, replace the stock BIOS with open-source firmware:
- **[Libreboot Guide](https://selfcustodylabs.com/docs/libreboot)**: removes Intel ME completely
- **[Coreboot Guide](https://selfcustodylabs.com/docs/coreboot)**: supports more laptop models
**Danger: Critical Reminder**
No matter which wallet you use:
- Your seed phrase is the most important thing
- Anyone with it controls your Bitcoin
- Losing it means losing access forever
The wallet is a tool. The seed phrase is the key.
---
# Coldcard Entropy Incident: What Happened, Who's Affected
> The 2026 Coldcard entropy flaw explained: which devices and firmware are affected, how $116M was stolen, and how to migrate your funds safely.
Source: https://selfcustodylabs.com/docs/learn/wallets/coldcard-entropy-incident/
Last updated: 2026-08-21
Publisher: Self Custody Labs (https://selfcustodylabs.com)
---
Between July 30 and August 4, 2026, attackers drained roughly **1,816 BTC (about $116 million at the time) from more than 5,200 Bitcoin addresses**. Every victim had generated their wallet seed on a Coldcard hardware wallet. None of the devices were ever connected to the internet, none were physically stolen, and no malware was involved. The attackers simply guessed the seeds, because for over five years, a firmware bug made those seeds guessable.
It is the largest hardware wallet exploit in Bitcoin's history, and it rewrites some assumptions about what makes a signing device "safe." This page explains what happened, how to know whether you're affected, and exactly what to do about it.
**Danger: If you generated a seed on a Coldcard between March 2021 and July 2026**
Treat that seed as compromised and **migrate your funds to a new wallet**. Updating firmware does **not** fix a seed that was already generated weak. Jump to [Am I affected?](#am-i-affected) and [How to migrate](#how-to-migrate-safely).
## What Happened
| Date | Event |
|------|-------|
| March 1, 2021 | Firmware v4.0.1 ships with the entropy bug (Mk2/Mk3) |
| May 2025 | Developer James O'Beirne raises concerns about the RNG code with Coinkite; the report is dismissed |
| July 30, 2026, 01:31 UTC | First attack wave: ~594 BTC (~$38M) drained from ~500 addresses in 25 minutes |
| July 30 – Aug 4, 2026 | Three more waves follow |
| July 31, 2026 | Coinkite ships fixed firmware for all models |
| August 1, 2026 | Coinkite publishes its security advisory |
| August 4, 2026 | TRM Labs tallies ~1,816 BTC (~$116M) stolen from 5,200+ addresses |
The bug went undetected for **1,978 days**. The attackers remain unidentified as of August 2026, and most of the stolen funds sit unmoved in attacker-controlled addresses. Coinkite apologized and released fixes quickly once the draining began, but has not offered compensation, and the dismissed 2025 warning remains the most damaging fact of the whole affair.
## What Went Wrong
When a Coldcard generated a new seed, it was supposed to mix output from its **hardware true random number generator (TRNG)**, a chip that harvests physical noise, into the seed material. Due to a build-system error (a linker resolving a function name to the wrong implementation), the seed path silently called a **software pseudo-random generator** instead: an algorithm called Yasmarang, intended as a fallback for devices with no hardware RNG at all.
As the researchers at Wizardsardine put it: the code meant to mix physical noise with a software generator was actually *mixing two software generators*. The software generator was seeded from almost nothing: a chip ID (largely recoverable from the device's USB serial number), a millisecond counter, and a real-time clock register that on Mk2/Mk3 devices read zero.
The result, in numbers:
| Device | Promised entropy | Actual effective entropy | Cost to brute-force one seed |
|--------|-----------------|--------------------------|------------------------------|
| Mk2 / Mk3 | 128+ bits | ~22–32 bits | Seconds to ~50 minutes on one consumer GPU |
| Mk4 / Mk5 / Q | 128+ bits | ~52–72 bits | Years of GPU time (weakened, not trivially broken) |
A 22-bit space is about 4.5 million possibilities. An attacker precomputed candidate seeds, derived their addresses, watched the blockchain for matches, and swept everything in four automated waves. That's why **air-gapping didn't matter**: the attack never touched the devices. When a key is guessable, the blockchain itself is the attack surface.
Mk4, Mk5, and Q devices kept substantially more entropy because their secure element contributed additional randomness. Coinkite's advisory put the figure at about 72 bits; independent analysis estimated the practically searchable space nearer 52 bits. Neither number is acceptable for a device promising 128+, which is why the advisory tells *all* affected users to migrate, but the confirmed thefts hit Mk2/Mk3-generated seeds.
### Why nobody caught it for five years
The firmware was open source the entire time. Statistical randomness tests existed, but they ran against the simulator on a development machine, which used the developer's computer's randomness, not the chip's. Code reviewers confirmed the right function *existed*, but not which implementation the build actually linked. And in May 2025, when a respected Bitcoin developer questioned exactly this code path, the concern was waved off. Open source is necessary for verifiability; this incident proved it is not sufficient.
## Am I Affected?
Your exposure depends on **how and when your seed was created**, not on which firmware the device runs today.
| Your situation | Status |
|----------------|--------|
| Seed generated on-device, Mk2/Mk3, firmware 4.0.1–4.1.9 | 🔴 **Critical: migrate immediately** |
| Seed generated on-device, Mk4/Mk5 before 5.6.0, or Q before 1.5.0Q | 🟠 **At risk: migrate** |
| Seed generated on-device before March 2021 (firmware 3.x or earlier) | 🟢 Not affected by this bug |
| Seed generated **with dice rolls** (Coldcard's dice feature, 50+ rolls) | 🟢 Safe: dice input bypassed the broken generator |
| Seed generated elsewhere and **imported** into the Coldcard | 🟢 Safe: the device never generated it |
| Seed generated on fixed firmware (Mk3 4.2.0+, Mk4/Mk5 5.6.0+, Q 1.5.0Q+) | 🟢 Not affected |
| TAPSIGNER, SATSCARD, OPENDIME | 🟢 Not affected (different generation path) |
Two important nuances:
- **A BIP39 passphrase helped, but is not a pass.** Wallets protected by a strong, unique passphrase were not drained. The attacker would need to brute-force the passphrase on top of the seed. It's an independent barrier, and it visibly saved people. But your foundation is still a weak seed, so migrate anyway; the passphrase bought you time, not safety.
- **Multisig contained the damage.** If one key in a 2-of-3 quorum was a weak Coldcard seed, the attacker still couldn't spend. This is exactly the failure mode multisig exists for. Replace the weak key at your convenience, but do replace it.
Signing was never affected: Coldcards use deterministic nonces (RFC 6979), so transactions signed by an affected device leaked nothing. The flaw lived entirely in seed *generation*.
## How to Migrate Safely
If your seed falls in a red or orange row above, move your funds to a fresh wallet. Do it calmly and in this order, because rushed migrations cause their own losses:
1. **Update the firmware first** (Mk3: 4.2.0+, Mk4/Mk5: 5.6.0+, Q: 1.5.0Q+), verifying the download per Coinkite's instructions. Never generate a replacement seed on vulnerable firmware.
2. **Generate the new seed with your own entropy.** Use [dice rolls](https://selfcustodylabs.com/docs/learn/keys/random/), either the device's dice-roll feature (99 rolls for 256-bit entropy) or the fully manual process. After this incident, "trust the device's RNG" should be a fallback, not a default.
3. **Back up the new seed on metal and [verify the backup](https://selfcustodylabs.com/docs/wallet-setup/backup-verification/)** before moving anything.
4. **Send a small test amount** to the new wallet and confirm you can spend from it.
5. **Move the rest**, largest amounts last, using your own node if you have one. Don't consolidate everything into one giant transaction if privacy matters to you. See [UTXO management](https://selfcustodylabs.com/docs/learn/privacy/utxo-management/).
6. **Keep the old backup** until the migration is confirmed and settled. An emptied wallet's seed can be destroyed later; a destroyed seed with funds still on it cannot.
If the amounts at stake are significant, consider landing the funds in a [multisig setup](https://selfcustodylabs.com/docs/learn/wallets/multisig/) rather than another single-signature wallet. This incident is the strongest argument for it to date.
## What This Incident Teaches
**Entropy is a trust point.** Every "your keys are generated securely inside the device" claim rests on an RNG you cannot see working. It failed silently here for five years, on a device marketed to and trusted by the most security-conscious users in Bitcoin. The fix is not a better brand; it's [supplying entropy yourself](https://selfcustodylabs.com/docs/learn/keys/random/) and verifying what you can.
**Air-gap protects against exfiltration, not weak keys.** An air gap stops malware from reaching your device and your key from leaking out. It does nothing if the key was predictable the moment it was born. Victims' devices worked exactly as designed, offline, in safes, while their funds were swept remotely.
**Open source is necessary, not sufficient.** The bug sat in public code for over five years. What matters alongside source availability: reproducible builds, independent review of what the build *actually links*, how a vendor treats researcher warnings, and how it responds when things go wrong.
**Defense in depth works.** Every layer that operated independently of the broken RNG (dice entropy, passphrases, multisig) held. Nobody who used all three lost anything. Layer your security so that one silent failure is never enough.
For the fairness ledger: Coinkite shipped fixes within a day of the exploit, published a detailed advisory, and has since had independent reviewers validate the fixed RNG path. That's a competent crisis response, to a crisis a heeded warning could have prevented fourteen months earlier. Whether you continue using the brand is your call; our current device guidance is in the [hardware wallet comparison](https://selfcustodylabs.com/docs/reference/hardware-wallet-comparison/).
## Sources
- [Coinkite security advisory](https://blog.coinkite.com/coldcard-mk3-seed-generation-warning/): affected versions and required actions
- [Coinkite technical backgrounder](https://blog.coinkite.com/entropy-technical-backgrounder/): the vendor's own root-cause analysis
- [Wizardsardine: technical autopsy of an entropy failure](https://wizardsardine.com/blog/coldcard-vuln-deep-dive/): independent deep dive, entropy math
- [TRM Labs: inside the $116M Coldcard hack](https://www.trmlabs.com/resources/blog/the-largest-hardware-wallet-exploit-of-2026-inside-the-usd-116-million-coldcard-hack): on-chain analysis of the attack waves
*Figures on this page are as of early August 2026 and may be revised as investigations continue.*
---
# Bitcoin Multisig: Complete Guide
> Understand and set up a Bitcoin multisig wallet. Concepts, 2-of-3 configurations, hardware devices, and a full step-by-step setup guide.
Source: https://selfcustodylabs.com/docs/learn/wallets/multisig/
Last updated: 2026-08-23
Publisher: Self Custody Labs (https://selfcustodylabs.com)
---
A **multisig** (multi-signature) wallet requires more than one key to spend, written as M-of-N: M signatures out of N total keys. The usual choice for an individual is 2-of-3, where any two of three keys can move the funds, so losing one key does not lose your bitcoin and stealing one key does not steal it.
A standard Bitcoin wallet has a single point of failure instead: one seed phrase controls everything. If it's stolen, your bitcoin is gone. If it's lost, your bitcoin is gone. Multisig eliminates that vulnerability by distributing control across several keys.
## What is Multisig?
A multisig wallet requires **multiple private keys** to authorize a transaction. Instead of one key having complete control, you distribute control across several keys.
Think of it like a bank vault that requires two managers to turn their keys simultaneously; neither can open it alone.
## The M-of-N Model
Multisig uses an "M-of-N" structure:
- **N** = Total number of keys in the setup
- **M** = Number of keys required to sign
```
2-of-3 MULTISIG:
────────────────────────────────────────────────────
Total keys: 3
Required to spend: 2
Any combination of 2 keys can authorize a transaction.
```
### Common Configurations
| Setup | Required | Total | Use Case |
|-------|----------|-------|----------|
| **2-of-3** | 2 | 3 | Individual self-custody (most popular) |
| **3-of-5** | 3 | 5 | High-value holdings, organizations |
| **2-of-2** | 2 | 2 | Shared control (no fault tolerance) |
| **1-of-2** | 1 | 2 | Easy access from multiple locations |
## How It Works
### Creating a Multisig Wallet
1. Generate 3 separate private keys (usually on 3 hardware wallets)
2. Extract the public key (xpub) from each device
3. Combine the xpubs in coordinator software to create the multisig wallet
4. The wallet can now receive bitcoin
### Spending from a Multisig Wallet
1. Create an unsigned transaction (called a PSBT)
2. Sign with Device 1 → Transaction is still incomplete
3. Sign with Device 2 → Transaction is now valid
4. Broadcast the fully-signed transaction
```
SIGNING FLOW:
────────────────────────────────────────────────────
PSBT (Unsigned Transaction)
│
┌─────────┴─────────┐
▼ ▼
┌─────────┐ ┌─────────┐
│ Device 1│ │ Device 2│
│ Signs │ │ Signs │
└────┬────┘ └────┬────┘
│ │
└─────────┬─────────┘
▼
Fully Signed Transaction
│
▼
Broadcast to Network
```
## Why Use Multisig?
### Eliminates Single Points of Failure
| Scenario | Single-Sig | 2-of-3 Multisig |
|----------|------------|-----------------|
| One key stolen | **Funds lost** | Safe (thief needs 2 keys) |
| One key lost | **Funds lost forever** | Safe (2 remaining keys work) |
| House fire destroys backup | **Funds lost** | Safe (other locations have keys) |
| Coerced to hand over key | **Funds lost** | Safe (can't access other keys) |
### Security Through Distribution
With multisig, your bitcoin security doesn't depend on any single thing:
```
SINGLE-SIG:
──────────────────
One seed phrase → Full control → Single point of failure
MULTISIG (2-of-3):
──────────────────
Key 1 (Home) ─┐
Key 2 (Office) ─┼─→ Need ANY 2 to spend
Key 3 (Safe) ─┘
One key compromised ≠ funds lost
```
## The Tradeoffs
### Advantages
- **Theft protection**: attacker needs multiple keys
- **Loss protection**: can lose one key and still recover
- **Inheritance**: can distribute keys to family
- **Shared control**: multiple parties must agree to spend
### Disadvantages
- **More complexity**: more things to back up and manage
- **Higher fees**: multisig transactions are larger
- **More points of failure**: must back up descriptor AND seeds
- **Slower transactions**: need multiple devices to sign
### The Complexity Warning
**Danger: Before Using Multisig**
Multisig adds complexity that can lead to permanent fund loss if mismanaged:
- You must back up the **wallet descriptor** (not just seed phrases)
- You must test recovery **before** depositing significant funds
- You need secure storage for multiple seeds in different locations
If you're not comfortable with single-sig hardware wallets yet, master that first.
## When to Consider Multisig
### Good Candidates
- ✅ Significant holdings you'd be devastated to lose
- ✅ Long-term "vault" storage (not daily spending)
- ✅ Business funds requiring multiple approvals
- ✅ Inheritance planning scenarios
- ✅ Access to multiple secure storage locations
### Not Necessary For
- Small amounts (under ~$10,000)
- Daily spending funds
- Users still learning basic self-custody
- Those without multiple secure storage locations
## Key Components
### Hardware Wallets
Each key lives on a separate hardware wallet. Recommended: use devices from **different manufacturers** to avoid single-vendor vulnerabilities.
### Coordinator Software
Software like Sparrow, Nunchuk, or Specter:
- Creates the multisig configuration
- Generates receive addresses
- Creates unsigned transactions
- Combines signatures
### Wallet Descriptor
A text string containing:
- All public keys (xpubs)
- The M-of-N policy
- Script type and derivation paths
**Danger: Critical**
**The wallet descriptor is as important as your seed phrases.** Without it, you cannot reconstruct your multisig wallet, even with all seeds.
## Collaborative Custody
Some services offer "assisted" multisig where they hold one key:
| Service | Model | You Hold | They Hold |
|---------|-------|----------|-----------|
| Unchained | 2-of-3 | 2 keys | 1 key |
| Casa | 2-of-3 or 3-of-5 | 2+ keys | 1 key |
| Nunchuk | Flexible | Your choice | Optional |
**Benefits:** Professional backup, inheritance support, recovery assistance
**Tradeoff:** Third party involved (though they can't spend without you)
## Key Takeaways
- Multisig requires **multiple keys** to spend bitcoin
- **2-of-3** is the most popular individual setup
- Eliminates **single points of failure** for both theft and loss
- Adds **complexity**: more things can go wrong
- **Wallet descriptor** backup is critical (not just seeds)
- Best for **significant, long-term holdings**
- Master single-sig first before attempting multisig
---
## Ready to Build It? Step-by-Step Setup
If you understand the concepts above and want to implement a 2-of-3 multisig, the following sections walk you through the full DIY setup with Sparrow Wallet.
**Info: What You'll Do**
- Set up 3 hardware wallets for multisig
- Create a 2-of-3 multisig wallet in Sparrow
- Properly back up seed phrases and wallet descriptor
- Test your recovery procedure
**⏱️ Time required:** 2-3 hours
**📊 Difficulty:** Intermediate to Advanced
**💰 Estimated cost:** $200-450 (3 hardware wallets) + $30-60 (metal seed backups)
## Choosing Your Configuration
### 2-of-3: The Sweet Spot
For most individuals, **2-of-3 multisig** offers the best balance:
**Advantages:**
- Lose 1 key → Still have access (fault tolerance)
- 1 key stolen → Funds still safe (theft protection)
- Manageable complexity (3 backups, 3 devices)
- Lower transaction fees than 3-of-5
### 3-of-5: Maximum Security
For very large holdings or organizations:
**Advantages:**
- Can lose 2 keys and still access funds
- 2 keys can be stolen without fund loss
- Good for distributed teams/families
**Disadvantages:**
- 5 devices to purchase and manage
- 5 seed phrases to secure (10 locations if you separate!)
- Higher transaction fees
- More coordination for signing
### 2-of-2: Shared Control (Use Carefully)
**⚠️ Not recommended for most users**
- No redundancy: lose 1 key, lose everything
- Both parties must be available to spend
- Use only for specific shared-custody scenarios
## DIY vs. Collaborative Custody
Don't want to manage all keys yourself? **Collaborative custody** providers hold one key while you hold the majority.
| Service | Free Tier | Paid Plans | Best For |
|---------|-----------|------------|----------|
| **Unchained** | Yes (2-of-3) | From $0 + per-sign fee | Financial services, loans |
| **Casa** | Basic wallet | From $30/month | Beginners, inheritance |
| **Nunchuk** | Yes | From $15/month | Privacy, flexibility |
| Factor | DIY Multisig | Collaborative Custody |
|--------|--------------|----------------------|
| **Technical skill needed** | High | Low-Medium |
| **Privacy** | Maximum | Provider sees balances |
| **Support available** | Community only | Professional help |
| **Ongoing cost** | One-time (hardware) | Monthly subscription |
| **Recovery assistance** | You're on your own | Help available |
| **Best for** | Technical users | Beginners, busy people |
**Recommendation:**
- **New to multisig?** Start with collaborative custody to learn the concepts
- **Technical and privacy-focused?** DIY with Sparrow Wallet
- **Significant holdings but not technical?** Collaborative custody is worth the cost
## Common Multisig Mistakes
### Mistake 1: Not Backing Up the Wallet Descriptor
**Problem:** You have all 3 seed phrases but can't reconstruct the wallet.
**Solution:** Store the wallet descriptor (as PDF, file, or printed) with each seed phrase backup.
### Mistake 2: Storing Multiple Seeds Together
**Problem:** A single theft or disaster compromises multiple keys.
**Solution:** Geographic distribution, each seed in a different location.
### Mistake 3: Using the Same Hardware Wallet Brand
**Problem:** A firmware vulnerability affects all your signing devices.
**Solution:** Mix manufacturers (e.g., Jade + Trezor + Keystone).
This stopped being hypothetical in July 2026. The [Coldcard entropy flaw](https://selfcustodylabs.com/docs/learn/wallets/coldcard-entropy-incident/) made single-sig Coldcard wallets brute-forceable and ~$116M was drained, while multisig quorums containing one weak Coldcard key lost nothing, because the other vendors' keys held. One silent firmware failure, two completely different outcomes.
### Mistake 4: Not Testing Recovery
**Problem:** You think your backup works but haven't verified it.
**Solution:** Practice recovery with a small amount before depositing significant funds.
### Mistake 5: Overcomplicating the Setup
**Problem:** 5-of-7 multisig across 3 continents with time locks...
**Solution:** Start simple. 2-of-3 is sufficient for most individuals.
### Mistake 6: Not Verifying Addresses on Devices
**Problem:** Malware could show you a fake address on your computer.
**Solution:** **Always verify receive addresses on your hardware wallet screens** before depositing.
## Security Checklist
Before depositing significant funds, verify:
- [ ] Each hardware wallet is from a different manufacturer (recommended)
- [ ] Each seed phrase is backed up on metal (fire/water resistant)
- [ ] Seed phrases are stored in separate physical locations
- [ ] Wallet descriptor is backed up (multiple copies in different locations)
- [ ] You've verified a receive address matches on at least 2 hardware wallets
- [ ] You've successfully completed a test transaction (send and receive)
- [ ] You've practiced full wallet recovery from backups
- [ ] You understand you need M keys to spend (not just one)
- [ ] Hardware wallets are registered with the multisig configuration
---
# Multisig Hardware Setup
> Prepare your hardware wallets for multisig. Learn how to initialize signing devices from different manufacturers for maximum security.
Source: https://selfcustodylabs.com/docs/learn/wallets/multisig/hardware-setup/
Last updated: 2026-08-21
Publisher: Self Custody Labs (https://selfcustodylabs.com)
---
Before creating your multisig wallet, you need to set up each hardware wallet (signing device) individually. This page guides you through preparing your devices.
## Recommended Hardware Combinations
For a **2-of-3 multisig**, using different manufacturers eliminates single-vendor risk:
### Option A: Maximum Security (Air-Gapped)
| Device | Role | Communication |
|--------|------|---------------|
| **Jade Plus** | Key 1 | QR codes (air-gapped) |
| **Keystone 3 Pro** | Key 2 | QR codes (air-gapped) |
| **Trezor Safe 5/7** | Key 3 | USB |
### Option B: Balanced (User-Friendly)
| Device | Role | Communication |
|--------|------|---------------|
| **Trezor Safe 5** | Key 1 | USB |
| **BitBox02 Nova** | Key 2 | USB |
| **Blockstream Jade** | Key 3 | USB or QR |
### Option C: Budget-Conscious
| Device | Role | Communication |
|--------|------|---------------|
| **Blockstream Jade** | Key 1 | USB or QR |
| **Trezor Safe 3** | Key 2 | USB |
| **[SeedSigner](https://selfcustodylabs.com/docs/seedsigner/) (DIY)** | Key 3 | QR codes (stateless) |
**Tip: Cost Consideration**
A complete 3-device setup costs $200–500 depending on models chosen. This is a one-time investment to protect potentially much larger holdings.
If you already own a Coldcard, it can still serve as a quorum member, after you [check whether its seed needs migration](https://selfcustodylabs.com/docs/learn/wallets/coldcard-entropy-incident/#am-i-affected) and regenerate with dice on fixed firmware. We just don't recommend buying one new right now.
## General Setup Principles
### 1. Give Each Device Its Own Independent Seed
**Each device gets a fresh seed that has never existed anywhere else.** Never:
- Reuse a seed from a software wallet or another device
- Share seeds between devices
- Let one backup location hold more than one seed
Each device = Unique seed = Independent key
Generate each seed on its device **using the dice-roll option** where available, or import a seed you [generated yourself with dice](https://selfcustodylabs.com/docs/learn/keys/random/). The 2026 Coldcard incident was caused by trusting on-device RNG blindly. In a multisig, independent entropy per key is exactly what keeps one vendor's silent failure from mattering.
### 2. Verify Device Authenticity
Before setup:
- Purchase directly from manufacturers or authorized resellers
- Check tamper-evident packaging
- Verify firmware signatures where possible
### 3. Update Firmware First
Before generating seeds:
- Connect to manufacturer's official software
- Update to latest firmware
- Skim the vendor's security advisories page while you're there
Seeds generated on flawed firmware stay weak forever, and [updating later doesn't repair them](https://selfcustodylabs.com/docs/learn/wallets/coldcard-entropy-incident/), so patch *before* you generate, not after.
### 4. Create Strong PINs
Each device needs a PIN:
- Use 6-8 digits minimum
- Don't use obvious patterns (123456, 000000)
- Don't reuse PINs across devices
- Consider writing PINs down separately from seeds (stored in different locations)
## Device-Specific Setup
### Coldcard Setup
Coldcard is Bitcoin-only and supports excellent air-gapped operation. (These steps remain here for existing owners; for new purchases, see [why Coldcard currently isn't recommended](https://selfcustodylabs.com/docs/learn/wallets/coldcard-entropy-incident/). Make sure the firmware is fixed (Mk4/Mk5: 5.6.0+, Q: 1.5.0Q+) before generating anything.)
**Initial Setup:**
1. Power on with battery pack or USB power adapter (not computer)
2. Accept terms and create a PIN
- Prefix PIN (shown before words)
- Main PIN (required to access)
3. Select "New Seed Words", and use the **dice roll option** (99 rolls) rather than plain device RNG
4. Choose 24 words
5. **Write down all 24 words on paper/metal**
6. Verify by re-entering selected words
7. Record the **master fingerprint** (8 characters, e.g., `7C8A9B2D`)
**Export Public Key for Multisig:**
1. Insert MicroSD card
2. Go to: `Advanced/Tools` → `Export Wallet` → `Generic JSON`
3. This creates a file with your xpub for the coordinator software
**Label your Coldcard** with a number (1, 2, or 3) using the included stickers.
### Trezor Setup
Trezor offers excellent software integration with Sparrow.
**Initial Setup:**
1. Connect to computer via USB
2. Open Trezor Suite or Sparrow Wallet
3. Select "Create new wallet"
4. Choose 12 or 24 words (24 recommended for multisig)
5. **Write down all words on paper/metal**
6. Verify by re-entering words
7. Create a PIN (up to 50 digits)
8. Note the **master fingerprint** (visible in Sparrow after connecting)
**For Multisig:**
- Trezor works via USB connection with Sparrow
- No export file needed; Sparrow reads directly from device
### Keystone Setup
Keystone uses QR codes for fully air-gapped operation.
**Initial Setup:**
1. Power on and select language
2. Create a password (device access)
3. Select "Create New Wallet"
4. Choose 24 words
5. **Write down all words on paper/metal**
6. Verify the seed phrase
7. Note the **master fingerprint** from wallet info
**Export for Multisig:**
1. Go to: `Menu` → `Multisig Wallet` → three dots → `Show/Export XPUB`
2. Can export via QR code or to MicroSD
### BitBox02 Setup
BitBox02 offers simple setup with strong security.
**Initial Setup:**
1. Connect via USB
2. Open BitBox App
3. Select "Create wallet"
4. Device generates 24-word seed
5. **Write down all words on paper/metal**
6. Verify on device
7. Set device password
**For Multisig:**
- BitBox02 works directly with Sparrow via USB
- Note the fingerprint shown in Sparrow
### Ledger Setup
Ledger devices work with most multisig coordinators.
**Initial Setup:**
1. Connect via USB
2. Set up PIN (4-8 digits)
3. Select "Set up as new device"
4. Write down the 24-word recovery phrase
5. Confirm words on device
6. Install Bitcoin app via Ledger Live
**For Multisig:**
- Works with Sparrow via USB
- Note: Ledger uses closed-source firmware
## Recording Device Information
For each device, create a record card:
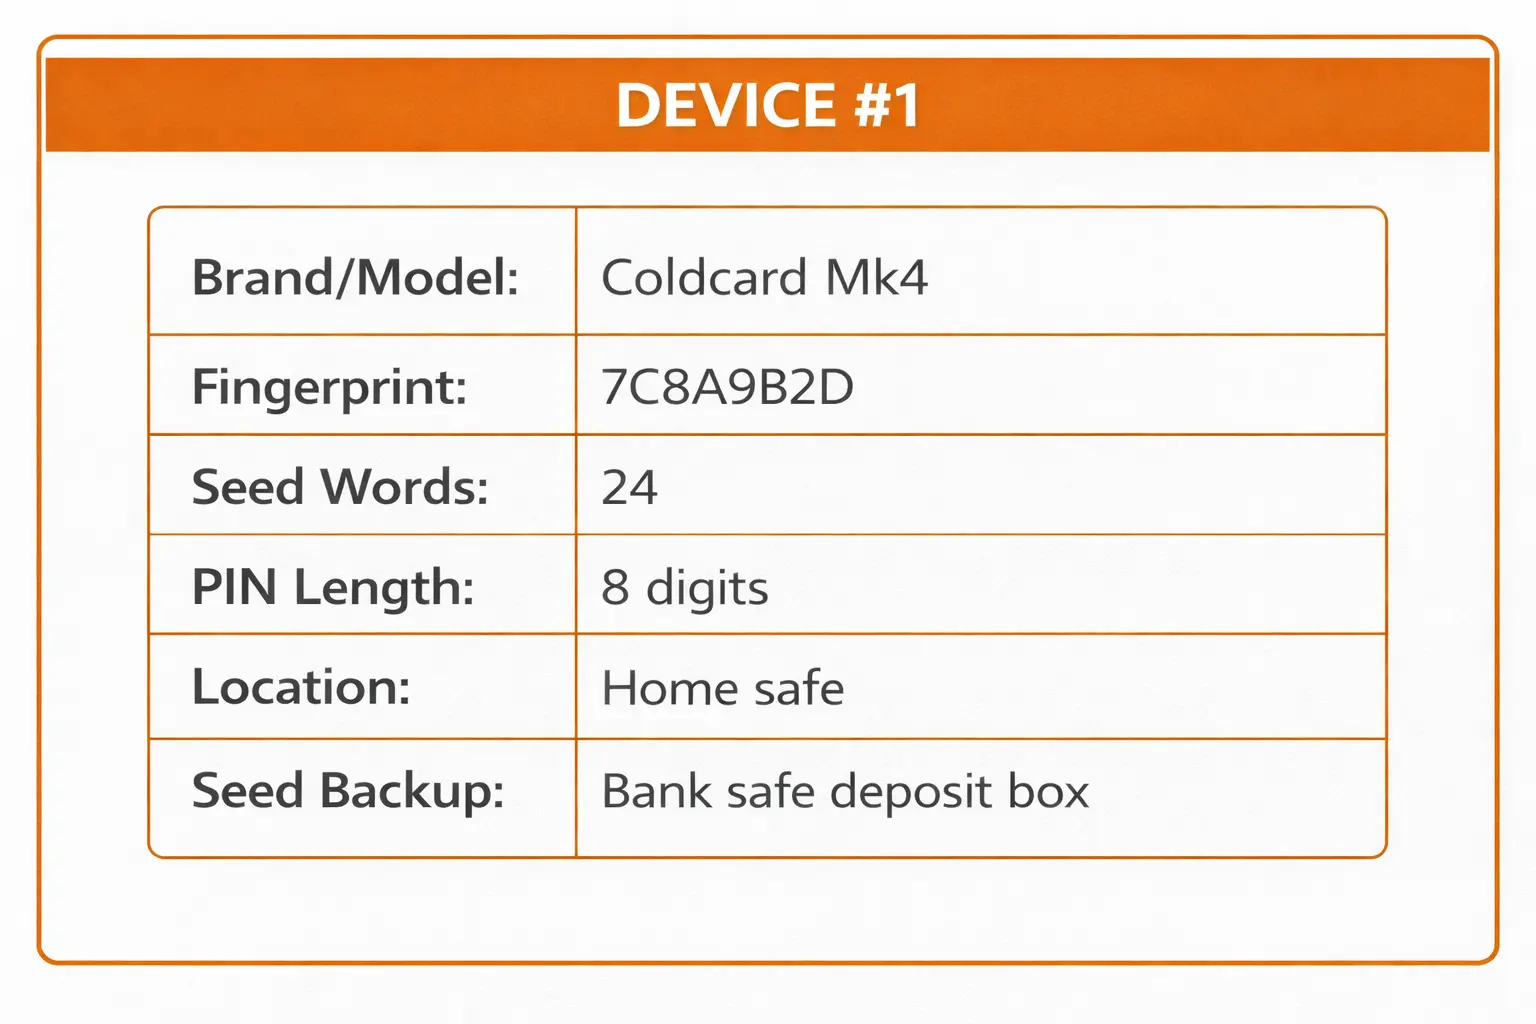
**Important:** Store this record SEPARATELY from the seed phrases.
## Seed Phrase Backup
### Why Metal Backups Matter
Paper can be destroyed by:
- Fire
- Water/flooding
- Ink fading over time
- Accidental disposal
**Metal seed backups** survive these disasters.
### Recommended Metal Backup Options
| Product | Type | Price Range |
|---------|------|-------------|
| Blockplate | Punch plates | $80-100 |
| Cryptosteel | Letter tiles | $80-100 |
| Seedplate | Stamp/punch | $50-80 |
| Billfodl | Letter tiles | $80-100 |
### Backup Process
1. Set up hardware wallet and verify seed works
2. Transfer seed to metal backup carefully
3. Verify metal backup by reading it back
4. Store metal backup in secure location (NOT with the device)
### Seed Backup Locations for 2-of-3
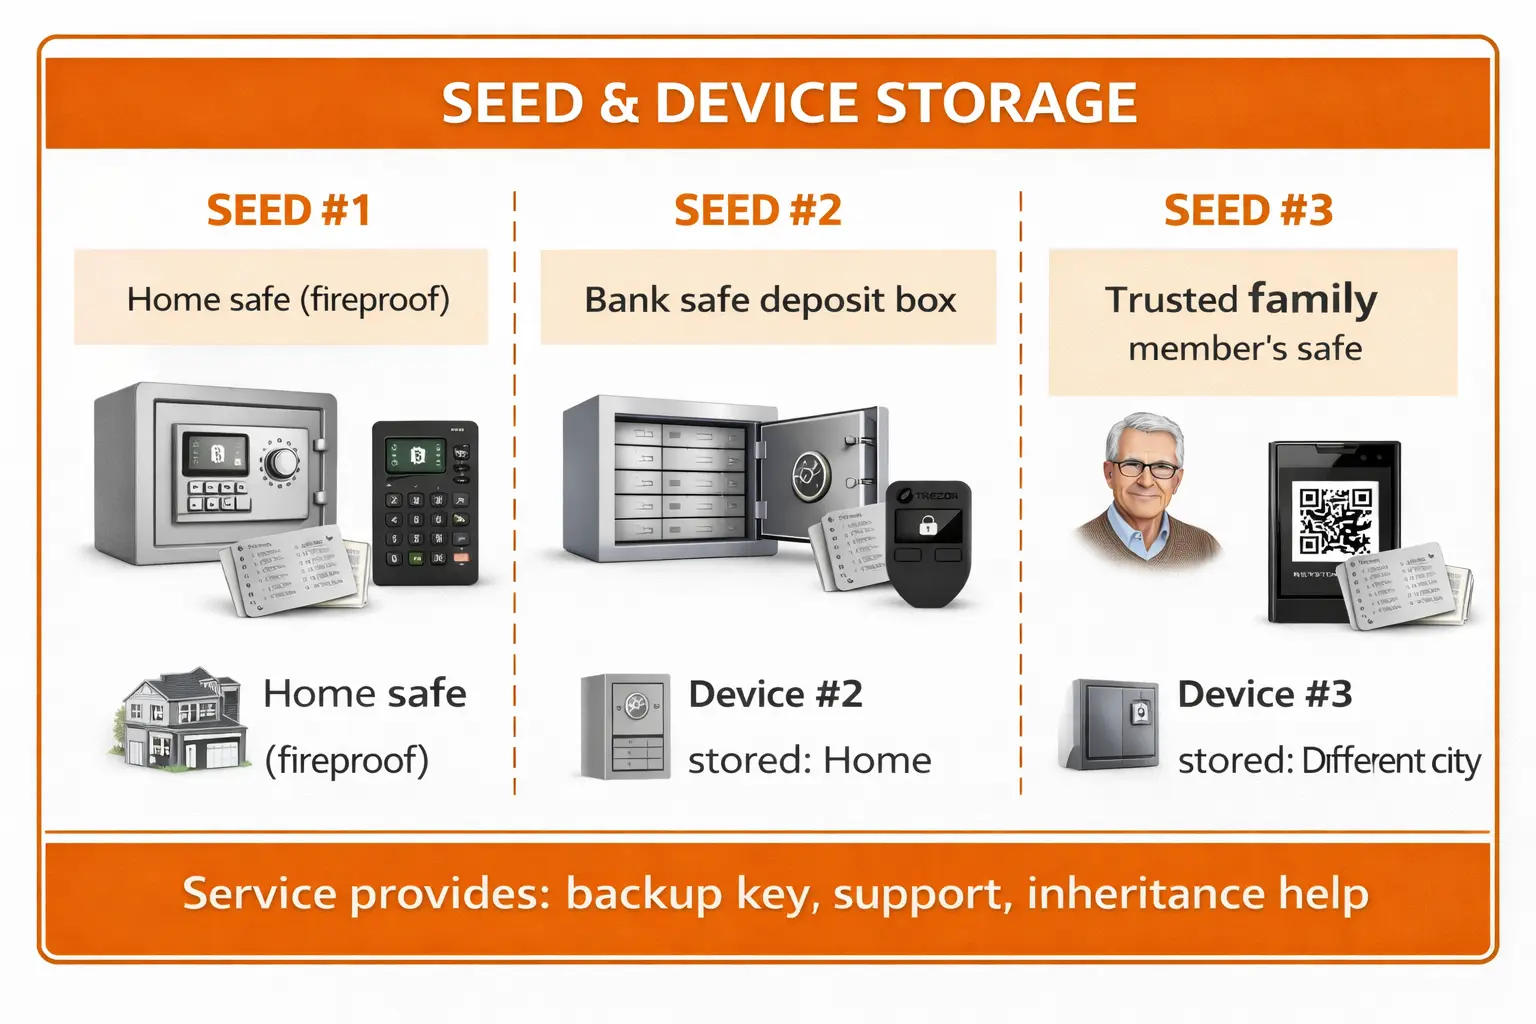
**Never store a seed phrase with its corresponding device!**
## Pre-Multisig Checklist
Before proceeding to create your multisig wallet, verify:
- [ ] All 3 devices are set up with unique seed phrases
- [ ] All 3 seed phrases are backed up on metal
- [ ] Each seed backup is in a different physical location
- [ ] You've recorded the master fingerprint for each device
- [ ] Each device has a unique PIN you can remember
- [ ] Firmware is up to date on all devices
- [ ] You've labeled each device (1, 2, 3) for easy identification
**Warning: Double-Check Seeds**
Before creating the multisig, verify each seed works:
1. Reset one device to factory
2. Restore from its seed backup
3. Confirm the fingerprint matches
4. Repeat for each device
This confirms your backups are correct BEFORE you deposit funds.
## Next Steps
With your hardware wallets prepared:
→ Continue to [Sparrow Wallet Setup](https://selfcustodylabs.com/docs/learn/wallets/multisig/sparrow-setup) to create your 2-of-3 multisig wallet.
---
# Multisig in Sparrow Wallet
> Step-by-step guide to creating a 2-of-3 multisig wallet in Sparrow. Learn to configure your multisig, verify addresses, and make transactions.
Source: https://selfcustodylabs.com/docs/learn/wallets/multisig/sparrow-setup/
Last updated: 2026-08-21
Publisher: Self Custody Labs (https://selfcustodylabs.com)
---
Sparrow Wallet is the best free option for managing multisig wallets. This guide walks through creating a **2-of-3 multisig** step by step.
## Prerequisites
Before starting:
- [ ] [Sparrow Wallet](https://sparrowwallet.com/download/) installed
- [ ] 3 hardware wallets set up with unique seeds ([Hardware Setup](https://selfcustodylabs.com/docs/learn/wallets/multisig/hardware-setup))
- [ ] Master fingerprint recorded for each device
- [ ] Ideally: Your own [Bitcoin node](https://selfcustodylabs.com/docs/bitcoin-node) running
## Step 1: Connect Sparrow to a Server
For maximum privacy, connect Sparrow to your own Bitcoin node. If you don't have one yet, you can use a public server to start (but plan to run your own for privacy).
1. Open Sparrow Wallet
2. Go to `File` → `Preferences` → `Server`
3. Choose your connection type:
- **Bitcoin Core**: if running your own node
- **Private Electrum**: your own Electrum server
- **Public Server**: acceptable for testing (less private)
4. Click `Test Connection` then `Close`
## Step 2: Create New Multisig Wallet
1. Go to `File` → `New Wallet`
2. Enter a name (e.g., "My Multisig Vault")
3. Click `Create Wallet`
You'll see the **Settings** screen with configuration options.
## Step 3: Configure Multisig Settings
### Policy Type
1. Change `Policy Type` from "Single Signature" to **"Multi Signature"**
### Signature Settings
2. Set the signature requirement:
- **M (Cosigners required):** 2
- **N (Total cosigners):** 3
This creates a **2-of-3 multisig**.
### Script Type
3. Leave as **Native Segwit (P2WSH)**: most efficient and recommended
Your settings should show: `2 of 3 Multi Signature (Sorted Multi, Native Segwit)`
## Step 4: Add Keystore 1 (First Hardware Wallet)
Below the settings, you'll see tabs for `Keystore 1`, `Keystore 2`, and `Keystore 3`.
### For USB-Connected Devices (Trezor, Ledger, BitBox)
1. Click on `Keystore 1` tab
2. Click **"Connected Hardware Wallet"**
3. Connect your first hardware wallet via USB
4. Click **"Scan..."** in the dialog
5. Your device should appear. Click on it
6. Unlock the device with your PIN
7. Click **"Import Keystore"**
The keystore details will populate:
- **Label:** (Rename to identify this device, e.g., "Trezor - Home")
- **Master fingerprint:** Should match what you recorded
- **Derivation:** `m/48'/0'/0'/2'` (standard for multisig)
- **xpub:** Extended public key
### For Air-Gapped Devices (Jade, Keystone, Coldcard)
1. Click on `Keystore 1` tab
2. Click **"Airgapped Hardware Wallet"**
3. Select your device type (e.g., "Coldcard Multisig")
4. Choose import method:
- **Import File:** Insert MicroSD with exported JSON
- **Scan QR:** Use camera to scan device's QR code
5. Select the file or complete the scan
6. The keystore details will populate
**Rename the label** to identify which device (e.g., "Coldcard - Key #1")
## Step 5: Add Keystore 2
1. Click the `Keystore 2` tab
2. Repeat the process for your second hardware wallet
3. Use the appropriate method (USB or air-gapped)
4. Label appropriately (e.g., "Keystone - Key #2")
5. **Verify the fingerprint matches your records**
## Step 6: Add Keystore 3
1. Click the `Keystore 3` tab
2. Repeat the process for your third hardware wallet
3. Label appropriately (e.g., "BitBox02 - Key #3")
4. **Verify the fingerprint matches your records**
## Step 7: Apply and Save
1. Review all three keystores:
- Each should have a unique fingerprint
- Labels should clearly identify each device
2. Click **"Apply"**
3. You'll be asked to set a password (optional but recommended)
4. Click **"Save"**
Your wallet is now created!
## Step 8: Register Multisig on Hardware Wallets
**Critical step!** Your hardware wallets need to know about the multisig to verify addresses.
### Coldcard Registration
1. In Sparrow, go to `Settings` tab
2. Click `Export...` at the bottom
3. Select **"Coldcard Multisig"** and save to MicroSD
4. Insert MicroSD into Coldcard
5. On Coldcard: `Settings` → `Multisig Wallets` → `Import from SD`
6. Review and confirm the wallet details
7. Coldcard will now verify multisig addresses
### Keystone Registration
1. In Sparrow, click `Export...`
2. Select **"Keystone Multisig"** and choose "Show QR"
3. On Keystone: `Menu` → `Multisig Wallet` → `Import Multisig`
4. Scan the QR code displayed by Sparrow
5. Confirm the wallet details
### Trezor / Ledger / BitBox
These devices register automatically when you verify an address:
1. Go to `Receive` tab in Sparrow
2. Click `Display Address` on the hardware wallet
3. The device will show the multisig configuration for confirmation
4. Verify and confirm
## Step 9: Verify Your First Address
**Never deposit to an address without verifying it!**
1. Go to the `Receive` tab
2. You'll see your first multisig receive address
3. Click **"Display Address"** for each hardware wallet
4. Each device should display the **exact same address**
5. Confirm on each device
If addresses don't match on all devices, **STOP**: something is wrong.
```
ADDRESS VERIFICATION:
────────────────────────────────────────
Sparrow shows: bc1q8n5...xyz
Coldcard shows: bc1q8n5...xyz ✓
Keystone shows: bc1q8n5...xyz ✓
Trezor shows: bc1q8n5...xyz ✓
All match = Safe to receive!
```
## Step 10: Backup Your Wallet Descriptor
**Essential!** Without this, you cannot recreate your multisig even with all seeds.
### Export as PDF
1. Go to `Settings` tab
2. Click the QR code icon (top right of settings)
3. Click **"Save PDF..."**
4. Save and print this document
5. Store copies with each seed phrase backup
### Export as File
1. Click `Export...` at bottom of Settings
2. Select **"Sparrow"** to export wallet file
3. Save the `.json` file to multiple locations
The PDF contains:
- QR code of your wallet descriptor
- All three xpubs with fingerprints
- Derivation paths
- Script type
**Store this with your seed backups.** You'll need it for recovery.
## Making Your First Transaction
### Receiving Bitcoin
1. Go to `Receive` tab
2. Click `Get Next Address` for a new address
3. **Verify on at least 2 hardware wallets**
4. Send a small test amount first
5. Wait for confirmation
### Sending Bitcoin
1. Go to `Send` tab
2. Enter recipient address
3. Enter amount
4. Set fee (check [mempool.space](https://mempool.space) for current rates)
5. Click **"Create Transaction"**
6. Click **"Finalize Transaction for Signing"**
### Signing the Transaction
You need **2 of 3** signatures. Here's the process:
**With USB devices:**
1. Connect first hardware wallet
2. Click **"Sign"**
3. Verify transaction details on device
4. Confirm on device
5. Disconnect, connect second device
6. Click **"Sign"** again
7. Verify and confirm on second device
**With air-gapped devices:**
1. Click **"Save PSBT"** to MicroSD (or show QR)
2. Load PSBT on first device and sign
3. Export signed PSBT back to computer
4. Load into Sparrow
5. Repeat with second device
**Broadcast:**
1. After 2 signatures, click **"Broadcast Transaction"**
2. Your transaction is sent to the network
```
SIGNING FLOW:
─────────────────────────────────────────────
Sparrow creates PSBT (unsigned transaction)
↓
Device #1 signs → Now have 1 of 2 needed
↓
Device #2 signs → Now have 2 of 2 needed ✓
↓
Sparrow broadcasts to network
```
## Important Tips
### Address Verification
**Always verify on devices before depositing significant amounts:**
- First deposit to a new wallet
- After software updates
- Periodically for ongoing deposits
### Test Transaction First
Before depositing large amounts:
1. Send a small test amount (e.g., $10)
2. Verify it appears in your wallet
3. Send it back out (proves you can spend)
4. Now you know everything works
### Keep Sparrow Updated
Sparrow receives security updates:
1. Check for updates regularly
2. Verify download signatures
3. Update promptly for security fixes
## Troubleshooting
### Device Not Detected
- Check USB cable (try a different one)
- Try a different USB port
- Ensure device is unlocked
- Check that Bitcoin app is open (Ledger)
### Addresses Don't Match
- Verify you imported the correct xpubs
- Check derivation paths match (should be `m/48'/0'/0'/2'`)
- Ensure all devices are registered with the same multisig
- Try re-exporting and re-importing the wallet to devices
### Transaction Won't Sign
- Ensure PSBT is for the correct wallet
- Verify device has the multisig registered
- Check that you're signing with a key from this multisig
## Summary
You now have a working 2-of-3 multisig wallet:
1. ✅ Three hardware wallets initialized
2. ✅ Multisig created in Sparrow
3. ✅ All devices registered with the multisig
4. ✅ Addresses verified on multiple devices
5. ✅ Wallet descriptor backed up
**Next step:** Ensure your backups are properly secured.
→ Continue to [Backup & Recovery](https://selfcustodylabs.com/docs/learn/wallets/multisig/backup-recovery)
---
# Multisig Backup & Recovery
> How to properly backup your multisig wallet and recover it if needed. Critical information for protecting your bitcoin long-term.
Source: https://selfcustodylabs.com/docs/learn/wallets/multisig/backup-recovery/
Last updated: 2026-08-03
Publisher: Self Custody Labs (https://selfcustodylabs.com)
---
Proper backup is **critical** for multisig. The complexity that provides security can also lead to permanent loss if backups aren't done correctly.
## What You Must Back Up
For a 2-of-3 multisig, you need to secure:
| Item | Copies | Purpose |
|------|--------|---------|
| **Seed Phrase #1** | 1 | Recover Key 1 |
| **Seed Phrase #2** | 1 | Recover Key 2 |
| **Seed Phrase #3** | 1 | Recover Key 3 |
| **Wallet Descriptor** | 3+ | Reconstruct multisig structure |
| **Device PINs** | 3 | Access hardware wallets |
**Danger: Critical**
**The wallet descriptor is as important as your seed phrases!**
Without it, having all three seeds won't help you; you won't know how to combine them into the multisig.
## Understanding the Wallet Descriptor
The wallet descriptor contains:
```
Example (simplified):
wsh(sortedmulti(2,
[73c5da0a/48h/0h/0h/2h]xpub6...ABC,
[8f3a2b1c/48h/0h/0h/2h]xpub6...DEF,
[a2c4e6f8/48h/0h/0h/2h]xpub6...GHI
))#checksum
```
This tells wallet software:
- **wsh**: native SegWit script type
- **sortedmulti(2,...)**: 2-of-3 multisig with sorted keys
- **[fingerprint/path]**: which device and derivation for each key
- **xpub...**: the extended public key for each signer
- **#checksum**: verification that descriptor is correct
**From seed phrases alone, you get xpubs, but you don't know:**
- Which xpubs belong together
- What the M-of-N requirement is
- The correct derivation paths
- The script type used
## Backup Storage Strategy
### The Cardinal Rules
1. **Never store multiple seed phrases together**
2. **Never store a seed with its corresponding device**
3. **Store wallet descriptor copies with seed backups**
4. **Geographic separation**: different buildings, ideally different cities
### Recommended 2-of-3 Storage Layout
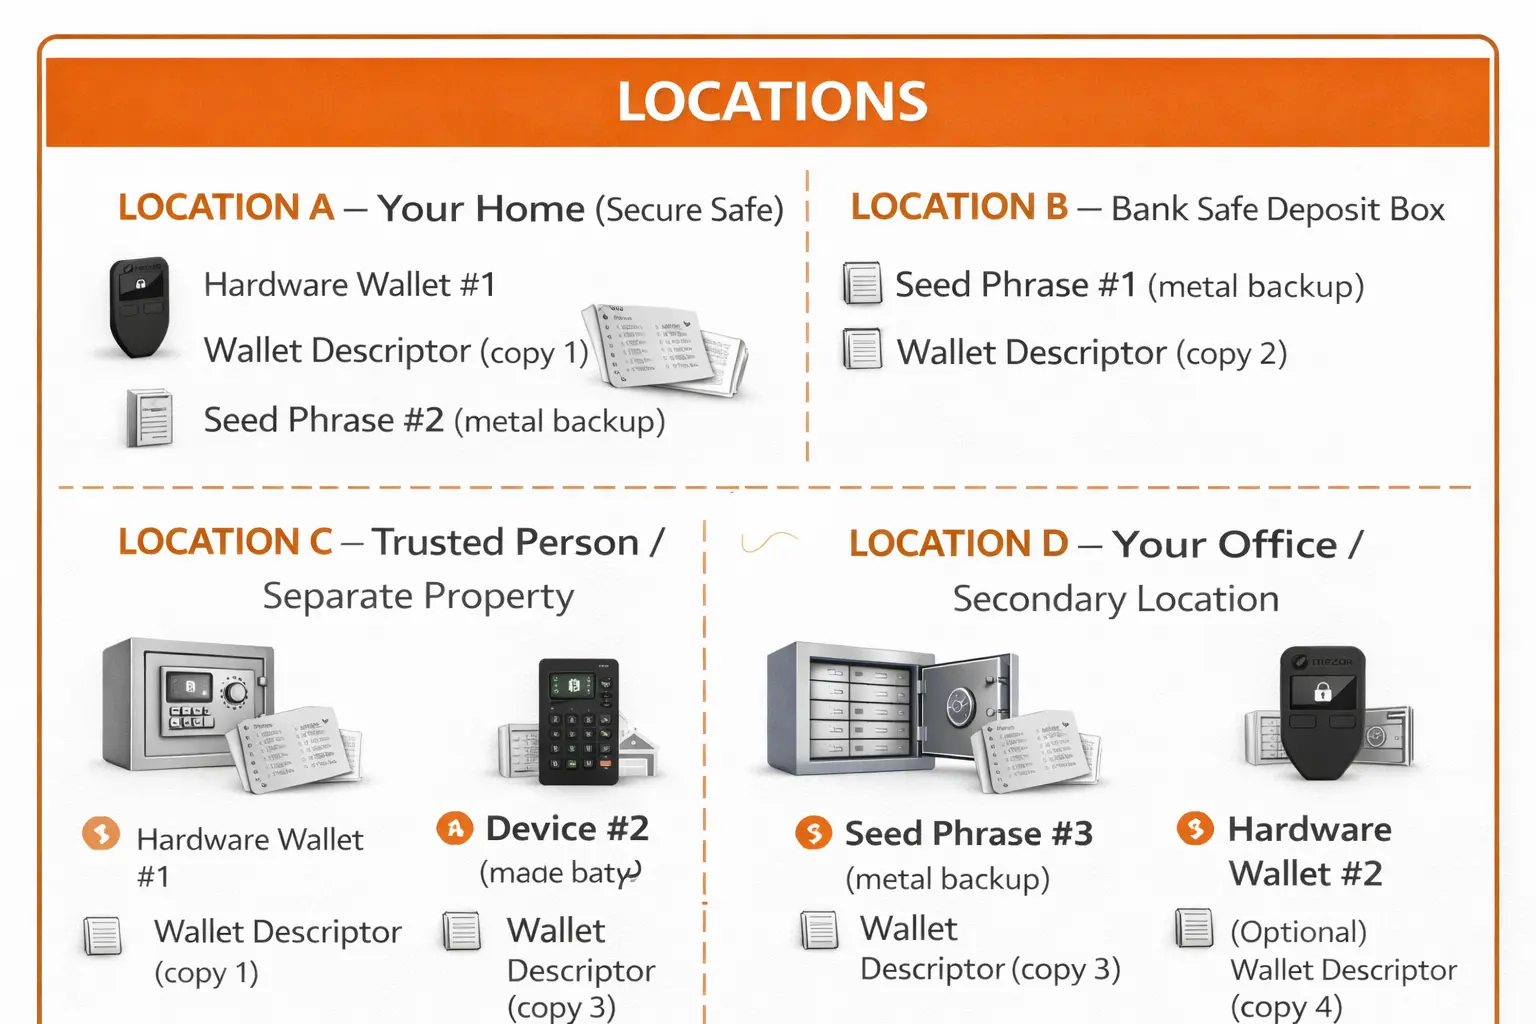
**Notice:**
- Each seed is in a different location
- No seed is stored with its own device
- Wallet descriptor has multiple copies
- Any two locations provide enough to recover
## Creating Your Backups
### Seed Phrase Backups (Metal)
**Why metal:**
- Survives house fires (paper burns)
- Survives flooding (paper disintegrates)
- Doesn't fade over time (ink fades)
- Resistant to physical damage
**Process:**
1. Purchase 3 metal backup devices
2. After verifying each seed works, stamp/engrave onto metal
3. Double-check every word is correct
4. Store in separate locations
**Verification:**
- Read back what you stamped
- Compare letter-by-letter with the seed
- One wrong letter = wrong seed = lost funds
### Wallet Descriptor Backup
**Export from Sparrow:**
1. Go to `Settings` tab
2. Click QR code icon (top right)
3. Click **"Save PDF..."**
4. Print multiple copies
**The PDF includes:**
- QR code (scannable for recovery)
- All xpubs in text form
- Fingerprints and derivation paths
- Human-readable format
**Storage:**
- Print on acid-free paper
- Laminate if possible
- Store one copy with each seed backup
- Consider an encrypted digital backup (USB drive in safe)
## Recovery Scenarios
### Scenario 1: Lost One Hardware Wallet
**Situation:** Device #2 is lost or broken, but you have its seed backup.
**Solution:**
1. Purchase new hardware wallet
2. Restore seed #2 onto new device
3. Re-register the multisig on the new device
4. Verify addresses match the other devices
5. Move funds to a fresh multisig (recommended, not required)
**Why it works:** You still have 3 working keys (2 devices + 1 restored).
### Scenario 2: Lost One Seed Phrase
**Situation:** Seed backup #1 was destroyed, but Device #1 still works.
**Solution:**
1. Device #1 still holds Key #1; you can still sign
2. Use Device #1 + one other device to move funds
3. Create a NEW multisig wallet with 3 fresh seeds
4. Transfer all funds to the new wallet
5. Properly backup all 3 new seeds
**Why immediate action:** If Device #1 breaks now, you've lost Key #1 forever.
### Scenario 3: One Device Stolen
**Situation:** Thief took Hardware Wallet #3.
**Solution:**
1. **Don't panic**: the thief needs 2 keys, they only have 1
2. Use Device #1 + Device #2 to move funds immediately
3. Create a NEW multisig wallet with fresh seeds
4. Transfer all funds to the new wallet
5. The stolen device is now worthless
**Time sensitivity:** Move funds before thief can potentially compromise another key.
### Scenario 4: Complete Recovery (Worst Case)
**Situation:** All three hardware wallets are destroyed. You have 2 seed backups and the wallet descriptor.
**Recovery Steps:**
1. **Obtain new hardware wallets** (2 minimum)
2. **Restore seeds onto new devices:**
- Device A: Restore Seed #1
- Device B: Restore Seed #2
3. **Import wallet descriptor into Sparrow:**
- Open Sparrow Wallet
- `File` → `New Wallet`
- Click the scan icon next to wallet name
- Scan the QR code from your descriptor PDF
- Or: `File` → `Import Wallet` → Select Sparrow format
4. **Verify recovery:**
- Check that addresses match what you expected
- Confirm fingerprints match your records
- Verify balance appears correctly
5. **Sign a test transaction:**
- Send a small amount to confirm signing works
- Use both restored devices
6. **Create fresh multisig (recommended):**
- Generate 3 new seeds on 3 new devices
- Create new multisig wallet
- Transfer all funds from recovered wallet
- Properly backup everything
## Testing Your Recovery
**Before depositing significant funds, test recovery:**
### Test 1: Single Device Recovery
1. Wipe Device #1 to factory settings
2. Restore Seed #1 onto it
3. Re-register the multisig
4. Verify the fingerprint matches
5. Verify addresses match other devices
6. Sign a small test transaction
### Test 2: Full Wallet Recovery
1. Delete the wallet from Sparrow
2. Re-import using only the wallet descriptor
3. Verify balances and addresses appear
4. Connect restored devices
5. Sign a transaction successfully
### Test 3: Simulate Disaster
1. Pretend you lost all hardware wallets
2. Using only 2 seed backups + descriptor:
- Restore seeds to new/different devices
- Import descriptor into Sparrow
- Verify you can see your balance
- Sign and broadcast a transaction
If all tests pass, your backup strategy works.
## Recovery Checklist
Use this checklist to verify your backup status:
### Seed Phrases
- [ ] Seed #1 backed up on metal
- [ ] Seed #2 backed up on metal
- [ ] Seed #3 backed up on metal
- [ ] Each seed stored in separate location
- [ ] No seed stored with its device
- [ ] All seeds verified (restore test passed)
### Wallet Descriptor
- [ ] Exported as PDF with QR code
- [ ] Printed multiple copies
- [ ] Copy stored with each seed backup
- [ ] Digital backup on encrypted USB (optional)
- [ ] Import test successful
### Hardware Wallets
- [ ] All devices have unique PINs
- [ ] PINs recorded separately from seeds
- [ ] Multisig registered on all devices
- [ ] Addresses verified on all devices
- [ ] Stored in different locations from seeds
### Documentation
- [ ] Fingerprint recorded for each device
- [ ] Locations documented (where is what)
- [ ] Trusted person knows where to find info (if needed)
## Inheritance Considerations
Multisig adds complexity for inheritance. Your heirs need:
1. **Knowledge that the multisig exists**
2. **Access to 2 of 3 seed backups**
3. **The wallet descriptor**
4. **Instructions on how to recover**
### Options:
**DIY Inheritance:**
- Write clear instructions
- Store with a lawyer or in a safe place
- Consider a time-locked letter service
**Collaborative Custody:**
- Services like Unchained, Casa, Nunchuk offer inheritance features
- They can help heirs recover funds
- Removes technical burden from family
**Trusted Third Party:**
- Give one key to a trusted person/lawyer
- They can assist heirs but can't steal funds alone
## Common Backup Mistakes
### Mistake: Storing Seeds Digitally
**Problem:** Screenshots, cloud storage, email = hackable
**Solution:** Metal backups only, never digital for seeds
### Mistake: All Backups in One Location
**Problem:** Single fire/flood/theft destroys everything
**Solution:** Geographic distribution across multiple locations
### Mistake: No Wallet Descriptor Backup
**Problem:** Can't reconstruct multisig even with all seeds
**Solution:** Multiple printed copies stored with seeds
### Mistake: Never Testing Recovery
**Problem:** Discover backup doesn't work when you need it
**Solution:** Test recovery before depositing significant funds
### Mistake: Forgetting PIN Codes
**Problem:** Can't access device, need to restore (delays)
**Solution:** Write PINs down, store separately from seeds
## Summary
Multisig backup is more complex but follows clear rules:
1. **Separate everything**: seeds, devices, locations
2. **Back up the descriptor**: as critical as seeds
3. **Test your recovery**: before you need it
4. **Plan for inheritance**: others may need access someday
Your backup strategy should ensure that:
- Any single loss (fire, theft, failure) doesn't compromise funds
- You can recover with 2 seeds + descriptor
- Someone you trust can help your family if needed
---
## Related Guides
- [Multisig Overview](https://selfcustodylabs.com/docs/learn/wallets/multisig) (understanding multisig fundamentals)
- [Hardware Setup](https://selfcustodylabs.com/docs/learn/wallets/multisig/hardware-setup) (setting up signing devices)
- [Sparrow Setup](https://selfcustodylabs.com/docs/learn/wallets/multisig/sparrow-setup) (creating the wallet)
- [Seed Phrase Backup](https://selfcustodylabs.com/docs/learn/keys/random/#step-6-back-up-on-metal) (metal backup options)
---
# Bitcoin Transactions: How They Work
> How Bitcoin transactions work end to end: UTXOs, transaction creation, signing, broadcasting, fees, and the transaction types you will actually encounter.
Source: https://selfcustodylabs.com/docs/learn/transactions/
Last updated: 2026-08-02
Publisher: Self Custody Labs (https://selfcustodylabs.com)
---
A Bitcoin transaction is not a debit from an account. It is a chain of cryptographic claims: you prove you control some unspent outputs (UTXOs), you spend them, and you create new outputs locked to whoever you are paying. Understanding this changes how you think about wallets, fees, and privacy.
## In this section
- **[Understanding Transactions](https://selfcustodylabs.com/docs/learn/transactions/understanding)**: the mental model you need before anything else
- **[UTXOs](https://selfcustodylabs.com/docs/learn/transactions/utxos)**: the building blocks every transaction consumes and produces
- **[Creating Transactions](https://selfcustodylabs.com/docs/learn/transactions/create)**: how a wallet actually assembles a transaction
- **[Signing Transactions](https://selfcustodylabs.com/docs/learn/transactions/sign)**: what signing means and how online vs offline signing differ
- **[Broadcasting Transactions](https://selfcustodylabs.com/docs/learn/transactions/broadcast)**: getting your signed transaction onto the network
- **[Fees](https://selfcustodylabs.com/docs/learn/transactions/fees)**: how miners pick which transactions to include
- **[Transaction Types](https://selfcustodylabs.com/docs/learn/transactions/types)**: pre-signed, fully signed, and partially signed (PSBT)
---
# UTXOs Explained
> Understand Bitcoin's UTXO model. Learn how Unspent Transaction Outputs work, why Bitcoin isn't an account balance, and how UTXOs affect fees and privacy.
Source: https://selfcustodylabs.com/docs/learn/transactions/utxos/
Last updated: 2026-08-02
Publisher: Self Custody Labs (https://selfcustodylabs.com)
---
Most people think of their Bitcoin wallet like a bank account, a single balance that goes up and down. This mental model is wrong, and misunderstanding it leads to costly mistakes.
Bitcoin uses the **UTXO model**: Unspent Transaction Outputs. Understanding UTXOs is fundamental to understanding Bitcoin.
## What is a UTXO?
A UTXO is an **Unspent Transaction Output**, a discrete chunk of bitcoin that you can spend.
Think of UTXOs as **digital coins** or **digital bills** in your wallet. You don't have a "balance" in the traditional sense. You have a collection of individual UTXOs, and your wallet displays their sum.
## The Cash Analogy
Imagine your physical wallet contains:
| Bills | Value |
|-------|-------|
| One $50 bill | $50 |
| Two $20 bills | $40 |
| Three $5 bills | $15 |
| **Total** | **$105** |
You don't have "$105 of balance." You have **six physical bills** that add up to $105.
Your Bitcoin wallet works the same way:
| UTXOs | Value |
|-------|-------|
| One UTXO | 0.05 BTC |
| One UTXO | 0.02 BTC |
| One UTXO | 0.02 BTC |
| One UTXO | 0.005 BTC |
| One UTXO | 0.005 BTC |
| **Total** | **0.1 BTC** |
You don't have "0.1 BTC of balance." You have **five UTXOs** that add up to 0.1 BTC.
## How UTXOs Are Created and Destroyed
UTXOs follow a simple lifecycle:
```
CREATION:
When someone sends you bitcoin, a new UTXO is created.
This UTXO is "locked" to your address; only you can spend it.
DESTRUCTION:
When you spend a UTXO, it is completely consumed.
It no longer exists. New UTXOs are created from its value.
```
### Every Transaction Destroys and Creates UTXOs
When you send bitcoin:
1. **Inputs**: Existing UTXOs you own are consumed (destroyed)
2. **Outputs**: New UTXOs are created for recipients (and change for you)
```
BEFORE TRANSACTION:
──────────────────────────────────────────────────
Your wallet contains:
UTXO #1: 0.05 BTC
UTXO #2: 0.03 BTC
UTXO #3: 0.02 BTC
TRANSACTION (pay someone 0.04 BTC):
──────────────────────────────────────────────────
INPUTS (destroyed): OUTPUTS (created):
UTXO #1: 0.05 BTC → 0.04 BTC (to recipient)
0.0099 BTC (change to you)
[0.0001 BTC fee]
AFTER TRANSACTION:
──────────────────────────────────────────────────
Your wallet contains:
UTXO #2: 0.03 BTC (unchanged)
UTXO #3: 0.02 BTC (unchanged)
UTXO #4: 0.0099 BTC (new - your change)
Recipient's wallet contains:
New UTXO: 0.04 BTC
```
## Key Properties of UTXOs
### 1. UTXOs Are Indivisible
You cannot spend "part" of a UTXO. When you use a UTXO as a transaction input, the **entire UTXO** is consumed.
**Example:**
You have a 0.1 BTC UTXO and want to pay 0.03 BTC.
- You must spend the whole 0.1 BTC UTXO
- 0.03 BTC goes to the recipient
- ~0.07 BTC comes back to you as a new UTXO (change)
### 2. UTXOs Can Be Combined
You can spend multiple UTXOs in a single transaction. They all get consumed, and their combined value creates new outputs.
```
COMBINING UTXOs:
──────────────────────────────────────────────────
INPUTS: OUTPUTS:
UTXO A: 0.02 BTC ─┐
UTXO B: 0.02 BTC ─┼──→ 0.05 BTC (payment)
UTXO C: 0.02 BTC ─┘ 0.0099 BTC (change)
[0.0001 fee]
```
### 3. Each UTXO Has a History
Every UTXO can be traced back through the blockchain to its creation. This history is permanent and public.
```
UTXO HISTORY EXAMPLE:
──────────────────────────────────────────────────
Your 0.05 BTC UTXO came from:
← A payment from Alice
← Who got it from an exchange withdrawal
← Who got it from a mining pool
← ...back to the coinbase (mining reward)
```
This traceable history has important implications for [privacy](https://selfcustodylabs.com/docs/learn/privacy/why-privacy-matters).
### 4. UTXOs Are Locked by Addresses
Each UTXO is "locked" to a specific Bitcoin address. Only someone with the private key for that address can "unlock" and spend it.
Your wallet manages many addresses and their UTXOs automatically. When you see a "balance," your wallet is summing all UTXOs locked to addresses it controls.
## Why the UTXO Model Matters
### Transaction Fees Depend on UTXOs
Bitcoin fees are based on **transaction size in bytes**, not the **value** being sent.
Each UTXO input adds bytes to your transaction:
| Input Type | Size |
|------------|------|
| Legacy (P2PKH) | ~148 bytes |
| SegWit (P2WPKH) | ~68 vbytes |
| Taproot (P2TR) | ~57 vbytes |
**More UTXOs = Larger transaction = Higher fees**
```
SAME VALUE, DIFFERENT FEES:
──────────────────────────────────────────────────
Sending 0.1 BTC using 1 UTXO:
~140 vbytes → Low fee
Sending 0.1 BTC using 10 UTXOs:
~680 vbytes → ~5x higher fee
Sending 0.1 BTC using 50 UTXOs:
~3,400 vbytes → ~25x higher fee
```
### Privacy Depends on UTXO Handling
When you combine UTXOs from different sources, you reveal they belong to the same owner:
```
PRIVACY LEAK:
──────────────────────────────────────────────────
INPUTS: OUTPUT:
From Exchange A ─┐
From Exchange B ─┼──→ 0.15 BTC (payment)
From friend ─┘
Chain analysis conclusion:
"All three inputs belong to the same person"
```
This is called the **common-input-ownership heuristic**. See [Chain Analysis Explained](https://selfcustodylabs.com/docs/learn/privacy/chain-analysis) for more details.
### Small UTXOs Can Become Unspendable
If a UTXO is worth less than the fee required to spend it, it becomes **economic dust**, trapped forever.
**Example during high fees (100 sat/vB):**
- Spending one SegWit input costs ~6,800 sats in fees
- A UTXO worth 5,000 sats costs more to spend than it's worth
- This UTXO is effectively worthless until fees drop significantly
## UTXOs in Your Wallet
Your wallet software handles UTXOs automatically:
| Function | What Your Wallet Does |
|----------|----------------------|
| **Balance** | Sums all UTXOs you control |
| **Receiving** | Generates new addresses to receive new UTXOs |
| **Sending** | Selects which UTXOs to spend (coin selection) |
| **Change** | Creates change outputs back to addresses you control |
### Coin Selection
When you send bitcoin, your wallet must choose which UTXOs to spend. This is called **coin selection**.
Different wallets use different strategies:
| Strategy | Behavior |
|----------|----------|
| **Largest first** | Uses biggest UTXOs first |
| **Smallest first** | Uses smallest UTXOs first |
| **Random** | Selects randomly |
| **Branch and bound** | Tries to find exact match (no change) |
Advanced users use **coin control** to manually select UTXOs. This is important for privacy and fee optimization.
## UTXO Visualization
Here's how to think about your wallet:
```
YOUR WALLET
──────────────────────────────────────────────────
┌──────────────────────────────────────────────┐
│ │
│ ┌─────────┐ ┌─────────┐ ┌─────────┐ │
│ │ UTXO │ │ UTXO │ │ UTXO │ │
│ │ 0.05 BTC│ │ 0.02 BTC│ │ 0.01 BTC│ │
│ │ addr: A │ │ addr: B │ │ addr: C │ │
│ └─────────┘ └─────────┘ └─────────┘ │
│ │
│ ┌─────────┐ ┌─────────┐ │
│ │ UTXO │ │ UTXO │ │
│ │0.005 BTC│ │0.003 BTC│ │
│ │ addr: D │ │ addr: E │ │
│ └─────────┘ └─────────┘ │
│ │
│ Balance displayed: 0.088 BTC │
│ Actual structure: 5 separate UTXOs │
│ │
└──────────────────────────────────────────────┘
```
Each UTXO:
- Has a specific value
- Is locked to a specific address
- Has a history on the blockchain
- Must be spent entirely when used
## Common Misconceptions
### ❌ "I can send part of my balance"
**Reality:** You can only spend whole UTXOs. Your wallet creates change automatically, but behind the scenes, entire UTXOs are being consumed.
### ❌ "Fees depend on how much I'm sending"
**Reality:** Fees depend on transaction **size** (bytes), which depends on how many UTXOs you're spending, not their value.
### ❌ "All my bitcoin is the same"
**Reality:** Each UTXO has different history, came from different sources, and may have different privacy implications.
### ❌ "My wallet balance is one number"
**Reality:** Your balance is a sum of discrete UTXOs. Understanding which UTXOs you have and where they came from is important for fees and privacy.
## Key Takeaways
- Bitcoin uses **UTXOs** (Unspent Transaction Outputs), not account balances
- Your wallet balance is the **sum of individual UTXOs** you control
- UTXOs are **indivisible**: you spend them entirely or not at all
- **More UTXOs = higher fees** because each adds bytes to transactions
- **Combining UTXOs reveals common ownership** (privacy implication)
- Each UTXO has a **traceable history** on the blockchain
- Small UTXOs can become **unspendable dust** during high fees
---
# How Bitcoin Transactions Work
> Understand how Bitcoin transactions work: inputs, outputs, change, fees, and the complete lifecycle from creation to confirmation.
Source: https://selfcustodylabs.com/docs/learn/transactions/understanding/
Last updated: 2026-08-02
Publisher: Self Custody Labs (https://selfcustodylabs.com)
---
Bitcoin might seem complicated at first, but once you understand a few key ideas, the process becomes much clearer. This page covers both the structure of transactions and what happens when you send one.
## Inputs and Outputs
Bitcoin doesn't work like a bank account where your balance is just a number. Instead, it uses the **UTXO model** (Unspent Transaction Outputs).
**Tip: Deep Dive**
For a complete explanation of UTXOs, see [UTXOs Explained](https://selfcustodylabs.com/docs/learn/transactions/utxos).
- **Input:** Where the Bitcoin is coming from (previous UTXOs you own)
- **Output:** Where the Bitcoin is going (new UTXOs being created)
When you send Bitcoin, you're telling the network:
*"I want to consume these inputs (UTXOs I previously received) and create these outputs (new UTXOs for the recipient and change for myself)."*
## You Always Spend the Whole Input
One important detail: Bitcoin doesn't let you spend just a portion of an input. You always spend the whole thing. If you only need part of it, the rest is sent back to you as **change**, usually to a new address that your wallet controls automatically.
Example:
- You have an input worth 0.01 BTC
- You send 0.008 BTC to a friend
- The remaining 0.002 BTC goes back to you as change on a new address
Your wallet takes care of this behind the scenes, but it helps to understand what's happening.
## Transaction Fees
To get your transaction included in a block, you pay a small fee to the miners. This fee isn't a separate line item: it's simply the difference between the amount you're spending and what's being sent out.
Going back to our example:
- **Inputs**: 0.01 BTC
- **Outputs**: 0.008 BTC to friend + 0.0019 BTC change
- **Fee**: 0.0001 BTC (automatically calculated by your wallet)
That means the remaining 0.0001 BTC was used as the transaction fee.
Your wallet usually calculates the fee for you, based on how busy the network is.
**Info: Fee Insight**
Fees depend on transaction **size** (in bytes), not the **value** being sent. More UTXOs means a larger transaction and higher fees. See [Transaction Fees](https://selfcustodylabs.com/docs/learn/transactions/fees) for a complete guide.
---
## Transaction Lifecycle
When you send Bitcoin, the transaction goes through a series of steps before it's fully confirmed and secure. Here's what happens behind the scenes.
### Step 1: Creating the Transaction
It all begins in your Bitcoin wallet. You enter the recipient's address and the amount you want to send. The wallet then:
1. Selects which coins (UTXOs) to use
2. Generates the outputs, including any change back to you
3. Calculates an appropriate fee based on current network conditions
Once everything is set, the transaction is **signed** using your private key. This signature proves that you're authorized to spend the funds and makes the transaction ready for broadcasting.
### Step 2: Broadcasting
Next, your wallet sends the signed transaction to the Bitcoin network. It connects to one or more Bitcoin nodes and transmits the transaction data. The nodes validate that your transaction follows the rules and then relay it to other nodes.
Within seconds, your transaction is visible across the network.
### Step 3: The Mempool (Waiting Room)
Every full node on the Bitcoin network keeps a copy of the **mempool**, a holding area for unconfirmed transactions. This is where your transaction waits to be included in a block.
Miners review the mempool and select which transactions to include, typically favoring those that pay higher fees per byte (sat/vB).
If your fee is too low, your transaction might stay in the mempool for a while. You can speed things up using:
- **RBF (Replace-By-Fee):** Rebroadcast with a higher fee
- **CPFP (Child-Pays-For-Parent):** Spend the unconfirmed output with a high-fee transaction
### Step 4: Block Inclusion
Roughly every 10 minutes, a miner successfully mines a new block and includes a set of transactions from the mempool. If your transaction makes it into the block, it's now considered **confirmed**; this is the moment it officially becomes part of the blockchain.
### Step 5: Confirmations
Once your transaction is in a block, each additional block that gets added afterward increases its number of **confirmations**:
| Confirmations | Status | Typical Use |
|---------------|--------|-------------|
| 0 | Unconfirmed | Transaction broadcast but not yet in a block |
| 1 | Confirmed | In a block; suitable for small payments |
| 3 | More secure | Reasonable for medium amounts |
| 6 | Highly secure | Standard for large transactions |
The more confirmations a transaction has, the harder it becomes to reverse. That's why businesses and users often wait for multiple confirmations before considering a payment final.
```
TRANSACTION FLOW
════════════════════════════════════════════════════════════
Create → Sign → Broadcast → Mempool → Block → Confirmed
│ │ │ │ │ │
Wallet Private Nodes Waiting Miner Each new
builds key relay for adds block adds
tx proves to miner to confirmation
owner network pickup blockchain
════════════════════════════════════════════════════════════
```
## Key Takeaways
- Transactions consume **inputs** (UTXOs you own) and create **outputs** (new UTXOs)
- You always spend the **whole input**: excess comes back as change
- **Fees** are the difference between inputs and outputs
- Transactions wait in the **mempool** until a miner includes them in a block
- More **confirmations** = more security (6 is the standard for large amounts)
---
# How Bitcoin Transactions Are Created
> Practical guide: Creation. Covers Manually Building Transactions, Using Wallets to Send Transactions, RBF – Replace-by-Fee.
Source: https://selfcustodylabs.com/docs/learn/transactions/create/
Last updated: 2026-04-14
Publisher: Self Custody Labs (https://selfcustodylabs.com)
---
Most Bitcoin wallets make it incredibly simple to create a transaction: just enter the amount you want to send and the recipient’s address. Behind the scenes, though, there’s a lot more going on.
## Manually Building Transactions
For users who want greater control, it's possible to build Bitcoin transactions manually. This involves selecting which unspent transaction outputs (UTXOs) to use as **inputs**, specifying the **outputs** (where the Bitcoin will go), choosing a **change address** (where the leftover amount returns), and setting a transaction fee to pay the miners.
Tools like [Sparrow Wallet](https://sparrowwallet.com/), [Electrum Wallet](https://electrum.org/), and [Bitcoin Core](https://bitcoin.org/en/bitcoin-core/) allow for this level of precision. Manual construction is especially useful for privacy-conscious users, since it enables **coin control**, avoiding UTXOs that could be linked to your identity. It also lets you fine-tune fees and decide how your change is handled, which can impact both cost and privacy.
## Using Wallets to Send Transactions
Most wallets take care of everything for you. They automatically select inputs and outputs, calculate the fee, and handle signing and broadcasting the transaction.
From your end, all you typically do is enter the recipient's address and the amount to send. Some wallets may also let you choose a **fee rate** or priority level. This convenience makes wallet-based sending ideal for everyday use and helps minimize user error.
## RBF – Replace-by-Fee
**Replace-by-Fee (RBF)** is a feature that lets you increase a transaction’s fee after it’s been broadcast, provided it hasn’t been confirmed yet.
This is especially useful when a transaction gets stuck in the mempool because the original fee was too low. Instead of waiting indefinitely, you can resend the transaction with a higher fee to speed things up.
To use RBF, you need to enable it when creating the transaction. Most wallets have a checkbox or setting for this. If the transaction remains unconfirmed, you can then replace it with a higher-fee version.
## CPFP – Child Pays for Parent
If you didn’t enable RBF and your transaction is stuck, there’s another option: **Child Pays for Parent (CPFP)**.
With CPFP, you create a second transaction, the "child" that spends from the unconfirmed transaction, the "parent." You attach a high fee to the child transaction, which incentivizes miners to include both in the next block so they can claim the combined fee.
This method is particularly useful in wallets that support advanced fee control or for miners optimizing which transactions to include in a block.
---
---
# How Bitcoin Transaction Signing Works
> How Bitcoin transaction signing works: what signing means, online vs offline signing flows, and single-sig versus multisig signing.
Source: https://selfcustodylabs.com/docs/learn/transactions/sign/
Last updated: 2026-04-15
Publisher: Self Custody Labs (https://selfcustodylabs.com)
---
Before a Bitcoin transaction can be broadcast to the network, it must first be signed using a private key. This signature acts as proof that you control the coins you’re trying to spend.
## What Is Signing?
Think of signing as placing a digital signature on your transaction. It tells the Bitcoin network, “Yes, I’m authorized to move these funds.” To do this, you need your **private key**, a secret piece of data that should never be shared. If anyone else gets access to your private key, they can steal your Bitcoin.
## Online vs. Offline Signing
In **online signing**, the wallet that builds and signs the transaction is connected to the internet. This method is convenient and fast but carries more risk, if your device is compromised, your private key could be exposed.
**Offline signing**, often referred to as air-gapped signing, offers stronger security. The transaction is first built on a watch-only wallet connected to the internet (which has no access to your private keys). It’s then transferred to a completely offline device for signing. This air-gapped computer holds your private key and never touches the internet, making it highly resistant to remote attacks. Once the transaction is signed, it’s transferred back online to be broadcast.
This approach is popular in cold storage and high-security setups.
## Single-Sig vs. Multisig Signing
With **single-signature** (single-sig) wallets, only one private key is required to sign a transaction. This setup is common for personal use and simpler wallets.
In contrast, **multi-signature** (multisig) wallets require multiple keys to sign. For example, a “2-of-3” configuration means two out of three keys must sign the transaction before it’s valid. This method is often used in business wallets, collaborative custody, or more secure personal setups.
Multisig is frequently combined with **PSBTs** and air-gapped workflows for added flexibility and safety.
## What Is PSBT? (Partially Signed Bitcoin Transaction)
A Partially Signed Bitcoin Transaction (PSBT) is a special file format designed to safely move transactions between devices that sign in stages.
It’s particularly useful when:
- You want to build a transaction on an online device.
- Then sign it gradually using one or more offline devices.
- Each signer adds their signature until the transaction is complete.
PSBTs are a key tool for multisig arrangements and air-gapped environments, where no single device handles every step of the process.
## Air-Gapped Signing Workflow (Example)
Here’s how a typical air-gapped signing setup works:
1. Build the transaction on an online, watch-only wallet.
2. Export it as a PSBT file.
3. Transfer the file to an offline (air-gapped) computer using USB, QR code, or SD card.
4. Sign the transaction with the private key on the offline device.
5. Move the signed transaction back to the online device.
6. Broadcast it to the Bitcoin network.
This layered approach keeps your private key isolated from internet exposure while allowing secure transaction signing.
---
---
# How to Broadcast a Bitcoin Transaction
> Practical guide: Broadcasting. Covers Broadcasting via Your Own Node vs. Third-Party Servers, Privacy Considerations, bitcoin.
Source: https://selfcustodylabs.com/docs/learn/transactions/broadcast/
Last updated: 2026-01-16
Publisher: Self Custody Labs (https://selfcustodylabs.com)
---
Once your Bitcoin transaction is fully signed, it's ready to be **broadcasted**, meaning sent out to the peer-to-peer (P2P) network. Other nodes receive it and temporarily store it in their **mempool**, essentially a waiting room for transactions. From there, miners select transactions from the mempool to include in the next block.
In short, broadcasting is how your transaction gets announced to the network for confirmation.
## Broadcasting via Your Own Node vs. Third-Party Servers
You have two main ways to broadcast a transaction: through your own full node or via third-party servers.
### Using Your Own Node
When your wallet connects to your personal full node, the transaction is sent directly from your machine, no intermediaries involved.
This method offers **maximum privacy and control**. It’s trustless, meaning you independently verify everything without relying on a third party. However, it does require you to run and maintain a full node (e.g., Bitcoin Core or Umbrel), which can be a technical or resource commitment.
### Using Third-Party Servers
Many wallets, especially mobile apps, broadcast transactions through external servers such as Electrum public servers, Blockstream.info, or the wallet provider’s backend.
This approach is much more convenient. It’s fast, with no setup required. But there’s a tradeoff: you’re trusting that server not to log your IP, delay, censor, or snoop on your transaction. This method offers less privacy, and you lose some control over how your transaction is relayed.
## Privacy Considerations
Broadcasting can reveal information about you if not done carefully. To improve your privacy:
- Use Tor: Whether you're using your own node or a third-party server, routing through Tor helps conceal your IP address.
- Be cautious with mobile wallets: Many rely on centralized servers. Understand what you're giving up in terms of privacy.
- Run your own node whenever possible. It's the best way to retain sovereignty and keep your broadcast private.
---
---
# Bitcoin Transaction Fees Explained
> Understand how Bitcoin transaction fees work, why they vary, and how to minimize costs. Learn fee estimation, RBF, CPFP, and fee optimization strategies.
Source: https://selfcustodylabs.com/docs/learn/transactions/fees/
Last updated: 2026-08-02
Publisher: Self Custody Labs (https://selfcustodylabs.com)
---
Every Bitcoin transaction requires a fee to be processed. Understanding how fees work helps you avoid overpaying during normal times and ensures your transactions confirm when you need them to.
## How Fees Work
Bitcoin fees are paid to miners for including your transaction in a block. Unlike traditional payment systems with fixed percentages, Bitcoin fees are based on **data size, not transaction value**.
### Fee Basics
```
FEE = TRANSACTION SIZE (vBytes) × FEE RATE (sats/vB)
```
This means:
- Sending 0.001 BTC costs the same as sending 100 BTC
- Complex transactions (more inputs/outputs) cost more
- Simple transactions are cheapest
### Why Fees Vary
Bitcoin blocks have limited space (~4MB, or ~2,000-3,000 transactions). When more people want to transact than blocks can hold, a market forms:
| Demand | Typical Fee Rate | Confirmation Time |
|--------|------------------|-------------------|
| Low | 1-5 sats/vB | Next block - hours |
| Normal | 5-20 sats/vB | 10 min - 1 hour |
| High | 20-100 sats/vB | 10-30 minutes |
| Extreme | 100-500+ sats/vB | Priority inclusion |
Fees fluctuate constantly based on network demand.
## Understanding Fee Rates
### sats/vB (Satoshis per Virtual Byte)
The standard unit for Bitcoin fees:
- **sat** = satoshi (0.00000001 BTC)
- **vB** = virtual byte (measure of transaction size)
A typical single-input, single-output transaction is ~140 vB.
### Example Calculations
| Transaction Type | Size | At 10 sats/vB | At 50 sats/vB |
|------------------|------|---------------|---------------|
| Simple (1 input → 2 outputs) | ~140 vB | 1,400 sats (~$0.60) | 7,000 sats (~$3) |
| Medium (3 inputs → 2 outputs) | ~380 vB | 3,800 sats (~$1.60) | 19,000 sats (~$8) |
| Complex (10 inputs → 2 outputs) | ~1,100 vB | 11,000 sats (~$4.70) | 55,000 sats (~$24) |
*Prices assume ~$43,000/BTC*
## What Affects Transaction Size
### Inputs vs Outputs
Every transaction has:
- **Inputs**: UTXOs you're spending (where funds come from)
- **Outputs**: Where funds are going (recipients + change)
**More inputs = larger transaction = higher fee**
This is why [UTXO management](https://selfcustodylabs.com/docs/learn/transactions/utxos) matters.
### Address Types
Different address types have different sizes:
| Address Type | Input Size | Output Size | Notes |
|--------------|------------|-------------|-------|
| P2PKH (Legacy) | ~148 vB | ~34 vB | Starts with `1` |
| P2SH-P2WPKH (Nested SegWit) | ~91 vB | ~32 vB | Starts with `3` |
| P2WPKH (Native SegWit) | ~68 vB | ~31 vB | Starts with `bc1q` |
| P2TR (Taproot) | ~57 vB | ~43 vB | Starts with `bc1p` |
**Recommendation**: Use Native SegWit (`bc1q`) or Taproot (`bc1p`) addresses for lowest fees.
## Fee Estimation
### Mempool Analysis
The **mempool** is the waiting room for unconfirmed transactions. Analyzing it helps estimate appropriate fees:
- [mempool.space](https://mempool.space): Visual fee estimation
- Sparrow Wallet's built-in fee estimation
- Your node's mempool data
### Fee Estimation Strategy
1. **Check current mempool.** What fee rate is clearing?
2. **Consider urgency.** Do you need next block or can you wait?
3. **Account for volatility.** Fees can spike suddenly
### Common Mistakes
❌ **Overpaying during low demand**: checking fees saves money
❌ **Underpaying during high demand**: transaction gets stuck
❌ **Using wallet defaults blindly**: often set too high
## Stuck Transactions
If your transaction isn't confirming, you have options:
### RBF (Replace-By-Fee)
Replace your unconfirmed transaction with a higher-fee version.
**Requirements:**
- Original transaction must have RBF enabled (Sparrow enables by default)
- You control at least one input
**How to use in Sparrow:**
1. Find the unconfirmed transaction
2. Right-click → "Increase Fee"
3. Set new fee rate
4. Broadcast replacement
### CPFP (Child-Pays-For-Parent)
Create a new transaction that spends the unconfirmed output with a high enough fee to incentivize mining both.
**When to use:**
- RBF not available
- You're the recipient (can't RBF sender's transaction)
**How it works:**
The new transaction's fee must cover the "deficit" of the parent transaction to make the combined package attractive to miners.
## Fee Optimization Strategies
### 1. Consolidate During Low Fees
When fees are cheap (1-5 sats/vB), combine small UTXOs:
```
BEFORE: 50 small UTXOs
→ Future transaction needs 50 inputs = expensive
AFTER: 1 large UTXO
→ Future transaction needs 1 input = cheap
```
See [UTXO Consolidation](https://selfcustodylabs.com/docs/learn/privacy/utxo-management#consolidation-strategies) for details.
### 2. Batch Transactions
If sending to multiple recipients, batch them:
```
INEFFICIENT:
Transaction 1: You → Alice (140 vB)
Transaction 2: You → Bob (140 vB)
Transaction 3: You → Charlie (140 vB)
Total: 420 vB
EFFICIENT:
Transaction 1: You → Alice, Bob, Charlie (200 vB)
Savings: 52%
```
### 3. Time Your Transactions
Fee patterns by time:
- **Weekends**: Often lower fees
- **US business hours**: Often higher fees
- **After difficulty adjustments**: Variable
### 4. Use Appropriate Address Types
Switching from Legacy to SegWit addresses can save 30-40% on fees.
### 5. Enable RBF
Always enable RBF (Replace-By-Fee) so you can bump fees if needed. Sparrow Wallet enables this by default.
## Lightning Network
For small, frequent transactions, the [Lightning Network](https://lightning.network) offers:
- Near-instant confirmation
- Fees of ~1 sat or less
- No on-chain footprint per transaction
**Tradeoff**: Requires channel management and isn't suitable for cold storage.
## Fee Calculator
Quick reference for planning:
| Your Goal | Recommended Strategy |
|-----------|---------------------|
| Send immediately | Pay current "high priority" rate |
| Send within hours | Pay "medium priority" rate |
| Send within a day | Pay "low priority" rate |
| Consolidate UTXOs | Wait for under 5 sats/vB |
| Large cold storage deposit | Use batching, wait for low fees |
## Summary
- Fees are based on **transaction size**, not value
- Use **SegWit or Taproot** addresses for lower fees
- **Check the mempool** before setting fees
- **Consolidate UTXOs** during low-fee periods
- Enable **RBF** on all transactions
- **Batch** when sending to multiple recipients
Understanding fees helps you save money and ensures your transactions confirm when you need them.
---
# Bitcoin Transaction Types Explained
> Bitcoin transaction types explained: pre-signed, fully signed, and partially signed (PSBT). When each type is used and how they differ.
Source: https://selfcustodylabs.com/docs/learn/transactions/types/
Last updated: 2026-08-02
Publisher: Self Custody Labs (https://selfcustodylabs.com)
---
There are three main stages of a Bitcoin transaction:
## Pre-Signed
This is the first step, where a transaction is created but not yet signed. It’s typically made on an internet-connected computer using a watch-only wallet, ideally connected to your own Bitcoin node. Since this wallet doesn’t have access to your private keys, it can safely build the transaction without risking your Bitcoin.
Once the unsigned transaction is ready, you transfer it to an offline (air-gapped) computer for signing. This offline computer securely holds your private keys and is never connected to the internet, keeping them safe from hackers.
You can learn more in the Air-Gapped Computer [section](https://selfcustodylabs.com/docs/learn/wallets/air-gapped-wallets).
## Fully Signed
Once your offline (air-gapped) computer signs the transaction using your private keys, it becomes a fully signed transaction.
You then transfer it back to your online computer and load it into your wallet to broadcast it to the Bitcoin network.
Since the air-gapped machine is offline, it can’t broadcast the transaction itself, it just signs it securely.
You can also create and save fully signed transactions ahead of time, so they’re ready to be broadcast later when you're online.
## Partially Signed (PSBT)
Partially Signed Bitcoin Transactions (PSBTs) are mostly used in multi-signature wallets, where more than one signature is required to approve a transaction.
Here’s how it works:
- You first create the transaction on your online watch-only wallet, just like with a regular unsigned transaction
- Then, you transfer it to the first offline (air-gapped) device, which adds the first signature , this makes it a PSBT.
- After that, you pass the PSBT to the next offline device, and so on, until the required number of signatures has been added. Once all the necessary signatures are included, the PSBT becomes a fully signed transaction.
- Finally, you move it back to your online computer and broadcast it to the Bitcoin network.
---
## You've Completed the Transactions Section
You now understand how Bitcoin moves: from UTXOs to transaction creation, signing, broadcasting, fees, and different transaction types. Next, explore why privacy matters on a transparent blockchain.
---
# Bitcoin Privacy: Chain Analysis, CoinJoin, UTXO Control
> Bitcoin privacy fundamentals: what is exposed on the public blockchain, how chain analysis works, and how CoinJoin and UTXO control protect you.
Source: https://selfcustodylabs.com/docs/learn/privacy/
Last updated: 2026-08-22
Publisher: Self Custody Labs (https://selfcustodylabs.com)
---
Bitcoin's blockchain is public. Every transaction, every address, every amount: all permanently visible to anyone who looks. Privacy on Bitcoin is not automatic; it is something you actively design for.
This section covers what the chain reveals, how surveillance firms link addresses to identities, and the tools and habits that keep your financial life your own.
## In this section
- **[Why Privacy Matters](https://selfcustodylabs.com/docs/learn/privacy/why-privacy-matters)**: the case for financial privacy, even if you have nothing to hide
- **[Chain Analysis](https://selfcustodylabs.com/docs/learn/privacy/chain-analysis)**: how surveillance firms cluster addresses and trace flows
- **[Protecting Privacy](https://selfcustodylabs.com/docs/learn/privacy/protecting-privacy)**: practical habits that limit what the chain reveals
- **[CoinJoin](https://selfcustodylabs.com/docs/learn/privacy/coinjoin)**: collaborative transactions that break heuristics
- **[CoinJoin Tutorial](https://selfcustodylabs.com/docs/learn/privacy/coinjoin-tutorial)**: hands-on mixing with JoinMarket NG and Jam
- **[PayJoin](https://selfcustodylabs.com/docs/learn/privacy/payjoin)**: cooperative payments that hide the true sender
- **[UTXO Management](https://selfcustodylabs.com/docs/learn/privacy/utxo-management)**: coin control, consolidation, and source separation
---
# Why Bitcoin Privacy Matters
> Why financial privacy matters for Bitcoin users. What information is exposed on the public blockchain and how it affects your security.
Source: https://selfcustodylabs.com/docs/learn/privacy/why-privacy-matters/
Last updated: 2026-08-02
Publisher: Self Custody Labs (https://selfcustodylabs.com)
---
Imagine if everyone could see your bank account. Not just your balance, but every transaction you've ever made. Every paycheck. Every bill. Every embarrassing purchase. Every donation to causes you believe in. All of it, permanently recorded and publicly accessible.
That's Bitcoin by default.
Bitcoin's blockchain is completely public. Every transaction ever made is visible to anyone, forever. This transparency is a feature, not a bug; it's what allows Bitcoin to work without trusted third parties. But it creates a privacy challenge that every Bitcoin user should understand.
The good news: privacy is possible. The first step is understanding what you're dealing with.
## The Transparency Problem
When you make a Bitcoin transaction, more information is recorded than most people realize. The sending address, the receiving address, the exact amount, the precise time: all of it goes on a permanent public ledger that will exist as long as Bitcoin exists.
```
WHAT THE BLOCKCHAIN SHOWS:
──────────────────────────────────────────────────────────
Address A ──→ 1.5 BTC ──→ Address B
0.3 BTC ──→ Address C (change)
Anyone can see:
• A sent 1.5 BTC to B
• A received 0.3 BTC back as change
• This happened at block 812,345
• This data will exist forever
```
Now, the blockchain doesn't contain names, only addresses. This is called **pseudonymity**. You're identified by a string of characters rather than your legal name. At first glance, this seems private enough. But here's the problem: pseudonymity is fragile. Once your identity connects to any address, the veil starts to unravel.
## From Pseudonymous to Identified
The moment your real identity touches any Bitcoin address, your privacy begins to erode. And in the modern Bitcoin ecosystem, these connections happen constantly, often without you realizing it.
Think about how most people acquire Bitcoin. They sign up for an exchange, submit identification documents, and buy their first coins. When they withdraw those coins, the exchange records exactly which address belongs to which verified customer. That single withdrawal creates a permanent link between your legal identity and your Bitcoin activity.
| Action | What Gets Exposed |
|--------|-------------------|
| Buy from KYC exchange | Your name linked to withdrawal address |
| Pay a merchant | Merchant knows your address |
| Post address online | Anyone can search and find it |
| Send to a friend | Friend knows your address |
| Receive salary in BTC | Employer knows your address |
Once that first link exists, blockchain analysis can follow the trail. Your coins move from address to address, and each hop is publicly recorded.
```
YOUR PRIVACY LEAK:
──────────────────────────────────────────────────────────
Exchange knows:
"John Smith withdrew to address A"
↓
Blockchain shows:
Address A → Address B → Address C → Address D
↓
Analyst concludes:
"John Smith likely controls A, B, C, and D"
"John Smith has approximately X bitcoin"
"John Smith paid merchant M on this date"
```
What started as "just one withdrawal" becomes a comprehensive financial profile.
## Why Should You Care?
"I have nothing to hide" is a common response. It's also dangerously naive. Privacy isn't about hiding wrongdoing; it's about protecting yourself from a range of threats that most people don't consider until it's too late.
### 1. Security Risk
The most immediate danger is physical. If people know how much Bitcoin you hold, you become a target.
Consider the "$5 wrench attack." Someone doesn't need to hack your wallet if they can threaten you or your family. Bitcoin's pseudonymity only protects you until someone connects your identity to your holdings. Then you have a physical security problem that no amount of technical security can solve.
Beyond physical threats, known Bitcoin holders face an onslaught of sophisticated social engineering. Scammers research wealthy targets and craft personalized attacks. If they know you're worth targeting, they'll invest the time to find your vulnerabilities.
### 2. Financial Discrimination
Your transaction history is more revealing than you might think. Merchants could theoretically charge you more if they see you're wealthy. Services might deny you based on where your coins have been, even if you had nothing to do with their prior history. Insurance companies and lenders increasingly factor financial profiles into their decisions.
This isn't science fiction. Chain analysis companies already offer "risk scoring" services that flag addresses based on transaction history. Your coins might be marked as "high risk" because of where they passed through before reaching you.
### 3. Surveillance and Control
Governments and corporations have always sought to monitor financial activity. Bitcoin's transparent ledger makes this easier, not harder. Tax authorities can trace your entire transaction history without requesting records from a bank. Data brokers can build and sell your financial profile. In more hostile jurisdictions, authoritarian regimes can identify and target people based on their financial behavior.
### 4. Basic Human Dignity
Perhaps the most fundamental argument: financial privacy is a reasonable expectation. You don't share your bank statements on social media. You don't announce your purchases to strangers. You don't invite the world to scrutinize your spending habits.
You shouldn't have to justify every purchase. Your wealth shouldn't be visible to anyone curious enough to look. Your financial decisions are your own business. Privacy isn't about having something to hide; it's about having something to protect.
## Bitcoin Is Not Anonymous
Let's address the elephant in the room. A common misconception persists: "Bitcoin is anonymous." This belief has led to catastrophic mistakes.
**The reality is the opposite of what most people assume.**
| Cash | Bitcoin |
|------|---------|
| No permanent record | Permanent public record |
| Physical transfer leaves no trail | Every transfer is logged forever |
| Difficult to trace at scale | Entire history traceable by anyone |
Bitcoin may actually be **less private** than traditional banking in some important ways. Your bank doesn't publish your transactions publicly; they're visible to the bank and to law enforcement with appropriate legal process, but not to the general public. Bank records can eventually be deleted; blockchain records cannot. Bank surveillance requires legal authorization; blockchain surveillance requires only an internet connection.
This isn't an argument against Bitcoin. It's an argument for taking privacy seriously.
## The Surveillance Industry
What started as academic research has become a multi-billion dollar industry. Chain analysis companies employ hundreds of specialists to study blockchain data, and they've gotten remarkably good at what they do.
These companies don't just look at the blockchain in isolation. They build comprehensive databases linking addresses to identities, analyzing transaction patterns, and flagging suspicious activity. They've tagged millions of addresses as belonging to exchanges, mixing services, ransomware operators, and individual users.
**Their capabilities include:**
- Clustering addresses they believe belong to the same entity
- Identifying which addresses belong to major exchanges
- Tracking behavioral patterns that reveal user identities
- Building probabilistic models to link addresses to real-world identities
**Their clients include:**
- Law enforcement agencies investigating crimes
- Tax authorities ensuring compliance
- Banks conducting due diligence
- Cryptocurrency exchanges screening transactions
To be clear: some of this activity is legitimate. Tracking ransomware payments and recovering stolen funds are valuable services. But the same tools that trace criminals can trace anyone, and the surveillance infrastructure, once built, doesn't distinguish between legitimate privacy and criminal evasion.
## The Good News
If you've made it this far, you might be feeling overwhelmed, or even defeated. Don't be. The point of understanding these challenges isn't to despair; it's to take informed action.
Privacy is not hopeless. It requires effort, but it's achievable. And you've already taken the first step: understanding the problem. You can't protect yourself from threats you don't know exist.
**Your path forward:**
Start by learning how tracking actually works. The [Chain Analysis Explained](https://selfcustodylabs.com/docs/learn/privacy/chain-analysis) guide breaks down the specific techniques surveillance companies use. Understanding their methods reveals their limitations.
Then, explore privacy-preserving techniques. [UTXO management](https://selfcustodylabs.com/docs/learn/privacy/utxo-management), coin control, running your own node, using Tor, and eventually CoinJoin: these tools exist precisely because this problem exists. Each one addresses specific vulnerabilities.
Most importantly, be thoughtful. Every Bitcoin action you take has privacy implications. Thinking twice before posting an address online, using different addresses for different purposes, keeping your holdings private in conversation: these habits matter.
Privacy isn't something you achieve once and forget about. It's an ongoing practice. But with knowledge and intention, you can transact with far more privacy than the average user, and far more than blockchain analysis companies expect.
---
## Key Takeaways
The Bitcoin privacy landscape is challenging but navigable. Keep these principles in mind:
- Bitcoin is **pseudonymous, not anonymous**; don't confuse the two
- All transactions are **public and permanent**; they can't be unsent or deleted
- Once your identity connects to an address, your entire **history becomes exposed**
- Privacy matters for **security, freedom, and dignity**, not just for criminals
- A sophisticated surveillance industry **actively tracks** Bitcoin users
- Despite all this, **privacy can be improved** with knowledge and the right tools
---
# Chain Analysis Explained
> Learn how blockchain surveillance works. Understand the heuristics and techniques used to track Bitcoin transactions and link addresses to identities.
Source: https://selfcustodylabs.com/docs/learn/privacy/chain-analysis/
Last updated: 2026-08-02
Publisher: Self Custody Labs (https://selfcustodylabs.com)
---
Imagine a detective with unlimited time, a complete record of every financial transaction you've ever made, and sophisticated software to find patterns in that data. That's essentially what chain analysis companies do, and they're doing it to millions of Bitcoin users right now.
Chain analysis is the practice of examining the Bitcoin blockchain to track the flow of funds and identify users. It's a multi-billion dollar industry that serves governments, exchanges, and anyone willing to pay for intelligence about Bitcoin movements. Understanding how it works isn't just academic; it's essential knowledge for protecting your privacy.
The good news: chain analysis isn't magic. It relies on heuristics (educated guesses) and external data sources, both of which have limitations. By understanding the techniques, you can understand their weaknesses, and protect yourself accordingly.
## What Is Chain Analysis?
At its core, chain analysis is pattern recognition on a massive scale. Analysts study blockchain data to achieve several goals:
**Clustering addresses:** Determining which addresses belong to the same person or entity. If they can prove that addresses A, B, and C all belong to you, they've dramatically expanded what they know about your activity.
**Tracking fund flows:** Following bitcoin as it moves through the network. Where did your coins come from? Where did they go? Who else handled them along the way?
**Identifying entities:** Linking address clusters to real-world identities. This is where the blockchain's pseudonymity breaks down entirely.
**Flagging transactions:** Marking certain coins as "tainted" or suspicious based on their history. Yes, your coins can be flagged for something a previous owner did.
This intelligence is valuable. Law enforcement uses it to track criminals. Exchanges use it to comply with regulations. Tax authorities use it to ensure compliance. And increasingly, ordinary financial institutions use it to make decisions about which customers to serve.
## The Core Techniques
Chain analysis isn't black magic. It's a set of logical inferences applied at scale. The industry relies on **heuristics**: rules of thumb that are usually (but not always) true. Understanding these heuristics reveals both their power and their limitations.
### 1. Common Input Ownership Heuristic
This is the most powerful tool in the analyst's arsenal, and it's deceptively simple.
**The assumption:** If multiple addresses are used as inputs in the same transaction, they all belong to the same owner.
**Why it usually works:** To spend bitcoin from multiple addresses in one transaction, you need the private keys for all of them. Typically, only one person has those keys.
```
TRANSACTION EXAMPLE:
──────────────────────────────────────────────────────────
Inputs: Outputs:
Address A (0.5 BTC) ─┐
Address B (0.3 BTC) ─┼──→ Address X (0.7 BTC)
Address C (0.4 BTC) ─┘ Address Y (0.5 BTC)
Analyst concludes:
"A, B, and C are controlled by the same entity"
```
**When it breaks down:**
- CoinJoin transactions intentionally combine inputs from multiple people
- PayJoin transactions mix buyer and seller inputs
### 2. Change Address Detection
When you spend bitcoin, you rarely have the exact amount needed. If you have a 1 BTC UTXO and want to pay someone 0.7 BTC, the remaining 0.3 BTC comes back to you as change, sent to a new address your wallet controls.
Analysts exploit this pattern. In any transaction with two outputs, they ask: which one is the payment, and which one is change returning to the sender?
```
CHANGE DETECTION:
──────────────────────────────────────────────────────────
Input: Outputs:
Address A (1.0 BTC) ──→ Address B (0.7 BTC) ← Payment
Address C (0.29 BTC) ← Change?
Clues that C is change:
• C is a new address (never seen before)
• C has an odd amount (0.29 vs round 0.7)
• C uses same address type as input
```
Several indicators help analysts make this determination:
| Indicator | Why It Suggests Change |
|-----------|----------------------|
| New address | Wallets generate fresh change addresses |
| Odd decimal places | Payments tend to be round numbers |
| Same script type | Wallet uses consistent address format |
| Smaller amount | Change is often the remainder |
The real power comes from combining heuristics. Once analysts identify a change address, they can link it to your other addresses via common input ownership when you spend from it later. Your change address becomes another piece of your financial profile.
### 3. Address Reuse Detection
Using the same address twice is a privacy catastrophe. It creates an undeniable link between transactions.
```
ADDRESS REUSE RISK:
──────────────────────────────────────────────────────────
Transaction 1: Someone pays you at Address A
Transaction 2: You pay someone from Address A
Transaction 3: Someone else pays you at Address A
All three transactions are now linked.
Anyone who knows one transaction knows all of them.
```
Modern wallets generate new addresses automatically for this reason, but address reuse still happens, especially when people share a single "donation" address publicly or when merchants use static payment addresses.
### 4. Timing Analysis
Time leaves fingerprints. Transactions close together in time are often related, and regular patterns reveal behavioral information.
If you deposit to an exchange and withdraw minutes later, those transactions are likely related. If you receive payment and immediately forward it to another address, the connection is obvious. If you make transactions at the same time every day or week, you're creating a pattern that can be correlated with real-world activity.
### 5. Amount Correlation
Numbers tell stories. Payments are often round numbers (0.1 BTC, 0.01 BTC), while change addresses tend to have irregular amounts. If 0.5 BTC enters a mixer and 0.5 BTC exits somewhere else, they might be connected, though sophisticated mixers work hard to break this correlation.
## Clustering: Building Your Profile
The real power of chain analysis comes from combining these techniques. Individually, each heuristic provides a piece of the puzzle. Together, they build comprehensive profiles.
```
CLUSTER BUILDING:
──────────────────────────────────────────────────────────
Step 1: Find multi-input transaction
Addresses A, B, C spent together → Same owner
Step 2: Identify change addresses
Transaction from A creates change at D → Add D to cluster
Step 3: Follow the chain
D later spent with E → Add E to cluster
Step 4: Continue...
Cluster grows: {A, B, C, D, E, F, G, H...}
Result: Analyst knows all your addresses
```
## External Data Sources
Blockchain analysis is powerful, but it becomes devastating when combined with off-chain data. The blockchain tells analysts where coins move; external data tells them who's moving them.
### Exchange Data
Here's the uncomfortable truth: when you use a KYC (Know Your Customer) exchange, you're creating a permanent link between your legal identity and your Bitcoin addresses. The exchange knows who you are. They know which addresses you've deposited to and withdrawn from. And they share this information with chain analysis companies, sometimes directly, sometimes through regulatory requirements.
This is often the starting point for tracing. An analyst might not know who controls a random address on the blockchain, but once that address receives funds from a known exchange withdrawal, the connection is made.
### Web Scraping
Chain analysis companies don't just watch the blockchain; they scour the internet. They search for Bitcoin addresses posted in forums, donation addresses on websites, addresses in leaked databases, and social media posts where people mention their addresses. Every public mention of a Bitcoin address is potential data.
That donation address on your blog? It's been catalogued. That transaction ID you shared to prove a payment? It's been noted. The internet never forgets, and neither do surveillance companies.
### Transaction Metadata
Even beyond blockchain and web data, your transactions leak information. If you're not using Tor, your IP address may be associated with your transactions. Browser fingerprints, transaction timing patterns, and unique wallet behaviors all create signatures that can be correlated with other data.
## The Attribution Challenge
There's an important distinction between clustering and attribution. Clustering means determining that addresses A, B, and C belong to the same entity. Attribution means determining that entity is you.
**Strong attribution** comes from direct evidence: your exchange account withdrew to that address, you posted that address publicly, or that address appears in a law enforcement database linked to your identity.
**Weak attribution** comes from inference: the address transacted with someone identified, the behavioral pattern matches expectations, or statistical analysis suggests a likely owner.
Chain analysis companies often have high confidence in their clusters but varying confidence in attribution. They know addresses belong together; they're less certain about who controls them. This matters because weak attribution can be challenged, and because it creates false positive risk.
## What This Means for You
Let's make this concrete. If an analyst has identified even one address you control, here's what they can potentially learn:
**Your transaction history is visible.** Every transaction from identified addresses is recorded permanently. Where you sent coins, when you sent them, how much you sent: all of it.
**Past actions affect future privacy.** Those coins you bought years ago still carry their history. Address reuse from the past still creates links. Your entire financial history can be reconstructed retroactively if the starting point is identified.
**Exchanges are key vulnerability points.** KYC exchanges create the identity links that make everything else possible. Even using an exchange once, years ago, creates a permanent record that can anchor future analysis.
## Limitations of Chain Analysis
Chain analysis is powerful, but it's not omniscient. Every technique has limitations, and understanding them reveals opportunities for protection.
| Technique | Limitation |
|-----------|------------|
| Common input ownership | Broken by CoinJoin and PayJoin |
| Change detection | Multiple conflicting indicators |
| Timing analysis | Users can deliberately delay transactions |
| Amount correlation | Equal-output transactions obscure amounts |
**CoinJoin and similar techniques** specifically target these heuristics. When multiple people combine their transactions, the common input ownership assumption breaks down completely. When outputs are all equal amounts, change detection becomes impossible. When timing is randomized, temporal analysis loses power.
This is the key insight: chain analysis relies on assumptions about how people typically use Bitcoin. Use Bitcoin atypically, intentionally, and those assumptions fail.
## Key Takeaways
Chain analysis is sophisticated but not invincible. Keep these points in mind:
- Chain analysis uses **heuristics** (educated guesses), not certainty
- **Common input ownership** and **change detection** are the primary techniques
- Analysts build **clusters** of addresses they believe you control
- **External data** (especially exchanges) provides the identity links that make clusters meaningful
- The techniques have **known limitations** that privacy tools specifically exploit
---
## Continue Learning
Understanding chain analysis is the first step to defeating it. The next steps are practical.
→ **Next:** [Protecting Your Privacy](https://selfcustodylabs.com/docs/learn/privacy/protecting-privacy): Practical techniques you can use today
→ **Practice:** [UTXO Management Guide](https://selfcustodylabs.com/docs/learn/privacy/utxo-management): Coin control, labeling, and consolidation
→ **Advanced:** [CoinJoin Guide](https://selfcustodylabs.com/docs/learn/privacy/coinjoin): Break the chain analysis heuristics
---
# Protecting Your Privacy
> Overview of Bitcoin privacy techniques. Learn the principles and methods for protecting your financial privacy when using Bitcoin.
Source: https://selfcustodylabs.com/docs/learn/privacy/protecting-privacy/
Last updated: 2026-08-02
Publisher: Self Custody Labs (https://selfcustodylabs.com)
---
Now that you understand [why privacy matters](https://selfcustodylabs.com/docs/learn/privacy/why-privacy-matters) and [how chain analysis works](https://selfcustodylabs.com/docs/learn/privacy/chain-analysis), let's look at what you can do about it.
This page provides an overview of privacy techniques. Each has dedicated guides for implementation.
## The Privacy Mindset
Before diving into techniques, adopt these principles:
### 1. Think Before You Act
Every transaction leaves permanent traces. Ask yourself:
- Does this link my identity to this address?
- Am I revealing information unnecessarily?
- Could I do this more privately?
### 2. Separate Your Identities
Don't mix:
- **KYC bitcoin** (bought from exchanges with ID) with **non-KYC bitcoin**
- **Work-related** transactions with **personal** ones
- **Public** donation addresses with **private** savings
### 3. Minimize Data Leakage
Share only what's necessary:
- Use new addresses for each transaction
- Don't post addresses publicly unless required
- Consider who can see your transaction
## Privacy Techniques Overview
### Level 1: Basic Hygiene
These require no special tools, just awareness.
| Technique | What It Does | Difficulty |
|-----------|--------------|------------|
| **Never reuse addresses** | Prevents linking transactions | Easy |
| **Use your own node** | Stops leaking addresses to third parties | Medium |
| **Avoid address posting** | Prevents web scraping | Easy |
| **Separate coin sources** | Keeps identities apart | Easy |
### Level 2: Active Protection
These require learning specific tools.
| Technique | What It Does | Guide |
|-----------|--------------|-------|
| **UTXO management** | Control which coins you spend | [UTXO Guide](https://selfcustodylabs.com/docs/learn/privacy/utxo-management) |
| **Coin control** | Choose specific inputs for transactions | [Coin Control](https://selfcustodylabs.com/docs/learn/privacy/utxo-management#coin-control-choosing-your-utxos) |
| **Labeling** | Track coin sources and privacy levels | [UTXO Guide](https://selfcustodylabs.com/docs/learn/privacy/utxo-management) |
### Level 3: Breaking the Chain
These actively defeat chain analysis.
| Technique | What It Does | Guide |
|-----------|--------------|-------|
| **CoinJoin** | Mix coins with others to break history | [CoinJoin Guide](https://selfcustodylabs.com/docs/learn/privacy/coinjoin) |
| **PayJoin** | Hide payments in normal-looking transactions | [PayJoin Guide](https://selfcustodylabs.com/docs/learn/privacy/payjoin) |
## Run Your Own Node
**Why it matters:**
When you use someone else's node (or a public server), you reveal:
- All your addresses
- Your transaction history
- Your IP address (potentially)
With your own node:
- Your wallet queries stay local
- No third party sees your addresses
- You verify everything yourself
→ **Learn:** [What is a Bitcoin Node](https://selfcustodylabs.com/docs/learn/nodes/what-is-node) | [Why Run Your Own](https://selfcustodylabs.com/docs/learn/nodes/why-run-node)
→ **Guide:** [Bitcoin Node Setup](https://selfcustodylabs.com/docs/bitcoin-node)
## UTXO Management
**Why it matters:**
UTXOs (Unspent Transaction Outputs) are the individual "pieces" of bitcoin you own. How you manage them affects:
- **Privacy:** Combining UTXOs from different sources links them
- **Fees:** More UTXOs = higher transaction fees
- **Traceability:** Careless spending reveals your activity
**Key practices:**
1. **Label everything:** Know where each UTXO came from
2. **Keep sources separate:** Never combine KYC and non-KYC coins
3. **Use coin control:** Manually select which UTXOs to spend
4. **Consolidate carefully:** Only combine same-source UTXOs
→ **Guide:** [UTXO Management](https://selfcustodylabs.com/docs/learn/privacy/utxo-management)
## CoinJoin
**Why it matters:**
CoinJoin directly breaks the chain analysis heuristics by:
- Combining inputs from multiple people (breaks common input ownership)
- Creating equal outputs (hides which output belongs to whom)
- Adding ambiguity to transaction graphs
**After a CoinJoin:**
- Analysts cannot determine which output is yours
- Your transaction history is "broken"
- Coins gain **forward privacy**
**Important considerations:**
- Mixed coins must be handled carefully after
- Some exchanges flag CoinJoin transactions
- Proper post-mix behavior is essential
→ **Guide:** [CoinJoin](https://selfcustodylabs.com/docs/learn/privacy/coinjoin)
## Acquiring Bitcoin Privately
**The acquisition problem:**
If you buy bitcoin through a KYC exchange, your identity is linked from the start. Even the best privacy techniques cannot fully undo this.
**More private acquisition methods:**
| Method | Privacy Level | Tradeoffs |
|--------|---------------|-----------|
| **Peer-to-peer (P2P)** | Higher | Requires more effort, potential scams |
| **Bitcoin ATMs** (some) | Medium | Often have cameras, some require ID |
| **Earning bitcoin** | Higher | Employer/client knows your address |
| **Mining** | Highest | Expensive equipment, technical knowledge |
→ **Guide:** Coming soon
## Network-Level Privacy
**The problem beyond blockchain:**
Even if your transactions look private on-chain, you might leak information at the network level:
- **IP address:** When you broadcast a transaction
- **Timing:** When you come online
- **Connections:** Who you connect to
**Solutions:**
| Tool | What It Does |
|------|--------------|
| **Tor** | Hides your IP address |
| **VPN** | Hides your IP (but VPN provider sees it) |
| **Own node** | Broadcast transactions through your node |
| **Own node over Tor** | Best combination |
→ **Guide:** [Tor Setup](https://selfcustodylabs.com/docs/bitcoin-node/tor)
## What You Cannot Fix
Some privacy losses are permanent:
| Situation | Why It Can't Be Undone |
|-----------|----------------------|
| KYC exchange withdrawal | Exchange has your identity forever |
| Posted address online | May be archived, scraped, saved |
| Sent to identified address | That transaction is permanent |
| Blockchain history | The past cannot be changed |
**What you can do:**
- Start fresh with new coins
- CoinJoin existing coins for forward privacy
- Be more careful going forward
## Privacy and Tradeoffs
Every technique has tradeoffs:
| Technique | Privacy Benefit | Cost/Risk |
|-----------|----------------|-----------|
| Own node | No address leakage | Disk space, setup time |
| CoinJoin | Breaks transaction links | Fees, time, potential exchange issues |
| P2P buying | No KYC link | Premium price, counterparty risk |
| Coin control | Better UTXO privacy | Manual effort, learning curve |
Choose based on your threat model and resources.
## Building Your Privacy Practice
**Start here:**
1. ✅ Understand the risks (you've done this)
2. ⬜ Run your own node → [Bitcoin Node Guide](https://selfcustodylabs.com/docs/bitcoin-node)
3. ⬜ Learn UTXO management → [UTXO Guide](https://selfcustodylabs.com/docs/learn/privacy/utxo-management)
4. ⬜ Practice coin control → [Coin Control Guide](https://selfcustodylabs.com/docs/learn/privacy/utxo-management#coin-control-choosing-your-utxos)
5. ⬜ Consider CoinJoin for existing coins → [CoinJoin Guide](https://selfcustodylabs.com/docs/learn/privacy/coinjoin)
**Ongoing habits:**
- Never reuse addresses
- Label all incoming transactions
- Keep different sources separate
- Think before each transaction
## Key Takeaways
- **Run your own node** to stop leaking addresses
- **Manage UTXOs carefully** to prevent linking
- **CoinJoin** breaks chain analysis heuristics
- **Acquisition method** determines starting privacy
- **Some losses are permanent:** prevention is best
- **Build habits:** privacy is ongoing, not one-time
---
## You've Completed the Privacy Section
You now understand why privacy matters, how blockchain surveillance works, and the techniques available to protect yourself. Next, learn about running your own Bitcoin node for maximum sovereignty.
---
# Bitcoin UTXO Management: Coin Control & Consolidation Guide
> Bitcoin UTXO management for lower fees and better privacy. Coin control in Sparrow, consolidation strategies, dusting attacks, and source separation rules.
Source: https://selfcustodylabs.com/docs/learn/privacy/utxo-management/
Last updated: 2026-08-22
Publisher: Self Custody Labs (https://selfcustodylabs.com)
---
Most Bitcoin users never think about UTXOs. They see a balance in their wallet and assume that is all there is to know. That is a costly mistake, both for fees and for privacy.
**Info: What You'll Learn**
**Time:** 40 minutes
**Difficulty:** Intermediate
**Prerequisites:** Understanding of [UTXOs](https://selfcustodylabs.com/docs/learn/transactions/utxos), [transactions](https://selfcustodylabs.com/docs/learn/transactions/understanding), and [why privacy matters](https://selfcustodylabs.com/docs/learn/privacy/why-privacy-matters).
**UTXO management** is the practice of being intentional about:
- How many UTXOs you have
- What size they are
- Where they came from
- How you spend them
Poor UTXO management leads to:
- 💸 Unnecessarily high transaction fees
- 🔍 Privacy leaks that expose your wealth (see [Chain Analysis](https://selfcustodylabs.com/docs/learn/privacy/chain-analysis))
- 🚫 Unspendable "dust" trapped in your wallet
- ⚠️ Vulnerability to tracking attacks
This guide teaches you to manage UTXOs like a pro.
## Quick UTXO Recap
UTXOs (Unspent Transaction Outputs) are the individual "pieces" of bitcoin you own. Your wallet balance is the sum of all your UTXOs.
| Property | Management Implication |
|----------|------------------------|
| UTXOs are indivisible | You spend entire UTXOs, creating change |
| Each UTXO adds transaction bytes | More UTXOs = higher fees |
| UTXOs have traceable history | Combining UTXOs links their histories |
| UTXOs are locked to addresses | Labels help track sources |
## Why UTXO Management Matters
### 1. Fees Are Based on Data Size, Not Value
**Warning: Critical Concept**
Bitcoin fees are based on transaction **size** (in bytes), not the **value** being sent. Sending $10 or $10,000,000 costs the same if the transaction has the same structure.
Transaction size is determined by:
- **Number of inputs (UTXOs being spent):** each input adds ~57-148 bytes
- **Number of outputs:** each output adds ~31-43 bytes
- **Address type:** SegWit / Taproot are smaller than legacy
**More UTXOs = more inputs = higher fees.**
Sending 0.1 BTC at 50 sat/vB:
| Scenario | Inputs | Approx. Size | Fee |
|----------|--------|--------------|-----|
| 1 UTXO of 0.1 BTC | 1 | ~140 vB | ~7,000 sats |
| 10 UTXOs of 0.01 BTC each | 10 | ~680 vB | ~34,000 sats |
| 100 UTXOs of 0.001 BTC each | 100 | ~5,800 vB | ~290,000 sats |
Same amount sent. Wildly different fees.
### 2. Privacy Depends on UTXO Separation
When you spend multiple UTXOs in one transaction, you reveal they belong to the same person:
```
BAD FOR PRIVACY:
────────────────────────────────────────────
INPUTS OUTPUT
────── ──────
0.05 BTC (from Exchange A) ─┬─→ 0.15 BTC (payment)
0.07 BTC (from Exchange B) ─┤
0.03 BTC (from friend) ─┘
Result: Exchange A, Exchange B, and your friend
can now link all these sources to you.
```
This is the **common-input-ownership heuristic**, one of the primary tools blockchain analysts use to track people.
### 3. Small UTXOs Can Become Unspendable
If a UTXO is worth less than the fee to spend it, it is effectively **dust**: trapped forever.
At 100 sat/vB, spending one SegWit input costs ~6,800 sats. A UTXO of 5,000 sats costs more to spend than it is worth. As fees rise, more small UTXOs become uneconomical.
## The Golden Rules of UTXO Management
### Rule 1: Keep UTXOs Above Minimum Size
Recommended minimum: **0.01 BTC (1,000,000 sats).** This keeps your UTXOs spendable across a wide range of fee environments.
| Fee Environment | 0.001 BTC UTXO | 0.01 BTC UTXO | 0.1 BTC UTXO |
|-----------------|----------------|---------------|--------------|
| Low (10 sat/vB) | ✅ Spendable | ✅ Spendable | ✅ Spendable |
| Medium (50 sat/vB) | ⚠️ ~3% fee | ✅ ~0.3% fee | ✅ ~0.03% fee |
| High (200 sat/vB) | ❌ ~14% fee | ⚠️ ~1.4% fee | ✅ ~0.14% fee |
| Extreme (500 sat/vB) | ❌ ~34% fee | ❌ ~3.4% fee | ✅ ~0.34% fee |
### Rule 2: Don't Consolidate Everything Into One UTXO
Having all your bitcoin in a single UTXO is bad for privacy. Any payment you make reveals your entire holdings to the recipient.
```
You pay someone 0.01 BTC from your 1.0 BTC UTXO:
INPUT OUTPUTS
───── ───────
1.0 BTC (your entire stack) → 0.01 BTC (payment)
0.99 BTC (change)
The recipient sees: "This person has at least 1 BTC."
```
### Rule 3: Keep UTXOs from Different Sources Separate
Never mix:
- **KYC coins** (from exchanges with your ID) with **non-KYC coins**
- Coins from **different exchanges** in the same transaction
- **Mixed (CoinJoin) coins** with **unmixed coins**
Each mix creates a link that can be traced forever.
### Rule 4: Label Everything
Without labels you will forget where each UTXO came from, which are KYC vs. non-KYC, and which have been through [CoinJoin](https://selfcustodylabs.com/docs/learn/privacy/coinjoin). Use descriptive labels:
- "Coinbase withdrawal 2024-01"
- "Friend repayment (no KYC)"
- "CoinJoined via Jam, round 3"
- "Strike DCA, weekly buy"
## Coin Control: Choosing Your UTXOs
**Coin control** is the ability to select exactly which UTXOs you spend in a transaction. Without it, your wallet makes these decisions for you, often poorly.
### Without Coin Control
```
You want to send 0.05 BTC.
Wallet automatically picks:
- 0.03 BTC (from KYC exchange)
- 0.025 BTC (from non-KYC source)
─────────────────────────────────
Result: KYC and non-KYC coins are now linked.
```
### With Coin Control
```
You want to send 0.05 BTC.
You select:
- 0.05 BTC (from KYC exchange only)
─────────────────────────────────
Result: Non-KYC coins remain separate.
```
### Coin Control in Sparrow Wallet
Sparrow has the best coin control interface available.
**Viewing your UTXOs**
1. Open your wallet in Sparrow
2. Click the **UTXOs** tab
3. You see every UTXO with amount, address, label, date, and transaction ID
**Sending from specific UTXOs**
1. Go to the **UTXOs** tab
2. Check the boxes next to the UTXOs you want to spend
3. Click **Send Selected**
4. Enter destination and amount
5. Complete the transaction
**Labeling**
1. Double-click any UTXO in the UTXOs tab
2. Enter a descriptive label (source, KYC status, date, purpose)
3. Labels persist across sessions
**Freezing a UTXO** (for suspicious dust)
1. Right-click the UTXO in the UTXOs tab
2. Select **Freeze UTXO**
3. The UTXO is excluded from all transactions until unfrozen
### Coin Control in Electrum
**Enable coin view:** `View → Show Coins` adds a **Coins** tab.
**Spend from a specific UTXO:** In the Coins tab, right-click the UTXO and select **Spend From**. Only that UTXO is used in the transaction.
**Freeze a UTXO:** Right-click in the Coins tab and select **Freeze**.
### Coin Control Strategies
**Exact match:** find a UTXO close to your payment amount to minimize change:
```
Payment needed: 0.048 BTC
Available UTXOs:
- 0.1 BTC ← Too big (lots of change)
- 0.05 BTC ← Good match (0.002 BTC change)
- 0.02 BTC ← Too small (would need 3)
Best choice: 0.05 BTC UTXO.
```
**Combine same-source:** when you must use multiple UTXOs, keep them from the same source:
```
Payment needed: 0.15 BTC
- 0.1 BTC (Coinbase)
- 0.08 BTC (Coinbase)
- 0.05 BTC (Kraken)
- 0.03 BTC (Non-KYC)
Best choice: 0.1 + 0.08 from Coinbase.
Avoid: mixing Coinbase with Kraken or Non-KYC.
```
**Spend oldest first:** older UTXOs have had more time to "settle" and are less likely to correlate with recent activity.
## Consolidation Strategies
Consolidation is combining multiple UTXOs into fewer, larger ones. Done correctly, it reduces future transaction costs. Done incorrectly, it destroys privacy.
### When to Consolidate
Check current fee rates at [mempool.space](https://mempool.space):
| Fee Rate | Recommendation |
|----------|----------------|
| **1-10 sat/vB** | 🟢 Excellent time to consolidate |
| **10-30 sat/vB** | 🟡 Good, proceed if needed |
| **30-100 sat/vB** | 🟠 Wait if possible |
| **100+ sat/vB** | 🔴 Do not consolidate |
Signs you need consolidation:
- Many UTXOs under 0.01 BTC
- Your last transaction used 5+ inputs
- You're paying high fees for simple sends
- You've been dollar-cost averaging in small amounts
### The Privacy-Preserving Consolidation Rule
**Danger: Critical Rule**
**Only consolidate UTXOs from the SAME source.** Never combine KYC with non-KYC, different exchanges, or mixed with unmixed coins.
When you consolidate, you create an on-chain record that says "all these UTXOs belong to the same person":
```
GOOD CONSOLIDATION:
────────────────────────────────────────────
0.01 BTC (from Coinbase) ─┐
0.02 BTC (from Coinbase) ─┼─→ 0.06 BTC (to yourself)
0.03 BTC (from Coinbase) ─┘
✅ All from same source, already linked to same identity.
```
```
BAD CONSOLIDATION:
────────────────────────────────────────────
0.01 BTC (from Coinbase) ─┐
0.02 BTC (from Kraken) ─┼─→ 0.06 BTC (to yourself)
0.03 BTC (non-KYC trade) ─┘
❌ Coinbase, Kraken, and your non-KYC coins are now
linked together forever.
```
### Step-by-Step Consolidation
**Step 1: Sort your UTXOs by source.** Group every UTXO by where it came from.
**Step 2: Plan each consolidation separately.** One transaction per source:
```
Tx 1: Coinbase UTXOs
0.005 + 0.003 + 0.007 + 0.002 → 0.017 BTC (minus fee)
Tx 2: Kraken UTXOs
0.008 + 0.012 + 0.004 → 0.024 BTC (minus fee)
Tx 3: Non-KYC UTXOs
0.05 + 0.02 → 0.07 BTC (minus fee)
```
**Step 3: Execute during low fees.** Wait for rates below 15 sat/vB, use coin control to select same-source UTXOs, send to a fresh address in your own wallet, and set a low fee (timing isn't critical).
**Step 4: Verify and label.** Confirm the new UTXO appears, label it with its source, and check that old UTXOs are gone.
### Is Consolidation Worth It?
Cost to consolidate 10 UTXOs now at 10 sat/vB:
```
Inputs: 10 × 68 vB = 680 vB
Outputs: 1 × 34 vB = 34 vB
Overhead: ~ 10 vB
────────────────────────────
Total: ~724 vB → 7,240 sats
```
Future cost if you spend those same 10 UTXOs later at 100 sat/vB:
```
724 vB × 100 sat/vB = 72,400 sats.
```
**Savings: ~65,000 sats.** The higher the gap between today's fees and future fees, the more consolidation pays off.
### When NOT to Consolidate
- The privacy cost is too high (different sources)
- UTXOs are already large (no benefit to combining 0.5 BTC UTXOs)
- Fees are high; wait for a better window
- You're mixing soon; let [CoinJoin](https://selfcustodylabs.com/docs/learn/privacy/coinjoin) handle it
### Target UTXO Sizes
| Purpose | Target Size | Reasoning |
|---------|-------------|-----------|
| Long-term holding | 0.1 – 1.0 BTC | Efficient for large future spends |
| Regular spending | 0.01 – 0.1 BTC | Flexible without revealing full stack |
| Minimum viable | 0.01 BTC | Stays economical in most fee environments |
An ideal portfolio might be `1 × 0.5 BTC + 3 × 0.1 BTC + 5 × 0.02 BTC`.
## Practical Strategies
### Strategy 1: Consolidate During Low Fees
When fees drop to 5-15 sat/vB, combine small same-source UTXOs into larger ones. Never mix sources in the same consolidation transaction.
### Strategy 2: Plan Withdrawals for Good UTXO Sizes
When withdrawing from exchanges:
- **0.01 BTC minimum:** stays economical in most fee environments
- **0.05-0.1 BTC:** good balance of flexibility and efficiency
- **Avoid many tiny withdrawals:** they become expensive to spend later
### Strategy 3: Use Coin Control for Every Transaction
Never let your wallet auto-select UTXOs. Always choose deliberately based on source, size, and privacy implications.
### Strategy 4: Maintain a Mix of UTXO Sizes
Varied sizes give you flexibility to make payments without revealing your full balance or creating excessive change.
## Wallets with Good UTXO Management
| Wallet | Coin Control | Labeling | UTXO View | Platform |
|--------|--------------|----------|-----------|----------|
| **Sparrow** | ✅ Excellent | ✅ Yes | ✅ Detailed | Desktop |
| **Electrum** | ✅ Good | ✅ Yes | ✅ Yes | Desktop |
| **Wasabi** | ✅ Good | ✅ Yes | ✅ Yes | Desktop |
| **BlueWallet** | ✅ Yes | ✅ Yes | ✅ Yes | Mobile |
Avoid wallets that hide UTXOs behind a simple "balance" view; they make UTXO management impossible.
## Common UTXO Mistakes
**1. Automatic coin selection:** the wallet picks UTXOs randomly, potentially mixing sources. Always use coin control.
**2. Receiving many small payments:** each payment creates a UTXO. Batch incoming payments when possible, use Lightning for small amounts, and consolidate during low fees.
**3. Consolidating KYC with non-KYC:** links your private coins to your identified ones. Keep completely separate wallets for each source type.
**4. Ignoring change outputs:** change from transactions creates new UTXOs with partial privacy. Plan transactions to minimize change, or label the change appropriately.
**5. Dollar-cost averaging tiny amounts:** weekly $20 buys create many small UTXOs over time. Stack on-exchange and withdraw monthly in larger amounts, or use Lightning for small frequent purchases, then consolidate on the main chain during low fees.
## Dusting Attacks
A **dusting attack** is when someone sends tiny amounts of bitcoin to many addresses, hoping to track the recipients.
### How Dusting Works
1. Attacker sends 546 sats (the minimum relay amount) to thousands of addresses.
2. Recipients spend these tiny UTXOs alongside their other coins.
3. The attacker sees which other UTXOs now co-spent with the dust, and links them all to the same owner.
4. Combined with other analysis, the attacker may identify you.
### How to Protect Yourself
- **Freeze suspicious small UTXOs:** mark them "do not spend"
- **Never consolidate unknown dust:** it is exactly what attackers want
- **Use coin control:** always know what you are spending
- **Label incoming transactions:** identify unexpected tiny amounts
Most wallets (Sparrow, Electrum) let you freeze UTXOs to prevent accidental spending.
## UTXO Management Checklist
Before every transaction:
- [ ] Am I using coin control?
- [ ] Are all inputs from the same source category (KYC / non-KYC / mixed)?
- [ ] Is the change output going to an appropriate address?
- [ ] Have I labeled this transaction and its outputs?
- [ ] Am I avoiding unnecessary consolidation of different sources?
- [ ] Is this the most efficient UTXO selection for fees?
### Quick Reference
| Situation | Action |
|-----------|--------|
| Fees under 20 sat/vB | Consolidate same-source small UTXOs |
| Fees over 100 sat/vB | Avoid transactions, wait if possible |
| Receiving regular payments | Consider Lightning, or batch and consolidate |
| Spending from wallet | Use coin control, minimize inputs |
| Privacy is critical | Keep sources separated, consider CoinJoin |
| Unknown small deposits | Freeze them, don't spend |
## Next Steps
1. **Audit your current UTXOs:** open your wallet's UTXO view and see what you have
2. **Label everything:** identify sources for all existing UTXOs
3. **Plan consolidation:** wait for low fees and consolidate same-source UTXOs
4. **Use coin control:** make it a habit for every transaction
---
# Bitcoin CoinJoin: How It Works & Best Practices
> How Bitcoin CoinJoin works: equal outputs, anonymity sets, the 2026 tools (JoinMarket NG, Jam, Ashigaru Whirlpool, Wasabi), and post-mix rules.
Source: https://selfcustodylabs.com/docs/learn/privacy/coinjoin/
Last updated: 2026-08-23
Publisher: Self Custody Labs (https://selfcustodylabs.com)
---
CoinJoin is Bitcoin's most important on-chain privacy tool. It lets strangers combine their transactions into one, so that blockchain analysts can no longer tell who owns which coin. This page explains the concept: how it works, what it can and cannot do, which tools still work in 2026, and the post-mix rules that decide whether your privacy survives.
**Info: What You'll Learn**
**Time:** 30 minutes
**Difficulty:** Intermediate
**Prerequisites:** Understanding of [UTXOs](https://selfcustodylabs.com/docs/learn/transactions/utxos), [chain analysis](https://selfcustodylabs.com/docs/learn/privacy/chain-analysis), and [UTXO management](https://selfcustodylabs.com/docs/learn/privacy/utxo-management).
**Tip: Want to actually do it?**
This page is the theory. When you are ready to run real coinjoins, follow the hands-on guide: [CoinJoin Tutorial: JoinMarket NG and Jam](https://selfcustodylabs.com/docs/learn/privacy/coinjoin-tutorial/).
## What is CoinJoin?
Picture ten people around a table. Each drops an identical 50 euro note into a hat. The hat is shaken and everyone takes one note back out. Every person walks away with exactly what they put in, but nobody watching can say which note ended up with whom.
CoinJoin is that hat, built as a single Bitcoin transaction. Multiple users combine their inputs and receive **equal-sized outputs**, so an outside observer cannot match inputs to outputs.
```
NORMAL TRANSACTION:
────────────────────────────────
Alice (1 BTC) ─────► Bob (1 BTC)
Easy to trace: Alice paid Bob.
COINJOIN TRANSACTION:
────────────────────────────────
Alice (1 BTC) ──┐
Bob (1 BTC) ──┼──► 1 BTC ──► ??? (Alice? Bob? Carol?)
Carol (1 BTC) ──┘ 1 BTC ──► ??? (Alice? Bob? Carol?)
1 BTC ──► ??? (Alice? Bob? Carol?)
Hard to trace: each participant got 1 BTC back, but who got which?
```
Two properties make this safe:
- **Non-custodial:** nobody ever holds your coins. You sign only your own input, and only after checking the transaction pays you back.
- **Nothing to confiscate:** the privacy comes from the transaction structure itself, not from trusting a company.
## Why CoinJoin Exists
Bitcoin is **pseudonymous, not anonymous**. Every transaction is public forever, and [chain analysis](https://selfcustodylabs.com/docs/learn/privacy/chain-analysis) firms are good at attaching names to addresses. Without countermeasures:
- The exchange you bought from can follow your coins for years
- Anyone you pay can look up your balance and income
- Analytics companies sell profiles of your financial life
- Thieves can identify wealthy targets
CoinJoin attacks the tracing directly. It breaks the **common-input-ownership heuristic** (the assumption that all inputs of a transaction belong to one person) and the output linking that chain analysis depends on. After a good coinjoin, your coins have **forward privacy**: their future movements can no longer be confidently tied to their past.
## How CoinJoin Works {#how-coinjoin-works}
### Equal Outputs Make Coins Interchangeable
If outputs had different sizes, you could trace them by following the amounts. Equal outputs remove that signal.
```
Without equal outputs (traceable):
Inputs: 0.5 + 0.8 + 0.3 BTC
Outputs: 0.3 + 0.5 + 0.8 BTC
Analyst: "The 0.8 output belongs to whoever sent 0.8."
With equal outputs (not traceable):
Inputs: 0.5 + 0.8 + 0.3 BTC
Outputs: 0.5 + 0.5 + 0.5 BTC + change
Analyst: "Three identical outputs. I cannot tell them apart."
```
### The Anonymity Set
The **anonymity set** is the number of equally plausible owners each output has. Bigger is better.
```
3-person coinjoin: each output has 3 possible owners
10-person coinjoin: each output has 10 possible owners
100-person coinjoin: each output has 100 possible owners
```
After one 100-person round, an analyst picking an output has a 1% chance of naming the right owner.
### Rounds Compound
One coinjoin is good; several chained coinjoins are far better. Each extra round multiplies the possibilities an analyst must consider, and remixing with new participants each time compounds the ambiguity. This is why every serious tool supports **remixing**, and why doing a single round and stopping is a half-measure.
### Why Nobody Can Steal
A coinjoin is one transaction that everyone must sign. Each participant:
1. Contributes an input they control
2. Checks the draft transaction pays them back in full
3. Signs **only their own input**, and only if step 2 checks out
If anyone (including a coordinator) tampers with the outputs, the signatures simply never arrive and the transaction dies. The worst a malicious party can do is waste your time, never take your coins.
## A Concrete Example
Three people each hold 0.1 BTC with a history they would rather not carry around:
- **Alice** was paid by her employer, who knows her address
- **Bob** withdrew from an exchange that keeps records under his name
- **Carol** received coins whose past is publicly known
They coinjoin:
```
INPUTS OUTPUTS
────── ───────
Alice's 0.1 BTC ─┐ ──► 0.1 BTC to ???
Bob's 0.1 BTC ─┼──► ──► 0.1 BTC to ???
Carol's 0.1 BTC ─┘ ──► 0.1 BTC to ???
```
Afterward, Alice's employer sees her 0.1 BTC entered a coinjoin and then becomes one of three identical outputs. It cannot tell which one is hers, and neither can Bob's exchange or anyone watching Carol's coins. Each history now dead-ends into ambiguity, and with bigger rounds and more remixes the ambiguity grows from "one in three" to "one in hundreds".
## What CoinJoin Can and Cannot Do
### ✅ What it accomplishes
- **Breaks history:** the link between your coins' past and future is cut
- **Creates doubt:** analysts get probabilities, not proof
- **Forward privacy:** mixed coins start fresh
### ❌ What it does not do
- **Hide that you coinjoined:** the transaction is recognizable as a coinjoin on-chain, and the funding transaction into it is visible to whoever knew your coins
- **Make you anonymous:** amounts, timing, and your own later behavior still leak information
- **Survive bad habits:** one careless transaction afterward can undo everything (see the rules below)
- **Work at arbitrary size:** equal outputs constrain the amounts you can mix at once
## CoinJoin Tools in 2026 {#coinjoin-services}
The coinjoin landscape was reshaped by law enforcement and burnout between 2024 and 2026. Older guides recommend setups that no longer exist, so here is the honest current state.
**Note: The 2024-2026 shakeout**
- **April 2024:** US federal authorities seize Samourai Wallet's infrastructure; the original Whirlpool coordinator goes dark. The founders plead guilty and, in November 2025, are sentenced to five and four years in prison.
- **June 2024:** zkSNACKs shuts down the original Wasabi coordinator; Sparrow Wallet removes its Whirlpool integration.
- **June 2025:** Ashigaru, a community fork of Samourai, launches a new Whirlpool coordinator, reachable only over Tor.
- **April 2026:** the original JoinMarket repository is archived after a long quiet period; development continues in JoinMarket NG.
### JoinMarket NG + Jam (our recommendation)
[JoinMarket NG](https://github.com/joinmarket-ng/joinmarket-ng) is the actively developed implementation of the JoinMarket protocol, wire-compatible with the original client whose repository was archived in April 2026. There is **no coordinator at all**: it is a peer-to-peer market with two roles.
- **Takers** pay a small fee to mix on demand, whenever they want, at any amount
- **Makers** provide liquidity and earn those fees; their coins get mixed as a side effect
Because no company sits in the middle, there is nothing to seize and nobody to subpoena; the Samourai story cannot repeat here. The historical downside was usability: JoinMarket lived on the command line. **[Jam](https://github.com/joinmarket-webui/jam)** fixed that: it is a web interface for JoinMarket NG that turns wallet creation, single coinjoins, scheduled mixing rounds, and maker mode into a point-and-click experience. It ships as an app on most node-in-a-box platforms.
- ✅ Decentralized: no coordinator to trust, seize, or fee-gouge
- ✅ Flexible amounts, mix immediately as a taker
- ✅ Can earn fees as a maker instead of paying them
- ✅ Cheap: market-set maker fees, typically fractions of a percent
- ❌ Needs your own Bitcoin node and a little setup
- ❌ Smaller per-round anonymity sets (typically 4-20 participants), so plan multiple rounds
**Best for:** self-custody users who run their own node, which, if you are reading this site, likely means you. The [practical tutorial](https://selfcustodylabs.com/docs/learn/privacy/coinjoin-tutorial/) walks through the full setup.
### Whirlpool: Gone, Then Back (Ashigaru)
Short answer to "does Whirlpool still work?": **the original is dead; a revival exists under new management.**
The original Whirlpool depended on Samourai Wallet's central coordinator. When the servers were seized in April 2024 every Whirlpool client stopped mixing the same day, which is the textbook demonstration of coordinator risk. Sparrow Wallet removed its integration shortly after; old guides pointing at "Whirlpool via Sparrow" are obsolete.
In June 2025, [Ashigaru](https://ashigaru.rs/), an open-source fork of Samourai run by anonymous maintainers, launched a **new, independent Whirlpool coordinator**:
- Tor-only, no clearnet access, using the Zerolink fixed-pool model
- Two pools: **0.025 BTC** and **0.25 BTC**
- Flat **5% entry fee** per pool entry (0.00125 and 0.0125 BTC respectively), then free remixing indefinitely
- Requires Ashigaru's own software (Ashigaru Terminal on desktop, Ashigaru Mobile); it does not work with Sparrow or the old Samourai apps
- ✅ Zerolink pools with free remixes, a proven privacy design
- ✅ Strict Tor-only posture
- ❌ Still a centralized coordinator: the same structural weakness that killed the original
- ❌ 5% entry fee is steep (JoinMarket costs a fraction of a percent)
- ❌ Fixed pool sizes only
**Best for:** users who specifically want the Zerolink model and accept the fee and the coordinator risk.
### Wasabi Wallet
[Wasabi](https://wasabiwallet.io/) survived its own coordinator shutdown. zkSNACKs (the company) exited in June 2024, but the wallet is community-maintained and, since version 2.2, ships with **no built-in coordinator fee**: you choose an independent, third-party coordinator, several of which coordinate for free, so costs can be just mining fees.
- ✅ Easiest experience: install, pick a coordinator, enable coinjoin
- ✅ Large rounds (often 100+ participants) and variable amounts that reduce toxic change
- ✅ Free or near-free depending on coordinator
- ❌ You must trust your chosen coordinator to be honest about round composition
- ❌ Coordinators are centralized parties and can disappear or be pressured, as history shows
**Best for:** desktop users who want set-and-forget mixing and accept picking a coordinator.
### Comparison
| Aspect | JoinMarket NG + Jam | Ashigaru Whirlpool | Wasabi |
|--------|--------------------|--------------------|--------|
| Coordinator | None (peer-to-peer) | Centralized (Ashigaru) | Centralized (third-party) |
| Amounts | Flexible | Fixed pools (0.025 / 0.25 BTC) | Variable |
| Cost | Maker fees, well under 1% | 5% pool entry, free remix | Often free + mining fees |
| Anonymity set per round | 4-20 | Pool-based, grows with remixes | 100+ |
| Own node | Required | Recommended | Recommended |
| Can earn fees | Yes (maker) | No | No |
**Our pick is JoinMarket NG with Jam.** It is the only option with no central point of failure, it aligns with everything else this site teaches (your node, your keys, your rules), and 2024 proved that coordinator-based services can vanish overnight. Wasabi is a reasonable simpler alternative; Ashigaru Whirlpool is for committed Zerolink fans.
## Use Your Own Node
Whichever tool you pick, connect it to **your own Bitcoin node**. If your wallet talks to someone else's server, that server learns all your addresses, including the freshly mixed ones, and your coinjoin becomes theater. JoinMarket NG makes this mandatory; treat it as mandatory everywhere. See the [Bitcoin Node guide](https://selfcustodylabs.com/docs/bitcoin-node/).
## Best Practices After CoinJoin {#best-practices-after-coinjoin}
Mixing is half the work. What you do **afterward** decides whether the privacy holds.
**Danger: Critical rules**
1. Never combine mixed coins with KYC or unmixed coins
2. Never consolidate multiple mixed UTXOs into one address
3. Always use your own node
4. Use coin control for every post-mix transaction
### Rule 1: Never Merge Mixed and Unmixed Coins
The most common way people destroy their own coinjoin:
```
BAD TRANSACTION:
─────────────────────────────────────────────────
INPUTS OUTPUT
────── ──────
0.1 BTC (mixed, private) ─┬─→ 0.25 BTC (payment)
0.15 BTC (KYC, not mixed) ─┘
Result: the mixed coin is now linked to your identity again.
```
The KYC coin carries your name. Spending both in one transaction signs your name onto the mixed coin too, and the mixing fee bought you nothing. Keep mixed and unmixed funds in **separate wallets** so your software cannot combine them by accident.
### Rule 2: Don't Consolidate Mixed Coins
```
BAD TRANSACTION:
─────────────────────────────────────────────────
INPUTS OUTPUT
────── ──────
0.1 BTC (mixed, round 1) ─┬─→ 0.3 BTC (your address)
0.1 BTC (mixed, round 2) ─┤
0.1 BTC (mixed, round 3) ─┘
Observer: "these three mixed coins belong to one person."
```
Before this transaction each output could have belonged to anyone in its round. After it, all three provably share an owner, which collapses their anonymity sets at once. Spend mixed UTXOs individually. If a payment truly requires combining, understand you are spending privacy to make it.
### Rule 3: Handle Change Carefully
Spending a mixed coin usually produces change, and that change is linked to the payment you just made. Treat it as semi-exposed:
1. **Remix it** through another coinjoin round, or
2. **Spend it somewhere non-private**, since it is already exposed, or
3. **Combine it only with other change**, never with fresh mixed coins
### Rule 4: Use Coin Control
Without [coin control](https://selfcustodylabs.com/docs/learn/privacy/utxo-management), your wallet picks UTXOs automatically and will eventually pair a mixed coin with a labeled one. Choose inputs by hand for every transaction that touches mixed funds.
### Rule 5: Let Coins Age
If you mix at 14:00 and spend at 14:15, timing alone links the two events. Let mixed outputs sit for days or weeks, and avoid being the first or last participant to move funds after a round.
### Rule 6: Consider Lightning
Opening a [Lightning](https://lightning.network/) channel with a mixed UTXO adds another layer: the channel open is visible, the payments inside it are not, and the eventual channel close produces coins with yet more distance from their origin.
## Checklist: Before Spending Mixed Coins
- [ ] Am I connected to my own node?
- [ ] Did I hand-pick the UTXOs for this transaction?
- [ ] Are ALL inputs from my mixed pool, and no KYC coins?
- [ ] Am I spending one mixed UTXO, not consolidating several?
- [ ] Has enough time passed since the mix?
## Common Mistakes Summary
| Mistake | Why it's bad | How to avoid |
|---------|--------------|--------------|
| Merging mixed + unmixed | Re-links coins to your identity | Separate wallets |
| Consolidating mixed UTXOs | Proves common ownership | Spend individually |
| Using a public server | Operator learns your addresses | Run your own node |
| Auto coin selection | Wallet pairs the wrong UTXOs | Coin control |
| Spending immediately | Timing correlation | Be patient |
| Ignoring change | Change is semi-exposed | Remix or quarantine it |
## Is CoinJoin Legal?
In most jurisdictions, using CoinJoin is legal. It is a privacy technique, comparable to keeping your bank statements out of public view.
The 2024-2025 Samourai prosecutions targeted the **operators**, not users: the founders ran a centralized coordinator business, collected fees on it, and were convicted of operating an unlicensed money-transmitting business. No CoinJoin *user* was charged. Non-custodial coinjoins, where nobody else ever controls your coins, are a different activity from running a mixing service, and decentralized designs like JoinMarket have no operator in the first place.
Practical realities to keep in mind:
- **Some exchanges flag coinjoin history** and may freeze deposits or ask questions; avoid sending freshly mixed coins straight to a KYC exchange
- **Rules differ by country and change**; know your local situation
- None of this is legal advice
## Do You Need CoinJoin?
CoinJoin is most valuable if you:
- Hold KYC coins and want forward privacy
- Plan to spend Bitcoin without broadcasting your net worth to every counterparty
- Are a journalist, activist, or otherwise a target
- Hold enough that being identifiable is a physical-security risk
It may be unnecessary if your coins were acquired without identity attached, or you only ever move small amounts. Privacy is a spectrum; match the effort to your [threat model](https://selfcustodylabs.com/docs/learn/fundamentals/threat-models).
## Summary
- CoinJoin makes equal outputs interchangeable, cutting the link between your coins' past and future.
- It is non-custodial: nobody can steal during a round.
- In 2026 the working options are **JoinMarket NG + Jam** (decentralized, our pick), **Ashigaru Whirlpool** (revived, centralized, 5% entry), and **Wasabi** (third-party coordinators).
- The original Samourai Whirlpool is gone, and its shutdown is the argument for decentralized mixing.
- Privacy survives only if you follow the post-mix rules: separate wallets, no consolidation, coin control, patience, your own node.
Ready for practice? Continue with the [CoinJoin Tutorial: JoinMarket NG and Jam](https://selfcustodylabs.com/docs/learn/privacy/coinjoin-tutorial/).
---
# CoinJoin Tutorial: JoinMarket NG and Jam Step by Step
> Step-by-step Bitcoin coinjoin with JoinMarket NG and Jam: your own node, a dedicated hot wallet, funding, mixing rounds, and sweeping out cleanly.
Source: https://selfcustodylabs.com/docs/learn/privacy/coinjoin-tutorial/
Last updated: 2026-08-22
Publisher: Self Custody Labs (https://selfcustodylabs.com)
---
**Info: What You'll Do**
**Time:** 1-2 hours of setup, then mixing runs on its own
**Difficulty:** Advanced
**Cost:** Maker fees (a small fraction of a percent) plus mining fees
**Prerequisites:** The [CoinJoin theory page](https://selfcustodylabs.com/docs/learn/privacy/coinjoin/) and a [Bitcoin node](https://selfcustodylabs.com/docs/bitcoin-node/), or the willingness to set one up in Step 1.
The [theory page](https://selfcustodylabs.com/docs/learn/privacy/coinjoin/) explains why CoinJoin works. This page is the practice: by the end you will have run real coinjoins through your own node, with no coordinator and no third-party server involved.
The stack has four pieces, and you will set them up in this order:
1. **Your own Bitcoin node**: the backend everything else talks to
2. **A dedicated hot wallet with a passphrase**: a temporary wallet that exists only to run coinjoin rounds
3. **[JoinMarket NG](https://github.com/joinmarket-ng/joinmarket-ng)**: the engine that finds counterparties and builds the coinjoins
4. **[Jam](https://github.com/joinmarket-webui/jam)**: the web interface that makes the engine pleasant to use
## What You're Building
```
┌─────────────────┐ ┌──────────────────┐ ┌─────────────────┐
│ Bitcoin Core │◄────│ JoinMarket NG │◄────│ Jam │
│ (your node) │ │ (daemon + Tor) │ │ (your browser) │
└─────────────────┘ └──────────────────┘ └─────────────────┘
verifies the chain talks to makers, buttons instead
and your balance signs your coinjoins of command lines
```
Jam is the control panel, JoinMarket NG does the mixing, and your node keeps everything private and verified. Counterparty traffic runs over Tor.
## Before You Start: This Is a Hot Wallet
**Danger: Understand what "hot" means here**
Coinjoining requires keys that are online while rounds run. The mixing wallet you create below is a **hot wallet**: less secure than your hardware wallet or cold storage by definition. Handle it accordingly:
- Treat it as a **temporary working wallet**, not savings. Coins go in, get mixed, and get swept out.
- Fund it with **only the amount you are actively mixing**. Start small: an amount you could tolerate losing while you learn.
- It gets its **own brand-new seed**. Never import your cold storage or hardware wallet seed into it.
This separation is not just damage control; it is also what makes the privacy rules easy to follow. With mixing funds in their own wallet, your KYC coins and your mixed coins physically cannot end up in the same transaction by accident.
## Step 1: Run Your Own Bitcoin Node
JoinMarket NG needs a backend to check balances and broadcast transactions, and for privacy that backend must be **your** node. If your setup asked someone else's server, that server would see every address you are trying to unlink, before, during, and after the mix.
Two ways to get there:
- **Node-in-a-box** (easiest): platforms like Umbrel, Start9, RaspiBlitz, Citadel, and MyNode run Bitcoin Core for you and offer Jam as an installable app. If this is you, Step 2 takes five minutes.
- **Manual node**: Bitcoin Core on your own hardware. Follow the [Bitcoin Node guide](https://selfcustodylabs.com/docs/bitcoin-node/) first, then come back.
Either way, wait until the node is fully synced before mixing.
## Step 2: Install JoinMarket NG and Jam
### The Easy Path: Node-in-a-Box App Store
If you run Umbrel, Start9, RaspiBlitz, Citadel, or MyNode, open its app store and **install Jam**. The app bundles the JoinMarket backend and wires it to your node automatically. When Jam opens in your browser, skip to Step 3.
### The Manual Path: Your Own Server
On your own Linux machine, install JoinMarket NG with its installer:
```bash
curl -sSL https://raw.githubusercontent.com/joinmarket-ng/joinmarket-ng/main/install.sh | bash
source ~/.joinmarket-ng/activate.sh
```
**Tip: Verify before you run**
Piping a script from the internet into your shell deserves a look first. Download `install.sh`, read it, then run it; being able to do that is the point of open source.
Then point it at your node. The configuration lives in `~/.joinmarket-ng/config.toml`; set the backend to Bitcoin Core and fill in your node's RPC credentials:
```toml
backend_type = "descriptor_wallet" # use Bitcoin Core as the backend
# plus your Bitcoin Core RPC host, port, user, and password
```
Start the wallet daemon (`jmwalletd`), which exposes the API that Jam connects to. Finally install Jam itself and point it at the daemon; the [Jam installation docs](https://jamdocs.org/software/installation/) cover the supported setups, including Docker.
**Note: Commands drift**
Installer flags, config options, and daemon names evolve faster than guide pages. If anything here disagrees with the [JoinMarket NG documentation](https://joinmarket-ng.github.io/joinmarket-ng/) or the [Jam docs](https://jamdocs.org/), trust the official docs.
## Step 3: Create the Mixing Wallet
In Jam, create a **new wallet**. This is the temporary hot wallet from the warning above.
1. **Give it an obvious name** like `mixing`, so it can never be confused with anything long-term.
2. **Set a strong password.** Jam encrypts the wallet with it; anyone with access to the machine and this password can spend the funds.
3. **Write down the seed phrase.** Yes, even for a temporary wallet: coins may sit here for days while rounds run, and a crashed disk should not cost you them. If Jam offers an additional passphrase on top of the seed (a mnemonic extension), you can add one; write it down too, because the seed alone will not restore the wallet without it.
4. **Never put your cold storage seed here.** The mixing wallet gets its own fresh seed, full stop.
When the wallet opens, Jam shows a receive address. That is where your coins to be mixed will go.
## Step 4: Fund the Wallet
Send the amount you want to mix from wherever it currently lives (exchange withdrawal, your existing wallet) to the mixing wallet's receive address.
- **Start small** for your first session: something in the 0.001 to 0.01 BTC range is enough to watch full rounds complete without meaningful risk.
- **The funding transaction is visible.** Whoever knew your coins before (the exchange, anyone watching that wallet) can see they moved into a wallet that then coinjoins. That is expected: CoinJoin gives your coins a private *future*, it does not hide their past.
- Wait for a confirmation before mixing.
## Step 5: Mix
Jam gives you two ways to coinjoin, visible as soon as the wallet is funded.
**A single collaborative transaction.** In the send screen, toggle the collaborative option, pick the number of counterparties, and send, either to one of your own fresh addresses or straight to a payment destination. You pay each maker its advertised fee plus mining fees; even with many counterparties the total is normally a small fraction of one percent. This is the taker role: your mix happens on your schedule, usually within minutes.
**The scheduler.** Jam's flagship feature runs a full mixing session for you: it splits your balance and executes a sequence of collaborative transactions over several hours or days with randomized timing, ending by sweeping the wallet. This is the closest thing to "press play, come back to mixed coins". Use it when you are mixing a meaningful amount rather than experimenting.
A few things while rounds run:
- **Keep the machine on.** Rounds cannot complete with the daemon offline; node-in-a-box setups shine here because they are always on.
- **Check the orderbook** (Jam shows it) if nothing seems to happen; it lists the makers currently offering liquidity and their fees.
- **Remember rounds compound.** One join gives you one round's anonymity set; the scheduler's chain of joins is what builds real privacy, as covered in the [theory page](https://selfcustodylabs.com/docs/learn/privacy/coinjoin/#how-coinjoin-works).
## Step 6: Sweep Out and Wind Down
The mixing wallet is a waypoint, not a destination. When mixing is done:
1. **Send mixed coins to fresh addresses** of your long-term wallet (your hardware wallet or cold storage), one UTXO per address, never to an address that has been used before. If you used the scheduler, you can give it destination addresses so the final sweep lands there directly.
2. **Follow the post-mix rules** from the theory page: [never merge with KYC coins, never consolidate, coin control always](https://selfcustodylabs.com/docs/learn/privacy/coinjoin/#best-practices-after-coinjoin). The mixing was the cheap part; the discipline afterward is the actual product.
3. **Empty means done.** Once swept, the wallet can sit empty until your next batch, or be retired entirely. Keep the seed backup until the balance is zero and confirmed elsewhere.
## Optional: Stay On as a Maker
So far you acted as a taker: you paid small fees to mix on demand. Jam's earn tab lets you switch sides and run as a **maker**: your wallet offers liquidity, other people's coinjoins include your coins, and you collect fees while your coins get remixed over and over for free.
- Your keys stay online the whole time; this is a long-running hot wallet by design, so size the balance accordingly.
- Earnings are modest; think of them as offsetting your costs while your privacy keeps compounding.
- Serious makers can lock a **fidelity bond** (timelocked coins) to rank higher in taker selections; read the [JoinMarket NG docs](https://joinmarket-ng.github.io/joinmarket-ng/) before locking anything.
## Troubleshooting
- **Jam cannot reach the backend:** the wallet daemon is not running, or (manual path) Jam is pointed at the wrong host or port.
- **Backend cannot reach the node:** RPC credentials in `config.toml` do not match your Bitcoin Core settings, or the node is still syncing.
- **No collaborative transaction starts:** check the orderbook. If you see no offers, your Tor connection is likely down; if you see offers but joins fail, retry, since individual makers do drop out mid-round.
- **Everything is slow:** normal. Tor adds latency and the scheduler adds deliberate random delays. Slow is part of the privacy.
## Safety Checklist
- [ ] The mixing wallet has its own fresh seed, written down
- [ ] Strong wallet password set
- [ ] Funded with a small, tolerable amount for the first session
- [ ] Node fully synced, daemon running through your own node only
- [ ] Mixed coins swept to fresh cold storage addresses when done
- [ ] Post-mix rules followed: no merging, no consolidation, coin control
## Where to Go Next
You now have a working, coordinator-free privacy pipeline: node, JoinMarket NG, Jam, and a disciplined wallet routine around it. Keep the [post-mix rules](https://selfcustodylabs.com/docs/learn/privacy/coinjoin/#best-practices-after-coinjoin) close, manage the results with [UTXO management](https://selfcustodylabs.com/docs/learn/privacy/utxo-management/), and consider [PayJoin](https://selfcustodylabs.com/docs/learn/privacy/payjoin/) for the payments themselves.
---
# Bitcoin PayJoin (BIP78): Stealth Privacy for Payments
> Learn how PayJoin (BIP78) enhances Bitcoin privacy by breaking the common-input-ownership assumption. Set up PayJoin with Sparrow Wallet and BTCPay Server.
Source: https://selfcustodylabs.com/docs/learn/privacy/payjoin/
Last updated: 2026-08-22
Publisher: Self Custody Labs (https://selfcustodylabs.com)
---
**Info: What You'll Learn**
**Time:** 30 minutes
**Difficulty:** Intermediate
**Cost:** Free (just transaction fees)
**Prerequisites:** Understanding of [UTXOs](https://selfcustodylabs.com/docs/learn/transactions/utxos), a compatible wallet.
PayJoin (also called P2EP: Pay-to-EndPoint, specified as BIP78) is a privacy technique where **both the sender and the receiver contribute inputs** to a transaction.
In a normal Bitcoin transaction the sender provides the inputs, the receiver gets an output, and the sender gets change. PayJoin adds a twist: the receiver also adds one of their own inputs. The on-chain result looks like a normal transaction, but the assumptions that blockchain analysts make about it are wrong.
```
NORMAL TRANSACTION:
─────────────────────────────────────────────────────────
Alice (sender) → Bob (receiver)
┌─────────────┐ ┌─────────────┐
│ Input: 1 BTC│ ───────► │ Output: 0.7 │ Bob
└─────────────┘ │ Output: 0.3 │ Alice (change)
└─────────────┘
Analyst assumes: All inputs belong to sender (Alice).
PAYJOIN TRANSACTION:
─────────────────────────────────────────────────────────
Alice (sender) + Bob (receiver) → Both
┌─────────────┐ ┌─────────────┐
│ Input: 1 BTC│ (Alice) │ Output: 1.2 │ Bob
│ Input: 0.5 │ (Bob) ───────► │ Output: 0.3 │ Alice (change)
└─────────────┘ └─────────────┘
Analyst assumes: All inputs belong to sender. Wrong.
The common-input-ownership heuristic fails.
```
## Why PayJoin Matters
### The Common-Input-Ownership Heuristic
Blockchain analysts rely on a key assumption:
> All inputs in a transaction belong to the same entity.
This assumption is correct most of the time, which is exactly why it is so useful for surveillance. Chain analysis companies trace funds by assuming inputs are owned together.
**PayJoin breaks this assumption.** When PayJoin transactions exist on-chain, analysts can no longer be certain that inputs share ownership, even in transactions that aren't PayJoins. That uncertainty ripples across the entire transaction graph.
### Privacy for Everyone
Even if you never use PayJoin yourself, widespread PayJoin adoption helps you:
- Adds uncertainty to every chain-analysis inference
- Makes the common-input-ownership assumption unreliable
- Benefits the entire network, not just participants
## How PayJoin Works
```
PAYJOIN FLOW:
─────────────────────────────────────────────────────────
1. Alice wants to pay Bob 0.7 BTC.
2. Alice creates a normal transaction:
- Input: 1 BTC (Alice's UTXO)
- Output: 0.7 BTC to Bob
- Output: 0.3 BTC change to Alice
3. Instead of broadcasting, Alice sends this PSBT
to Bob's PayJoin endpoint.
4. Bob adds his own input:
- Adds input: 0.5 BTC (Bob's UTXO)
- Adjusts his output: 0.7 + 0.5 = 1.2 BTC
5. Bob sends the modified transaction back to Alice.
6. Alice verifies the payment still goes where she intended
and signs her inputs.
7. The final transaction is broadcast:
- Inputs: 1 BTC (Alice) + 0.5 BTC (Bob)
- Outputs: 1.2 BTC (Bob) + 0.3 BTC (Alice)
From outside it looks like Alice spent 1.5 BTC total.
No one knows Bob contributed an input.
```
### What an Analyst Sees
| What Analyst Assumes | Reality |
|----------------------|---------|
| Sender owns 1.5 BTC of inputs | Sender owns 1 BTC, receiver owns 0.5 BTC |
| Payment amount is ~1.2 BTC | Payment amount is 0.7 BTC |
| Change is 0.3 BTC | Correct, by coincidence |
The analyst's model of the transaction is completely wrong.
## PayJoin vs. CoinJoin
Both are privacy techniques, but they work differently:
| Feature | PayJoin | CoinJoin |
|---------|---------|----------|
| **Participants** | 2 (sender + receiver) | Many (5 – 100+) |
| **Coordination** | Direct, during payment | Requires coordinator or protocol |
| **Visibility** | Looks like normal transaction | Clearly identifiable on-chain |
| **Use case** | Privacy during payments | Breaking transaction history |
| **Complexity** | Simple | More complex |
| **Fees** | Normal transaction fee | Coordinator fees + larger transaction |
**PayJoin is stealth privacy.** It doesn't look like a privacy transaction. **CoinJoin is explicit privacy.** Anyone can see it is a mixing transaction (though they can't trace through it). The two are complementary.
## Wallets Supporting PayJoin
### As Sender
| Wallet | Platform | PayJoin Support |
|--------|----------|-----------------|
| **Sparrow** | Desktop | ✅ Full support |
| **BTCPay Server** | Web | ✅ Full support |
| **Wasabi** | Desktop | ✅ Full support |
| **BlueWallet** | Mobile | ✅ Full support |
| **JoinMarket** | Desktop | ✅ Full support |
### As Receiver
To receive PayJoin you need a wallet with PayJoin receiver support **and** a way to expose a PayJoin endpoint (URL). **BTCPay Server** is the easiest option for merchants; it handles PayJoin automatically for customers whose wallets support it.
## Using PayJoin with Sparrow Wallet
### Sending a PayJoin Payment
1. **Recipient provides a PayJoin URL.** It looks like `https://btcpay.example.com/BTC/pj` and is usually encoded inside a BIP21 URI.
2. **Create the transaction in Sparrow.** Go to the **Send** tab and paste the BIP21 URI. Sparrow detects the PayJoin capability automatically.
3. **Review and send.** Sparrow handles the PayJoin negotiation with the recipient endpoint. The transaction details show it is a PayJoin. Confirm and broadcast.
### Receiving PayJoin Payments
For individuals, receiving PayJoin typically requires running BTCPay Server or similar infrastructure. For merchants, BTCPay Server makes it automatic: just enable PayJoin in settings.
## Using PayJoin with BTCPay Server
If you run BTCPay Server for your business or personal use:
1. Go to **Store Settings → Checkout**
2. Find the **PayJoin (BIP78)** option
3. Enable it
4. Configure your hot wallet (PayJoin requires a hot wallet to contribute inputs)
When a customer pays an invoice:
1. They scan or copy the payment request.
2. If their wallet supports PayJoin, it negotiates automatically.
3. If it doesn't, they pay normally: no error, no friction.
No action is required from the customer. It just works.
## PayJoin Best Practices
### Do ✅
- **Use PayJoin whenever available:** every PayJoin helps network privacy
- **Run BTCPay Server if you accept payments:** easy PayJoin for your customers
- **Combine with other privacy practices:** PayJoin + coin control + own node
### Don't ❌
- **Don't expect anonymity from PayJoin alone:** it breaks one heuristic, not all
- **Don't use with KYC UTXOs expecting full privacy:** your exchange still knows your inputs
- **Don't rely on the receiver's privacy:** a receiver using bad infrastructure can leak information you can't control
## Limitations of PayJoin
1. **Doesn't hide amounts:** transaction amounts are still visible on-chain.
2. **Doesn't break all heuristics:** only the common-input-ownership one.
3. **Doesn't work retroactively:** only helps new transactions.
4. **Requires receiver support:** both parties need compatible wallets.
### When to Use CoinJoin Instead
Use [CoinJoin](https://selfcustodylabs.com/docs/learn/privacy/coinjoin) when you need to break links to past transaction history, get a stronger anonymity set, or gain privacy without the receiver's cooperation.
Use PayJoin when you are making a payment to a supporting merchant, you want stealth privacy that doesn't look like a privacy transaction, or you want to help network privacy broadly.
## The Bigger Picture
PayJoin is one tool in the privacy toolbox:
| Tool | What It Does |
|------|--------------|
| **Own node** | Hides your addresses from third parties |
| **Coin control** | Prevents linking your UTXOs together |
| **PayJoin** | Breaks the common-input-ownership heuristic |
| **CoinJoin** | Breaks transaction graph traceability |
| **Tor** | Hides your IP when transacting |
Maximum privacy uses multiple layers together.
## Summary
- PayJoin is a **stealth privacy technique** where sender and receiver both contribute inputs.
- It **breaks the common-input-ownership assumption** that chain analysis relies on.
- PayJoin transactions **look like normal payments**; they aren't identifiable as privacy transactions.
- **Widespread adoption benefits everyone**, even non-users, by adding uncertainty to analysis.
- Use PayJoin whenever you pay a merchant or service that supports it.
## Resources
- [BIP78 Specification](https://github.com/bitcoin/bips/blob/master/bip-0078.mediawiki): the technical standard
- [BTCPay Server PayJoin Docs](https://docs.btcpayserver.org/Payjoin/): setup guide for merchants
- [Sparrow Wallet](https://sparrowwallet.com): desktop wallet with PayJoin support
---
# Bitcoin Nodes: What They Are and Why They Matter
> What Bitcoin nodes do, why running your own matters for self-custody, and how a personal node verifies every transaction without trusting third parties.
Source: https://selfcustodylabs.com/docs/learn/nodes/
Last updated: 2026-08-02
Publisher: Self Custody Labs (https://selfcustodylabs.com)
---
A Bitcoin node is software that downloads the blockchain, validates every transaction and block against consensus rules, and serves data to wallets. When you run your own node, you stop trusting somebody else's view of the chain. You verify it yourself.
For self-custody, this matters more than most people realize. Without your own node, your wallet asks a stranger's server about your balance and transactions, leaking your addresses and trusting their answers.
## In this section
- **[What Is a Bitcoin Node](https://selfcustodylabs.com/docs/learn/nodes/what-is-node)**: the technical role nodes play in the network
- **[Why Run Your Own Node](https://selfcustodylabs.com/docs/learn/nodes/why-run-node)**: privacy, sovereignty, and the verification you gain
Ready to actually run one? See the [Bitcoin Node setup guide](https://selfcustodylabs.com/docs/bitcoin-node/) for a full walkthrough.
---
# What is a Bitcoin Node
> Understand what a Bitcoin node does, how it differs from a wallet, and its role in the network. Essential knowledge before running your own node.
Source: https://selfcustodylabs.com/docs/learn/nodes/what-is-node/
Last updated: 2026-08-02
Publisher: Self Custody Labs (https://selfcustodylabs.com)
---
Every time you check your wallet balance, someone is answering your question. Every time you broadcast a transaction, someone is relaying it to the network. That "someone" is a Bitcoin node, and unless you're running your own, you're trusting a stranger with intimate details of your financial life.
A Bitcoin node is software that participates in the Bitcoin network. It maintains a complete copy of the blockchain, verifies every transaction against Bitcoin's rules, and helps keep the entire system running. Nodes are the backbone of Bitcoin's trustless architecture: they're what make "don't trust, verify" possible.
Understanding nodes is important because **your wallet depends on a node to function**, whether you realize it or not. The question isn't whether you'll use a node; it's whether you'll use your own or someone else's.
## What a Node Does
A Bitcoin node performs several critical functions, each one essential to the network's operation and your security.
### 1. Stores the Blockchain
A full node downloads and stores the complete Bitcoin blockchain: every transaction since Satoshi mined the genesis block in January 2009. This currently requires around 600+ GB of storage, and it grows by roughly 50-100 GB per year.
```
YOUR NODE'S COPY:
──────────────────────────────────────────────
Block 1 → Block 2 → Block 3 → ... → Block 850,000+
(and counting)
Every transaction ever made, stored locally.
```
This might seem excessive, but there's a reason for it. Having the complete history means your node can independently verify any claim about any transaction. No trust required.
### 2. Verifies Everything
Here's where nodes become powerful: your node doesn't believe anything it's told. When it receives a new block or transaction, it independently verifies that every rule is followed. Did this transaction actually have valid signatures? Does the sender actually have the coins they're trying to spend? Does this block follow the consensus rules?
If a block breaks any rule (even by a single satoshi), your node rejects it. It doesn't matter if every other node in the world accepts it. Your node enforces the rules you agreed to run.
### 3. Connects to the Network
Nodes communicate with each other in a peer-to-peer mesh, sharing new transactions as they're created, propagating new blocks as they're mined, and helping new nodes synchronize with the current state. When you broadcast a transaction, your node sends it to its peers, who send it to their peers, until it reaches miners who can include it in a block.
### 4. Maintains the Mempool
Before transactions are confirmed in blocks, they wait in the **mempool**, a holding area of pending transactions. Each node maintains its own mempool, deciding which unconfirmed transactions to keep based on factors like fee rates and validity.
### 5. Responds to Wallet Queries
This is where it gets personal. When your wallet needs to check your balance, see if a payment arrived, or broadcast a transaction you've signed, it asks a node. That node sees exactly what your wallet is asking about: your addresses, your transactions, your financial activity.
## Nodes vs. Wallets
This distinction is critical:
| Node | Wallet |
|------|--------|
| Stores full blockchain | Stores only your keys |
| Verifies all transactions | Creates your transactions |
| Serves data to wallets | Needs a node to function |
| No private keys | Contains private keys |
| Anyone can run one | Personal to you |
**Your wallet needs a node to work.** The question is: whose node?
```
┌─────────────┐
│ Wallet │
│ (your keys) │
└──────┬──────┘
│
│ "What's my balance?"
│ "Did I receive payment?"
│ "Broadcast this transaction"
▼
┌─────────────┐
│ Node │
│ (blockchain)│
└─────────────┘
```
## Why the Node Matters
Here's the privacy problem most Bitcoin users don't think about: when your wallet queries a node, it necessarily reveals information. Your addresses, your transaction history, your current balance, when you're online: all of this flows to whatever node your wallet connects to.
If you use **someone else's node**, they learn all of this. And "someone else" could be anyone: a privacy-respecting node operator, a chain analysis company, or something in between.
### Random Public Nodes
Many wallets default to connecting to random public nodes. From the user's perspective, this just works: you open your wallet, see your balance, send transactions. Behind the scenes, however, your wallet is having a very revealing conversation:
```
YOUR WALLET:
"What's the balance of address bc1q...abc?"
"What's the balance of address bc1q...xyz?"
"What's the balance of address bc1q...123?"
│
▼
RANDOM NODE (possibly surveillance company):
"Interesting... these addresses all belong
to the same person. Let me log this."
```
The node operator now knows that these addresses belong to the same wallet. Combined with timing information and transaction patterns, this builds a comprehensive profile.
### Your Own Node
When you run your own node, this privacy leak disappears. Your wallet queries your node, and those queries never leave your control:
```
YOUR WALLET ──→ YOUR NODE
│
└─ Queries stay between you and your own infrastructure
```
This is why running a node isn't just for technical enthusiasts; it's a fundamental privacy measure.
## Types of Nodes
Not all nodes are the same. Different configurations offer different tradeoffs between storage requirements, verification depth, and functionality.
### Full Node
The gold standard. A full node downloads and verifies the complete blockchain: every block, every transaction, from the beginning of time to right now.
This is what most people mean by "running a node." It provides maximum verification (you're trusting no one) and best privacy (queries stay local). The cost is storage (currently around 600 GB and growing) plus an initial sync that can take hours to days depending on your hardware.
### Pruned Node
A pruned node is a full node that deletes old block data after verification. It still validates everything, but it doesn't keep the historical data around afterward.
- **Pros:** Less storage needed (~10 GB minimum)
- **Cons:** Can't serve historical data to other nodes
### Light Client / SPV
Light clients take a different approach. Instead of downloading and verifying everything, they only download block headers, tiny summaries that let them check whether a transaction is included in a block. For the actual transaction data, they ask full nodes.
This is fast and requires minimal storage, but it comes at a cost: you're trusting that the nodes you query are honest. For small amounts and convenience, this tradeoff can be acceptable. For serious holdings or privacy-sensitive use, it's not.
### Bitcoin Core
Bitcoin Core is the reference implementation, the original Bitcoin software maintained by the community since Satoshi's initial release. When people say "run a node," they usually mean running Bitcoin Core.
It's not the only option (alternatives like Bitcoin Knots exist), but it's the most widely used and the default choice for most node operators.
## The Verification Principle
Bitcoin's core philosophy can be summarized in three words: **Don't trust, verify.**
This isn't just a slogan. It's a fundamental architectural principle that distinguishes Bitcoin from every financial system that came before it. Traditional finance requires trust at every layer: trust that banks are solvent, trust that ledgers are accurate, trust that institutions follow the rules. Bitcoin replaces that trust with verification.
Without your own node, you're reintroducing trust. You trust someone else to tell you your correct balance. You trust them to accurately report whether transactions are valid. You trust them not to lie about the blockchain state.
With your own node, that trust becomes unnecessary. You verify everything yourself. You can't be deceived about your balance because you've independently confirmed it. You enforce Bitcoin's rules directly because you check every rule on every transaction.
## Why Running Your Own Node Matters
The benefits of running a node aren't abstract; they're practical improvements to your security, privacy, and relationship with the Bitcoin network.
**Privacy:** When your wallet talks to your node, no third party learns which addresses belong to you, what your balance is, or what transactions you're making. This is the single biggest privacy upgrade most Bitcoiners can make.
**Security:** You verify your own transactions against your own copy of the blockchain. No one can fool you with fake confirmations or misleading balance information. What your node says is what's true, because your node has verified it independently.
**Sovereignty:** You're not just using Bitcoin. You're participating in it. Your node validates the consensus rules, and by running it, you're part of the decentralized enforcement mechanism that keeps Bitcoin working.
**Network Health:** Every node makes Bitcoin stronger. The more nodes exist, the more copies of the blockchain exist, the harder it becomes to attack or censor the network. Running a node isn't just self-interested: it's a contribution to Bitcoin's resilience.
## Common Misconceptions
Even experienced Bitcoiners sometimes misunderstand what nodes do (and don't do).
**"I need a node to hold bitcoin"**: Your wallet holds bitcoin via private keys. A node is for verification and privacy. You can absolutely hold bitcoin without running a node; you'll just be trusting someone else's node for information about your holdings.
**"Running a node earns me bitcoin"**: Nodes don't earn rewards. Mining earns rewards. Nodes verify transactions and propagate blocks, but this service is provided for free. The reward is the security and privacy benefits to the node operator.
**"I need technical skills to run a node"**: This was true years ago; it's much less true today. Modern node software (especially user-friendly distributions like Umbrel or RaspiBlitz) has made running a node accessible to anyone who can follow basic instructions. If you can set up a Raspberry Pi or install software on a computer, you can run a node.
**"My hardware wallet is my node"**: Hardware wallets store keys and sign transactions. That's it. They have no blockchain data and can't verify anything independently. When you check your balance on a hardware wallet setup, that information is coming from a node somewhere, either yours or someone else's.
## Key Takeaways
The relationship between nodes and wallets is fundamental to understanding Bitcoin. Remember:
- A **node** stores the blockchain and verifies transactions
- A **wallet** stores your keys and creates transactions
- Wallets **depend on nodes** to function: the question is whose node
- Using someone else's node **exposes your privacy**
- Running your own node means you **verify everything yourself**
- The principle: **Don't trust, verify**
---
## Continue Learning
Understanding what nodes do is the first step. The next is understanding why running your own is worth the effort.
→ **Next:** [Why Run Your Own Node](https://selfcustodylabs.com/docs/learn/nodes/why-run-node): The benefits explained in depth
→ **Practical Guide:** [Bitcoin Node Setup](https://selfcustodylabs.com/docs/bitcoin-node): Ready to run your own node
→ **Related:** [Why Privacy Matters](https://selfcustodylabs.com/docs/learn/privacy/why-privacy-matters): The privacy implications
---
# Why Run Your Own Node
> Understand why running your own Bitcoin node matters for privacy, security, and true self-custody. Learn the risks of using third-party nodes.
Source: https://selfcustodylabs.com/docs/learn/nodes/why-run-node/
Last updated: 2026-08-02
Publisher: Self Custody Labs (https://selfcustodylabs.com)
---
Running your own Bitcoin node isn't required, but it's strongly recommended for anyone serious about self-custody. Here's why.
## The Privacy Problem
When your wallet checks your balance, it asks a Bitcoin node for information. If you don't run your own node, you're asking someone else's.
### What Gets Exposed
Every time your wallet connects to a third-party node:
| Information Revealed | Risk |
|---------------------|------|
| All your addresses | Node knows your complete wallet structure |
| Your balances | Node knows how much bitcoin you have |
| Your transaction history | Node can build your financial profile |
| Your IP address | Node can link addresses to your location |
| When you're online | Node knows your activity patterns |
| Future addresses | Wallets often query unused addresses too |
### Who Might Be Watching
Random public nodes could be run by:
- **Surveillance companies**: Building databases of address ownership
- **Exchanges**: Tracking customer activity post-withdrawal
- **Governments**: Monitoring financial activity
- **Hackers**: Identifying targets for theft
You have no way of knowing who operates the nodes your wallet connects to.
```
YOUR WALLET THINKS:
"I'll just ask this helpful node for my balance"
REALITY:
"Thanks for telling me all your addresses.
I've added them to my database." (Surveillance node)
```
## The Verification Problem
Without your own node, you trust others to tell you the truth about Bitcoin.
### The Fake Confirmation Attack
A technically skilled attacker could:
1. Manipulate which node your wallet connects to
2. Send you a fake transaction that doesn't exist on the real blockchain
3. Your wallet shows "confirmed" when it isn't
```
ATTACKER'S NODE:
"Yes, that 10 BTC transaction to you is confirmed!"
REAL BLOCKCHAIN:
Transaction doesn't exist
LATER:
Your wallet connects to an honest node
Your balance is suddenly 10 BTC less than expected
```
This is difficult to pull off but not impossible, especially in targeted attacks.
### The Wrong Chain Problem
If Bitcoin ever splits into different versions (like the 2017 Bitcoin/Bitcoin Cash split), your wallet might connect to a node running the "wrong" version:
- You think you're receiving Bitcoin
- You're actually receiving a different coin
- The coins have different rules and values
With your own node, you choose exactly which version of Bitcoin you're using.
## The Security Benefits
### You Verify Everything
Your node independently verifies:
- That transactions are valid
- That blocks follow all rules
- That no one is cheating
- That your balance is real
You don't ask anyone; you check yourself.
### No Single Point of Trust
```
WITHOUT YOUR NODE:
Your security = Wallet + Third-party node
(unknown trustworthiness)
WITH YOUR NODE:
Your security = Wallet + Your own verification
```
### No Lies About Confirmations
A payment isn't confirmed until your node verifies the block containing it. No one can trick you about confirmation status.
## The Self-Custody Connection
True self-custody means:
- ✅ You control your keys (hardware wallet)
- ✅ You verify your transactions (your own node)
- ✅ You don't depend on third parties
Without your own node, you're only 2/3 of the way there.
```
COMPLETE SELF-CUSTODY:
────────────────────────────────────────────────────
Your Hardware Wallet Your Node Your Internet
(signs transactions) (verifies) (broadcasts)
│ │ │
└──────────────────┴──────────────┘
│
Full control, no third parties
```
## Benefits Beyond Privacy and Security
### Supporting the Network
Every node strengthens Bitcoin:
- More nodes = harder to attack
- More nodes = faster transaction propagation
- More nodes = more decentralization
Running a node is participating in Bitcoin's consensus.
### Learning How Bitcoin Works
Operating a node teaches you:
- How transactions propagate
- How blocks are verified
- How the mempool works
- How Bitcoin's rules are enforced
This knowledge is valuable for any serious bitcoiner.
### Enabling Other Services
Your own node can power:
- Your own Electrum server (wallet backend)
- Lightning Network node
- Block explorer
- Payment processing
It becomes the foundation for a complete Bitcoin setup.
## Common Objections
### "It's too technical"
Modern node software is user-friendly. If you can install an app and wait for it to sync, you can run a node. Pre-built solutions like Umbrel or RaspiBlitz make it even easier.
### "I don't have the storage space"
A pruned node requires only ~10 GB. A full node needs ~600 GB, but external drives are cheap.
### "I don't leave my computer on"
Nodes only need to be running when you're using your wallet. They can catch up when turned on. For best results, a dedicated device (Raspberry Pi, old laptop) can run 24/7.
### "I'm not a target"
You might not be a target today. Privacy is easier to maintain than to recover. And you don't know who's logging data for future use.
## Who Should Run a Node?
### Strongly Recommended
- Anyone holding significant bitcoin
- Anyone who values financial privacy
- Anyone regularly receiving bitcoin
- Anyone using non-custodial Lightning
### Nice to Have
- Hobbyist bitcoiners wanting to learn
- Anyone wanting to support the network
- Those moving toward more sovereignty
### Can Probably Wait
- Complete beginners (learn basics first)
- Those holding very small amounts
- Those who only use custodial services
## Key Takeaways
- Using third-party nodes **exposes your privacy**
- Without your own node, you **trust others** to tell the truth
- Running your own node enables **true verification**
- A node completes your **self-custody setup**
- Modern tools make running a node **accessible to anyone**
---
## You've Completed the Learn Section! 🎉
Congratulations, you now understand the core concepts of Bitcoin self-custody: keys, wallets, transactions, privacy, and nodes. You have the knowledge foundation to confidently secure your Bitcoin.
**Now it's time to put knowledge into practice.**
---
# Bitcoin Wallet Setup: Hardware Wallet & Backup Guides
> Step-by-step Bitcoin wallet setup guides. Learn to configure hardware wallets, verify backups, and complete the pre-deposit security checklist.
Source: https://selfcustodylabs.com/docs/wallet-setup/
Last updated: 2026-08-21
Publisher: Self Custody Labs (https://selfcustodylabs.com)
---
Everything you need to set up secure Bitcoin self-custody.
**Tip: Before You Begin**
If you're new to Bitcoin, start with [Learn](https://selfcustodylabs.com/docs/learn/) to understand the fundamentals first.
## Setup Path
Follow these guides in order for a secure setup:
```
1. Hardware Wallet Setup → Get your device configured
2. Backup Verification → Test that your backup works
3. Before You Deposit → Final checklist before funding
```
---
## 📦 Hardware Wallet Setup
### [Hardware Wallet Setup Guide](https://selfcustodylabs.com/docs/wallet-setup/hardware-wallet/)
**Time:** 30-60 minutes | **Difficulty:** Beginner
Set up a hardware wallet from scratch. Covers:
- Choosing and purchasing a hardware wallet
- Initial device setup and PIN configuration
- Generating your seed phrase securely
- Installing and connecting wallet software (Sparrow)
- Receiving your first transaction
**Prerequisites:** None (this is where most people should start).
---
## ✅ Backup Verification
### [Backup Verification Guide](https://selfcustodylabs.com/docs/wallet-setup/backup-verification/)
**Time:** 30-60 minutes | **Difficulty:** Beginner
Verify your seed backup actually works before trusting it with significant funds.
- Why verification is critical
- Multiple verification methods
- Testing recovery on a second device
- What to do if verification fails
**Prerequisites:** Completed hardware wallet setup with seed backup written down.
---
## 🚦 Before You Deposit
### [Before You Deposit Checklist](https://selfcustodylabs.com/docs/wallet-setup/before-you-deposit)
**Time:** 15-30 minutes | **Difficulty:** Beginner
Critical checklist to complete before moving significant Bitcoin to your wallet.
- Seed phrase verification
- Backup recovery test confirmation
- Address verification on device
- Test transaction completion
**Prerequisites:** Completed hardware wallet setup AND backup verification.
---
## Which Wallet Should I Use?
Not sure which hardware wallet to buy? See our [Choose Your Setup](https://selfcustodylabs.com/docs/learn/fundamentals/choosing-your-path) guide for recommendations based on your situation.
**Quick recommendations:**
| Situation | Recommendation |
|-----------|----------------|
| Budget-conscious | Blockstream Jade ($79) |
| Simplicity priority | BitBox02 Nova Bitcoin-only (~$185) |
| Verifiable security | Jade Plus ($149) + [dice-generated seed](https://selfcustodylabs.com/docs/learn/keys/random/) |
| Full transparency | Trezor Safe 7 ($249, auditable secure element) |
---
## Software Wallet Option
For small amounts while learning, a software wallet is acceptable:
### [Software Wallets Overview](https://selfcustodylabs.com/docs/learn/wallets/software-wallets)
Software wallets store keys on your phone or computer. They're free and convenient but less secure than hardware wallets.
**Recommended for:**
- Amounts under $500
- Learning and experimentation
- Daily spending wallet (alongside hardware wallet for savings)
**Not recommended for:**
- Significant savings
- Long-term holdings
- Anyone who can afford a hardware wallet
---
## After Setup: Next Steps
Once your wallet is set up and verified:
1. **[Run Your Own Node](https://selfcustodylabs.com/docs/bitcoin-node/)**: Verify transactions yourself
2. **[UTXO Management](https://selfcustodylabs.com/docs/learn/privacy/utxo-management/)**: Manage privacy and fees
3. **[Add a Passphrase](https://selfcustodylabs.com/docs/learn/keys/passphrase/)**: Extra security layer
4. **[Multisig Setup](https://selfcustodylabs.com/docs/learn/wallets/multisig/)**: Eliminate single points of failure (for larger holdings)
---
## Common Questions
**"Do I need to buy a hardware wallet?"**
For anything more than pocket change, yes. Hardware wallets are the minimum security standard for meaningful amounts.
**"Which is better: Trezor, Ledger, or Coldcard?"**
As of 2026, Trezor is the safe mainstream pick of the three: open source with a long security track record. Coldcard is not currently recommended: its [2026 entropy incident](https://selfcustodylabs.com/docs/learn/wallets/coldcard-entropy-incident/) cost users ~$116M after a warning was dismissed. Ledger's secure-element firmware is closed source, which means trusting what you can't verify. Also consider Jade, BitBox02 Nova, and Passport; see the [hardware wallet comparison](https://selfcustodylabs.com/docs/reference/hardware-wallet-comparison).
**"Can I use the same seed on multiple devices?"**
Yes, but generally not recommended. If you need redundancy, consider multisig instead.
**"What if I already have a hardware wallet set up?"**
Skip to [Backup Verification](https://selfcustodylabs.com/docs/wallet-setup/backup-verification/) to ensure your existing setup is secure.
---
# Hardware Wallet Setup: Step-by-Step Bitcoin Security Guide
> Step-by-step guide to setting up your first hardware wallet. Learn how to initialize, secure, and use a hardware wallet for Bitcoin self-custody.
Source: https://selfcustodylabs.com/docs/wallet-setup/hardware-wallet/
Last updated: 2026-08-21
Publisher: Self Custody Labs (https://selfcustodylabs.com)
---
**Info: What You'll Do**
In this guide, you will:
- Choose the right hardware wallet for your needs
- Initialize your device securely
- Generate or import a seed phrase
- Verify your backup works
- Connect to wallet software
- Receive and send your first transaction
**Time required:** 1-2 hours
**Difficulty:** Beginner to Intermediate
**Estimated cost:** $70-250 (hardware wallet)
**Prerequisites:** None - this is a beginner guide
**Tip: Why This Matters**
A hardware wallet is the foundation of secure Bitcoin self-custody. Unlike software wallets, your private keys never touch an internet-connected device, protecting you from malware, hackers, and remote attacks.
## What is a Hardware Wallet?
A hardware wallet is a dedicated physical device designed to store your Bitcoin private keys securely. Think of it as a personal vault that:
- **Generates keys offline**: Your seed phrase is created inside the device
- **Stores keys in isolation**: Keys never leave the secure chip
- **Signs transactions internally** (your computer never sees your private key)
- **Verifies on its own screen**: Confirm addresses without trusting your computer
```
HOW A HARDWARE WALLET WORKS:
─────────────────────────────────────────────────────────
Your Computer Hardware Wallet
───────────── ───────────────
1. Create transaction ───►
2. Display details on screen
3. You verify and approve
4. Device signs internally
◄─── 5. Return signed transaction
6. Broadcast to network
Private key NEVER leaves device
```
## Choosing Your Hardware Wallet
### Comparison of Popular Options (August 2026)
| Device | Price | Best For | Key Features |
|--------|-------|----------|--------------|
| **BitBox02 Nova** | ~$185 | Beginners, simplicity | Secure element, Bitcoin-only edition, dice entropy |
| **Trezor Safe 5** | $169 | Beginners | Secure element, open source, dice entropy |
| **Trezor Safe 7** | $249 | Transparency + UX | Auditable secure element, touchscreen |
| **Blockstream Jade** | $79 | Budget | Open source, QR air-gap capable, dice entropy |
| **Jade Plus** | $149 | Verifiable security | QR air-gap, anti-exfil signing, multi-source entropy |
| **Passport Prime** | $556 | Premium air-gap | QR air-gap, entropy-testing app, Bitcoin-only |
| **Keystone 3 Pro** | $149 | QR workflow, mobile | Air-gapped via QR, large screen, 3 secure elements |
| **[SeedSigner](https://selfcustodylabs.com/docs/seedsigner/) / Krux** | ~$50–80 | DIY builders | Stateless, you supply all entropy |
See the full [hardware wallet comparison](https://selfcustodylabs.com/docs/reference/hardware-wallet-comparison/) for detailed trade-offs, including why two familiar names are missing from this table.
### My Recommendations
**For beginners:** BitBox02 Nova (Bitcoin-only) or Trezor Safe 5
- Easy to use, good security, dice-roll support for later
**For verifiable security:** Jade Plus or Passport Prime
- Air-gapped workflows from vendors with strong entropy practices and crisis track records
**For DIY builders:** [SeedSigner](https://selfcustodylabs.com/docs/seedsigner/) (our favourite; see the [build guide](https://selfcustodylabs.com/docs/seedsigner/build-guide/)) or Krux
- Stateless devices where every bit of entropy is yours by construction
**Warning: About Coldcard and Ledger**
**Coldcard** was our security pick for years, until the [2026 entropy incident](https://selfcustodylabs.com/docs/learn/wallets/coldcard-entropy-incident/): a five-year firmware flaw made device-generated seeds guessable and ~$116M was stolen. The flaw is patched and dice-generated seeds were never affected, but a warning about this exact code was dismissed in 2025, so we're not recommending new purchases until trust is rebuilt. Existing owners: [check if you're affected](https://selfcustodylabs.com/docs/learn/wallets/coldcard-entropy-incident/#am-i-affected).
**Ledger** devices use closed-source secure-element firmware that cannot be independently audited. After 2026, unverifiable randomness is a bigger ask than ever.
## Before You Begin
### Security Checklist
Before setting up your hardware wallet:
- [ ] **Buy from official sources only**: Never buy used or from third-party sellers
- [ ] **Check the packaging** (look for signs of tampering)
- [ ] **Verify the device**: Most wallets have authenticity checks
- [ ] **Prepare a secure environment**: Private location, no cameras
- [ ] **Have backup materials ready** (metal plate or paper for seed phrase)
- [ ] **Clear your schedule**: Don't rush this process
### What You'll Need
| Item | Purpose |
|------|---------|
| Hardware wallet | Your new device |
| Computer or phone | To run wallet software |
| USB cable | To connect device (included with most) |
| Seed backup material | Metal plate recommended, paper acceptable |
| Pen (not pencil) | For writing seed words |
| 15-30 minutes of privacy | Uninterrupted setup time |
## General Setup Process
While each device has specific steps, the general process is similar:
### Step 1: Verify Authenticity
Before powering on, check that your device is genuine:
- **Packaging intact**: No signs of opening or resealing
- **Holographic seals**: If present, should be unbroken
- **Device verification** (run manufacturer's authenticity check)
### Step 2: Initialize the Device
Power on and follow the device prompts:
1. Select language and region
2. Accept terms (read them!)
3. **Update to the latest firmware** and skim the vendor's security advisories page: the 2026 Coldcard incident hit seeds generated on outdated, flawed firmware
4. Set a PIN code
5. Choose whether to create new wallet or restore existing
### Step 3: Generate Your Seed Phrase
This is the moment that decides how much you're trusting the manufacturer. When the device generates a seed by itself, you're trusting its random number generator completely, and in 2026 [that trust failed publicly](https://selfcustodylabs.com/docs/learn/wallets/coldcard-entropy-incident/) for the first time at nine-figure scale. Pick your path deliberately:
**Path A: device-generated (acceptable for starter amounts)**
The device will display 12 or 24 words one at a time. If you take this path, plan to add a [passphrase](https://selfcustodylabs.com/docs/learn/keys/passphrase/) so your funds never rest on the device's randomness alone.
**Path B: with your own entropy (recommended)**
Use the device's **dice-roll option** during setup: 99 rolls of a casino die fully covers a 24-word seed even if the device's generator is broken. Or go further and [generate the seed entirely yourself](https://selfcustodylabs.com/docs/learn/keys/random/), then import it: maximum trust minimization, and every step checkable.
**Danger: Critical Steps (both paths)**
1. **Write down every word**: In exact order, spelled correctly
2. **Verify you wrote them correctly**: Device will quiz you
3. **Never photograph your seed** (digital copies are vulnerable)
4. **Never type your seed into a computer**: Except the hardware wallet itself
**Warning: Firmware updates can't fix a weak seed**
If a seed was generated by flawed firmware, updating the firmware later does nothing for it; the seed is already weak. That's why affected Coldcard users had to migrate to new wallets entirely. Generate your seed on current firmware, ideally with your own entropy, and you'll never face that migration.
### Step 4: Verify Your Backup
Most devices will test that you wrote down your seed correctly:
1. Device asks you to confirm specific words
2. Enter the requested words using the device
3. Device confirms backup is correct
**This is not enough!** See our [Backup Verification Guide](https://selfcustodylabs.com/docs/wallet-setup/backup-verification) for proper testing.
### Step 5: Set Up Wallet Software
Your hardware wallet needs companion software to:
- View your balance
- Create transactions
- Manage addresses
**Recommended software:**
| Software | Platform | Best With |
|----------|----------|-----------|
| **Sparrow Wallet** | Desktop | Any hardware wallet |
| **Trezor Suite** | Desktop/Web | Trezor devices |
| **Ledger Live** | Desktop/Mobile | Ledger devices |
| **BlueWallet** | Mobile | Coldcard, others |
| **Nunchuk** | Desktop/Mobile | Any hardware wallet |
**We recommend Sparrow Wallet** for most users. It works with all major hardware wallets and offers advanced features like coin control.
### Step 6: Connect and Verify
1. Connect your hardware wallet to your computer
2. Open your wallet software
3. Add your hardware wallet as a new device
4. **Verify the receive address matches on both screens**
**Warning: Always Verify Addresses**
Before receiving Bitcoin, confirm the address shown in your software matches what's displayed on your hardware wallet screen. Malware can show you fake addresses.
## Your First Transaction
### Receiving Bitcoin
1. Open your wallet software
2. Click "Receive" to generate an address
3. **Verify the address on your hardware wallet screen**
4. Share the address with the sender
5. Wait for confirmation (1+ blocks for security)
### Sending Bitcoin
1. Create a transaction in your wallet software
2. Enter recipient address and amount
3. Review the transaction on your hardware wallet:
- Verify the recipient address
- Verify the amount
- Check the fee
4. Approve on the device
5. Software broadcasts the signed transaction
```
SENDING FLOW:
────────────────────────────────────────────────────
Software Hardware Wallet
──────── ───────────────
Create transaction ────►
Show: "Send 0.01 BTC to bc1q...?"
Show: "Fee: 1,500 sats"
◄──── You verify and press CONFIRM
Receive signature ◄──── Device signs transaction
Broadcast to network
```
## Common Mistakes to Avoid
### ❌ Storing Seed Digitally
Never store your seed phrase:
- In a photo
- In a notes app
- In cloud storage
- In a password manager
- In an email
### ❌ Using a Weak PIN
Avoid PINs like:
- 1234, 0000, 1111
- Birthdays
- Repeated numbers
Use a random PIN you can remember, or write it down separately from your seed.
### ❌ Not Testing Your Backup
Many people lose Bitcoin because their backup was wrong. Always verify your backup works before depositing significant funds. See our [Backup Verification Guide](https://selfcustodylabs.com/docs/wallet-setup/backup-verification).
### ❌ Trusting Your Computer Screen
Malware can display fake addresses on your computer. **Always verify addresses on your hardware wallet screen** before sending or receiving.
### ❌ Buying from Unofficial Sources
Pre-compromised devices have been sold on eBay and Amazon. Only buy directly from manufacturers or authorized resellers.
## Passphrase (Optional Advanced Feature)
A passphrase (sometimes called the "25th word") adds extra security:
- Creates a completely separate wallet
- Protects against physical theft of your seed backup
- Requires both seed AND passphrase to access funds
**Danger: Passphrase Risks**
- **If you forget your passphrase, your Bitcoin is gone forever**
- Even a single character difference creates a different wallet
- You must back up your passphrase separately from your seed
Only use a passphrase if you fully understand the risks. See [DIY Passphrase Guide](https://selfcustodylabs.com/docs/learn/keys/passphrase) for details.
## Next Steps
Now that your hardware wallet is set up:
1. **[Verify Your Backup](https://selfcustodylabs.com/docs/wallet-setup/backup-verification)**: Test that your seed backup actually works
2. **Start small**: Receive a small amount first to test the process
3. **[Run Your Own Node](https://selfcustodylabs.com/docs/bitcoin-node)** (connect to your own node for privacy)
4. **[Learn UTXO Management](https://selfcustodylabs.com/docs/learn/privacy/utxo-management)**: Manage your coins effectively
5. **Consider [Multisig](https://selfcustodylabs.com/docs/learn/wallets/multisig)**: For significant holdings
---
# How to Test Your Bitcoin Seed Backup (Before You Need It)
> Learn how to properly verify your Bitcoin seed backup works before trusting it with significant funds. Step-by-step guide to testing your recovery process.
Source: https://selfcustodylabs.com/docs/wallet-setup/backup-verification/
Last updated: 2026-08-02
Publisher: Self Custody Labs (https://selfcustodylabs.com)
---
**Info: What You'll Do**
In this guide, you will:
- Understand why backup verification is critical
- Learn safe methods to test your backup
- Perform a complete recovery test
- Verify your backup without risking funds
**Time required:** 30-60 minutes
**Difficulty:** Beginner
**Estimated cost:** Free
**Prerequisites:** A seed phrase backup to test
**Danger: Why This Matters**
**Thousands of Bitcoin have been lost** because people assumed their backup was correct without testing it. A single wrong word, a smudged letter, or a misread character can make your backup useless.
**Test your backup BEFORE depositing significant funds.**
## The Problem
Most people set up their wallet like this:
1. ✅ Generate seed phrase
2. ✅ Write down seed phrase
3. ✅ Device confirms words are correct
4. ❌ Assume backup works forever
5. 💀 Years later, need to recover... backup doesn't work
**What can go wrong:**
- Handwriting is illegible
- A word was misspelled
- Words are in wrong order
- Paper degraded or got wet
- Metal stamp is unclear
- Wrong word list was used
- Passphrase was forgotten
## The Solution: Test Your Recovery
The only way to **know** your backup works is to actually use it to recover your wallet. This guide shows you how to do this safely.
## Method 1: Recovery Test on the Same Device
The simplest method: reset your device and recover using your backup.
### When to Use This Method
- You have a hardware wallet
- You haven't deposited any funds yet
- You want to verify before your first deposit
### Step-by-Step Process
**1. Verify you have your seed backup ready**
Before doing anything, confirm you have your written seed phrase in hand.
**2. Check your wallet is empty**
Make sure there are no funds in the wallet. If there are funds, use Method 2 instead.
**3. Reset your device to factory settings**
Each device has a different process:
| Device | How to Reset |
|--------|--------------|
| **Coldcard** | Settings → Danger Zone → Seed Functions → Destroy Seed |
| **Trezor** | Settings → Device → Factory Reset |
| **Ledger** | Settings → Security → Reset Device |
| **Keystone** | Settings → Wallet → Delete All Data |
| **BitBox02** | Device Settings → Reset Device |
**4. Recover using your seed backup**
- Start the device as if it were new
- Choose "Recover wallet" or "Import existing wallet"
- Enter your seed words exactly as written on your backup
- If you used a passphrase, enter that too
**5. Verify the recovery succeeded**
Connect to your wallet software and verify:
- The wallet loads correctly
- The first receive address matches what you had before
**Tip: Pro Tip**
Before resetting, write down your first receive address. After recovery, verify this address matches exactly. If it matches, your backup is correct.
## Method 2: Recovery Test on a Different Device
More thorough: verify your backup works on independent hardware.
### When to Use This Method
- You already have funds in your wallet
- You want extra confidence
- You have access to a second device
### Step-by-Step Process
**1. Get a second device or use software wallet temporarily**
Options:
- A second hardware wallet (same or different brand)
- A software wallet on an air-gapped device (for testing only)
- Sparrow Wallet in watch-only mode + seed verification tool
**2. Recover on the second device**
Enter your seed phrase (and passphrase if applicable) on the second device.
**3. Compare addresses**
The recovered wallet should show the same addresses as your original:
```
VERIFICATION CHECK:
─────────────────────────────────────────────────────────
Original Wallet Recovered Wallet
──────────────── ────────────────
First address: First address:
bc1qxy2...abc =? bc1qxy2...abc
If they match → ✅ Backup is correct
If different → ❌ Something is wrong
```
**4. Delete the test wallet**
After verification, securely delete the recovered wallet from the second device:
- Factory reset hardware wallet, or
- Securely delete software wallet data
## Method 3: Address Verification (No Recovery Needed)
Verify your backup mathematically without fully recovering.
### When to Use This Method
- You want to verify without entering your seed anywhere
- You have technical comfort with command line
- You want to verify periodically without a full recovery
### Using Ian Coleman's BIP39 Tool (Offline)
**Warning: Security Warning**
Only use this tool on an **air-gapped computer** that will never connect to the internet. Never enter your real seed phrase on an internet-connected device.
**1. Download the tool**
Download from: https://github.com/iancoleman/bip39
**2. Transfer to air-gapped computer**
Use a USB drive to move the HTML file to your offline computer.
**3. Open in browser (offline)**
Open the HTML file in a browser with NO internet connection.
**4. Enter your seed phrase**
Type your seed words into the tool.
**5. Compare derived addresses**
The tool shows addresses derived from your seed. Compare the first several with your actual wallet addresses.
**If they match** → Your seed backup is correct
**If they don't match** → Check for errors in your seed, passphrase, or derivation path
## Method 4: Using Sparrow Wallet's Verification
Sparrow Wallet can verify your backup matches your wallet.
### Step-by-Step Process
**1. Open Sparrow and connect your hardware wallet**
**2. Go to Settings → Keystore**
**3. Click "Test Backup..."**
**4. Enter your seed phrase**
Sparrow will verify the seed matches the connected wallet without exposing your keys.
## Verifying Passphrase Backups
If you use a passphrase (25th word), you must verify that too:
### The Challenge
A passphrase creates a **completely different wallet**. Even a tiny difference (capitalization, extra space) generates different addresses.
### Verification Process
1. Recover with seed phrase ONLY (no passphrase)
2. Note the first address (this is the "decoy" wallet)
3. Now add your passphrase
4. Note the first address (this is your real wallet)
5. Verify this matches your actual wallet
```
PASSPHRASE VERIFICATION:
─────────────────────────────────────────────────────────
Seed only: seed + "MyPassphrase":
bc1q111...xxx bc1q222...yyy
(decoy wallet) (your real wallet)
Both should be derivable from your backup.
```
### Common Passphrase Mistakes
- Forgetting capitalization: "Bitcoin" ≠ "bitcoin"
- Extra spaces: "my phrase" ≠ "my phrase "
- Similar characters: "0" (zero) ≠ "O" (letter)
- Forgetting you used one at all
## How Often to Verify
| Situation | Recommended Action |
|-----------|-------------------|
| New wallet setup | Verify immediately before depositing |
| After creating metal backup | Verify the metal backup specifically |
| Every 6-12 months | Quick verification that backup is readable |
| Before major life changes | Full recovery test |
| After any backup modification | Full verification |
## Signs Your Backup May Be Compromised
Perform a full recovery test if:
- Your backup was exposed to water, fire, or heat
- Paper is yellowing or ink is fading
- You can't read your handwriting clearly
- Metal stamps are unclear or corroded
- You found your backup wasn't stored securely
- You suspect someone may have seen it
## What If Verification Fails?
### If addresses don't match:
**1. Check for simple errors**
- Did you enter all words?
- Are words spelled correctly?
- Are words in the right order?
- Did you use the correct passphrase?
- Is the passphrase entered exactly right (caps, spaces)?
**2. Check derivation path**
Different wallet software may use different paths:
- BIP84 (bc1q...): `m/84'/0'/0'` (most common for SegWit)
- BIP49 (3...): `m/49'/0'/0'` (older SegWit)
- BIP44 (1...): `m/44'/0'/0'` (legacy)
**3. Check word list**
Make sure you're using the English BIP39 word list. Other languages have different words.
### If you find an error:
**1. Don't panic**
Your original wallet still works. The error is in your backup, not your wallet.
**2. Create a new backup**
While your wallet is still accessible:
- Display the seed phrase on your hardware wallet
- Create a fresh, correct backup
- Verify the new backup immediately
**3. Consider creating a new wallet**
If your backup was wrong, it may have been compromised. Consider:
- Generating a new seed
- Moving funds to the new wallet
- Properly backing up the new seed
## Backup Verification Checklist
Before trusting your backup with significant funds:
- [ ] Seed phrase is readable and legible
- [ ] All 12/24 words are present
- [ ] Words are spelled correctly
- [ ] Words are in correct order
- [ ] Successfully recovered wallet on test device
- [ ] First receive address matches original wallet
- [ ] Passphrase verified (if applicable)
- [ ] Backup stored securely after verification
## Summary
**Verification is not optional.** It's a critical part of self-custody.
The process is simple:
1. Reset or use a second device
2. Recover using only your backup
3. Confirm addresses match
4. Repeat periodically
Taking 30 minutes to verify your backup can save you from losing everything.
---
# Before You Deposit: Critical Checklist
> Essential verification steps before sending Bitcoin to any new wallet. This checklist can save you from catastrophic, irreversible mistakes.
Source: https://selfcustodylabs.com/docs/wallet-setup/before-you-deposit/
Last updated: 2026-08-21
Publisher: Self Custody Labs (https://selfcustodylabs.com)
---
**Danger: Stop and Read This**
This page exists because people have lost Bitcoin by skipping these steps.
Every item below addresses a real failure mode. **Do not skip any step.**
If you're impatient, Bitcoin self-custody is not for you yet. Slow down.
## Why This Checklist Exists
Moving Bitcoin to a new wallet is **irreversible**. If anything is wrong with your setup:
- Wrong seed backup → Funds lost forever
- Compromised device → Funds stolen
- Wrong address type → Recovery may be impossible
- Untested backup → False sense of security
This checklist ensures you've verified everything *before* it matters.
## The Pre-Deposit Checklist
Complete every item before depositing significant funds.
### ✅ Seed Phrase Verification
- [ ] **I know how my seed was generated**: with my own dice entropy, or by the device's RNG on current, unaffected firmware (if it came from a [Coldcard on 2021–2026 firmware](https://selfcustodylabs.com/docs/learn/wallets/coldcard-entropy-incident/), migrate before depositing anything)
- [ ] **I have written down my seed phrase physically** (paper or metal)
- [ ] **I have verified every word is spelled correctly** (check against [BIP39 word list](https://github.com/bitcoin/bips/blob/master/bip-0039/english.txt))
- [ ] **I have verified the words are in the correct order**
- [ ] **My seed phrase has never been:**
- Photographed
- Typed into a computer (except hardware wallet)
- Stored in a notes app, cloud service, or password manager
- Spoken aloud or sent via any messaging app
- Shown to anyone else
### ✅ Backup Recovery Test
**Danger: Most Critical Step**
If you skip only one thing (don't), don't skip this one. More Bitcoin has been lost to untested backups than to hackers.
- [ ] **I have performed a full recovery test** using my written backup
- Reset device OR use a second device
- Restored wallet using only my physical backup
- Verified the first receive address matches my original wallet
→ See [Backup Verification Guide](https://selfcustodylabs.com/docs/wallet-setup/backup-verification/) for detailed instructions
### ✅ Passphrase Verification (If Used)
If you're using a passphrase (25th word):
- [ ] **I understand a passphrase creates a completely different wallet**
- [ ] **I have backed up my passphrase separately from my seed**
- [ ] **I have tested recovery with seed + passphrase**
- [ ] **I have verified the passphrase wallet shows different addresses than the seed-only wallet**
- [ ] **I understand that forgetting my passphrase = losing my Bitcoin forever**
### ✅ Receive Address Verification
- [ ] **I have generated a receive address in my wallet software**
- [ ] **I have verified this address on my hardware wallet screen**
- The address shown on my computer matches exactly what my device displays
- I checked character-by-character (at least first 8 and last 8 characters)
- [ ] **I understand why this matters:** Malware can show fake addresses on your computer screen. Your hardware wallet cannot be fooled.
### ✅ Device Security
- [ ] **My hardware wallet was purchased directly from the manufacturer** (not Amazon, eBay, or third-party sellers)
- [ ] **The packaging showed no signs of tampering** when I received it
- [ ] **I ran the manufacturer's authenticity verification** (if available)
- [ ] **My device firmware is up to date** (verified on manufacturer's website)
- [ ] **I set a strong PIN** that I can remember but others cannot guess
### ✅ Wallet Software Security
- [ ] **I downloaded wallet software from official sources only**
- Sparrow: https://sparrowwallet.com
- Electrum: https://electrum.org
- Manufacturer software: from their official website
- [ ] **I verified the download signature** (if technically able)
- [ ] **My computer is reasonably secure:**
- Operating system is up to date
- No suspicious software installed
- Not a public or shared computer
### ✅ Test Transaction
Before sending significant funds:
- [ ] **I have sent a small test amount** (enough to verify, not enough to hurt if lost)
- [ ] **I have verified the transaction arrived** in my wallet
- [ ] **I have successfully sent a transaction** from this wallet
- [ ] **I understand the fee structure** and how to set appropriate fees
## The Mental Checklist
Beyond technical verification, ask yourself:
### Do I Understand What I'm Doing?
- [ ] I can explain what a seed phrase is in my own words
- [ ] I understand that my seed phrase IS my Bitcoin (not the device)
- [ ] I understand that if I lose my seed phrase, no one can help me recover
- [ ] I understand that if someone else sees my seed phrase, they can take everything
### Am I Prepared for Responsibility?
- [ ] I have a plan for where my backup is stored
- [ ] I have considered fire, flood, theft, and other disaster scenarios
- [ ] I have thought about what happens if I die (inheritance planning)
- [ ] I am comfortable being my own bank
### Am I Moving Too Fast?
- [ ] I am not rushing because of market FOMO
- [ ] I have taken at least 24 hours between setup and significant deposit
- [ ] I have read through this entire checklist, not just skimmed it
## Red Flags: Stop If...
🚩 **Do NOT deposit if any of these apply:**
- You're not 100% sure you wrote down the seed correctly
- You haven't tested recovery
- Your hardware wallet came from an unofficial source
- Someone else has seen your seed phrase
- You're feeling rushed or pressured
- Something "feels off" about your setup
- You're doing this on a compromised or untrusted computer
**It's better to delay than to lose everything.**
## After You Deposit
Once funds are in your wallet:
1. **Verify the transaction confirmed** (at least 1 confirmation, 6 for certainty)
2. **Record the transaction** for your own records
3. **Do NOT share:**
- Your receive address publicly (address reuse = privacy leak)
- Screenshots showing your balance
- That you own Bitcoin at all (for physical security)
## What If Something Goes Wrong?
### "I sent to the wrong address"
Unfortunately, Bitcoin transactions are irreversible. If you sent to an address you don't control, those funds are likely gone. This is why we verify addresses before sending.
### "I can't remember my passphrase"
If you used a passphrase and cannot remember it exactly:
- Your seed phrase without the passphrase controls a different (empty) wallet
- There is no recovery mechanism
- This is why we test passphrases before depositing
### "I lost my seed phrase"
If your device still works, you can:
1. Move funds to a NEW wallet with a NEW seed
2. Properly back up the new seed
3. Test the new backup
If your device is also lost/broken, those funds are unrecoverable.
### "Someone saw my seed phrase"
Assume compromise. Immediately:
1. Create a new wallet with a new seed
2. Transfer all funds to the new wallet
3. The old seed should never be used again
## Summary
This checklist exists because self-custody is serious. The freedom and security it provides comes with real responsibility.
**Complete the checklist. Test your backup. Verify everything.**
Then, and only then, are you ready to truly own your Bitcoin.
**Tip: 🎉 Congratulations!**
If you've completed this checklist, you've finished the core wallet setup journey. You now have a secure hardware wallet with a verified backup. Welcome to true Bitcoin ownership!
---
# Bitcoin Security: DIY Seed Generation & Advanced Protection
> Advanced Bitcoin security: generate seeds with dice, add passphrase protection, and apply operational and physical security best practices.
Source: https://selfcustodylabs.com/docs/security/
Last updated: 2026-08-21
Publisher: Self Custody Labs (https://selfcustodylabs.com)
---
Take your Bitcoin security beyond the basics.
**Info: Who Is This For?**
These guides are for users who already have a working hardware wallet setup and want to enhance their security. If you haven't set up a wallet yet, start with [Wallet Setup](https://selfcustodylabs.com/docs/wallet-setup/) first.
## Security Layers
Bitcoin security works in layers. Each layer you add makes your setup more resilient:
```
SECURITY LAYERS
═══════════════════════════════════════════════════════════════
Layer 1: Hardware Wallet ← Most people stop here
└─ Keys offline, device signs
Layer 2: DIY Seed Generation ← Verify your randomness
└─ Dice-generated entropy
Layer 3: Passphrase ← Hidden wallet protection
└─ 25th word adds second factor
Layer 4: Operational Security ← Behavior and habits
└─ How you act matters
Layer 5: Physical Security ← Real-world protection
└─ Protect against physical threats
Layer 6: Multisig ← Eliminate single points of failure
└─ Multiple keys required
```
**You don't need all layers.** Match your security to your [threat model](https://selfcustodylabs.com/docs/learn/fundamentals/threat-models).
---
## 🎲 DIY Seed Generation
### [DIY Seed Generation Guide](https://selfcustodylabs.com/docs/learn/keys/random/)
**Time:** 2-4 hours | **Difficulty:** Intermediate | **Cost:** $30-80
Generate your own seed phrase using dice for verifiable randomness. Don't trust, verify.
**Why do this?**
- Hardware wallet RNG could be compromised, and [it happened in 2026](https://selfcustodylabs.com/docs/learn/wallets/coldcard-entropy-incident/): a Coldcard firmware flaw made seeds guessable and ~$116M was stolen; dice-generated seeds were untouched
- Verify your entropy source
- Educational: understand how seeds work
**What you'll learn:**
- Rolling dice for true randomness
- Converting rolls to binary
- Calculating BIP39 checksum
- Proper backup procedures
**Prerequisites:** Understanding of [seed phrases](https://selfcustodylabs.com/docs/learn/keys/seed) and [private keys](https://selfcustodylabs.com/docs/learn/keys/intro).
---
## 🔐 Passphrase Security
### [DIY Passphrase Guide](https://selfcustodylabs.com/docs/learn/keys/passphrase/)
**Time:** 1-2 hours | **Difficulty:** Beginner | **Cost:** Free-$10
Add a passphrase (25th word) to create a hidden wallet that requires both seed AND passphrase.
**Why do this?**
- Creates plausible deniability (decoy wallet)
- Adds second factor to seed
- Protects against seed-only compromise
**What you'll learn:**
- How passphrases work
- Generating strong passphrases
- Backup strategies for passphrases
- Common passphrase mistakes
**Prerequisites:** Working hardware wallet with seed backup.
**Danger: Critical Understanding**
A passphrase creates a **completely different wallet**. If you forget your passphrase, funds in that wallet are **unrecoverable**. This is not like a password: there's no reset.
---
## 🕵️ Operational Security
### [Operational Security Guide](https://selfcustodylabs.com/docs/security/operational-security/)
**Time:** 30 min read | **Difficulty:** Beginner | **Cost:** Free
How you behave matters as much as your technical setup. OpSec covers the human element.
**Key topics:**
- Don't talk about your holdings
- Verify before you trust
- Assume devices are compromised
- Secure communication practices
- Social engineering awareness
**Why it matters:** The best technical security fails if you tell the wrong person or click the wrong link.
---
## 🏠 Physical Security
### [Physical Security Guide](https://selfcustodylabs.com/docs/security/physical-security/)
**Time:** 30 min read | **Difficulty:** Beginner | **Cost:** Varies
Protect yourself and your Bitcoin from real-world threats.
**Key topics:**
- The $5 wrench attack
- Home security considerations
- Backup storage locations
- Travel with Bitcoin
- Duress wallets and plausible deniability
**Why it matters:** All the cryptography in the world won't help if someone threatens you physically.
---
## Security Progression
Here's a recommended order for implementing security layers:
| Stage | What to Do | When |
|-------|------------|------|
| **1. Foundation** | Hardware wallet + proper backup | Everyone |
| **2. Verification** | Test backup recovery | Everyone |
| **3. OpSec Basics** | Don't discuss holdings publicly | Everyone |
| **4. Passphrase** | Add 25th word | Meaningful holdings |
| **5. DIY Seed** | Generate your own entropy | High security needs |
| **6. Physical Security** | Secure storage, home security | Significant holdings |
| **7. Multisig** | Multiple keys required | Large holdings |
---
## Common Security Mistakes
### 1. Security Theater
Focusing on exotic threats while ignoring basics. Your threat isn't the NSA; it's phishing, malware, and social engineering.
### 2. Complexity Beyond Competence
Implementing security you don't understand. If you can't recover your own setup, it's not secure. It's a trap.
### 3. Single Points of Failure
One seed, one location, one device. Redundancy matters.
### 4. Trusting Without Verifying
"The website said it was safe." Verify addresses on your device. Verify software signatures. Verify everything.
### 5. Talking Too Much
The more people know you have Bitcoin, the larger your attack surface.
---
## Related Guides
After hardening your security:
- **[Run Your Own Node](https://selfcustodylabs.com/docs/bitcoin-node/)**: Verify transactions yourself
- **[UTXO Management](https://selfcustodylabs.com/docs/learn/privacy/utxo-management/)** (privacy through coin control)
- **[Multisig Setup](https://selfcustodylabs.com/docs/learn/wallets/multisig/)**: Eliminate single points of failure
- **[Air-Gapped Computer](https://selfcustodylabs.com/docs/learn/wallets/air-gapped-wallets/)** (maximum isolation)
---
## Security Resources
### Threat Modeling
- [Assess Your Threat Model](https://selfcustodylabs.com/docs/learn/fundamentals/threat-models): What level do you need?
### Recovery Planning
- [What If You Lose Your Seed?](https://selfcustodylabs.com/docs/reference/faq/lost-seed) (understanding the stakes)
- [Recovery Scam Warning](https://selfcustodylabs.com/docs/reference/faq/recovery-scams): Protect yourself from fraud
### Pre-Deposit Checklist
- [Before You Deposit](https://selfcustodylabs.com/docs/wallet-setup/before-you-deposit): Final verification steps
---
# Operational Security for Bitcoiners
> Essential operational security practices for Bitcoin holders. Learn how your behavior affects your security and how to minimize your attack surface.
Source: https://selfcustodylabs.com/docs/security/operational-security/
Last updated: 2026-08-02
Publisher: Self Custody Labs (https://selfcustodylabs.com)
---
Your behavior matters as much as your technical setup.
**Info: What is OpSec?**
**Operational Security (OpSec)** is about protecting sensitive information through careful behavior. The best hardware wallet in the world won't help if you tell everyone about your Bitcoin or fall for a phishing attack.
## The Human Element
Most Bitcoin losses aren't from sophisticated hacks; they're from human error:
- Clicking phishing links
- Sharing too much information
- Trusting the wrong people
- Not verifying before acting
- Social engineering attacks
**Your security is only as strong as your weakest moment.**
## Core OpSec Principles
### 1. Don't Talk About Your Holdings
**Danger: The #1 Rule**
The single most important OpSec rule: **don't tell people you own Bitcoin**.
Every person who knows is a potential:
- Social engineering vector
- Physical threat source
- Gossip chain starting point
**What to avoid:**
- Posting about Bitcoin on social media with your real identity
- Telling coworkers, acquaintances, or extended family
- Wearing Bitcoin merchandise
- Having Bitcoin stickers on your laptop/car
- Discussing specific amounts with anyone
**What's acceptable:**
- Discussing Bitcoin conceptually without revealing ownership
- Talking with close, trusted family who need to know (inheritance)
- Anonymous participation in Bitcoin communities
### 2. Verify Everything
**Trust no one. Verify everything.**
| Scenario | What to Verify |
|----------|----------------|
| Receiving address | Confirm on hardware wallet screen |
| Software download | Check official website, verify signatures |
| Firmware update | Verify on manufacturer's website first |
| "Support" contact | Companies never DM you first |
| Investment opportunity | If it sounds too good, it's a scam |
**Common verification failures:**
- Trusting addresses shown only on computer screen
- Downloading wallet software from Google ads
- Responding to "support" messages on social media
- Clicking links in emails claiming to be from exchanges
### 3. Assume Compromise
Operate as if every device could be compromised:
- **Your computer**: Could have malware showing fake addresses
- **Your phone** (could be SIM-swapped or have spyware)
- **Your email**: Could be accessed by attackers
- **Public WiFi**: Could be monitored
- **Cloud storage** (could be breached)
**Mitigations:**
- Verify addresses on hardware wallet, not computer
- Use hardware security keys for important accounts
- Don't store seeds digitally anywhere
- Use a VPN on public networks
- Enable 2FA everywhere (preferably hardware-based)
### 4. Compartmentalize
Don't put all your eggs in one basket:
- **Multiple wallets** for different purposes
- **Separate email** for Bitcoin-related accounts
- **Different identities** for Bitcoin vs. personal life
- **Geographic distribution** of backups
- **Multiple devices** (dedicated Bitcoin computer if possible)
### 5. Minimize Your Attack Surface
Every connection is a potential vulnerability:
- Fewer accounts = fewer breach points
- Fewer people who know = fewer social engineering vectors
- Fewer devices = fewer compromise points
- Less public presence = less targeting
## Practical OpSec Checklist
### Daily Habits
- [ ] Never discuss specific holdings
- [ ] Verify addresses on hardware device before sending
- [ ] Don't click links in emails; navigate directly to sites
- [ ] Use unique passwords for every account
- [ ] Be suspicious of unsolicited contact
### Communication Security
- [ ] Use encrypted messaging (Signal) for sensitive discussions
- [ ] Don't discuss Bitcoin on SMS or regular email
- [ ] Be vague if asked about Bitcoin ownership
- [ ] Never share your seed phrase with anyone for any reason
### Device Security
- [ ] Keep operating systems updated
- [ ] Use reputable antivirus/anti-malware
- [ ] Don't install unnecessary software
- [ ] Consider a dedicated Bitcoin-only device
- [ ] Use hardware security keys where possible
### Account Security
- [ ] Enable 2FA on all accounts (hardware key > authenticator app > SMS)
- [ ] Use unique, strong passwords (password manager)
- [ ] Separate email for financial/Bitcoin accounts
- [ ] Monitor accounts for unauthorized access
- [ ] Use privacy-focused email provider
## Social Engineering Awareness
**Social engineering** is manipulating people into giving up information or access. It's the most common attack vector.
### Common Attacks
**Phishing**
- Fake emails/websites that look legitimate
- "Your account has been compromised, click here"
- Fake wallet software or browser extensions
**Impersonation**
- "Tech support" reaching out to help
- Someone claiming to be from your exchange
- "Moderators" in Telegram/Discord groups
**Romance/Trust Scams**
- Building relationship to eventually request funds
- "Investment opportunities" from new friends
- Fake job offers requiring Bitcoin transactions
**Urgency/Fear**
- "Act now or lose your funds"
- "Your account will be locked"
- Pressure to make quick decisions
### Defense
- **Slow down**: Urgency is a red flag
- **Verify independently**: Don't use links provided; navigate directly
- **Question everything** (why would they contact you?)
- **Never share seeds** (no legitimate entity ever needs this)
- **Confirm through other channels**: Call the company directly
## OpSec for Different Threat Levels
### Casual Holder
- Don't discuss holdings publicly
- Use hardware wallet
- Strong passwords + 2FA
- Basic verification habits
### Serious Holder
- All of above, plus:
- Dedicated email for Bitcoin
- More careful about who knows
- Run your own node
- Consider VPN usage
### High-Value Holder
- All of above, plus:
- Dedicated Bitcoin device
- Strict compartmentalization
- Geographic distribution
- Consider legal structures
- Professional security review
## Red Flags Checklist
**Immediate danger signs:**
🚩 Anyone asking for your seed phrase
🚩 "Support" contacting you first
🚩 Urgency pressure ("act now!")
🚩 Requests for remote access
🚩 Investment opportunities that seem too good
🚩 Links in emails or DMs
🚩 Requests to "verify" your wallet
🚩 Anyone claiming they can "recover" lost Bitcoin
## Summary
Good OpSec is about:
1. **Silence**: Don't reveal you own Bitcoin
2. **Verification** (confirm everything independently)
3. **Assumption**: Treat all devices as potentially compromised
4. **Compartmentalization**: Separate concerns and identities
5. **Minimization**: Reduce your attack surface
6. **Skepticism** (question unsolicited contact)
The technical security of Bitcoin is excellent. The weak point is always human behavior.
---
## Related Guides
- [Physical Security](https://selfcustodylabs.com/docs/security/physical-security/): Real-world threat protection
- [Threat Model Assessment](https://selfcustodylabs.com/docs/learn/fundamentals/threat-models) (what level do you need?)
- [Recovery Scam Warning](https://selfcustodylabs.com/docs/reference/faq/recovery-scams): Common fraud tactics
---
# Physical Security for Bitcoin Holders
> Protect your Bitcoin from real-world threats. Home security, backup storage, travel considerations, and defense against physical attacks.
Source: https://selfcustodylabs.com/docs/security/physical-security/
Last updated: 2026-08-02
Publisher: Self Custody Labs (https://selfcustodylabs.com)
---
Cryptography can't protect you from physical threats.
**Warning: The Uncomfortable Truth**
No amount of technical security helps if someone threatens you or your family. Physical security is about preventing that situation and having options if it occurs.
## The $5 Wrench Attack
The famous "$5 wrench attack" illustrates a harsh reality:
```
CRYPTOGRAPHIC SECURITY
══════════════════════════════════════════════════════════════
Advanced encryption protects your Bitcoin from digital attacks.
Breaking it would take longer than the age of the universe.
$5 WRENCH ATTACK
══════════════════════════════════════════════════════════════
Someone threatens you with physical harm until you transfer
your Bitcoin. Works immediately.
```
**The point:** Your security model must account for physical threats, not just digital ones.
## Prevention First
The best physical security is preventing attackers from knowing you're a target.
### Don't Advertise
- No Bitcoin merchandise (shirts, hats, stickers)
- No car stickers or license plate frames
- No laptop stickers
- Don't display hardware wallets
- Be careful with mail packaging (generic boxes preferred)
### Don't Discuss
- Don't mention Bitcoin ownership to casual acquaintances
- Be especially careful at Bitcoin events/meetups
- Don't post on social media with real identity
- "I don't own any" is a valid response
### Don't Display
- Don't check portfolios in public
- Don't have wallet apps on home screen
- Be careful with screen visibility
- Close Bitcoin tabs when others can see
## Home Security Basics
If you hold significant Bitcoin, basic home security matters:
### Physical Barriers
- **Quality locks** on all entry points
- **Reinforced door frames** (kicks break frames, not locks)
- **Window security**: locks, film, or bars where appropriate
- **Lighting** (motion-activated exterior lights)
- **Visibility**: trim bushes near windows/doors
### Monitoring
- **Cameras** (visible deterrent + evidence)
- **Alarm system**: Monitored service recommended
- **Smart locks**: Know when doors open
- **Neighbors** (community awareness helps)
### Safe Storage
For hardware wallets and backup materials:
- **Home safe**: Fire-rated, bolted down
- **Hidden location**: Not the master bedroom (first place checked)
- **Decoy valuables** (give burglars something to take)
- **Off-site backup**: Don't keep everything in one location
## Seed Backup Storage
Your seed backup is the most sensitive physical item.
### Storage Options
| Location | Pros | Cons |
|----------|------|------|
| **Home safe** | Accessible, you control it | Known location, fire/flood risk |
| **Bank safe deposit box** | Secure, fire-protected | Bank access required, not truly private |
| **Buried/hidden** | Very hard to find | Forgetting location, environmental damage |
| **Trusted family** | Geographic distribution | Trust required, their security matters |
| **Multiple locations** | Redundancy | More exposure points |
### Best Practices
- **Metal backup**: Paper burns; metal survives fires
- **Multiple copies**: At least 2-3 in different locations
- **Geographic distribution** (different cities if possible)
- **Tamper evidence**: Know if backup has been accessed
- **Documentation**: Record where backups are (securely)
### What NOT to Do
❌ Single backup in one location
❌ Paper-only backup
❌ Bank safe deposit box as only copy
❌ Unprotected in a drawer
❌ Hidden somewhere you might forget
## Duress Protection
If you're ever in a situation where you're being coerced:
### Plausible Deniability
**Decoy wallet strategy:**
1. Primary wallet (large holdings) with passphrase
2. Decoy wallet (small amount) without passphrase
3. If coerced, reveal only the decoy
**How it works:**
- Same seed phrase generates two different wallets
- Without passphrase → Decoy wallet
- With passphrase → Real wallet
- Attacker can't know the passphrase wallet exists
**Warning: Limitations**
This only works if:
- Attacker doesn't know about passphrases
- Decoy has believable amount
- You can convincingly act defeated
- Attacker doesn't do research first
### Multisig Distribution
With multisig, you genuinely cannot access funds alone:
- "I need my partners to sign"
- "The other keys are in different locations"
- This isn't a bluff; it's true
This makes you a less attractive target.
### Time Locks
Some setups allow time-delayed transactions:
- Even if coerced, funds aren't immediately available
- Provides time for intervention
- More complex to set up
## Travel Security
Traveling with Bitcoin requires additional consideration.
### General Principles
- **Minimize what you carry**: Only what you need
- **Don't advertise** (no Bitcoin merchandise or visible hardware)
- **Separate wallets**: Travel wallet vs. main holdings
- **Know local laws**: Cryptocurrency regulations vary
### Hardware Wallet Travel
**Options:**
1. **Don't bring it**: Access via secure remote method if needed
2. **Bring empty device** (create new wallet at destination if needed)
3. **Bring loaded device**: Necessary for spending, increases risk
**If bringing a device:**
- Keep in carry-on (never checked luggage)
- Know how to explain it at security
- Consider a small decoy amount
- Memorize PIN (don't write it down)
### Border Crossings
- **Legal requirements vary**: Some countries require declaring crypto
- **Device searches**: Can you be compelled to unlock?
- **Plausible deniability** (empty device, passphrase wallet)
- **Know your rights**: Research before traveling
### Accommodation
- **Hotel safes**: Better than nothing, not truly secure
- **Don't leave devices unattended**: Maid service access
- **Be aware of surroundings** (who sees you with device?)
## Emergency Planning
Have a plan for various scenarios:
### If Your Home is Burglarized
1. Check if backup was accessed (tamper evidence)
2. If compromised, move funds to new wallet immediately
3. File police report (for insurance, not recovery expectation)
4. Review security, upgrade where needed
### If You're Physically Threatened
1. **Comply if necessary**: Bitcoin isn't worth injury or death
2. Give access to decoy wallet if you have one
3. Report to police when safe
4. Move any remaining funds to new setup
### If Backup is Stolen
1. Move funds immediately if you still have device access
2. Create new wallet with new seed
3. Secure new backup better
4. Consider what else was compromised
### If Hardware Wallet is Stolen
1. Don't panic. PIN + limited attempts provides time
2. Use backup to restore to new device
3. Move funds to new wallet (new seed)
4. Old seed should be considered compromised
## Security vs. Paranoia
Balance is important:
**Appropriate security:**
- Matches your actual threat level
- Doesn't significantly impair your life
- Is consistently maintainable
- Allows you to still use your Bitcoin
**Paranoia:**
- Excessive for your actual risk
- Causes significant stress
- Makes setup so complex you lock yourself out
- Prevents you from ever actually using Bitcoin
Most people need:
- Basic OpSec (don't advertise)
- Hardware wallet
- Distributed backups
- Basic home security
Few people need:
- Elaborate decoy systems
- Underground bunkers
- Professional security teams
## Summary
Physical security for Bitcoin:
1. **Prevention**: Don't let attackers know you're a target
2. **Barriers** (basic home security, secure storage)
3. **Distribution**: Don't keep everything in one place
4. **Contingency**: Decoy wallets, duress planning
5. **Balance**: Match security to actual threat level
The goal is making yourself a harder target than alternatives, not achieving perfect security.
---
## Related Guides
- [Operational Security](https://selfcustodylabs.com/docs/security/operational-security/): Behavioral security
- [Threat Model Assessment](https://selfcustodylabs.com/docs/learn/fundamentals/threat-models) (what level do you need?)
- [Passphrase Guide](https://selfcustodylabs.com/docs/learn/keys/passphrase/): Enable decoy wallets
- [Multisig Setup](https://selfcustodylabs.com/docs/learn/wallets/multisig/): Distributed key security
---
# Advanced Bitcoin Security: Multisig & Air-Gapped Setups
> Advanced Bitcoin self-custody: 2-of-3 multisig setup, inheritance planning for heirs, air-gapped signing computers, and open-source firmware guides.
Source: https://selfcustodylabs.com/docs/advanced/
Last updated: 2026-08-21
Publisher: Self Custody Labs (https://selfcustodylabs.com)
---
Take your Bitcoin security to the highest level.
**Warning: Prerequisites**
These guides are for users who already have:
- A working hardware wallet setup
- Verified backup recovery process
- Understanding of basic Bitcoin concepts
If you're new, start with [Learn](https://selfcustodylabs.com/docs/learn/) and [Wallet Setup](https://selfcustodylabs.com/docs/wallet-setup/) first.
## Why Go Advanced?
Standard hardware wallet setups are excellent for most users. Advanced setups address specific threat models:
| Setup | Protects Against | Complexity | Who Needs It |
|-------|------------------|------------|--------------|
| **Multisig** | Single point of failure, device compromise | High | Large holdings, inheritance planning |
| **Inheritance Planning** | Loss of Bitcoin at death | Medium | Anyone with Bitcoin to pass on |
| **Air-Gapped Computer** | Network-based attacks, malware | Medium | DIY seed generation, offline signing |
| **Bitcoin Computer** | Compromised daily-use devices | Medium | Privacy-focused users |
| **Open Firmware** | BIOS-level backdoors, Intel ME | Very High | Maximum security requirements |
**Most people don't need these.** Match your security to your [threat model](https://selfcustodylabs.com/docs/learn/fundamentals/threat-models).
---
## 🔐 Multisig Wallets
### [Multisig Setup Guide](https://selfcustodylabs.com/docs/learn/wallets/multisig/)
**Time:** 4-8 hours | **Difficulty:** Advanced | **Cost:** $230-510
Eliminate single points of failure by requiring multiple keys to spend. In a 2-of-3 multisig, you need any 2 of 3 keys to move funds.
**Benefits:**
- No single device compromise can steal funds
- Geographic distribution of keys
- Inheritance planning built-in
- Survives loss of one key
**What you'll learn:**
- Multisig concepts and quorum selection
- Hardware wallet configuration
- Sparrow Wallet multisig setup
- Backup and recovery procedures
**Prerequisites:** Experience with single-sig hardware wallets, understanding of [private keys](https://selfcustodylabs.com/docs/learn/keys/intro).
---
## 📜 Inheritance Planning
### [Bitcoin Inheritance Guide](https://selfcustodylabs.com/docs/advanced/inheritance-planning)
**Time:** 2-4 hours | **Difficulty:** Intermediate | **Cost:** Varies
Ensure your Bitcoin passes to your loved ones, not lost forever. An estimated 4 million Bitcoin are permanently lost, many because owners died without sharing access.
**What you'll learn:**
- Why Bitcoin inheritance is different from traditional assets
- Simple to advanced inheritance approaches
- Step-by-step multisig inheritance setup
- Common mistakes that lose family fortunes
- Legal considerations and documentation
**Best approach:** Family multisig where heirs hold keys from the start. No reconstruction needed after death.
---
## 🔌 Air-Gapped Computer
### [Air-Gapped Computer Guide](https://selfcustodylabs.com/docs/learn/wallets/air-gapped-wallets/)
**Time:** 2-4 hours | **Difficulty:** Intermediate | **Cost:** $50-200 (or free with old hardware)
A computer that has never and will never connect to any network. Used for:
- DIY seed generation
- Offline transaction signing
- Secure key operations
**What you'll learn:**
- Types of air-gapped setups
- Hardware selection and preparation
- Software installation (Tails, etc.)
- Secure data transfer methods
**Why it matters:** Even the best hardware wallet connects to your computer. An air-gapped machine provides complete isolation.
---
## 💻 Dedicated Bitcoin Computer
### [Bitcoin Computer Guide](https://selfcustodylabs.com/docs/advanced/bitcoin-computer/)
**Time:** 2-4 hours | **Difficulty:** Intermediate | **Cost:** $50-150 (or free with repurposed hardware)
A computer used exclusively for Bitcoin operations, separate from your daily-use devices.
**Benefits:**
- Reduced attack surface
- No browsing, email, or other risky activities
- Clean environment for wallet software
- Can be hardened specifically for Bitcoin
**What you'll learn:**
- Hardware selection and options
- Operating system choices
- Security hardening
- Software installation
**Difference from air-gapped:** A Bitcoin computer can connect to the network (for running a node, broadcasting transactions). An air-gapped computer never connects.
---
## 🔧 Open-Source Firmware
For users with the highest security requirements, replacing proprietary BIOS/UEFI with open-source firmware eliminates potential backdoors at the deepest level.
### [Libreboot Guide](https://selfcustodylabs.com/docs/libreboot/)
**Difficulty:** Very Advanced | **Cost:** $15-30 (flashing hardware)
Fully open-source firmware that completely replaces proprietary BIOS and removes Intel Management Engine. Maximum transparency and security.
**Best for:** Users who want complete control and can verify the entire software stack.
### [Coreboot Guide](https://selfcustodylabs.com/docs/coreboot/)
**Difficulty:** Very Advanced | **Cost:** $0-30
Open-source firmware foundation. More hardware support than Libreboot but may retain some proprietary blobs.
**Best for:** Users who need open firmware on hardware not supported by Libreboot.
---
## Setup Progression
Build advanced capabilities in stages:
### Stage 1: Foundation (Do First)
1. **[Hardware wallet](https://selfcustodylabs.com/docs/wallet-setup/hardware-wallet/)**: Basic self-custody
2. **[Backup verification](https://selfcustodylabs.com/docs/wallet-setup/backup-verification/)**: Confirm recovery works
3. **[Run your own node](https://selfcustodylabs.com/docs/bitcoin-node/)**: Verify transactions yourself
### Stage 2: Enhanced Security
4. **[Dedicated Bitcoin computer](https://selfcustodylabs.com/docs/advanced/bitcoin-computer/)**: Separate from daily use
5. **[Security hardening](https://selfcustodylabs.com/docs/security/)**: OpSec and physical security
6. **[Inheritance planning](https://selfcustodylabs.com/docs/advanced/inheritance-planning)**: Don't let Bitcoin die with you
### Stage 3: Advanced Protection
7. **[Air-gapped computer](https://selfcustodylabs.com/docs/learn/wallets/air-gapped-wallets/)**: For offline operations
8. **[DIY seed generation](https://selfcustodylabs.com/docs/learn/keys/random/)**: Verify your entropy
### Stage 4: Maximum Security
9. **[Multisig setup](https://selfcustodylabs.com/docs/learn/wallets/multisig/)**: Eliminate single points of failure
10. **[Open firmware](https://selfcustodylabs.com/docs/libreboot/)**: Remove BIOS-level threats
---
## Choosing Your Path
### "I want to eliminate single points of failure"
→ **[Multisig](https://selfcustodylabs.com/docs/learn/wallets/multisig/)** is your answer. Start with 2-of-3.
### "I want my family to inherit my Bitcoin"
→ **[Inheritance Planning](https://selfcustodylabs.com/docs/advanced/inheritance-planning)**: don't let your Bitcoin die with you.
### "I want to generate my own seed securely"
→ **[Air-gapped computer](https://selfcustodylabs.com/docs/learn/wallets/air-gapped-wallets/)** + [DIY seed guide](https://selfcustodylabs.com/docs/learn/keys/random/)
### "I want a clean environment for Bitcoin"
→ **[Dedicated Bitcoin computer](https://selfcustodylabs.com/docs/advanced/bitcoin-computer/)**
### "I want maximum possible security"
→ All of the above, plus **[open firmware](https://selfcustodylabs.com/docs/libreboot/)**
---
## Common Questions
**"Is multisig worth the complexity?"**
For significant holdings (life-changing amounts), yes. The complexity cost is worth eliminating single points of failure. For smaller amounts, a well-secured single-sig setup is sufficient.
**"Can I use an old laptop as an air-gapped computer?"**
Yes! Old laptops are ideal. Disable WiFi/Bluetooth at the hardware level if possible (remove the card). See the [air-gapped setup guide](https://selfcustodylabs.com/docs/learn/wallets/air-gapped-wallets/#building-your-air-gapped-computer).
**"Do I really need open-source firmware?"**
For most users, no. Standard hardware wallets with good practices provide excellent security. Open firmware is for users with extreme threat models or those who want complete transparency. One honest caveat from 2026: open source alone caught nothing in the [Coldcard entropy incident](https://selfcustodylabs.com/docs/learn/wallets/coldcard-entropy-incident/): the bug sat in public code for five years. Openness enables verification; someone still has to do it.
**"What about hardware wallets with secure elements vs. open source?"**
Both approaches have merit. Secure elements provide tamper resistance. Open source provides auditability. It's no longer a strict trade-off: the Trezor Safe 7 pairs open firmware with an auditable secure element, and BitBox02 Nova and Passport Prime combine certified chips with fully open code. See the [hardware wallet comparison](https://selfcustodylabs.com/docs/reference/hardware-wallet-comparison).
---
## Related Resources
### Prerequisites
- [Threat Model Assessment](https://selfcustodylabs.com/docs/learn/fundamentals/threat-models): What level do you need?
- [Hardware Wallet Setup](https://selfcustodylabs.com/docs/wallet-setup/hardware-wallet/): Start here if you haven't
### Supporting Guides
- [Bitcoin Node Setup](https://selfcustodylabs.com/docs/bitcoin-node/): Verify your own transactions
- [Security Hardening](https://selfcustodylabs.com/docs/security/): OpSec and physical security
- [Privacy Guides](https://selfcustodylabs.com/docs/learn/privacy/protecting-privacy/): Protect your transaction history
---
# Dedicated Bitcoin Computer Guide
> Build a dedicated Bitcoin computer for secure transactions. Learn why using a regular computer is dangerous and how to protect your Bitcoin.
Source: https://selfcustodylabs.com/docs/advanced/bitcoin-computer/
Last updated: 2026-04-14
Publisher: Self Custody Labs (https://selfcustodylabs.com)
---
**Info: What You'll Do**
In this guide, you will:
- Understand why a dedicated Bitcoin computer is important
- Choose hardware for your Bitcoin-only machine
- Set up a secure environment for transactions
**Time required:** 1-2 hours
**Difficulty:** Beginner to Intermediate
**Estimated cost:** $50-150 (used laptop) or $0 (repurpose old computer)
**Prerequisites:** Spare laptop or desktop, USB drive
**Tip: Background Reading**
Before starting, make sure you understand:
- [Hardware wallets](https://selfcustodylabs.com/docs/learn/wallets/hardware-wallets) and how they protect your keys
- [Why privacy matters](https://selfcustodylabs.com/docs/learn/privacy/why-privacy-matters) when transacting
**Danger: Important**
**Never use your regular computer for Bitcoin transactions!** Malware on your everyday machine can compromise your security even if you use a hardware wallet.
## What is a Bitcoin Computer?
A Bitcoin computer is a dedicated device for securely creating and broadcasting Bitcoin transactions. It runs minimal software in a clean environment, reducing attack surface.
Transaction signing should still be handled by:
- A hardware wallet, or
- An [air-gapped computer](https://selfcustodylabs.com/docs/learn/wallets/air-gapped-wallets) for maximum security
## Why Your Regular Computer is Dangerous
Your everyday computer is exposed to:
- Websites, downloads, and email attachments
- Browser extensions and plugins
- Various software with potential vulnerabilities
If malware infects your regular computer, attackers could:
| Risk | Impact |
|------|--------|
| **View your balances** | Know how much you have (targeting risk) |
| **Modify clipboard** | Change destination addresses when you paste |
| **Monitor activity** | Track when you transact |
| **Physical threat** | Target you if they see large holdings |
A dedicated Bitcoin computer isolates your Bitcoin activity from these risks.
## Guide Overview
| Step | What You'll Do |
|------|----------------|
| 1. [Choosing Hardware](https://selfcustodylabs.com/docs/advanced/bitcoin-computer/choice) | Select appropriate hardware |
| 2. [Setup](https://selfcustodylabs.com/docs/advanced/bitcoin-computer/setup) | Install and configure your Bitcoin computer |
---
## Related Guides
**Tip: Want Maximum Security?**
For the highest level of protection, consider an **[Air-Gapped Computer](https://selfcustodylabs.com/docs/learn/wallets/air-gapped-wallets)** - a device that never connects to the internet and handles all signing offline.
**Info: Firmware Security**
Enhance your Bitcoin computer's security with open-source firmware:
- **[Libreboot Guide](https://selfcustodylabs.com/docs/libreboot)** - Maximum openness, removes Intel ME
- **[Coreboot Guide](https://selfcustodylabs.com/docs/coreboot)** - Supports more hardware models
---
# Choose Your Bitcoin Computer
> How to choose the right laptop for Bitcoin self-custody. Hardware recommendations and security precautions for your dedicated Bitcoin machine.
Source: https://selfcustodylabs.com/docs/advanced/bitcoin-computer/choice/
Last updated: 2026-05-23
Publisher: Self Custody Labs (https://selfcustodylabs.com)
---
I recommend getting a laptop that suits the size of your Bitcoin stack. The most basic models available today are more than capable of handling what you'll need. The processor and RAM specifications aren’t a big concern, as even entry-level setups will do the job just fine.
## My Recommendation
Some people suggest buying a brand-new laptop for security reasons, but what about the BIOS? A factory-installed BIOS is often proprietary and may not be fully trustworthy. That’s why I recommend a laptop that allows you to flash a custom open-source BIOS. My preferred choice is Libreboot (see the guide here). Flashing it isn’t the easiest process, but the security benefits are well worth the effort.
### Budget Options
- **Low Budget** – The Lenovo ThinkPad [X230](https://psref.lenovo.com/syspool/Sys/PDF/withdrawnbook/ThinkPad_X230.pdf) or [T430](https://psref.lenovo.com/syspool/sys/pdf/withdrawnbook/thinkpad_t430.pdf). These are legendary laptops, possibly among the best ever made!
- **Medium Budget** – The Lenovo ThinkPad [T480s](https://psref.lenovo.com/syspool/Sys/PDF/ThinkPad/ThinkPad_T480s/ThinkPad_T480s_Spec.pdf). Recently supported by Libreboot, it’s easy to flash, supports NVMe SSDs, and can handle up to 24GB of RAM. This is an amazing laptop that can also be used for everyday tasks or other Bitcoin-related activities.
## Hardware Precautions
Since these laptops are often purchased second-hand on eBay, Gumtree, or Marketplace, it's important to take a few precautions before turning them into a Bitcoin computer:
- **Use a brand-new SSD** – If possible, replace the old storage drive with a new SSD. If you can’t afford one, at the very least, format the existing drive twice and encrypt it using LUKS.
- **Use new USB drives** – Avoid using old or unknown USB sticks for installation and backups. Start fresh with brand-new USB keys.
---
# Bitcoin Computer Setup Guide
> Set up your dedicated Bitcoin computer with Libreboot BIOS, Linux Mint, and LUKS encryption for maximum security and privacy.
Source: https://selfcustodylabs.com/docs/advanced/bitcoin-computer/setup/
Last updated: 2026-05-23
Publisher: Self Custody Labs (https://selfcustodylabs.com)
---
When setting up your Bitcoin computer, it’s essential to focus on three key areas: BIOS firmware, Operating System, and Disk Encryption.
## BIOS: Libreboot
Libreboot ([see my guide here](https://selfcustodylabs.com/docs/libreboot)) is an open-source BIOS/firmware replacement that offers significant security advantages for any computer, particularly for an Bitcoin computer. By removing proprietary firmware like Intel Management Engine (ME) or AMD Platform Security Processor (PSP), Libreboot eliminates potential backdoors that could compromise the security of your device. In an Bitcoin computer setup, where the primary concern is creating and broadcasting Bitcoin transactions in a protected, malware-free environment, using Libreboot ensures that no hidden code is running on your hardware, minimizing the risk of attacks. Libreboot is fully transparent, meaning its source code is available for review, making it an ideal choice for those who prioritize control over their system and its security.
## OS: Linux Mint
Linux Mint is a great choice for a Bitcoin Laptop due to its balance of ease of use and stability. It offers a lightweight, user-friendly experience, ideal for minimizing unnecessary services and applications in an offline setup. Built on Ubuntu, Linux Mint benefits from a reputation for reliability and compatibility with various hardware, making it a solid foundation for a secure, online environment. Its default desktop environment is straightforward and easy to navigate, even for users who aren't deeply familiar with Linux.
## Hard Drive: LUKS Encryption
Linux Mint offers full disk encryption through LUKS (Linux Unified Key Setup), which ensures that all data on the device remains encrypted at rest. During installation, you must select LUKS to encrypt the entire drive, protecting sensitive data even if the device is stolen or accessed without authorization. LUKS is widely regarded as one of the most reliable encryption standards on Linux, offering both strong security and flexibility. The system uses a passphrase to unlock the encryption, and it supports additional layers of protection, such as multiple key slots for different passphrases. With LUKS, your Bitcoin computer can operate securely online, with all data fully protected from unauthorized access, making it a perfect solution for safeguarding critical Bitcoin data and other sensitive files.
## TOR
Tor (The Onion Router) protects your privacy by encrypting your internet traffic and routing it through multiple servers, making it difficult for anyone to track your IP address or link your online activity to your identity.
Since you'll be setting up a Bitcoin node on a separate device that runs over Tor, it's not strictly necessary to route all internet traffic from your Bitcoin laptop through Tor. However, because the laptop is connected to the internet, routing all Bitcoin-related activity through Tor ensures maximum privacy.
### Why Use Tor?
- **Hides Your IP Address** – Prevents blockchain surveillance from linking your node or wallet activity to your location.
- **Bypasses Censorship** – Some ISPs or governments restrict Bitcoin traffic; Tor helps bypass these blocks.
- **Enhances Privacy** – Even if you’re running a full node, Tor ensures your connections remain anonymous.
---
# Bitcoin Inheritance Planning: Pass Bitcoin to Heirs
> Plan Bitcoin inheritance for your heirs. Approaches from sealed instructions to family multisig, plus how to write recovery instructions.
Source: https://selfcustodylabs.com/docs/advanced/inheritance-planning/
Last updated: 2026-08-21
Publisher: Self Custody Labs (https://selfcustodylabs.com)
---
How to ensure your Bitcoin passes to your loved ones, not lost forever.
**Danger: The Stakes Are High**
An estimated **4 million Bitcoin** (worth hundreds of billions) are permanently lost, many because owners died without sharing access. Don't let your Bitcoin become another statistic.
## On This Page
This comprehensive guide covers everything you need:
1. **[Why Bitcoin Inheritance Is Different](#why-bitcoin-inheritance-is-different)**: Understanding the unique challenge
2. **[Approaches by Complexity](#approaches-by-complexity)**: Five methods from simple to advanced
3. **[Recommended Setup: Family Multisig](#recommended-setup-family-multisig)**: Step-by-step implementation
4. **[For Single-Sig Wallets](#for-single-sig-wallets)**: Options if you don't use multisig
5. **[Common Mistakes to Avoid](#common-mistakes-to-avoid)**: Eight pitfalls and how to prevent them
6. **[Legal Considerations](#legal-considerations)**: Wills, trusts, and taxes
7. **[Maintenance Schedule](#maintenance-schedule)**: Keeping your plan current
8. **[Quick Start Checklist](#quick-start-checklist)**: Action items summary
**Time to read:** ~20 minutes | **Time to implement:** 1-2 hours
---
## Why Bitcoin Inheritance Is Different
Traditional assets have built-in recovery mechanisms. Banks have beneficiary designations. Brokerages have transfer-on-death accounts. Courts can order access to safe deposit boxes.
**Bitcoin has none of this.**
| Traditional Assets | Bitcoin |
|-------------------|---------|
| Banks verify identity | Math verifies ownership |
| Courts can force access | No authority can recover keys |
| "Forgot password" exists | Lost seed = lost forever |
| Institutions hold records | Only you hold the keys |
If you die without a plan, your Bitcoin dies with you. There is no appeals process. No customer support. No exceptions.
---
## The Inheritance Dilemma
Bitcoin inheritance creates a fundamental tension:
**Security requires secrecy:** The fewer people who know your seed phrase, the safer your Bitcoin from theft.
**Inheritance requires sharing:** Someone must eventually access your keys after you're gone.
Every inheritance solution is a balance between these competing needs. The right choice depends on your situation.
---
## Approaches by Complexity
### Level 1: Simple Letter Method
**Best for:** Smaller amounts, high-trust family situations
**What it is:** A sealed letter with instructions stored securely, to be opened only upon death.
**Pros:**
- Simple to set up
- No technical knowledge required by heirs
- Works today with no changes to your setup
**Cons:**
- Single point of failure (letter gets lost/found/destroyed)
- Requires high trust (anyone who finds it can steal)
- No verification that letter is still valid/accessible
---
### Level 2: Lawyer/Executor Method
**Best for:** Moderate amounts, existing estate planning
**What it is:** Instructions stored with your estate attorney or in a safe deposit box accessed through probate.
**Pros:**
- Integrates with existing estate planning
- Professional management
- Can include conditions and delays
**Cons:**
- Requires trusting a third party
- Probate delays (months to years)
- Lawyer may not understand Bitcoin security
- Physical document can still be compromised
---
### Level 3: Split Seed Method
**Best for:** Moderate to significant amounts, technical heirs
**What it is:** Seed phrase split into parts distributed to different people/locations. Example: 3 parts, any 2 needed to reconstruct.
**Pros:**
- No single person/location has full access
- Survives loss of one part
- Can distribute across trusted parties
**Cons:**
- Requires technical understanding to recombine
- Shamir's Secret Sharing adds complexity
- Simple splits (words 1-12, 13-24) are LESS secure, not more
**Warning: About Simple Splits**
Never split a seed phrase by just dividing the words (1-12 to Person A, 13-24 to Person B). This is **less secure** than giving the whole seed to one trusted person. Each half significantly reduces the search space for an attacker. Use Shamir's Secret Sharing (SLIP39) or proper threshold schemes instead.
---
### Level 4: Multisig Inheritance
**Best for:** Significant amounts, long-term planning
**What it is:** A multisig wallet where heirs hold some keys from the start.
**Example 2-of-3 Setup:**
- Key 1: You control (primary spending)
- Key 2: Trusted family member (sealed, stored securely)
- Key 3: Estate attorney or second family member
**Pros:**
- No single point of failure
- Heirs can access funds without reconstructing anything
- Can spend normally during your lifetime
- Built-in redundancy
**Cons:**
- Complex to set up
- Requires hardware wallets for multiple parties
- All parties must safeguard wallet descriptor
- Higher upfront cost
This is the recommended approach for significant holdings.
---
### Level 5: Collaborative Custody Services
**Best for:** Very large holdings, institutional needs
**What it is:** Professional services like Unchained, Casa, or similar that hold one key in a multisig arrangement.
**Pros:**
- Professional key management
- Inheritance services built-in
- Support if something goes wrong
- Geographic distribution
**Cons:**
- Monthly/annual fees
- Counterparty risk (company could fail)
- Privacy implications
- Regulatory uncertainty
---
## Recommended Setup: Family Multisig
For most people with significant Bitcoin holdings, a family multisig provides the best balance of security and inheritance planning.
### How It Works
```
2-of-3 Multisig Structure
├── Key 1: Your primary hardware wallet (daily use)
├── Key 2: Spouse/child's hardware wallet (stored securely)
└── Key 3: Backup location (safe deposit box, attorney, etc.)
```
**During your lifetime:** You use Key 1 plus Key 2 or Key 3 to spend.
**After your passing:** Your heir uses Key 2 plus Key 3 to access funds.
### Step-by-Step Implementation
#### Step 1: Set Up the Multisig
Follow the [Multisig Setup Guide](https://selfcustodylabs.com/docs/learn/wallets/multisig/) to create a 2-of-3 multisig wallet.
Assign keys with inheritance in mind:
- **Key 1:** Your primary device (e.g., Jade Plus)
- **Key 2:** Heir's device (e.g., Trezor Safe 5), they keep it
- **Key 3:** Backup device (e.g., Keystone 3 Pro), secure storage
#### Step 2: Distribute the Seeds
Each key holder backs up their own seed phrase. You do NOT need to know their seeds, and they don't need to know yours.
| Key | Held By | Seed Stored |
|-----|---------|-------------|
| Key 1 | You | Your secure location |
| Key 2 | Primary heir | Their secure location |
| Key 3 | Backup | Safe deposit box, attorney, etc. |
#### Step 3: Back Up the Wallet Descriptor
**Danger: Critical Step**
Every key holder MUST have a copy of the wallet descriptor (also called "wallet configuration" or "multisig file"). Without it, the funds cannot be spent even with all three seeds.
The wallet descriptor contains:
- The extended public keys (xpubs) of all devices
- The quorum requirements (2-of-3)
- Derivation paths
- Address format
Export from Sparrow Wallet: `File → Export → Wallet Descriptor`
Store copies:
- With each hardware wallet backup
- With your estate documents
- In your instructions letter
#### Step 4: Create Instructions Document
Write clear instructions for your heirs. Include:
```markdown
## Bitcoin Inheritance Instructions
### What You're Inheriting
- A 2-of-3 multisig Bitcoin wallet
- You need ANY 2 of 3 keys to access funds
### What You Need
1. Two hardware wallets with their seed phrases
2. The wallet descriptor file (attached/located at ___)
3. Sparrow Wallet software (https://sparrowwallet.com)
### Steps to Access Funds
1. Download and verify Sparrow Wallet
2. Go to File → Import Wallet
3. Select "Wallet Descriptor" and load the file
4. Connect first hardware wallet, verify it's recognized
5. Connect second hardware wallet
6. You can now see balance and send transactions
### Important Contacts
- Estate attorney: [name, phone]
- Technical helper (if needed): [name, phone]
- Key 3 location: [details]
### If Something Goes Wrong
- DO NOT share seed phrases with "recovery services": they are scams
- Contact [trusted technical person] before taking any action
- The Bitcoin cannot be "hacked": if seeds are secure, funds are secure
```
#### Step 5: Test the Setup
Before relying on this for inheritance:
1. **Test spending:** Make a small transaction using Keys 1+2, then 1+3, then 2+3
2. **Test recovery:** Have your heir recover their wallet on a fresh device
3. **Verify descriptor:** Confirm all parties' descriptor copies produce the same addresses
4. **Practice run:** Walk your heir through the entire process with a test amount
#### Step 6: Secure Storage Checklist
| Item | Location | Who Knows |
|------|----------|-----------|
| Key 1 device | Your home | You |
| Key 1 seed | Your secure location | You only |
| Key 2 device | Heir's possession | Heir |
| Key 2 seed | Heir's secure location | Heir only |
| Key 3 device | Backup location | You (+ executor) |
| Key 3 seed | With Key 3 device | You (+ executor) |
| Wallet descriptor | Multiple locations | All parties |
| Instructions | With estate documents | Executor |
---
## For Single-Sig Wallets
If you're not ready for multisig, you can still plan for inheritance with a single-signature wallet.
### Option A: Sealed Letter with Passphrase
1. Store your seed phrase in a secure location (safe, safe deposit box)
2. Use a strong passphrase on your wallet
3. Store the passphrase SEPARATELY (with attorney, different location)
4. Leave instructions explaining both are needed
**Advantage:** Neither location alone grants access.
**Disadvantage:** Still relies on both items surviving and being found.
### Option B: Time-Locked Instructions
1. Use a service like [Dead Man's Switch](https://www.deadmansswitch.net/) or similar
2. Set up regular check-ins (monthly/quarterly)
3. If you miss check-ins, instructions are automatically sent
**Advantage:** Automated, doesn't require anyone to know in advance.
**Disadvantage:** Relies on third-party service continuing to operate.
### Option C: Shamir's Secret Sharing (SLIP39)
Some wallets support SLIP39, which splits your seed into shares where you define how many are needed to reconstruct.
Example: 3-of-5 split
- Share 1: Primary heir
- Share 2: Secondary heir
- Share 3: Attorney
- Share 4: Safe deposit box
- Share 5: Trusted friend
**Advantage:** True threshold security (any 3 of 5 works).
**Disadvantage:** Not all wallets support SLIP39; adds recovery complexity.
---
## Common Mistakes to Avoid
### 1. "I'll Set This Up Later"
The most common mistake. People procrastinate, and tragedy doesn't wait. Set up basic inheritance planning TODAY, even if imperfect. Improve it later.
### 2. Storing Seeds and Instructions Together
If someone finds your seed phrase AND knows it's for Bitcoin, they can steal everything. Keep seeds and explanatory documents separate.
### 3. Assuming Heirs Will "Figure It Out"
Most people don't understand Bitcoin. Without clear instructions, heirs may:
- Never find the wallet
- Fall for recovery scams
- Make mistakes that lose funds
- Give up and assume it's inaccessible
### 4. Forgetting the Wallet Descriptor (Multisig)
Seed phrases alone do NOT restore a multisig wallet. The descriptor is required. Back it up with every seed.
### 5. Not Testing the Plan
An untested inheritance plan is no plan at all. Walk through the entire process with your heirs before you need it.
### 6. Single Point of Failure
If everything depends on one document, one location, or one person, that's a vulnerability. Build in redundancy.
### 7. Over-Engineering
A complex plan that heirs can't execute is worse than a simple plan they can. Match complexity to your heirs' technical ability.
### 8. Trusting "Bitcoin Recovery Services"
There is no legitimate way to recover Bitcoin without the seed phrase. Any service claiming otherwise is a scam targeting grieving families. Warn your heirs explicitly.
---
## Legal Considerations
**Info: Not Legal Advice**
This is educational information, not legal advice. Consult an estate planning attorney familiar with digital assets in your jurisdiction.
### Include Bitcoin in Your Will
Even if you handle key transfer separately, your will should acknowledge Bitcoin exists. This prevents disputes and ensures your wishes are documented.
Example language (customize with your attorney):
> "I own Bitcoin cryptocurrency. Instructions for accessing these assets are stored separately and have been provided to [person/location]. I direct that these assets pass to [beneficiary]."
### Consider a Trust
A trust can provide:
- Privacy (avoids probate records)
- Conditions on distribution
- Professional management during transition
- Tax planning opportunities
Some people create a "Bitcoin trust" specifically for digital assets.
### Document for Taxes
Your heirs may owe taxes on inherited Bitcoin. Keep records of:
- Acquisition dates and prices (cost basis)
- Which addresses/wallets you control
- Any taxable events during your lifetime
This documentation can save heirs significant money and legal complications.
### International Considerations
If you have heirs in different countries:
- Laws vary significantly by jurisdiction
- Key storage locations may have legal implications
- Consider consulting attorneys in relevant jurisdictions
---
## Maintenance Schedule
Inheritance planning isn't "set and forget." Review annually:
### Annual Checklist
- [ ] **Verify access:** Can you still access all keys?
- [ ] **Update amounts:** Has your Bitcoin holding changed significantly?
- [ ] **Check contacts:** Are attorney, heir, trustee contacts still valid?
- [ ] **Test backups:** Do seed backups still work?
- [ ] **Review instructions:** Are they still accurate and clear?
- [ ] **Life changes:** Marriage, divorce, births, deaths: update beneficiaries?
- [ ] **Software updates:** Has wallet software changed significantly?
### When to Update Your Plan
- Significant change in Bitcoin value
- Change in family situation (marriage, divorce, children)
- Moving to a different jurisdiction
- Change in estate attorney or executor
- Hardware wallet reaching end of life
- Discovering a security concern
---
## Quick Start Checklist
If you do nothing else, do this TODAY:
- [ ] **Write down** which wallets/addresses hold your Bitcoin
- [ ] **Verify** your seed phrase backups exist and are readable
- [ ] **Tell ONE trusted person** that you own Bitcoin and where to find instructions
- [ ] **Write basic instructions** explaining how to access your Bitcoin
- [ ] **Store instructions** separately from seed phrases
This takes 30 minutes and could save your family from permanent loss.
---
## Summary
| Approach | Best For | Complexity | Trust Required |
|----------|----------|------------|----------------|
| Letter method | Small amounts, high trust | Low | High |
| Lawyer/executor | Existing estate plan | Low | Medium |
| Split seed (SLIP39) | Technical heirs | Medium | Distributed |
| **Multisig (recommended)** | **Significant holdings** | **Medium-High** | **Distributed** |
| Collaborative custody | Large holdings, institutions | Medium | Service provider |
The best plan is one that:
1. Actually gets implemented (don't let perfect be the enemy of good)
2. Your heirs can actually execute
3. Doesn't create new security vulnerabilities
4. Gets reviewed and updated regularly
---
## Next Steps
1. **Assess your situation:** How much Bitcoin? Who are your heirs? What's their technical level?
2. **Choose an approach:** Match complexity to your needs and heirs' abilities
3. **Implement the basics:** Even a simple letter is better than nothing
4. **Test the plan:** Walk through it before you need it
5. **Document and store:** Multiple copies, multiple locations
6. **Schedule reviews:** Annual check-up at minimum
### Related Guides
- [Multisig Setup Guide](https://selfcustodylabs.com/docs/learn/wallets/multisig/): Implement 2-of-3 inheritance multisig
- [Backup Verification](https://selfcustodylabs.com/docs/wallet-setup/backup-verification/): Ensure your backups work
- [Threat Model Assessment](https://selfcustodylabs.com/docs/learn/fundamentals/threat-models/): Understand what you're protecting against
- [Physical Security](https://selfcustodylabs.com/docs/security/physical-security/): Secure storage locations
---
# Frequently Asked Questions
> Common questions about Bitcoin self-custody, seed phrases, recovery, and security. Get answers to the questions that could save your Bitcoin.
Source: https://selfcustodylabs.com/docs/reference/faq/
Last updated: 2026-08-21
Publisher: Self Custody Labs (https://selfcustodylabs.com)
---
Answers to common (and critical) questions about Bitcoin self-custody.
**Tip: Can't Find Your Answer?**
Check the [Glossary](https://selfcustodylabs.com/docs/reference/glossary) for term definitions, or use the search function.
## 🔑 Seed Phrases & Recovery
### [Is my Coldcard seed affected by the 2026 entropy flaw?](https://selfcustodylabs.com/docs/learn/wallets/coldcard-entropy-incident/)
If you generated a seed on a Coldcard between March 2021 and July 2026, treat it as compromised and migrate; firmware updates don't fix an existing weak seed. Dice-roll and imported seeds were never affected. Full affected-firmware table and migration steps at the link.
### [What happens if I lose my seed phrase?](https://selfcustodylabs.com/docs/reference/faq/lost-seed)
The hard truth: if you lose your seed phrase AND your device, your Bitcoin is almost certainly gone forever. This page explains what's possible and what isn't.
### [Are Bitcoin recovery services legitimate?](https://selfcustodylabs.com/docs/reference/faq/recovery-scams)
Almost all "recovery services" are scams targeting desperate people. Learn how to recognize fraud and what legitimate recovery actually looks like.
### [My wallet shows zero balance after recovery](https://selfcustodylabs.com/docs/reference/faq/recovery-troubleshooting)
Recovered your wallet but funds are missing? This is usually a configuration issue, not lost Bitcoin. Troubleshoot derivation paths, passphrases, and other common problems.
---
## 📜 Estate & Inheritance
### [How do I pass my Bitcoin to my family?](https://selfcustodylabs.com/docs/advanced/inheritance-planning)
Comprehensive guide to Bitcoin inheritance planning. An estimated 4 million Bitcoin are permanently lost because owners died without sharing access. Don't let your Bitcoin become another statistic.
---
## 📋 More Questions Coming Soon
We're building out this FAQ based on common questions. Topics planned include:
- What if I sent Bitcoin to the wrong address?
- How do I know my hardware wallet is genuine?
- Should I use a passphrase?
- How often should I verify my backup?
- What's the safest way to buy Bitcoin?
---
## Ask a Question
Have a question not covered here?
- Check if it's in the [Glossary](https://selfcustodylabs.com/docs/reference/glossary)
- Search the documentation
- Ask via [Nostr](https://primal.net/p/nprofile1qqspxh8lqez8f9kt2cv7626rfax0phl8lu8tgt0jjjkwa6n8lhmt9qgxf4ey5) or [X](https://x.com/selfcustodylabs)
Your questions help us improve these resources for everyone.
---
# What Happens If You Lose Your Seed Phrase?
> The hard truth about losing your Bitcoin seed phrase. What you can do, what you can't do, and how to prevent this from happening to you.
Source: https://selfcustodylabs.com/docs/reference/faq/lost-seed/
Last updated: 2026-08-03
Publisher: Self Custody Labs (https://selfcustodylabs.com)
---
**Danger: The Hard Truth**
If you've lost your seed phrase and your hardware wallet/device is also lost or broken, your Bitcoin is almost certainly gone forever.
There is no backdoor. No customer support. No recovery service that can help.
This page explains why, and what (little) you can do.
## Understanding Why Recovery Is Impossible
Your seed phrase isn't like a password that unlocks an account somewhere. It **is** your Bitcoin in a very real sense.
**How it works:**
- Your seed phrase generates your private keys through mathematical derivation
- Your private keys are the only thing that can sign transactions moving your Bitcoin
- No one else has these keys: not Trezor, not Ledger, not Coinbase, not anyone
- The Bitcoin network doesn't know or care who you are; only valid signatures matter
**This is a feature, not a bug.** The same property that prevents anyone from taking your Bitcoin (without your keys) also prevents anyone from recovering it (without your keys).
## Scenarios and Options
### Scenario 1: Lost Seed, Device Still Works
**Situation:** You've lost your written seed backup, but your hardware wallet (or software wallet) still functions.
**What to do:**
1. **Immediately create a new wallet** with a new seed phrase
2. **Properly back up the new seed** (write it down, test the backup)
3. **Transfer all Bitcoin** from the old wallet to the new one
4. **Never use the old seed again** (even if you find it later, it's been "compromised" by the loss)
**Time is critical.** Your device could break at any moment. Don't delay.
---
### Scenario 2: Lost Seed, Device Broken/Lost
**Situation:** No seed backup AND no working device.
**The reality:** Your Bitcoin is almost certainly unrecoverable.
**Limited options to explore:**
1. **Search thoroughly** for your backup
- Did you make multiple copies?
- Could it be in a safety deposit box, with family, at another property?
- Check everywhere before giving up
2. **Check for partial backups**
- Do you have some of the words? (See "Partial Recovery" below)
- Did you ever type it somewhere you shouldn't have? (Check old devices, notes)
3. **Check wallet software**
- Some software wallets store encrypted backups
- Check cloud backups (not recommended, but check if desperate)
- This applies to software wallets only, not hardware wallets
4. **Accept the loss**
- If truly unrecoverable, there's nothing more to do
- Learn from this for the future
---
### Scenario 3: Partial Seed Recovery
**Situation:** You have most of your seed phrase but some words are missing or unreadable.
**Possibility of recovery depends on how many words are missing:**
| Missing Words | Difficulty | Realistic? |
|---------------|------------|------------|
| 1 word | 2,048 combinations | Yes, recoverable |
| 2 words | 4+ million combinations | Maybe, with specialized tools |
| 3 words | 8+ billion combinations | Extremely difficult |
| 4+ words | Practically impossible | No |
**For 1-2 missing words:**
- Tools exist that can brute-force the missing words
- Requires technical knowledge or hiring help
- BTCRecover is one open-source option
- Be extremely careful about who you share partial seeds with (see scam warnings below)
**For 3+ missing words:**
- Recovery is essentially impossible with current technology
- Anyone who says otherwise is likely a scammer
---
### Scenario 4: Wrong Passphrase
**Situation:** You have your seed phrase, but used a passphrase (25th word) that you can't remember.
**The problem:** A passphrase creates a completely different wallet. Even being off by one character generates different addresses.
**Options:**
- If you remember roughly what it might be, brute-forcing variations is possible
- If you have no idea, recovery is essentially impossible
- The math is the same as losing seed words (astronomical combinations)
---
## Scam Warning: "Recovery Services"
**Danger: Critical Warning**
Almost every "Bitcoin recovery service" is a scam.
They will:
- Ask for your partial seed phrase (then steal any remaining funds)
- Ask for money upfront (then disappear)
- Claim they have special technology (they don't)
- Show fake testimonials (fabricated)
**Legitimate recovery is only possible for:**
- 1-2 missing words (using open-source tools yourself)
- Some specific software wallet issues
**There is no service that can recover a fully lost seed phrase.** The math makes it impossible.
**If someone contacts you offering recovery:**
- They found you because you posted about your loss (scammers monitor these posts)
- They will sound professional and sympathetic
- They are trying to steal from you
**Legitimate help looks like:**
- Open-source tools you run yourself
- Transparent about limitations
- Doesn't require you to share your seed with anyone
## How This Happens
Understanding common scenarios helps prevent them:
### Poor Backup Practices
- Writing seed on paper that got damaged/lost
- Storing in only one location
- Not testing backup before trusting it
- Taking a photo (then losing the phone)
### Life Events
- House fire or flood
- Theft
- Moving homes and losing track of backup
- Death of family member who held backup
### Mental Factors
- Overconfidence ("I'll remember where I put it")
- Procrastination ("I'll make a proper backup later")
- Complexity overload (too many wallets, forgot which is which)
## Preventing Loss: Do This Now
If you're reading this and still have access to your Bitcoin:
### 1. Verify Your Backup Today
- [ ] Locate your seed backup right now
- [ ] Verify it's legible and complete
- [ ] Test recovery on a separate device
- [ ] See: [Backup Verification Guide](https://selfcustodylabs.com/docs/wallet-setup/backup-verification/)
### 2. Create Redundancy
- [ ] Make multiple copies of your seed
- [ ] Store in geographically separate locations
- [ ] Consider metal backup (fire/water resistant)
- [ ] See: [Seed Backup Guide](https://selfcustodylabs.com/docs/learn/keys/random/#step-6-back-up-on-metal)
### 3. Document and Communicate
- [ ] Record (securely) where backups are stored
- [ ] Consider inheritance planning: what happens if you die?
- [ ] Don't make backup so secret that you forget about them
### 4. Don't Over-Complicate
- [ ] Complexity creates failure modes
- [ ] Use security appropriate to your threat model
- [ ] If you can't manage your setup, simplify it
## If You've Lost Funds
Losing Bitcoin is painful. If you're in this situation:
1. **Don't chase losses** by falling for scam "recovery" services
2. **Learn from the experience** for any future holdings
3. **Don't beat yourself up.** This has happened to many people
4. **Consider it a lesson** in the importance of proper backups
Many early Bitcoiners lost coins to poor backup practices. It's a hard lesson, but you can do better going forward.
## Summary
| Situation | Outcome |
|-----------|---------|
| Lost seed, device works | Recover by transferring to new wallet NOW |
| Lost seed, device lost | Likely permanent loss |
| 1-2 missing words | Recoverable with effort |
| 3+ missing words | Not recoverable |
| Forgot passphrase | Likely not recoverable |
**The solution is prevention:**
- Multiple backup copies
- Geographic distribution
- Tested recovery
- Appropriate simplicity
---
## Related Guides
- [Backup Verification](https://selfcustodylabs.com/docs/wallet-setup/backup-verification/): Test your backup before you need it
- [DIY Seed Generation](https://selfcustodylabs.com/docs/learn/keys/random/): Create a secure seed properly
- [Hardware Wallet Setup](https://selfcustodylabs.com/docs/wallet-setup/hardware-wallet/): Start with good practices
- [Recovery Scams Warning](https://selfcustodylabs.com/docs/reference/faq/recovery-scams): Protect yourself from fraud
---
# Bitcoin Recovery Scams: How to Protect Yourself
> Why almost every 'Bitcoin recovery service' is a scam. Learn to recognize fraud and understand what legitimate recovery actually looks like.
Source: https://selfcustodylabs.com/docs/reference/faq/recovery-scams/
Last updated: 2026-08-02
Publisher: Self Custody Labs (https://selfcustodylabs.com)
---
**Danger: Scam Alert**
If someone has contacted you about recovering your Bitcoin, there is a 99%+ chance they are trying to steal from you.
This page explains how these scams work and how to protect yourself.
## Why Recovery Scams Are So Common
People who have lost access to their Bitcoin are desperate and vulnerable. Scammers know this. They actively search for victims by:
- Monitoring social media for posts about lost Bitcoin
- Monitoring Reddit, Twitter, and Bitcoin forums
- Running fake "recovery service" advertisements
- Creating fraudulent websites that look legitimate
- Impersonating legitimate companies
**The target:** Someone who has lost their seed phrase and is emotionally compromised.
**The approach:** Professional, sympathetic, and full of false hope.
## How Recovery Scams Work
### Scam Type 1: Upfront Payment Fraud
**How it works:**
1. Scammer claims they can recover your Bitcoin
2. They request payment upfront (often in Bitcoin or crypto)
3. They may show "progress" or fake screenshots
4. Eventually they disappear or demand more money
5. You lose both your Bitcoin AND the "recovery fee"
**Red flags:**
- Any request for payment before recovery
- Vague explanations of their "technology"
- Pressure to act quickly
- Untraceable payment methods (crypto, gift cards)
---
### Scam Type 2: Seed Phrase Theft
**How it works:**
1. Scammer offers to help recover your wallet
2. They claim they need your partial seed phrase "to help"
3. With even partial seed information, they may be able to:
- Steal funds immediately (if enough words provided)
- Attempt brute-force recovery faster than you can
4. Any recovered funds go to them, not you
**Red flags:**
- ANY request for your seed phrase or partial seed
- Offers to "check if your seed is valid"
- Remote access requests to your computer
---
### Scam Type 3: Fake Software/Websites
**How it works:**
1. Scammer creates fake "recovery tool" or website
2. You're asked to enter your seed phrase to "check" it
3. The seed phrase is transmitted to the scammer
4. They immediately sweep any funds from your wallet
**Red flags:**
- Websites asking you to enter your seed phrase
- Software downloads from unofficial sources
- Tools that promise "instant recovery"
---
### Scam Type 4: Impersonation
**How it works:**
1. Scammer impersonates legitimate company (Ledger, Trezor, etc.)
2. They claim there's been a security breach
3. They ask you to "verify" your seed for your protection
4. Your seed goes directly to the scammer
**Red flags:**
- Unsolicited contact claiming to be from hardware wallet company
- Urgency about "security threats"
- Request for seed phrase (legitimate companies NEVER ask for this)
## The Mathematics of Why Recovery Is Impossible
Scammers rely on you not understanding why recovery is impossible:
**A 24-word seed phrase has:**
- 2048^24 possible combinations
- That's approximately 10^79 combinations
- More than the number of atoms in the observable universe
**Even with the fastest supercomputers:**
- Brute-forcing a full 24-word seed would take longer than the age of the universe
- This is not an exaggeration: it's mathematics
**What IS possible:**
- Recovering 1-2 missing words (2,048 to ~4 million combinations)
- Using known partial information to narrow search space
- This is something you can do yourself with open-source tools
**What is NOT possible:**
- Recovering a seed with no information
- "Hacking the blockchain" to recover funds
- Any magic technology that bypasses mathematics
## Legitimate vs Fraudulent Recovery
### Legitimate Recovery Looks Like:
✅ **Open-source tools** you download and run yourself:
- BTCRecover (https://github.com/3rdIteration/btcrecover)
- SeedRecover
- You maintain full control; no one else sees your seed
✅ **Transparent limitations:**
- Will clearly state that full seed loss is unrecoverable
- Will explain that only 1-2 missing words are feasible
- Won't promise guaranteed results
✅ **No upfront payment:**
- Legitimate help doesn't require payment before recovery
- Open-source tools are free
✅ **Technical education:**
- Explains the process so you understand it
- Empowers you rather than creating dependency
### Fraudulent Recovery Looks Like:
❌ **Claims to recover any seed phrase**
- Mathematically impossible
❌ **Requests payment upfront**
- Scam pattern
❌ **Needs your seed phrase or partial seed**
- If they have it, they can steal from you
❌ **Uses urgency or pressure**
- Legitimate help doesn't pressure you
❌ **Vague about methodology**
- "Proprietary technology" = scam
❌ **Unsolicited contact**
- They found you by monitoring for vulnerable targets
## What To Do If You've Lost Access
### If You're Considering "Recovery Services":
1. **Stop.** Take a breath. Don't act while emotional.
2. **Understand the mathematics.** Full seed loss = no recovery.
3. **Use only open-source tools** you run yourself.
4. **Never share your seed** with anyone for any reason.
5. **Accept that some losses are permanent.**
### If You Have Partial Information:
1. **Document what you know** (words you remember, possible variations)
2. **Download BTCRecover** from the official GitHub
3. **Run it on an air-gapped computer** if possible
4. **Be patient**: recovery takes time
5. **Do not share your partial seed** with "helpers"
### If Someone Has Contacted You:
1. **Assume they are a scammer** until proven otherwise
2. **Do not engage** with them
3. **Do not send any money or information**
4. **Block and report** the account
5. **Warn others** if appropriate
## Stories From Victims
These are real patterns reported by scam victims:
> "They showed me screenshots of 'recovering' other people's wallets. Looked so professional. I paid $2,000 and never heard from them again."
> "They said they just needed 12 of my 24 words to 'verify' the format. The next day my wallet was empty."
> "I got an email that looked exactly like it was from Ledger saying my wallet was compromised. I entered my seed to 'protect' it."
> "They kept asking for more money: first $500, then $1000, then $5000 for 'mining fees.' I lost everything."
## If You've Been Scammed
If you've already fallen victim:
1. **Stop all contact** with the scammer
2. **Do not send more money** even if they promise your first payment back
3. **Document everything** (conversations, addresses, amounts)
4. **Report to authorities:**
- Local police
- FBI IC3 (ic3.gov) for US residents
- National fraud reporting in your country
5. **Report the scam** on platforms where you found them
6. **Warn others** on Reddit, Twitter, forums
**Be aware:** Recovery of scammed funds is extremely rare. The purpose of reporting is to potentially stop the scammer from hurting others.
## Protecting Yourself Going Forward
The best protection is prevention:
1. **Proper backups**: Multiple copies, tested recovery
2. **Never share your seed**: For any reason, with anyone
3. **Healthy skepticism**: If it sounds too good to be true, it is
4. **Verify everything**: Check official sources, not Google ads
5. **Understand the limits**: Know what's mathematically possible
→ See: [Backup Verification Guide](https://selfcustodylabs.com/docs/wallet-setup/backup-verification/)
→ See: [Before You Deposit Checklist](https://selfcustodylabs.com/docs/wallet-setup/before-you-deposit)
## Summary
| Claim | Reality |
|-------|---------|
| "We can recover any lost Bitcoin" | Mathematically impossible |
| "We have special technology" | No such technology exists |
| "Just send us your seed to verify" | They will steal your funds |
| "Pay upfront and we'll recover" | You'll lose the payment too |
| "We recovered $X million for clients" | Fake testimonials |
**The only legitimate recovery:**
- 1-2 missing words using open-source tools
- Running those tools yourself
- Never sharing your seed with anyone
---
## Related Guides
- [What Happens If You Lose Your Seed?](https://selfcustodylabs.com/docs/reference/faq/lost-seed): Understanding seed loss
- [Backup Verification](https://selfcustodylabs.com/docs/wallet-setup/backup-verification/): Prevent loss in the first place
- [Hardware Wallet Setup](https://selfcustodylabs.com/docs/wallet-setup/hardware-wallet/): Start with good practices
---
# Wallet Recovery Troubleshooting
> Common problems when recovering a Bitcoin wallet and how to solve them. Empty wallet after recovery, wrong addresses, and other troubleshooting steps.
Source: https://selfcustodylabs.com/docs/reference/faq/recovery-troubleshooting/
Last updated: 2026-08-02
Publisher: Self Custody Labs (https://selfcustodylabs.com)
---
Recovering a Bitcoin wallet should be straightforward, but things can go wrong. This guide covers the most common problems and their solutions.
**Danger: Before You Panic**
Most "missing" Bitcoin isn't actually lost: it's usually a configuration issue. Work through this guide systematically before assuming the worst.
## Problem: Wallet Shows Zero Balance After Recovery
This is the most common recovery issue. You enter your seed phrase correctly, but the wallet shows zero balance.
### Cause 1: Wrong Derivation Path
Different wallet software uses different derivation paths. If you recover with the wrong path, you'll see different (empty) addresses.
**Solution:**
1. **Check your original wallet's derivation path**
- BIP44 (Legacy): `m/44'/0'/0'`, addresses start with `1`
- BIP49 (Nested SegWit): `m/49'/0'/0'`, addresses start with `3`
- BIP84 (Native SegWit): `m/84'/0'/0'`, addresses start with `bc1q`
- BIP86 (Taproot): `m/86'/0'/0'`, addresses start with `bc1p`
2. **In Sparrow Wallet:**
- File → New Wallet
- Enter your seed
- Choose "Native SegWit" if your addresses started with `bc1q`
- If still empty, try other script types
3. **Common wallet defaults:**
| Wallet | Default Path |
|--------|--------------|
| Ledger Live | BIP84 (bc1q) |
| Trezor Suite | BIP84 (bc1q) |
| Electrum | BIP84 (bc1q) |
| Older wallets | BIP44 (Legacy) |
### Cause 2: Passphrase Required
If you set up a passphrase (25th word), the wallet will be empty without it.
**Solution:**
- Re-enter recovery with passphrase enabled
- In Sparrow: Check "Use passphrase" during wallet creation
- Try variations if you're unsure of exact passphrase
**Warning: Case Sensitivity**
Passphrases are case-sensitive. `MyPassphrase` and `mypassphrase` create different wallets.
### Cause 3: Wrong Seed Phrase
Even one wrong word creates a completely different (empty) wallet.
**Solution:**
- Double-check each word against the [BIP39 word list](https://github.com/bitcoin/bips/blob/master/bip-0039/english.txt)
- Common mistakes:
- `advice` vs `advise`
- `letter` vs `latter`
- `affect` vs `effect`
- Try reading from your backup again, carefully
### Cause 4: Not Enough Addresses Scanned
Wallets only check a certain number of addresses. If you used many addresses with gaps, funds might not be found.
**Solution:**
- Increase the "gap limit" in your wallet software
- In Sparrow: Wallet → Settings → Script Type → Increase gap limit
- Try scanning 100+ addresses
## Problem: Different Addresses Than Expected
You recover successfully but the addresses don't match what you had before.
### Check Script Type
Native SegWit vs Legacy vs Taproot:
| Your Old Addresses Started With | Script Type to Select |
|--------------------------------|----------------------|
| `1` | Legacy (P2PKH) |
| `3` | Nested SegWit (P2SH-P2WPKH) |
| `bc1q` | Native SegWit (P2WPKH) |
| `bc1p` | Taproot (P2TR) |
### Check Account Number
Some wallets use multiple accounts under the same seed:
- Account 0: `m/84'/0'/0'`
- Account 1: `m/84'/0'/1'`
- Account 2: `m/84'/0'/2'`
If you used Account 1, recovering with Account 0 shows different addresses.
**Solution in Sparrow:**
1. When importing, click "Show Advanced"
2. Change the account number in the derivation path
## Problem: Recovery Fails Completely
The wallet software rejects your seed phrase.
### Invalid Checksum
If any word is wrong, the checksum fails.
**Solution:**
- Verify each word exists in BIP39 word list
- Check for similar words (see common mistakes above)
- Ensure you have the correct number of words (12, 15, 18, 21, or 24)
### Wrong Word List Language
BIP39 has word lists in multiple languages (English, Spanish, Japanese, etc.). You must use the same language.
**Solution:**
- Most wallets use English
- If you created with non-English wallet, find matching word list
## Problem: Only Some Funds Recovered
You recovered some Bitcoin but not all of it.
### Multiple Address Types
You may have received Bitcoin to different address types:
- Some to Legacy addresses (start with `1`)
- Some to SegWit addresses (start with `bc1q`)
**Solution:**
1. In Sparrow, create multiple wallets from same seed
2. One with Legacy script type
3. One with Native SegWit
4. Check balances in each
### Multiple Accounts
Similar to above, funds may be in different accounts.
**Solution:**
- Create wallets with account numbers 0, 1, 2
- Check each for balances
### Unconfirmed Transactions
Funds from unconfirmed transactions won't appear until confirmed.
**Solution:**
- Wait for confirmation
- Check transaction status on mempool.space
## Problem: Hardware Wallet Shows Different Address
Your hardware wallet shows a different address than your software wallet.
### Verification Mismatch
This is a **critical security issue**. Never send to an address your hardware wallet doesn't display.
**Possible causes:**
1. Malware modified the address in software
2. Wrong derivation path in software
3. Hardware wallet has different seed than expected
**Solution:**
1. Verify you're using the correct wallet file
2. Check derivation paths match
3. Re-pair hardware wallet with software
4. If still mismatched, DO NOT TRANSACT until resolved
## Problem: Multisig Recovery Issues
Multisig wallets are more complex to recover.
### Missing Wallet Descriptor
You need more than just seed phrases for multisig recovery:
- All participating public keys (xpubs)
- The wallet descriptor or configuration file
- Knowledge of M-of-N setup (e.g., 2-of-3)
**Solution:**
- Locate your backup of the wallet descriptor
- In Sparrow, you can import via File → Import Wallet → Descriptor
### Wrong Cosigner Order
Multisig addresses depend on key ordering. Different order = different addresses.
**Solution:**
- Import using original wallet descriptor
- If manually recreating, match exact order of cosigners
## Systematic Recovery Checklist
If you're stuck, work through this systematically:
- [ ] Verify seed phrase words against BIP39 list
- [ ] Check for passphrase requirement
- [ ] Try different script types (Legacy, SegWit, Taproot)
- [ ] Try different account numbers (0, 1, 2)
- [ ] Increase address gap limit to 100+
- [ ] Check multiple derivation paths
- [ ] Verify with a different wallet software
- [ ] If multisig, locate wallet descriptor
## When to Seek Professional Help
Consider professional assistance if:
- You've exhausted all troubleshooting steps
- Significant funds are at stake
- You suspect hardware wallet malfunction
- You have partial seed phrase (some words missing)
**Danger: Recovery Scams**
Most "Bitcoin recovery services" are scams. See our [Recovery Scams](https://selfcustodylabs.com/docs/reference/faq/recovery-scams) guide before contacting anyone. Never share your seed phrase with "helpers."
## Prevention for the Future
Avoid recovery problems by:
1. **Document everything**
- Which wallet software you used
- Which derivation path
- Whether you used a passphrase
- Which script type (address format)
2. **Test your backup**
- [Verify your backup works](https://selfcustodylabs.com/docs/wallet-setup/backup-verification) before trusting it
3. **Keep wallet descriptor backups**
- Especially for multisig setups
4. **Use standard settings**
- Stick to defaults when possible
- BIP84 (Native SegWit) is the current standard
---
# Bitcoin Reference Guide: Glossary, FAQs & Comparisons
> Bitcoin self-custody reference: 100+ term glossary, hardware wallet comparisons, address type explanations, and frequently asked questions answered.
Source: https://selfcustodylabs.com/docs/reference/
Last updated: 2026-08-21
Publisher: Self Custody Labs (https://selfcustodylabs.com)
---
Quick-access reference materials for Bitcoin self-custody.
---
## 📖 Glossary & Terminology
### [Bitcoin Glossary](https://selfcustodylabs.com/docs/reference/glossary)
100+ terms defined, from UTXO to Taproot. A-Z reference for all Bitcoin terminology.
---
## 🏷️ Technical Reference
### [Bitcoin Address Types](https://selfcustodylabs.com/docs/reference/address-types)
Understand Legacy, SegWit, Native SegWit, and Taproot addresses. Learn which to use and why it matters for fees and compatibility.
### [Hardware Wallet Comparison](https://selfcustodylabs.com/docs/reference/hardware-wallet-comparison)
Compare Trezor, BitBox02 Nova, Jade Plus, Passport Prime, Keystone, SeedSigner, Coldcard, Ledger, and Bitkey, updated for the post-2026 landscape. Find the right hardware wallet for your needs, budget, and security requirements.
### [SeedSigner Guide](https://selfcustodylabs.com/docs/seedsigner/)
Our favourite signing solution: stateless, air-gapped, and built by you from commodity parts. Why we recommend it, who it's not for, and how to build and use one.
### External Technical Resources
- **[BIP39 Word List](https://github.com/bitcoin/bips/blob/master/bip-0039/english.txt)**: The 2048 valid seed words (external)
- **[BIP List](https://github.com/bitcoin/bips)**: All Bitcoin Improvement Proposals
---
## ❓ Frequently Asked Questions
Common questions about Bitcoin self-custody:
### Critical Safety Questions
| Question | Answer |
|----------|--------|
| [What if I lose my seed phrase?](https://selfcustodylabs.com/docs/reference/faq/lost-seed) | The hard truth about seed loss and what (little) you can do |
| [Are recovery services legitimate?](https://selfcustodylabs.com/docs/reference/faq/recovery-scams) | Almost all are scams: learn to protect yourself |
### More FAQs
Browse all FAQ topics: **[FAQ Index](https://selfcustodylabs.com/docs/reference/faq/)**
---
## 🔗 External Resources
Trusted external resources for Bitcoin education:
### Block Explorers
- [Mempool.space](https://mempool.space/): Transaction explorer and fee estimator
- [Blockstream.info](https://blockstream.info/): Clean, privacy-respecting explorer
### Tools
- [TimechainStats](https://timechainstats.com/): Bitcoin network statistics
- [KYCnot.me](https://kycnot.me/): Find non-KYC Bitcoin sources
### Further Learning
- [Bitcoin.org](https://bitcoin.org/): Official Bitcoin resources
- [Bitcoin Whitepaper](https://bitcoin.org/bitcoin.pdf): Satoshi's original paper
---
## Missing Something?
If you can't find what you're looking for:
1. Check the [Glossary](https://selfcustodylabs.com/docs/reference/glossary) for term definitions
2. Use the search function in the top navigation
3. Reach out via [Nostr](https://primal.net/p/nprofile1qqspxh8lqez8f9kt2cv7626rfax0phl8lu8tgt0jjjkwa6n8lhmt9qgxf4ey5) or [X](https://x.com/selfcustodylabs) with questions
---
# Bitcoin Glossary: 100+ Terms Explained
> Complete glossary of Bitcoin and self-custody terminology. Definitions for UTXO, seed phrase, hardware wallet, multisig, and 100+ other terms.
Source: https://selfcustodylabs.com/docs/reference/glossary/
Last updated: 2026-08-23
Publisher: Self Custody Labs (https://selfcustodylabs.com)
---
Plain-language definitions of the Bitcoin and self-custody terms used across this site, from address types and air-gapping through to UTXOs, xpubs, and derivation paths. Over 100 entries, listed alphabetically.
---
## Quick Navigation
[A](#a) · [B](#b) · [C](#c) · [D](#d) · [E](#e) · [F](#f) · [G](#g) · [H](#h) · [I](#i) · [J](#j) · [K](#k) · [L](#l) · [M](#m) · [N](#n) · [O](#o) · [P](#p) · [Q](#q) · [R](#r) · [S](#s) · [T](#t) · [U](#u) · [V](#v) · [W](#w) · [X](#x)
---
## A
### Address
A string of characters representing a destination for Bitcoin payments. Similar to an email address, but for receiving Bitcoin. Modern addresses typically start with `bc1q` (SegWit) or `bc1p` (Taproot). See [Address Types](https://selfcustodylabs.com/docs/reference/address-types).
### Air-Gapped
A security measure where a device is completely isolated from the internet and other networks. Air-gapped computers communicate only through QR codes, SD cards, or manual data entry. See [Air-Gapped Computer Guide](https://selfcustodylabs.com/docs/learn/wallets/air-gapped-wallets).
### Altcoin
Any cryptocurrency other than Bitcoin. Examples include Ethereum, Litecoin, and thousands of others.
---
## B
### Bech32
The encoding format for Native SegWit addresses (starting with `bc1q`). Uses only lowercase letters and numbers, avoiding confusing characters like `0/O` and `1/l`.
### Bech32m
An updated version of Bech32 used for Taproot addresses (starting with `bc1p`).
### BIP (Bitcoin Improvement Proposal)
A design document for introducing new features or information to Bitcoin. Important BIPs include BIP39 (seed phrases), BIP32 (HD wallets), and BIP44/49/84/86 (derivation paths).
### BIP39
The standard for mnemonic seed phrases. Defines the 2048-word list used to encode wallet seeds as human-readable words. See [Seed Phrases](https://selfcustodylabs.com/docs/learn/keys/seed).
### Bitcoin Core
The reference implementation of the Bitcoin protocol. A full node software that validates all transactions and blocks. See [Bitcoin Node Guide](https://selfcustodylabs.com/docs/bitcoin-node).
### Block
A collection of Bitcoin transactions bundled together and added to the blockchain. New blocks are created approximately every 10 minutes.
### Blockchain
A distributed ledger containing all Bitcoin transactions ever made. Each block links to the previous one, forming a chain.
### Block Explorer
A web tool that lets you view transactions, addresses, and blocks on the blockchain. Examples: Mempool.space, Blockstream.info.
### Block Height
The number of blocks in the blockchain since the genesis block (block 0). Used to identify specific points in Bitcoin's history.
### Block Reward
The amount of new bitcoin created with each block, paid to the miner who finds the block. Currently 3.125 BTC, halving approximately every 4 years.
---
## C
### Change Address
When you spend a UTXO but don't use the full amount, the remainder is sent to a change address in your own wallet. Like getting change when you pay with a $20 bill.
### Change Output
The transaction output that returns excess funds to the sender's wallet after a payment.
### Checksum
A small piece of data used to verify integrity. In seed phrases, the final word(s) include checksum data to detect errors.
### Coinjoin
A privacy technique that combines multiple users' transactions into a single transaction, making it difficult to trace which inputs correspond to which outputs. See [CoinJoin Guide](https://selfcustodylabs.com/docs/learn/privacy/coinjoin).
### Cold Storage
Keeping Bitcoin private keys on a device that never connects to the internet. The most secure form of storage.
### Cold Wallet
A wallet that stores private keys offline. Hardware wallets and air-gapped computers are cold wallets.
### Confirmation
Each new block added after a transaction is included counts as one confirmation. More confirmations = higher certainty the transaction is permanent. 6 confirmations is traditionally considered final.
### Consensus
The agreement among Bitcoin nodes about the current state of the blockchain. Bitcoin's proof-of-work consensus ensures all honest nodes agree.
### CPFP (Child Pays for Parent)
A technique to speed up an unconfirmed transaction by creating a new transaction that spends its output with a higher fee.
### Custodial
A service where a third party holds your private keys (and thus your Bitcoin) on your behalf. Exchanges are custodial. Opposite of self-custody.
---
## D
### Derivation Path
The hierarchical path used to derive specific keys from a master seed. Example: `m/84'/0'/0'/0/0`. Different paths generate different addresses. See [Derivation Paths](https://selfcustodylabs.com/docs/learn/keys/derivation-path).
### Descriptor
A standardized way to describe how addresses are generated from keys. Used for wallet backup and recovery, especially in multisig setups.
### Difficulty
A measure of how hard it is to mine a new block. Adjusts every 2016 blocks (~2 weeks) to maintain the 10-minute block target.
### Dusting Attack
A privacy attack where tiny amounts of Bitcoin are sent to many addresses to track their future spending patterns.
---
## E
### Electrum Server
Software that indexes the Bitcoin blockchain to allow lightweight wallets to query transaction data efficiently. Examples: Electrs, Fulcrum.
### Entropy
Randomness used to generate private keys and seed phrases. High-quality entropy is essential for security: the [2026 Coldcard incident](https://selfcustodylabs.com/docs/learn/wallets/coldcard-entropy-incident/), where weak entropy let attackers brute-force seeds and steal ~$116M, is the canonical example of what happens without it. See [Why Randomness Matters](https://selfcustodylabs.com/docs/learn/keys/random).
---
## F
### Fee
The amount paid to miners to include a transaction in a block. Measured in satoshis per virtual byte (sat/vB).
### Fee Rate
The fee density of a transaction, typically measured in sat/vB. Higher fee rates result in faster confirmation.
### Full Node
Software that independently validates all Bitcoin transactions and blocks against consensus rules. See [What is a Bitcoin Node](https://selfcustodylabs.com/docs/learn/nodes/what-is-node).
---
## G
### Genesis Block
The first block in the Bitcoin blockchain, mined by Satoshi Nakamoto on January 3, 2009.
---
## H
### Halving
The event where the block reward is cut in half, occurring approximately every 4 years (210,000 blocks). Reduces Bitcoin's inflation rate.
### Hardware Wallet
A dedicated physical device designed to securely store Bitcoin private keys offline. Examples: Trezor, BitBox02, Jade, Passport, Keystone. See [Hardware Wallets](https://selfcustodylabs.com/docs/learn/wallets/hardware-wallets).
### Hash
A fixed-length output produced by running data through a cryptographic hash function. Used extensively in Bitcoin for security and verification.
### Hash Rate
The total computational power being used to mine Bitcoin, measured in hashes per second.
### HD Wallet (Hierarchical Deterministic)
A wallet that generates all addresses from a single seed phrase, allowing complete wallet recovery from just the seed words.
### Hot Wallet
A wallet connected to the internet. More convenient but less secure than cold storage. See [Software Wallets](https://selfcustodylabs.com/docs/learn/wallets/software-wallets).
---
## I
### Input
A reference to a previous transaction output being spent in a new transaction. Transactions consume inputs and create outputs.
### Intel ME (Management Engine)
A subsystem in Intel processors that operates independently and can pose security risks. See [Libreboot Guide](https://selfcustodylabs.com/docs/libreboot).
---
## J
### JSON-RPC
A protocol used to communicate with Bitcoin Core. Many wallet applications use JSON-RPC to interact with a node.
---
## K
### KYC (Know Your Customer)
Identity verification requirements imposed by exchanges and financial services. Links your identity to your Bitcoin purchases, reducing privacy.
---
## L
### Legacy Address
The original Bitcoin address format, starting with `1`. Higher transaction fees than newer formats. See [Address Types](https://selfcustodylabs.com/docs/reference/address-types).
### Lightning Network
A "Layer 2" payment network built on top of Bitcoin, enabling fast, low-fee transactions.
### Libreboot
Open-source firmware replacement for computer BIOS that removes proprietary code and potential backdoors. See [Libreboot Guide](https://selfcustodylabs.com/docs/libreboot).
---
## M
### Mempool
The collection of unconfirmed transactions waiting to be included in a block. Each node maintains its own mempool.
### Mining
The process of using computational power to validate transactions and create new blocks. Miners compete to solve a proof-of-work puzzle.
### Mnemonic
The human-readable word sequence (seed phrase) used to encode a wallet's seed. See [Seed Phrases](https://selfcustodylabs.com/docs/learn/keys/seed).
### Multisig (Multisignature)
A security setup requiring multiple private keys to authorize a transaction. Example: 2-of-3 multisig needs any 2 of 3 keys to spend. See [Multisig Setup](https://selfcustodylabs.com/docs/learn/wallets/multisig).
---
## N
### Native SegWit
The most efficient address format for standard transactions, starting with `bc1q`. Lower fees than Legacy or Nested SegWit. See [Address Types](https://selfcustodylabs.com/docs/reference/address-types).
### Nested SegWit
A backwards-compatible SegWit format using addresses starting with `3`. A bridge between Legacy and Native SegWit.
### Node
A computer running Bitcoin software that validates and relays transactions. See [Bitcoin Node Guide](https://selfcustodylabs.com/docs/bitcoin-node).
### Non-Custodial
A wallet or service where you control your own private keys. Self-custody is non-custodial.
---
## O
### OP_RETURN
A Bitcoin script opcode that allows storing small amounts of data in a transaction without creating spendable outputs.
### Orphan Block
A valid block that is not part of the main chain, usually because another block at the same height was propagated first.
### Output
The destination(s) of a Bitcoin transaction. Each output specifies an amount and the conditions for spending it.
---
## P
### P2PKH (Pay to Public Key Hash)
The technical name for Legacy addresses (starting with `1`).
### P2SH (Pay to Script Hash)
The technical name for Script addresses (starting with `3`). Used for complex scripts including Nested SegWit.
### P2TR (Pay to Taproot)
The technical name for Taproot addresses (starting with `bc1p`).
### P2WPKH (Pay to Witness Public Key Hash)
The technical name for Native SegWit addresses (starting with `bc1q`).
### Passphrase
An optional additional word added to a seed phrase to create a separate wallet. Sometimes called the "25th word." See [Passphrases](https://selfcustodylabs.com/docs/learn/keys/passphrase).
### PayJoin
A privacy-enhancing transaction where both sender and receiver contribute inputs, breaking blockchain analysis heuristics.
### PBST
See PSBT.
### Private Key
A secret number that controls Bitcoin at a specific address. Must be kept secret. See [Private Keys](https://selfcustodylabs.com/docs/learn/keys/intro).
### Proof of Work (PoW)
The consensus mechanism Bitcoin uses to secure the network. Miners must perform computational work to create new blocks.
### PSBT (Partially Signed Bitcoin Transaction)
A format for passing unsigned or partially signed transactions between devices or parties. Essential for hardware wallets and multisig.
### Public Key
A number derived from a private key that can be shared publicly. Used to generate addresses and verify signatures.
---
## Q
### QR Code
A two-dimensional barcode often used to encode Bitcoin addresses for easy scanning.
---
## R
### RBF (Replace-By-Fee)
A feature allowing an unconfirmed transaction to be replaced with a new version paying a higher fee.
### Recovery Phrase
See Seed Phrase.
### RPC (Remote Procedure Call)
A protocol for applications to communicate with Bitcoin Core. See JSON-RPC.
---
## S
### Satoshi (sat)
The smallest unit of Bitcoin: 0.00000001 BTC. Named after Bitcoin's creator, Satoshi Nakamoto.
### Satoshi Nakamoto
The pseudonymous creator of Bitcoin who published the whitepaper in 2008 and launched the network in 2009.
### Script
Bitcoin's programming language used to define spending conditions for transactions.
### Secure Element
A tamper-resistant hardware chip that protects sensitive data (like private keys) from physical attacks.
### Seed Phrase
A sequence of 12 or 24 words that encodes your wallet's master seed. The backup that can restore your entire wallet. See [Seed Phrases](https://selfcustodylabs.com/docs/learn/keys/seed).
### SegWit (Segregated Witness)
A 2017 Bitcoin upgrade that separates transaction signatures ("witness" data) from transaction data, enabling more efficient transactions and fixing transaction malleability.
### Self-Custody
Holding your own Bitcoin private keys, rather than trusting a third party. See [What is Self-Custody](https://selfcustodylabs.com/docs/learn).
### Signature
Cryptographic proof that a transaction was authorized by the private key owner.
### Signing Device
A hardware wallet or other device used to sign Bitcoin transactions. See [Hardware Wallet Setup](https://selfcustodylabs.com/docs/wallet-setup/hardware-wallet).
### Single-Sig
A standard wallet where one private key controls the funds. Contrast with multisig.
### SOIC8
A type of chip package commonly used for BIOS flash chips. Relevant for [Libreboot](https://selfcustodylabs.com/docs/libreboot) flashing.
### Software Wallet
An application (mobile or desktop) that manages Bitcoin keys on a general-purpose device. See [Software Wallets](https://selfcustodylabs.com/docs/learn/wallets/software-wallets).
### SPV (Simplified Payment Verification)
A method for lightweight wallets to verify transactions without downloading the full blockchain.
---
## T
### Taproot
A 2021 Bitcoin upgrade enabling more efficient and private complex transactions using Schnorr signatures. Addresses start with `bc1p`.
### Testnet
A separate Bitcoin network for testing, using worthless coins. Developers use testnet to experiment without risking real Bitcoin.
### Timelock
A restriction that prevents Bitcoin from being spent until a certain time or block height.
### Tor (The Onion Router)
Privacy network that anonymizes internet traffic. Can be used with Bitcoin nodes and wallets for enhanced privacy.
### Transaction
A signed message that transfers Bitcoin from one or more inputs to one or more outputs.
### Transaction ID (TXID)
A unique identifier for a Bitcoin transaction, generated by hashing the transaction data.
---
## U
### UTXO (Unspent Transaction Output)
A Bitcoin amount that has been received but not yet spent. Your wallet balance is the sum of your UTXOs. See [UTXOs Explained](https://selfcustodylabs.com/docs/learn/transactions/utxos).
### UTXO Set
The collection of all unspent transaction outputs in the Bitcoin network. What every Bitcoin node tracks.
---
## V
### Vanity Address
A Bitcoin address containing a custom pattern (like `1Love...`). Generated by repeatedly creating addresses until a match is found.
### vByte (Virtual Byte)
The unit used to measure transaction size for fee calculation. Accounts for SegWit's different weighting of witness data.
### Verification
The process of independently confirming that data (like a transaction or software download) is valid and unmodified.
---
## W
### Wallet
Software or hardware that manages Bitcoin private keys and enables sending/receiving Bitcoin.
### Wallet Descriptor
See Descriptor.
### Watch-Only Wallet
A wallet that can monitor addresses and create unsigned transactions but cannot sign (spend) because it doesn't have the private keys.
### Whitepaper
The original Bitcoin paper published by Satoshi Nakamoto in 2008: "Bitcoin: A Peer-to-Peer Electronic Cash System."
### Witness
In SegWit transactions, the signature data that proves ownership. Separated from the main transaction for efficiency.
---
## X
### xprv (Extended Private Key)
A master private key that can derive all other private keys and addresses in an HD wallet. Must be kept secret like a seed phrase. See [Extended Private Keys](https://selfcustodylabs.com/docs/learn/keys/xprv).
### xpub (Extended Public Key)
A master public key that can derive all public keys and addresses in an HD wallet. Can be shared to generate receive addresses without exposing private keys. See [Extended Public Keys](https://selfcustodylabs.com/docs/learn/keys/xpub).
---
## Numbers & Symbols
### 2-of-3
A common multisig configuration requiring any 2 of 3 keys to spend funds. See [Multisig](https://selfcustodylabs.com/docs/learn/wallets/multisig).
### 21 Million
The maximum supply of Bitcoin that will ever exist, enforced by Bitcoin's consensus rules.
### 51% Attack
A theoretical attack where an entity controlling more than half the network's hash rate could double-spend or censor transactions.
---
## Didn't Find What You're Looking For?
If a term is missing, [let us know](mailto:selfcustodylabs@proton.me) and we'll add it.
---
## Continue Learning
- [What is Bitcoin?](https://selfcustodylabs.com/docs/learn/fundamentals/what-is-bitcoin): Start from the beginning
- [Learn Section](https://selfcustodylabs.com/learn): Comprehensive Bitcoin education
- [Guides](https://selfcustodylabs.com/guides): Hands-on tutorials
---
# Bitcoin Address Types Explained
> Understand the different Bitcoin address types: Legacy, SegWit, Native SegWit, and Taproot. Learn which to use and why it matters for fees and compatibility.
Source: https://selfcustodylabs.com/docs/reference/address-types/
Last updated: 2026-08-02
Publisher: Self Custody Labs (https://selfcustodylabs.com)
---
If you've used Bitcoin, you've noticed addresses can look very different:
- `1A1zP1eP5QGefi2DMPTfTL5SLmv7DivfNa` (starts with 1)
- `3J98t1WpEZ73CNmQviecrnyiWrnqRhWNLy` (starts with 3)
- `bc1qar0srrr7xfkvy5l643lydnw9re59gtzzwf5mdq` (starts with bc1q)
- `bc1p5d7rjq7g6rdk2yhzks9smlaqtedr4dekq08ge8ztwac72sfr9rusxg3297` (starts with bc1p)
These aren't random: each format represents a different **address type** with different properties. Understanding them helps you save on fees and avoid compatibility issues.
---
## The Four Address Types
| Type | Prefix | Name | Year | Status |
|------|--------|------|------|--------|
| Legacy | `1...` | P2PKH | 2009 | Outdated |
| Script | `3...` | P2SH / P2SH-P2WPKH | 2012 | Transitional |
| Native SegWit | `bc1q...` | P2WPKH / Bech32 | 2017 | **Recommended** |
| Taproot | `bc1p...` | P2TR / Bech32m | 2021 | Newest |
---
## Legacy Addresses (P2PKH)
**Starts with:** `1`
**Example:** `1BvBMSEYstWetqTFn5Au4m4GFg7xJaNVN2`
### What It Is
The original Bitcoin address format from 2009. "P2PKH" stands for "Pay to Public Key Hash."
### Pros
- Universal compatibility: every wallet and exchange supports it
- Battle-tested since Bitcoin's beginning
### Cons
- **Highest fees**: transactions are larger in bytes
- No SegWit benefits
- Considered outdated
### When to Use
Only if you're sending to an old wallet or service that doesn't support newer formats. Otherwise, avoid.
---
## Script Addresses (P2SH / Nested SegWit)
**Starts with:** `3`
**Example:** `3J98t1WpEZ73CNmQviecrnyiWrnqRhWNLy`
### What It Is
Introduced in 2012 for advanced scripts (like multisig). Later repurposed as "wrapped" or "nested" SegWit, a way to get SegWit benefits while maintaining compatibility with older systems.
### Pros
- Good compatibility with older exchanges
- Lower fees than Legacy
- SegWit benefits (when using P2SH-P2WPKH)
### Cons
- Not as efficient as Native SegWit
- Can be confusing (P2SH is used for both multisig and wrapped SegWit)
### When to Use
Useful if an exchange or wallet doesn't support `bc1` addresses (increasingly rare). Otherwise, prefer Native SegWit.
---
## Native SegWit (P2WPKH / Bech32)
**Starts with:** `bc1q`
**Example:** `bc1qar0srrr7xfkvy5l643lydnw9re59gtzzwf5mdq`
### What It Is
The "native" SegWit format introduced in 2017. Uses Bech32 encoding (lowercase, no ambiguous characters). "P2WPKH" stands for "Pay to Witness Public Key Hash."
### Pros
- **Lowest fees** (smallest transaction size for standard payments)
- Better error detection (Bech32 has built-in checksums)
- No mixed case confusion (all lowercase)
- Widely supported by most wallets and exchanges
### Cons
- Some older services still don't support it (rare now)
- Longer addresses than Legacy
### When to Use
**This should be your default for everyday use.** Best balance of low fees and compatibility.
---
## Taproot (P2TR / Bech32m)
**Starts with:** `bc1p`
**Example:** `bc1p5d7rjq7g6rdk2yhzks9smlaqtedr4dekq08ge8ztwac72sfr9rusxg3297`
### What It Is
The newest address type, activated in November 2021. Uses Schnorr signatures and enables advanced smart contracts while improving privacy.
### Pros
- **Best privacy**: multisig and single-sig look identical on-chain
- Advanced scripting capabilities
- Slightly smaller signatures than SegWit
- Future-proof for Bitcoin development
### Cons
- Not universally supported yet (but growing fast)
- Some exchanges still don't allow withdrawals to `bc1p`
- Minimal fee savings over Native SegWit for simple transactions
### When to Use
If your wallet supports it and you're sending to/from Taproot-compatible services. Especially valuable for multisig setups where privacy matters.
---
## Fee Comparison
Transaction size (and thus fees) varies by address type. Smaller = cheaper.
| Sending From | Approx. Size | Relative Fee |
|--------------|--------------|--------------|
| Legacy (P2PKH) | 148 vbytes | 100% (baseline) |
| Nested SegWit (P2SH) | 91 vbytes | ~61% |
| Native SegWit (P2WPKH) | 68 vbytes | ~46% |
| Taproot (P2TR) | 57 vbytes | ~39% |
**Using Native SegWit instead of Legacy saves you ~54% on fees.**
*Note: These are for simple single-input transactions. Complex transactions vary.*
---
## Visual Recognition Guide
```
ADDRESS TYPE QUICK REFERENCE:
─────────────────────────────────────────────────────────
1BvBMSEYstWetqTFn5Au4m4GFg7xJaNVN2
↑
Starts with "1" = LEGACY (P2PKH)
Higher fees, outdated but universal
3J98t1WpEZ73CNmQviecrnyiWrnqRhWNLy
↑
Starts with "3" = SCRIPT (P2SH)
Could be multisig or wrapped SegWit
bc1qar0srrr7xfkvy5l643lydnw9re59gtzzwf5mdq
↑↑↑↑
Starts with "bc1q" = NATIVE SEGWIT (P2WPKH)
Low fees, recommended for most use
bc1p5d7rjq7g6rdk2yhzks9smlaqtedr4dekq08ge8
↑↑↑↑
Starts with "bc1p" = TAPROOT (P2TR)
Newest, best privacy, growing support
```
---
## Which Should You Use?
### For Most People: Native SegWit (bc1q...)
**Use Native SegWit as your default.** It offers:
- Lowest practical fees
- Wide compatibility
- Proven reliability since 2017
### For Privacy-Focused Users: Taproot (bc1p...)
If your wallet supports Taproot and you're transacting with Taproot-compatible services:
- Better privacy (especially for multisig)
- Slightly lower fees
- Future-proof
### Avoid: Legacy (1...)
Only use Legacy addresses if absolutely required for compatibility. You're paying ~2x the fees for no benefit.
---
## Wallet Support
Most modern wallets support all address types. Here's what they typically default to:
| Wallet | Default Address Type |
|--------|---------------------|
| Sparrow | Native SegWit (bc1q), configurable |
| Electrum | Native SegWit (bc1q), configurable |
| Trezor Suite | Native SegWit (bc1q) |
| Ledger Live | Native SegWit (bc1q) |
| Coldcard | Native SegWit (bc1q), configurable |
| BlueWallet | Native SegWit (bc1q) |
You can usually change the address type in wallet settings if needed.
---
## Derivation Paths
Each address type uses a different **derivation path**, the recipe for generating addresses from your seed phrase.
| Address Type | Derivation Path | BIP Standard |
|--------------|-----------------|--------------|
| Legacy | `m/44'/0'/0'` | BIP44 |
| Nested SegWit | `m/49'/0'/0'` | BIP49 |
| Native SegWit | `m/84'/0'/0'` | BIP84 |
| Taproot | `m/86'/0'/0'` | BIP86 |
**Why this matters:** When recovering a wallet, you need to use the same derivation path to see your funds. Most wallets handle this automatically, but it's good to know.
---
## Common Questions
### Can I send between different address types?
**Yes.** You can send from any address type to any other. The network doesn't care. It's all Bitcoin.
### Why do I see different addresses in my wallet?
Wallets generate new addresses for privacy. Each receive address is unique, but they're all derived from your seed phrase and all belong to you.
### An exchange won't let me withdraw to bc1...
Some older exchanges don't support Bech32 (bc1) addresses. Options:
1. Use a different exchange
2. Withdraw to a Legacy (1...) or Script (3...) address temporarily
3. Contact their support; they should upgrade
### Does address type affect security?
Not directly. All types are secure. The differences are in fees, features, and compatibility.
### I recovered my wallet but balance shows zero?
You might be on the wrong derivation path. Try:
1. Check if your wallet is set to the correct address type
2. In Sparrow/Electrum, try different script types
3. Your funds are safe: you just need to find the right path
---
## Key Takeaways
1. **Use Native SegWit (bc1q...)** as your default (best fees and compatibility)
2. **Consider Taproot (bc1p...)** for enhanced privacy and future-proofing
3. **Avoid Legacy (1...)** unless required (you're overpaying for fees)
4. **All types are secure**: differences are mainly about efficiency
5. **You can send between any address types**: they're all Bitcoin
---
## Continue Learning
- [Private Keys Explained](https://selfcustodylabs.com/docs/learn/keys/intro): How addresses are derived
- [Transactions Explained](https://selfcustodylabs.com/docs/learn/transactions/understanding): How Bitcoin moves
- [UTXO Management](https://selfcustodylabs.com/docs/learn/privacy/utxo-management): Managing your coins effectively
---
# Coldcard vs Trezor vs Jade vs Passport: 2026 Compared
> Compare Bitcoin hardware wallets after the 2026 Coldcard incident: Trezor Safe 7, BitBox02 Nova, Jade Plus, Passport, SeedSigner, Bitkey, and more.
Source: https://selfcustodylabs.com/docs/reference/hardware-wallet-comparison/
Last updated: 2026-08-23
Publisher: Self Custody Labs (https://selfcustodylabs.com)
---
For a first Bitcoin hardware wallet in August 2026, the **BitBox02 Nova** (~$185) and the **Trezor Safe 5** ($169) are the easiest devices to use safely. If you want security you can verify yourself rather than take on trust, the **Blockstream Jade Plus** ($149) air-gaps over QR codes and is fully open source. **Coldcard is not recommended** following the 2026 entropy incident. Which device you buy matters less than three habits: supply your own dice entropy at seed creation, add a passphrase, and split keys across vendors once the balance is significant.
Choosing a hardware wallet is one of the most important decisions in your self-custody journey. This guide compares the leading options as of **August 2026**, and it weighs them differently than most comparisons do, because 2026 changed what matters.
**Danger: The Coldcard entropy incident changed this page**
In July 2026, attackers drained ~$116M from wallets whose seeds were generated on Coldcard devices with a five-year-old firmware flaw. The devices were air-gapped and worked "perfectly": the seeds were simply guessable. Read [what happened and who's affected](https://selfcustodylabs.com/docs/learn/wallets/coldcard-entropy-incident/) before trusting any device's random number generator, including the ones we recommend.
**Tip: Quick Recommendation**
- **Beginners**: BitBox02 Nova (Bitcoin-only) or Trezor Safe 5
- **Verifiable security**: Blockstream Jade Plus or Passport Prime, with [dice-roll entropy](https://selfcustodylabs.com/docs/learn/keys/random/)
- **Budget**: Blockstream Jade
- **DIY / stateless**: SeedSigner or Krux
- **Our favourite**: [SeedSigner](https://selfcustodylabs.com/docs/seedsigner/), if you can handle the assembly and the workflow; it's the only option here with no vendor to trust at all
- **Significant holdings**: [multisig](https://selfcustodylabs.com/docs/learn/wallets/multisig/) across vendors beats any single device
**Jump to wallet:** [Trezor Safe 5](#trezor-safe-5) · [Trezor Safe 7](#trezor-safe-7) · [BitBox02 Nova](#bitbox02-nova) · [Jade & Jade Plus](#blockstream-jade--jade-plus) · [Passport Prime](#passport-prime) · [Keystone 3 Pro](#keystone-3-pro) · [SeedSigner & Krux](#seedsigner--krux-diy) · [Coldcard](#coldcard-mk5--q) · [Ledger](#ledger) · [Bitkey](#bitkey)
**Jump to section:** [How to Choose](#how-to-choose-practices-before-devices) · [Security Comparison](#security-architecture-comparison) · [Recommendations](#recommendations-by-use-case) · [Where to Buy](#where-to-buy)
## Quick Comparison Table
Prices are manufacturer list prices as of August 2026; check official stores for current figures.
| Wallet | Price | Air-Gap | Open Source | Secure Element | User (Dice) Entropy | Best For |
|--------|-------|---------|-------------|----------------|---------------------|----------|
| **Trezor Safe 5** | $169 | ❌ No | ✅ Yes | ✅ EAL6+ | ✅ Yes | Beginners |
| **Trezor Safe 7** | $249 | ❌ No | ✅ Yes | ✅ Dual (incl. auditable TROPIC01) | ✅ Yes | Premium UX |
| **BitBox02 Nova** | ~$185 (€175) | ❌ No | ✅ Yes | ✅ EAL6+ | ✅ Yes | Simplicity + security |
| **Jade** | $79 | ✅ QR/camera opt. | ✅ Yes | ❌ Virtual (blind oracle) | ✅ Yes | Budget |
| **Jade Plus** | $149 | ✅ QR/camera | ✅ Yes | ❌ Virtual (blind oracle) | ✅ Yes | Verifiable security |
| **Passport Prime** | $556 | ✅ QR + QuantumLink | ✅ Yes | ✅ Yes | ✅ Yes | Premium air-gap |
| **Keystone 3 Pro** | $149 | ✅ QR only | ✅ Yes | ✅ 3 chips | ✅ Yes | QR air-gap value |
| **SeedSigner / Krux** | ~$50–80 (DIY) | ✅ Stateless QR | ✅ Yes | ❌ No (stateless) | ✅ Required | DIY verifiers |
| **Coldcard Mk5 / Q** | $189 / $289 | ✅ SD/QR (Q) | ⚠️ Source-visible | ✅ Dual | ✅ Yes | ⚠️ See incident |
| **Ledger (Flex/Stax/Nano)** | $79–399 | ❌ No | ❌ SE firmware closed | ✅ Yes | ❌ No | Not recommended |
| **Bitkey** | $250 | ❌ No | ⚠️ Not reproducible | ✅ Secure enclave | ❌ No | Not recommended |
## How to Choose: Practices Before Devices
The 2026 incident made one thing measurable: **the practices around a device protected people better than the device itself**. Coldcard owners who used dice entropy, a strong passphrase, or multisig lost nothing. Owners who trusted the device's defaults lost everything. So before comparing screens and chips, decide on your practices:
1. **Supply or verify your entropy.** Every device below now supports mixing in your own dice rolls at seed creation. Use it, or [generate the seed yourself](https://selfcustodylabs.com/docs/learn/keys/random/). This single habit removes the exact failure that cost Coldcard users $116M.
2. **Add a [passphrase](https://selfcustodylabs.com/docs/learn/keys/passphrase/)** for any balance you'd genuinely miss. It was the difference between drained and untouched in July 2026.
3. **Use [multisig](https://selfcustodylabs.com/docs/learn/wallets/multisig/) across vendors** for significant holdings, so no single vendor's mistake can reach your funds.
With those in place, the device choice is about verification ergonomics (screen, buttons, QR vs USB), supply-chain trust, and how the vendor has behaved when things went wrong.
## Detailed Comparisons
### Trezor Safe 5
**The beginner default**
| Aspect | Details |
|--------|---------|
| Price | $169 |
| Screen | 1.54" color, Gorilla Glass 3 |
| Connectivity | USB-C |
| Open Source | ✅ Firmware and hardware designs |
| Secure Element | ✅ EAL6+ (Optiga) |
| Dice entropy | ✅ Supported at setup |
| Bitcoin-only firmware | ✅ Available |
**Pros:** polished setup and documentation, great Sparrow integration, secure element with open firmware, active security team with a long disclosure track record.
**Cons:** no air-gap option (USB only), Trezor Suite nudges toward its own ecosystem, a shipping-provider breach disclosed in 2026 leaked customer shipping data (opt for pickup points where available).
**Best for:** first hardware wallet, amounts that don't yet justify multisig.
---
### Trezor Safe 7
**The flagship with an auditable secure element**
| Aspect | Details |
|--------|---------|
| Price | $249 |
| Screen | 2.5" color touchscreen |
| Connectivity | USB-C + encrypted Bluetooth |
| Open Source | ✅ Including the TROPIC01 secure element design |
| Secure Element | ✅ Dual: TROPIC01 (auditable) + EAL6+ Optiga |
| Dice entropy | ✅ Supported at setup |
| Bitcoin-only firmware | ✅ Available |
The Safe 7's TROPIC01 is the first secure element whose design can be independently audited; historically you had to choose between "secure element" and "no NDAs." After a year in which a silent firmware flaw cost users nine figures, auditability of the *whole* stack is no longer a purist's luxury.
**Pros:** auditable secure chip, big screen for address verification, quantum-resistant firmware signing, Bitcoin-only variant.
**Cons:** premium price, Bluetooth is a radio you may not want (it can stay off), still no QR air-gap mode.
**Best for:** users who want maximum transparency with mainstream polish.
---
### BitBox02 Nova
**Swiss minimalism, now with an EAL6+ chip**
| Aspect | Details |
|--------|---------|
| Price | ~$185 (€175) |
| Screen | Glass OLED with touch sliders |
| Connectivity | USB-C + Bluetooth (iPhone/iPad) |
| Open Source | ✅ Fully |
| Secure Element | ✅ EAL6+, dual-chip architecture |
| Dice entropy | ✅ Supported at setup |
| Bitcoin-only edition | ✅ Available |
**Pros:** the smoothest backup flow in the industry (microSD + optional wallet-app backup), dual-chip design where the open MCU checks the secure chip, Bitcoin-only edition, fast and transparent communication during the 2026 crisis, announced expanded audits afterward.
**Cons:** no air-gap mode, small screen means more scrolling to verify addresses, touch sliders divide opinion.
**Best for:** beginners and anyone who values a clean, fast workflow. The classic BitBox02 (€149) remains fine if Bluetooth doesn't matter to you.
---
### Blockstream Jade & Jade Plus
**The verifiable-security pick**
| Aspect | Details |
|--------|---------|
| Price | Jade $79 · Jade Plus $149 |
| Screen | Color LCD (Plus: larger, better camera) |
| Connectivity | USB, Bluetooth, camera for QR air-gap |
| Open Source | ✅ Fully |
| Secure Element | ❌ Virtual, "blind oracle" model |
| Dice entropy | ✅ Supported; multi-source entropy by default |
| Bitcoin-only | ✅ (Bitcoin + Liquid) |
Jade takes a different path on two fronts that both proved wise in 2026. Its **anti-exfiltration signing protocol** prevents a malicious device from leaking key material through signatures. And instead of one RNG, it **mixes multiple entropy sources**, a design Blockstream documented in detail within hours of the Coldcard news, alongside a concrete migration guide for affected users.
The trade-off: no hardware secure element. Jade's "blind oracle" splits the key protection with a Blockstream server (or your own self-hosted oracle) that rate-limits PIN guesses. It's a clever model, but you should understand it before relying on it.
**Pros:** true QR air-gap on a budget, anti-exfil signing, multi-source entropy, exemplary incident response, fully open source.
**Cons:** no hardware SE (oracle model requires understanding), camera workflow slower than USB.
**Best for:** security-focused users at any budget; the Plus's better camera makes it the nicer daily driver.
---
### Passport Prime
**The premium air-gapped flagship**
| Aspect | Details |
|--------|---------|
| Price | $556 |
| Screen | Large color touchscreen |
| Connectivity | QR codes + QuantumLink encrypted Bluetooth |
| Open Source | ✅ Fully (KeyOS, sandboxed apps) |
| Secure Element | ✅ Yes |
| Dice entropy | ✅ Supported; ships an entropy-testing app |
| Bitcoin-only | ✅ By design |
Foundation responded to the 2026 incident faster than almost anyone, confirming its entropy paths the same night, and then shipped an **entropy-testing app** so users can check the RNG's output distribution themselves. That's the post-2026 mindset: don't just claim good randomness, let the user probe it.
**Pros:** beautiful verification-first UX, US assembly, sandboxed app model, entropy self-testing, Bitcoin-only.
**Cons:** by far the most expensive option here; more device than most people need; the extra features (2FA, storage) widen the surface it's responsible for.
**Best for:** users who want air-gapped, verification-friendly hardware and are willing to pay for it.
---
### Keystone 3 Pro
**QR air-gap at a fair price**
| Aspect | Details |
|--------|---------|
| Price | $149 |
| Screen | 4" color touchscreen, fingerprint reader |
| Connectivity | QR codes + microSD only |
| Open Source | ✅ Fully |
| Secure Element | ✅ Three chips |
| Dice entropy | ✅ Supported at setup |
| Bitcoin-only firmware | ✅ Available |
**Pros:** true air-gap with a big screen for address verification, three secure elements, dice entropy at setup, excellent Sparrow multisig support, self-destruct on tamper.
**Cons:** multi-coin firmware by default (flash the Bitcoin-only build), company is younger than Trezor/Blockstream, battery to keep charged.
**Best for:** air-gapped workflows without the Passport price tag; a strong multisig quorum member.
---
### SeedSigner & Krux (DIY)
**Stateless signers you assemble yourself**
**Tip: Our favourite**
SeedSigner is the Self Custody Labs favourite signing solution, and we now have a [dedicated SeedSigner section](https://selfcustodylabs.com/docs/seedsigner/) covering why, how to build one, and how to use it. It is not the right pick for most beginners (see the caveats there); for everyone else it's the most verifiable device on this page.
| Aspect | Details |
|--------|---------|
| Price | SeedSigner ~$50–80 in parts · Krux ~$30–80 (K210 devices) |
| Screen | Small LCD (SeedSigner: 1.3" + camera for QR) |
| Connectivity | ✅ QR codes only, fully air-gapped |
| Open Source | ✅ Fully, community-built, reproducible |
| Secure Element | ❌ None: stateless, nothing stored to protect |
| Dice entropy | ✅ Required: you bring the entropy |
| Bitcoin-only | ✅ By design |
SeedSigner (Raspberry Pi Zero based) and Krux take the most radical position on the 2026 lesson: **the device never stores a seed at all**. You bring the seed to each signing session (typically as a [SeedQR](https://selfcustodylabs.com/docs/seedsigner/using-seedsigner/) or by re-entering it), and the device forgets everything at power-off.
Because you generate the seed yourself ([dice + verification](https://selfcustodylabs.com/docs/learn/keys/random/)), there is no vendor RNG to trust. Because you assemble it from commodity parts, there's no wallet-specific supply chain to intercept. The price is convenience: every signing session takes longer, and safe seed storage is entirely on you.
**Best for:** technical users, multisig quorums, and anyone who reads this site's [DIY sections](https://selfcustodylabs.com/docs/learn/wallets/air-gapped-wallets/) with enthusiasm. If you built a coreboot laptop, you'll feel at home. Start with the [build guide](https://selfcustodylabs.com/docs/seedsigner/build-guide/).
---
### Coldcard Mk5 & Q
**Not currently recommended**
**Warning: Why Coldcard lost its recommendation**
For years Coldcard was this site's "security maximalist" pick. Then the [entropy incident](https://selfcustodylabs.com/docs/learn/wallets/coldcard-entropy-incident/): a 2021 firmware bug silently replaced hardware randomness with a predictable software generator, ~$116M was stolen from 5,200+ wallets, and, decisively for us, a developer had **warned Coinkite about that exact code in May 2025 and was dismissed**. No compensation has been offered.
The current hardware (Mk5 $189, Q $289) is capable, the fixed firmware has been independently reviewed, and seeds generated with **dice rolls were never affected**. If you already own one: update firmware, [check whether your seed needs migration](https://selfcustodylabs.com/docs/learn/wallets/coldcard-entropy-incident/#am-i-affected), and generate any new seed with dice. But for new buyers, we don't recommend rewarding a vendor whose handling of a credible warning cost users nine figures, at least until a longer track record rebuilds that trust.
---
### Ledger
**Popular, but closed where it counts**
Ledger's devices (Nano S Plus/X, Flex, Stax; $79–399) have strong secure elements and survived 2026 without an entropy incident; the company was quick to point to its certified TRNG. Our concerns are unchanged: the secure element firmware is **closed source**, the 2023 "Ledger Recover" service showed the firmware can extract seed material for sharding, and the 2020 customer-data breach exposed buyers to years of phishing. You cannot verify the parts that matter most, and 2026 demonstrated exactly how much silent trust that requires.
**Best for:** users locked into Ledger's multi-coin ecosystem. For Bitcoin self-custody, the open alternatives above are stronger choices.
---
### Bitkey
**A different trust model entirely, and one you cannot verify**
| Aspect | Details |
|--------|---------|
| Price | $250 (2026 model with touchscreen; original was $150) |
| Screen | Secure touchscreen for on-device verification (2026 model) |
| Connectivity | Bluetooth + companion phone app; no air-gap |
| Open Source | ⚠️ Source published, but not buildable: fingerprint library is closed |
| Secure Element | ✅ Secure enclave, fingerprint unlock |
| Dice entropy | ❌ No; no user-visible seed phrase at all |
| Bitcoin-only | ✅ Yes |
Block's Bitkey ships as a 2-of-3 multisig by default (your phone + the device + a recovery server), with no user-visible seed phrase and a fingerprint instead of a PIN. It was untouched by the 2026 incident (by architecture, no single RNG failure can spend funds), and its incident-night communication was among the best.
**Warning: Why we don't recommend Bitkey**
Bitkey fails the standard this page was rebuilt around: **you cannot verify it**. The published firmware cannot be reproduced by outsiders because the proprietary fingerprint-matching library is missing from the repository (WalletScrutiny rates it "nosource"). There is no seed phrase to check, no dice entropy to supply, and most recovery paths run through Block's servers. That is precisely the "trust the vendor" posture that cost Coldcard users nine figures; Block has a clean record, but so did Coinkite until July 2026.
Bitkey's honest niche is someone leaving an exchange who would otherwise never self-custody at all: its 2-of-3 design with an Emergency Exit Kit is far better than custodial. But if you can follow a setup guide, a [BitBox02 Nova or Trezor Safe 5](#recommendations-by-use-case) gives you a portable, [standards-based seed](https://selfcustodylabs.com/docs/learn/keys/seed/) you can verify and recover anywhere.
## Security Architecture Comparison
### Secure Elements
| Wallet | Secure Element | Notes |
|--------|---------------|-------|
| Trezor Safe 5 | 1× Optiga (EAL6+) | Open firmware around a certified chip |
| Trezor Safe 7 | TROPIC01 + Optiga | TROPIC01 is auditable, no NDA |
| BitBox02 Nova | 1× EAL6+ | Dual-chip: open MCU cross-checks SE |
| Passport Prime | ✅ Yes | Sandboxed KeyOS on top |
| Keystone 3 Pro | 3× chips | PCI-grade, self-destruct on tamper |
| Coldcard Mk5/Q | 2× (dual vendors) | SEs were *not* the 2026 failure; the firmware was |
| Jade / Jade Plus | Virtual (blind oracle) | Server rate-limits PIN guesses; self-hostable |
| SeedSigner / Krux | None | Stateless: nothing stored to protect |
| Ledger | 1× ST33 | Certified but closed firmware |
| Bitkey | Secure enclave | Firmware not reproducible: closed fingerprint library |
### Entropy: Who Lets You Verify?
The lesson of 2026 in one table. "Dice support" means the device can mix user-supplied rolls into seed generation; "verifiable" means you can independently check the result honors your input.
| Wallet | Dice support | How to verify |
|--------|-------------|---------------|
| SeedSigner / Krux | Required: you bring entropy | Re-derive on a second device; stateless by design |
| Jade / Jade Plus | ✅ + multi-source default | Open firmware; cross-check words against [manual derivation](https://selfcustodylabs.com/docs/learn/keys/random/) |
| Passport Prime | ✅ + entropy-testing app | On-device RNG probing + manual cross-check |
| Trezor Safe 5/7 | ✅ | Cross-check words against manual derivation |
| BitBox02 Nova | ✅ | Cross-check words against manual derivation |
| Keystone 3 Pro | ✅ | Cross-check words against manual derivation |
| Coldcard Mk5/Q | ✅ (dice path was never affected) | Cross-check words against manual derivation |
| Ledger | ❌ | Trust the certification |
| Bitkey | ❌ (no seed phrase shown) | Cannot verify; trust Block's 2-of-3 architecture |
**Whatever you buy:** a device could theoretically ignore your dice. The check that catches everything is re-deriving the seed from the same rolls independently; our [dice guide](https://selfcustodylabs.com/docs/learn/keys/random/) shows how.
### Track Record & Incident Response
New for 2026, and it earned its place: when the Coldcard news broke, response speed and honesty varied enormously.
| Vendor | 2026 crisis response | History |
|--------|---------------------|---------|
| Blockstream (Jade) | Same-night entropy documentation + migration guide | Clean |
| Foundation (Passport) | Same-night confirmation; entropy-testing app after | Clean |
| Block (Bitkey) | Same-night technical analysis | Clean |
| Trezor | Next-day statement, sustained follow-ups, discussing dice UX improvements | Shipping-provider data breach (3rd party, disclosed 2026); glitch attacks on older models, addressed via SE |
| BitBox | Next-day; announced expanded audits | Clean |
| Keystone | Confirmed unaffected | Clean |
| Coinkite (Coldcard) | Fast patch + advisory, but see [dismissed 2025 warning](https://selfcustodylabs.com/docs/learn/wallets/coldcard-entropy-incident/) | The incident itself |
| Ledger | Brief statement ~14h later | Recover controversy (2023), customer-data breach (2020) |
## Recommendations by Use Case
### 👶 First Hardware Wallet
**BitBox02 Nova (Bitcoin-only)** or **Trezor Safe 5**
Polished, open source, secure element, dice support when you're ready for it.
### 🔐 Verifiable Security
**Jade Plus** or **Passport Prime**, seeded with [dice](https://selfcustodylabs.com/docs/learn/keys/random/)
Air-gapped workflows from vendors that treat verification, including of their own randomness, as a feature.
### 💰 Budget
**Blockstream Jade** ($79)
Nothing else at this price is open source, air-gap capable, and backed by this response record.
### 🛠️ DIY / Maximum Verification
**[SeedSigner](https://selfcustodylabs.com/docs/seedsigner/)** (our favourite) or **Krux**
Stateless, assembled from commodity parts, entropy fully in your hands. See the [SeedSigner build guide](https://selfcustodylabs.com/docs/seedsigner/build-guide/).
### 🏆 Significant Holdings
**Multisig across vendors**, e.g. Jade Plus + Keystone 3 Pro + Trezor Safe 5
Three architectures, three supply chains, three firmware teams. July 2026 proved this isn't paranoia: multisig users with a weak Coldcard key lost nothing. See the [multisig guide](https://selfcustodylabs.com/docs/learn/wallets/multisig/).
## Where to Buy
Always buy directly from manufacturers:
| Wallet | Official Store |
|--------|---------------|
| Trezor | [trezor.io](https://trezor.io) |
| BitBox | [bitbox.swiss](https://bitbox.swiss) |
| Jade | [store.blockstream.com](https://store.blockstream.com) |
| Passport | [foundation.xyz](https://foundation.xyz) |
| Keystone | [keyst.one](https://keyst.one) |
| SeedSigner (parts list) | [seedsigner.com](https://seedsigner.com) |
| Krux (build guide) | [selfcustody.github.io/krux](https://selfcustody.github.io/krux/) |
| Coldcard | [coldcard.com](https://coldcard.com) |
| Ledger | [ledger.com](https://ledger.com) |
| Bitkey | [bitkey.world](https://bitkey.world) |
**Danger: Never Buy from Third Parties**
Amazon, eBay, and other resellers have been sources of tampered devices. Only buy directly from manufacturers or authorized resellers listed on their official websites. And regardless of vendor: initialize the device yourself; a "pre-configured" wallet or included seed card is always a scam.
## Summary
There's no single "best" hardware wallet, but after 2026 there is a best *approach*: open hardware, entropy you supplied or verified, a passphrase, and multisig once the stakes are real.
| Priority | Best Choice |
|----------|-------------|
| Ease of use | BitBox02 Nova or Trezor Safe 5 |
| Verifiable security | Jade Plus or Passport Prime + dice |
| Value | Blockstream Jade |
| Full transparency | Trezor Safe 7 (auditable SE) or DIY |
| Air-gap + UX | Keystone 3 Pro |
| Significant holdings | Multi-vendor multisig |
For most users: start with a **BitBox02 Nova** or **Trezor Safe 5**, generate the seed with **your own dice entropy**, and graduate to **multisig** as your holdings grow. And if you're comfortable building your own hardware, our favourite solution on this whole page is the [SeedSigner](https://selfcustodylabs.com/docs/seedsigner/).
---
# Run Your Own Bitcoin Node: Complete Setup Guide
> Complete guide to running your own Bitcoin node. Learn why it matters, compare software options, and follow step-by-step setup instructions with Parmanode.
Source: https://selfcustodylabs.com/docs/bitcoin-node/
Last updated: 2026-08-02
Publisher: Self Custody Labs (https://selfcustodylabs.com)
---
Running your own Bitcoin node is one of the most important steps you can take toward true self-sovereignty. It's where "don't trust, verify" becomes real, where you stop relying on others to tell you what's happening on the network and start verifying everything yourself.
This guide will take you from understanding why nodes matter to running your own fully-configured setup.
**Info: What You'll Achieve**
By the end of this guide, you will have:
- Your own Bitcoin full node, verifying every transaction
- An Electrum server for efficient wallet queries
- Your wallet connected privately to YOUR infrastructure
- Optional Tor configuration for network privacy
**Time required:** 2-4 hours of active work (plus days of sync time)
**Difficulty:** Intermediate
**Cost:** $100-300 (Raspberry Pi + SSD) or $50-100 (repurpose old PC)
## Why Run a Node?
When you use Bitcoin without your own node, you're trusting someone else's computer to tell you:
- Your balance
- Whether transactions are valid
- What's actually happening on the network
That third party learns your addresses, your transaction history, when you're online. You're trading privacy for convenience.
With your own node:
- **Privacy:** Your queries stay between you and your own infrastructure
- **Verification:** You confirm everything yourself, trusting no one
- **Sovereignty:** You participate directly in Bitcoin's consensus
→ Read more: [Why Run Your Own Node](https://selfcustodylabs.com/docs/learn/nodes/why-run-node)
## What You're Building
A complete node setup connects three components:
```
YOUR NODE SETUP
─────────────────────────────────────────────────────────────
Bitcoin Core ───► Electrum Server ───► Your Wallet
(Full Node) │ (Sparrow)
│ │ │
▼ ▼ ▼
Downloads & Indexes data Connects to
verifies the for efficient YOUR server,
blockchain wallet queries not public ones
─────────────────────────────────────────────────────────────
```
| Component | What It Does |
|-----------|--------------|
| **Bitcoin Core** | Downloads and independently verifies the entire blockchain (~600 GB) |
| **Electrum Server** | Indexes the blockchain so your wallet can query it efficiently |
| **Your Wallet** | Connects to your server instead of random public servers |
## Hardware Requirements
| Component | Minimum | Recommended |
|-----------|---------|-------------|
| **Storage** | 1 TB SSD | 2 TB SSD |
| **RAM** | 4 GB | 8+ GB |
| **CPU** | Dual-core | Quad-core |
| **Internet** | Stable connection | Unlimited data |
**Warning: SSD Required**
Do NOT use a traditional hard drive (HDD). Initial sync takes weeks instead of days, and ongoing performance will be frustrating. An SSD is essential: this is not the place to save money.
### Hardware Options
**Dedicated Device (Recommended)**
A Raspberry Pi 4/5 or old laptop running 24/7. Low power consumption, always available for your wallet, set and forget.
**Your Desktop Computer**
No extra hardware, but your node only runs when your computer is on. You'll need to catch up each time you restart.
## Guide Structure
| Step | What You'll Do | Time |
|------|----------------|------|
| 1. [Choose Software](https://selfcustodylabs.com/docs/bitcoin-node/node-software-options) | Compare options and pick your approach | 15 min |
| 2. [Parmanode Setup](https://selfcustodylabs.com/docs/bitcoin-node/parmanode-setup) | Install and configure your node | 1-2 hours |
| 3. [Electrum Server](https://selfcustodylabs.com/docs/bitcoin-node/electrum-server) | Understand indexing options | 15 min |
| 4. [Tor Configuration](https://selfcustodylabs.com/docs/bitcoin-node/tor) | Add network privacy (optional) | 30 min |
| 5. [Connect Wallet](https://selfcustodylabs.com/docs/bitcoin-node/connect-sparrow-wallet) | Link Sparrow to your node | 15 min |
## Time Expectations
Be realistic about timing:
| Phase | Duration |
|-------|----------|
| Reading and planning | 30-60 minutes |
| Software installation | 30-60 minutes |
| Bitcoin Core sync | 1-7 days (depends on hardware) |
| Electrum server indexing | 12-48 hours |
| Wallet connection | 15 minutes |
The initial sync is slow but only happens once. After that, your node stays current automatically. Don't wait by the computer; start the sync and go live your life.
## Our Recommended Approach: Parmanode
We recommend **[Parmanode](https://selfcustodylabs.com/docs/bitcoin-node/parmanode-setup)** for most users. It's a terminal-based wizard that handles the complex parts (downloading, signature verification, configuration) while keeping you in control of a real Linux system.
The killer feature: **Parmanode automatically configures your wallet to connect to your node.** Install Sparrow through Parmanode and it just works: no copying connection strings or fumbling with settings.
→ **[Start with Parmanode](https://selfcustodylabs.com/docs/bitcoin-node/parmanode-setup)**
If you prefer a GUI-based approach, see our [comparison of node software options](https://selfcustodylabs.com/docs/bitcoin-node/node-software-options).
---
## Background Reading
If you're new to nodes, start here:
- [What is a Bitcoin Node](https://selfcustodylabs.com/docs/learn/nodes/what-is-node): The conceptual foundation
- [Why Run Your Own Node](https://selfcustodylabs.com/docs/learn/nodes/why-run-node): Privacy and verification benefits
- [Why Privacy Matters](https://selfcustodylabs.com/docs/learn/privacy/why-privacy-matters): The bigger picture
---
## Ready to Begin?
→ **[Node Software Options](https://selfcustodylabs.com/docs/bitcoin-node/node-software-options)**: Compare your choices
→ **[Parmanode Setup Guide](https://selfcustodylabs.com/docs/bitcoin-node/parmanode-setup)**: Jump straight in (recommended)
---
# Parmanode Setup Guide
> Step-by-step guide to setting up a Bitcoin node with Parmanode. Easy installation for Linux, Mac, and Raspberry Pi with automatic wallet configuration.
Source: https://selfcustodylabs.com/docs/bitcoin-node/parmanode-setup/
Last updated: 2026-08-22
Publisher: Self Custody Labs (https://selfcustodylabs.com)
---
If the idea of setting up a Bitcoin node sounds intimidating, Parmanode is about to change your mind. It's an open-source Bitcoin node installer that takes the complexity out of running your own node, without taking away your control.
Created by Arman the Parman (a well-known Bitcoin educator), Parmanode is a terminal-based wizard that guides you through installing Bitcoin Core and related software. It handles the tedious parts automatically (downloading, verifying signatures, configuring settings) while giving you full access to everything under the hood.
**Tip: Why Parmanode?**
Unlike GUI-based solutions like Umbrel or Start9, Parmanode doesn't hide anything from you. You're running real software on a real Linux (or Mac) system. When something goes wrong, you can actually troubleshoot it. When you want to customize something, you can. It's training wheels that come off gracefully.
## What Parmanode Does
Parmanode is a package installer wizard that makes it easy to:
- **Download software securely:** Automatic PGP signature and SHA256 verification
- **Install Bitcoin Core:** The reference Bitcoin implementation
- **Set up Electrum servers:** Fulcrum, Electrs, or Electrum X
- **Install wallet software:** Sparrow, Electrum, Specter, and more
- **Configure everything automatically:** Wallets connect to your node without manual setup
- **Add privacy tools:** Tor, JoinMarket
The key feature that sets Parmanode apart: **it connects your wallet to your node automatically**. Install Sparrow or Electrum through Parmanode, and they'll be pre-configured to use your local Electrum server. No copying connection strings or fumbling with settings.
## Supported Platforms
| Platform | Support Level |
|----------|---------------|
| **Linux (Debian/Ubuntu)** | Full support (recommended) |
| **Mac (Intel & Apple Silicon)** | Most features work |
| **Raspberry Pi** | Full support with ParmanodL OS |
| **Windows** | Not supported (use Linux VM) |
Parmanode works best on Linux. If you're on Mac, most node-related software will work, but some advanced features are Linux-only.
## What You Can Install
Parmanode organizes software into categories. You pick what you need:
### Node Software
- Bitcoin Core / Bitcoin Knots
- Electrs (Electrum Server)
- Fulcrum (faster Electrum Server)
- Electrum X
- Mempool (block explorer)
- LND (Lightning)
- BTCPay Server
### Wallet Software
- Sparrow Wallet
- Electrum
- Specter Desktop
- Green Wallet
- Trezor Suite
- Ledger Live
### Other Tools
- Tor
- Tor Browser
- JoinMarket (CoinJoin)
- Nostr Relay
- And more...
You don't have to install everything. Tailor it to your needs.
---
## Installation
### Prerequisites
Before you begin:
- A computer running **Linux (Debian/Ubuntu family)** or **Mac**
- At least **1 TB SSD** storage (2 TB recommended)
- **Stable internet connection** (blockchain download is ~600 GB)
- Basic comfort with the terminal
**Warning: Storage Warning**
Do not attempt to run a Bitcoin node on a traditional hard drive (HDD). The initial sync will take weeks instead of days, and ongoing performance will be frustrating. An SSD is essential.
### Step 1: Open Terminal
On Linux, open your terminal application. On Mac, open Terminal from Applications → Utilities.
### Step 2: Install Parmanode
Copy and paste this single command:
```bash
curl https://parmanode.com/install.sh | sh
```
This downloads and runs the Parmanode installer. The script is short and simple: if you want to inspect it first, run the command without `| sh` to print it to your screen.
**Note: Mac Users**
You may be prompted to install Command Line Developer Tools. A popup window will appear: click "Install" and wait a few minutes. This is required for git to work.
### Step 3: Run Parmanode
After installation completes, start Parmanode by typing:
```bash
rp
```
That's it, just two characters. The Parmanode menu will appear.
### Step 4: Navigate the Menus
Parmanode uses a simple menu system:
```
PARMANODE --> Main Menu --> Install Menu --> Node Install
═══════════════════════════════════════════════════════════
# Not yet installed...
(core) Bitcoin Core/Knots
(ersd) electrs (Docker)
(ex) Electrum X
(f) Fulcrum (an Electrum Server)
...
# Installed...
Bitcoin Core/Knots
electrs
═══════════════════════════════════════════════════════════
Type your choice from above options, or: (p) for previous,
(m) for main, (q) to quit.
Then :
```
Type the code in parentheses (like `core` or `f`) and press Enter to install that software.
---
## Installing Bitcoin Core
From the main menu:
1. Navigate to **Install Menu** → **Node Install**
2. Type `core` and press Enter
3. Follow the prompts
Parmanode will:
- Download Bitcoin Core from bitcoin.org
- Verify the PGP signatures automatically
- Install and configure Bitcoin Core
- Start the initial blockchain sync
**Info: Sync Time**
The initial blockchain download takes **1-7 days** depending on your hardware and internet speed. This only happens once; after that, your node stays current automatically.
### Checking Sync Progress
Parmanode provides status information for installed software. You can monitor your sync progress through the Bitcoin Core menu.
---
## Installing an Electrum Server
An Electrum server indexes the blockchain so your wallet can query it efficiently. Without one, your wallet would need to scan the entire blockchain for your transactions.
### Recommended: Fulcrum
Fulcrum is faster than electrs, though it requires more RAM. From the Node Install menu:
1. Type `f` and press Enter
2. Follow the prompts
### Alternative: Electrs
If you have limited RAM (4 GB or less), electrs is lighter:
1. Type `ersd` and press Enter
2. Follow the prompts
**Warning: Wait for Bitcoin Core**
Your Electrum server needs Bitcoin Core to be fully synced before it can index the blockchain. The indexing process takes an additional 12-48 hours after Bitcoin Core finishes syncing.
---
## Installing Sparrow Wallet
Here's where Parmanode shines. From the main menu:
1. Navigate to **Install Menu** → **Wallet Install**
2. Type `sparrow` and press Enter
3. Follow the prompts
When installation completes, **Sparrow will automatically be configured to connect to your local Electrum server**. No manual configuration needed.
Launch Sparrow and it will already be talking to your node. Your transactions, your addresses, your balance queries: all private, all verified by your own infrastructure.
---
## Connection Information
Even though Parmanode configures wallets automatically, you can view your connection settings anytime. From the Electrum server menu, you'll see something like:
```
═══════════════════════ Electrs v0.10.3 Menu ══════════════
ELECTRS IS: RUNNING
STATUS: Bitcoin still sync'ing (external drive)
CONNECT: 127.0.0.1:50001 [From this computer only]
127.0.0.1:50002:s [From this computer only]
192.168.0.170:50001:s [From any home network computer]
TOR: [onion address for remote access]
═══════════════════════════════════════════════════════════
```
Use these addresses to connect wallets on other devices to your node.
---
## Updating Parmanode
Parmanode can update itself from within the software. Look for the update option in the main menu.
**Important:** Updating Parmanode does not automatically update the apps it installed. To get newer versions of Bitcoin Core or other software:
1. Uninstall the app using Parmanode's remove tools
2. Reinstall it (the new version of Parmanode will install the newer version)
If the built-in update is giving you trouble, you can force a refresh:
```bash
curl https://parmanode.com/refresh_parmanode | sh
```
---
## Running on a Raspberry Pi
Parmanode offers **ParmanodL OS**, a complete operating system image for Raspberry Pi 4 or 5. This is the easiest way to set up a dedicated Bitcoin node.
### Getting ParmanodL
Download options:
1. **Direct download** from parmanode.com
2. **Torrent** (helps distribute the file to others)
3. **Tor hidden service** for maximum privacy
### Default Credentials
When you boot ParmanodL:
- **Username:** `parman`
- **Password:** `parmanodl`
### SSH Access
To access your node remotely:
```bash
ssh parman@parmanodl.local
```
**Note: Graphical Applications via SSH**
Some Parmanode features launch graphical applications (like wallets). To see these over SSH, use the `-Y` flag and ensure X11 forwarding is enabled:
```bash
ssh -Y parman@parmanodl.local
```
On Mac, you'll need an X11 viewer like XQuartz.
---
## Tips and Troubleshooting
### Password Prompts
When Parmanode asks for a password, it's asking for your computer's **sudo password** (your login password). This is needed to access system functions like mounting drives.
### Don't Run as Root
Parmanode is designed to run as a normal user, not root. If you try to run it as root, you'll get errors.
### VPS Hosting
You can run Parmanode on a Virtual Private Server, but be aware that blockchain storage can get expensive unless you run Bitcoin Core in pruned mode.
### Learning from the Code
Parmanode is fully open source with extensive comments. If you want to learn how things work:
1. Open `~/parman_programs/parmanode/` in a code editor
2. Start with `run_parmanode.sh` and follow the logic
3. Every command is something you could run manually in the terminal
This is a great way to learn Linux and Bitcoin infrastructure.
---
## Key Takeaways
Parmanode makes running a Bitcoin node accessible without dumbing it down:
- **One-line installation:** `curl https://parmanode.com/install.sh | sh`
- **Automatic verification:** PGP and SHA256 checks happen automatically
- **Automatic wallet configuration:** Sparrow and Electrum connect to your node without manual setup
- **Full control:** You're running real software on a real system, nothing hidden
- **Educational:** The code is commented and readable
Whether you're setting up your first node or your fifth, Parmanode removes friction without removing understanding.
---
## Next Steps
Once your node is running:
→ **Next:** [Electrum Server Details](https://selfcustodylabs.com/docs/bitcoin-node/electrum-server) (understand your indexing options)
→ **Privacy:** [Tor Configuration](https://selfcustodylabs.com/docs/bitcoin-node/tor) (add network-level privacy)
→ **Connect:** [Connect Sparrow Wallet](https://selfcustodylabs.com/docs/bitcoin-node/connect-sparrow-wallet) (link your wallet to your node)
---
## Resources
- [Parmanode Website](https://parmanode.com): Official site and downloads
- [Parmanode GitHub](https://github.com/ArmanTheParman/parmanode): Source code
- [Arman the Parman's Website](https://armantheparman.com): Educational articles on Bitcoin
---
# Node Software Options
> Compare Bitcoin node software options: Parmanode, Umbrel, RaspiBlitz, Start9, and DIY setups. Find the right approach for your skill level and needs.
Source: https://selfcustodylabs.com/docs/bitcoin-node/node-software-options/
Last updated: 2026-08-02
Publisher: Self Custody Labs (https://selfcustodylabs.com)
---
There's no single "best" way to run a Bitcoin node. Different solutions optimize for different things: ease of use, learning opportunity, feature richness, or maximum control. Here's how to think about your options.
## The Spectrum of Control
Node software exists on a spectrum from "just works" to "build everything yourself":
```
MORE GUIDED MORE CONTROL
─────────────────────────────────────────────────────────────
Umbrel Start9 Parmanode RaspiBlitz Raspibolt
Pretty App Terminal Scripts Manual
web UI store wizard & menus setup
─────────────────────────────────────────────────────────────
```
**Left side:** Easy to start, but when something breaks, you may not understand why.
**Right side:** Steeper learning curve, but you understand your system deeply.
## Quick Comparison
| Solution | Difficulty | Control | Learning Value | Best For |
|----------|------------|---------|----------------|----------|
| **Parmanode** | Medium | High | Excellent | Learning while doing |
| **Umbrel** | Easy | Low | Limited | Beginners who want simplicity |
| **Start9** | Easy | Medium | Moderate | Privacy-focused users |
| **RaspiBlitz** | Medium | High | Good | Lightning enthusiasts |
| **Raspibolt** | Hard | Maximum | Maximum | Deep learners |
## Option 1: Parmanode (Recommended)
**Best for:** Users who want to learn without suffering
Parmanode is our recommended approach because it strikes the ideal balance. You're working in a real terminal on a real Linux system, but the wizard handles the tedious parts: downloading, signature verification, configuration. When you install Sparrow through Parmanode, it automatically connects to your node. Magic that you can understand.
**Highlights:**
- One-line installation
- Automatic PGP/SHA256 verification
- Wallets auto-configure to use your node
- Open source with extensive code comments
- Works on Linux, Mac, and Raspberry Pi
**Tradeoffs:**
- Terminal-based (no pretty web UI)
- Requires basic command-line comfort
→ **[Parmanode Setup Guide](https://selfcustodylabs.com/docs/bitcoin-node/parmanode-setup)**
## Option 2: Umbrel
**Best for:** Non-technical users who just want a working node
Umbrel provides a beautiful web interface and an "app store" for installing Bitcoin software. Click to install Bitcoin Core, click to install an Electrum server, click to install Lightning. It's genuinely impressive how accessible they've made node operation.
**Highlights:**
- Gorgeous web interface
- One-click app installation
- Active community
- Works on Raspberry Pi or any Linux system
**Tradeoffs:**
- Abstracts away the details (hard to troubleshoot)
- Docker-based (adds complexity under the hood)
- When things break, you may feel helpless
→ [Umbrel Website](https://umbrel.com)
## Option 3: Start9
**Best for:** Privacy-focused users who want a sovereign server
Start9 goes beyond Bitcoin: it's trying to build a "personal server" for all your self-hosted needs. Their focus on privacy and sovereignty aligns well with Bitcoin values. The Embassy OS provides a polished experience with thoughtful design.
**Highlights:**
- Strong privacy focus
- Broader vision (not just Bitcoin)
- Health monitoring and alerts
- Sell pre-configured hardware
**Tradeoffs:**
- More expensive if buying hardware
- Smaller app ecosystem than Umbrel
- Proprietary OS (though open source)
→ [Start9 Website](https://start9.com)
## Option 4: RaspiBlitz
**Best for:** Lightning Network enthusiasts
RaspiBlitz started as a Lightning-focused node and has grown from there. It's feature-rich, well-maintained, and has an active community. The interface is terminal-based with ASCII menus, functional rather than pretty.
**Highlights:**
- Excellent Lightning support
- Feature-rich
- Long track record
- Active development
**Tradeoffs:**
- Can feel overwhelming (many options)
- Less polished UX than Umbrel
- Primarily Raspberry Pi focused
→ [RaspiBlitz Documentation](https://docs.raspiblitz.org)
## Option 5: DIY (Raspibolt/Minibolt)
**Best for:** Deep learners who want maximum understanding
Raspibolt and Minibolt are step-by-step guides to building a node from scratch. No wizard, no automation: you type every command, create every configuration file, understand every component. It's the slow path, but you emerge with genuine knowledge.
**Highlights:**
- Maximum learning opportunity
- Complete understanding of your system
- No magic or abstraction
- Excellent documentation
**Tradeoffs:**
- Time-intensive (expect hours to days)
- Easy to make mistakes
- Troubleshooting requires understanding
→ [Raspibolt Guide](https://raspibolt.org) (Raspberry Pi)
→ [Minibolt Guide](https://minibolt.minibolt.info) (PC/Laptop)
## Decision Framework
**Choose Parmanode if:**
- You want to learn but not suffer
- You're comfortable with a terminal
- You want wallets to auto-configure
- You might want to peek at the code
**Choose Umbrel if:**
- You want the easiest possible setup
- You prefer graphical interfaces
- You won't need deep customization
- You're okay trading control for convenience
**Choose Start9 if:**
- Privacy is your top priority
- You want a broader "sovereign computing" platform
- You're willing to pay for polished hardware
**Choose RaspiBlitz if:**
- Lightning Network is important to you
- You want lots of features
- You're comfortable with terminal menus
**Choose DIY (Raspibolt) if:**
- Learning is more important than finishing quickly
- You want to understand every component
- You enjoy technical challenges
## Hardware Considerations
Most node software works on similar hardware:
| Component | Minimum | Recommended |
|-----------|---------|-------------|
| **Device** | Raspberry Pi 4 (4GB) | Raspberry Pi 5 (8GB) or mini PC |
| **Storage** | 1 TB SSD | 2 TB SSD |
| **RAM** | 4 GB | 8+ GB |
| **Internet** | Stable connection | Unlimited data |
**Warning: SSD Required**
All node software requires an SSD. Traditional hard drives are too slow for the Bitcoin blockchain. Don't try to save money here: you'll waste days of sync time and have ongoing performance issues.
## Our Recommendation
For most users reading this site, **[Parmanode](https://selfcustodylabs.com/docs/bitcoin-node/parmanode-setup)** is the right choice. It teaches you real skills while removing unnecessary friction. You'll understand your node because you built it with real tools, but you won't waste hours on tasks a script can do in seconds.
If Parmanode feels too technical, start with Umbrel; you can always migrate later. If Parmanode feels too guided, try Raspibolt; you'll learn even more.
The important thing is running a node, period. Any of these options gets you there.
---
## Next Steps
→ **Recommended:** [Parmanode Setup Guide](https://selfcustodylabs.com/docs/bitcoin-node/parmanode-setup) (our recommended approach)
→ **Background:** [Why Run Your Own Node](https://selfcustodylabs.com/docs/learn/nodes/why-run-node) (understand the benefits)
---
# Electrum Server Explained
> Understand Electrum servers (Electrs, Fulcrum): what they do, why you need one, and how to choose between options for your Bitcoin node setup.
Source: https://selfcustodylabs.com/docs/bitcoin-node/electrum-server/
Last updated: 2026-08-02
Publisher: Self Custody Labs (https://selfcustodylabs.com)
---
You've got Bitcoin Core running, syncing hundreds of gigabytes of blockchain data. But here's the problem: when Sparrow Wallet asks "what's my balance?", Bitcoin Core can't answer quickly. It would need to scan the entire blockchain looking for transactions involving your addresses, a process that could take hours.
This is where an Electrum server comes in. It creates an index of the blockchain data, organizing everything by address. When your wallet asks about a specific address, the Electrum server can answer in milliseconds instead of hours.
Think of it like the difference between reading every page of a 600-gigabyte book versus checking the index at the back.
## What an Electrum Server Does
An Electrum server sits between Bitcoin Core and your wallet:
```
QUERY FLOW
─────────────────────────────────────────────────────────────
Sparrow Wallet Bitcoin Core
│ │
│ "Balance for │
│ address bc1q...?" │
│ │
▼ │
┌─────────────────┐ │
│ Electrum Server │◄────────────────────┘
│ (Index) │ Reads blockchain
└────────┬────────┘
│
│ "0.5 BTC"
│ (instant response)
▼
Sparrow Wallet
─────────────────────────────────────────────────────────────
```
The server indexes all addresses and transactions, building a database that can answer wallet queries efficiently. Your wallet never talks directly to Bitcoin Core. It talks to the Electrum server, which has already organized all the data for fast retrieval.
## Why You Need One
Without an Electrum server, you have limited options for connecting your wallet to your node:
**Option 1: Let your wallet scan the blockchain directly**
This works but is slow. Every time you open your wallet, it needs to catch up by scanning recent blocks. Some wallets support this; many don't.
**Option 2: Use a public Electrum server**
Fast, but defeats the purpose of running your own node. The public server sees all your addresses and can track your activity.
**Option 3: Run your own Electrum server**
Best of both worlds. Fast queries, complete privacy. This is what we recommend.
## Electrum Server Options
Several implementations exist, each with tradeoffs:
| Server | Language | RAM Usage | Index Time | Best For |
|--------|----------|-----------|------------|----------|
| **Fulcrum** | C++ | 4+ GB | Faster | Most users |
| **electrs** | Rust | 2+ GB | Slower | Limited RAM |
| **ElectrumX** | Python | 8+ GB | Varies | Legacy setups |
### Fulcrum (Recommended)
Fulcrum is written in C++ and is the fastest option. Once indexed, queries are lightning fast. The tradeoff is higher RAM usage: you'll want at least 4 GB available, ideally 8 GB.
If you're running Parmanode, install Fulcrum by typing `f` in the Node Install menu.
### electrs
electrs (lowercase) is written in Rust and uses less RAM than Fulcrum. It's a good choice for Raspberry Pi 4 with only 4 GB of RAM. The indexing process is slower, but once complete, it works well.
In Parmanode, type `ersd` for the Docker version of electrs.
### ElectrumX
The original Python implementation. Still works but generally not recommended for new setups; the alternatives are faster and more efficient.
## The Indexing Process
After Bitcoin Core finishes syncing, your Electrum server needs to build its index. This is a one-time process that takes **12-48 hours** depending on your hardware.
During indexing:
- The server reads the entire blockchain from Bitcoin Core
- It builds a database mapping addresses to transactions
- CPU and disk usage will be high
- Your wallet won't connect until indexing completes
**Be patient.** Just like the Bitcoin Core sync, this only happens once. After the initial index is built, the server stays current automatically.
## Security and Privacy Benefits
Running your own Electrum server provides significant advantages:
**Privacy:** Your wallet queries never leave your network. Public Electrum servers see every address you check and every transaction you broadcast. Your own server keeps that information private.
**Verification:** Data comes directly from your own Bitcoin Core instance, which has verified every block against Bitcoin's rules. You're not trusting a third party to tell you the truth.
**Reliability:** Public servers can go offline, be slow, or be shut down. Your own server is always available (when your computer is running).
**No Logging:** Public servers could be logging your activity. Your own server logs only what you configure it to log.
## Connection Information
Once your Electrum server is running, you'll need connection details for your wallet. If you installed through Parmanode, this information is displayed in the server's menu:
```
CONNECT: 127.0.0.1:50001 [From this computer only]
127.0.0.1:50002:s [From this computer only - SSL]
192.168.0.170:50001 [From any home network computer]
TOR: [onion address for remote access]
```
**Port 50001:** Standard Electrum protocol (unencrypted, fine for local network)
**Port 50002:** SSL-encrypted connection
**Tor address:** For connecting from outside your home network privately
If you installed your wallet through Parmanode, it will already be configured: no manual setup needed.
## Storage Requirements
Your Electrum server index adds storage beyond Bitcoin Core's blockchain:
| Server | Approximate Index Size |
|--------|----------------------|
| **Fulcrum** | 100-130 GB |
| **electrs** | 30-50 GB |
| **ElectrumX** | 50-70 GB |
Plan for **at least 1.5 TB total** for Bitcoin Core plus Fulcrum, or **1.2 TB** for Bitcoin Core plus electrs.
## Troubleshooting
### "Connection refused" when connecting wallet
The Electrum server might still be indexing, or it might not be running.
- Check if Bitcoin Core is fully synced first
- Verify the Electrum server is running (check the menu in Parmanode)
- Ensure you're using the correct port (50001 or 50002)
### Indexing seems stuck
Initial indexing takes 12-48 hours. It's not stuck; it's just slow. Check:
- Is there disk activity? (indicates the server is working)
- How much RAM is available? (low RAM slows indexing significantly)
- Is Bitcoin Core fully synced? (the Electrum server waits for Core)
### High CPU usage during indexing
This is normal. Once the initial index is complete, CPU usage drops dramatically. The server only needs to index new blocks as they arrive (every ~10 minutes).
---
## Key Takeaways
- An Electrum server **indexes the blockchain** for fast wallet queries
- Without one, your wallet would need to **scan the entire blockchain** (slow)
- **Fulcrum** is fastest, **electrs** uses less RAM
- Initial indexing takes **12-48 hours** (one-time)
- Parmanode **auto-configures** wallets to use your server
---
## Next Steps
→ **Next:** [Tor Configuration](https://selfcustodylabs.com/docs/bitcoin-node/tor) (add network privacy)
→ **Connect:** [Connect Sparrow Wallet](https://selfcustodylabs.com/docs/bitcoin-node/connect-sparrow-wallet) (manual wallet connection)
→ **Back:** [Parmanode Setup](https://selfcustodylabs.com/docs/bitcoin-node/parmanode-setup) (installation guide)
---
# Tor Configuration for Bitcoin Nodes
> Configure your Bitcoin node to run over Tor for enhanced privacy. Hide your IP address and enable secure remote access to your node.
Source: https://selfcustodylabs.com/docs/bitcoin-node/tor/
Last updated: 2026-08-02
Publisher: Self Custody Labs (https://selfcustodylabs.com)
---
Your Bitcoin node talks to the world in two ways: it connects to other Bitcoin nodes to stay synchronized, and it serves your wallet's queries. Both of these connections have privacy implications, and Tor can help with both.
## Why Tor Matters for Nodes
### Your IP Address is Your Identity
When your node connects to other Bitcoin nodes, those nodes see your IP address. Your IP address isn't anonymous: it's tied to your identity through your Internet Service Provider's records. With minimal effort, someone can:
- Determine your approximate geographic location
- Identify that you're running a Bitcoin node
- Potentially correlate your node with other online activity
Why does this matter? If attackers know you're running a Bitcoin node, they might assume you hold significant Bitcoin. If you're running a Lightning node, your channel capacity is publicly visible, giving observers a floor estimate of your holdings. This makes you a potential target for physical attacks.
Running your node over Tor hides your IP address from the Bitcoin network. Other nodes see a Tor exit address, not your home connection.
### Two Types of Tor Connections
Tor serves two distinct purposes for your node:
```
TOR USE CASES
─────────────────────────────────────────────────────────────
1. NODE-TO-NODE (Privacy)
Your Node ──► Tor Network ──► Other Bitcoin Nodes
Hides your IP from the Bitcoin network.
Other nodes can't see where you're located.
2. WALLET-TO-NODE (Remote Access)
Your Wallet ──► Tor Network ──► Your Node's Onion Address
Enables access from anywhere in the world.
No port forwarding or VPN needed.
─────────────────────────────────────────────────────────────
```
## Connection 1: Node to Bitcoin Network
This is about **privacy**. By routing your node's connections through Tor, you prevent other Bitcoin nodes from learning your real IP address.
### What It Protects Against
- Network observers learning you run a Bitcoin node
- Geographic identification of your node
- Correlation of your node with other internet activity
- ISP logging of your Bitcoin network connections
### Configuration
Most node software can be configured to connect to peers exclusively over Tor. In Parmanode, Tor support is built into the menus: enable it from the appropriate option.
Bitcoin Core's relevant settings:
```
proxy=127.0.0.1:9050
listen=1
bind=127.0.0.1
onlynet=onion
```
These settings tell Bitcoin Core to route all connections through Tor and only connect to other Tor-enabled nodes.
## Connection 2: Your Wallet to Your Node
This is about **remote access**. When you're home, your wallet connects to your node over your local network (completely private, no Tor needed). But what happens when you're away from home?
Your node has an internal IP address (like `192.168.1.100`) that only exists on your home network. When you're at a coffee shop or traveling, that address doesn't work; you're on a different network.
### The Problem with Traditional Solutions
**Port forwarding** exposes your node to the entire internet. Anyone can attempt to connect, and your home IP address is visible.
**VPN to home** works but requires setup and monthly costs.
**Tor hidden service** solves this elegantly. Your node publishes an onion address that's accessible from anywhere in the world, through the Tor network, without exposing your home IP.
### How It Works
Your node creates a Tor hidden service, an `.onion` address that routes through the Tor network to reach your node. Your wallet connects to this onion address from anywhere:
```
Remote Access via Tor
─────────────────────────────────────────────────────────────
You (traveling) Home Network
│ │
│ ┌──────┴──────┐
│ │ Your Node │
│ │ (electrum │
▼ │ server) │
┌───────────┐ └──────▲───────┘
│ Wallet │ │
│ (phone or │ │
│ laptop) │ │
└─────┬─────┘ Tor Hidden Service
│ abc123xyz.onion
│ ▲
└──────► Tor Network ───────┘
─────────────────────────────────────────────────────────────
```
The connection is encrypted, your home IP is never exposed, and no port forwarding is required.
## Setting Up Tor
### With Parmanode
Parmanode can install and configure Tor for you. From the Other Install menu, look for Tor-related options. Once installed, Parmanode will display your onion addresses for both Bitcoin Core and your Electrum server.
### Tor Connection Details
Your Electrum server (Fulcrum or electrs) will have its own onion address, shown in its status menu:
```
TOR: abc123...xyz.onion:50001
```
Enter this address in your wallet's server settings to connect from anywhere.
## Sharing Your Node
One benefit of Tor access: you can share your node with friends and family. Give them your Electrum server's onion address, and they can connect their wallets to your node from anywhere in the world.
**A word of caution:** Each connected wallet adds load to your node. A Raspberry Pi can handle a few simultaneous connections, but don't share your address publicly unless you have robust hardware.
## Privacy Tradeoffs
Running over Tor adds latency. Connections are slower because traffic routes through multiple relays. For most node operations, this is acceptable. For time-sensitive applications (like running a routing Lightning node), the latency might matter.
You can also run in "hybrid" mode, connecting to both Tor and clearnet peers. This improves connectivity but reduces privacy, as clearnet connections expose your IP.
## Key Takeaways
- **Node-to-network Tor** hides your IP from other Bitcoin nodes (privacy)
- **Wallet-to-node Tor** enables remote access without port forwarding (convenience)
- Your node's **onion address** lets you connect from anywhere in the world
- **Parmanode** can install and configure Tor for you
- **Share with caution:** too many connections can overload small hardware
---
## Next Steps
→ **Next:** [Connect Sparrow Wallet](https://selfcustodylabs.com/docs/bitcoin-node/connect-sparrow-wallet) (link your wallet)
→ **Back:** [Electrum Server](https://selfcustodylabs.com/docs/bitcoin-node/electrum-server) (understanding the indexer)
→ **Start:** [Parmanode Setup](https://selfcustodylabs.com/docs/bitcoin-node/parmanode-setup) (full installation guide)
---
# Connect Sparrow Wallet to Your Node
> Connect Sparrow Wallet to your own Bitcoin node and Electrum server so transactions stay private and verified by your own infrastructure.
Source: https://selfcustodylabs.com/docs/bitcoin-node/connect-sparrow-wallet/
Last updated: 2026-08-02
Publisher: Self Custody Labs (https://selfcustodylabs.com)
---
This is the moment everything comes together. You've set up Bitcoin Core. You've indexed the blockchain with an Electrum server. Now you'll connect your wallet, and from this point forward, your Bitcoin activity stays between you and your own infrastructure.
## If You Used Parmanode
Here's the beautiful part: **if you installed Sparrow through Parmanode, it's already configured**. Launch Sparrow and it will automatically connect to your local Electrum server. No manual configuration needed.
The connection indicator in the bottom-right corner should turn blue, indicating a successful private connection to your own server.
If it's not connecting, check that:
- Your Electrum server (Fulcrum or electrs) is running
- Bitcoin Core is fully synced
- The Electrum server has finished its initial indexing
## Manual Configuration
If you installed Sparrow separately, or need to reconfigure the connection, follow these steps:
### Step 1: Open Server Settings
In Sparrow Wallet:
1. Go to **File** → **Preferences** (or **Settings** on some versions)
2. Click **Server** in the left sidebar
### Step 2: Enter Your Server Details
You need three pieces of information:
| Field | Value | Notes |
|-------|-------|-------|
| **URL** | Your server's IP address | e.g., `192.168.1.100` or `127.0.0.1` |
| **Port** | `50002` (SSL) or `50001` (non-SSL) | 50002 recommended |
| **SSL** | Enabled (for port 50002) | Toggle on |
### Finding Your Server Address
**If using Parmanode:** Check the Electrum server menu; connection details are displayed there.
**If on the same computer as your node:** Use `127.0.0.1` (localhost).
**If on a different computer on your home network:** Use your node's local IP address (like `192.168.1.100`). You can find this in your router's admin panel or by running `ip addr` on your node.
**If connecting remotely via Tor:** Use your onion address.
### Step 3: Test the Connection
Click **Test Connection**. You should see:
- ✅ Connection successful
- Server version information
- Block height matching the current blockchain
If the test fails, see [Troubleshooting](#troubleshooting) below.
### Step 4: Enable the Connection
Toggle the switch in the bottom-right to enable the connection. The indicator should turn **blue**, showing an active private connection.
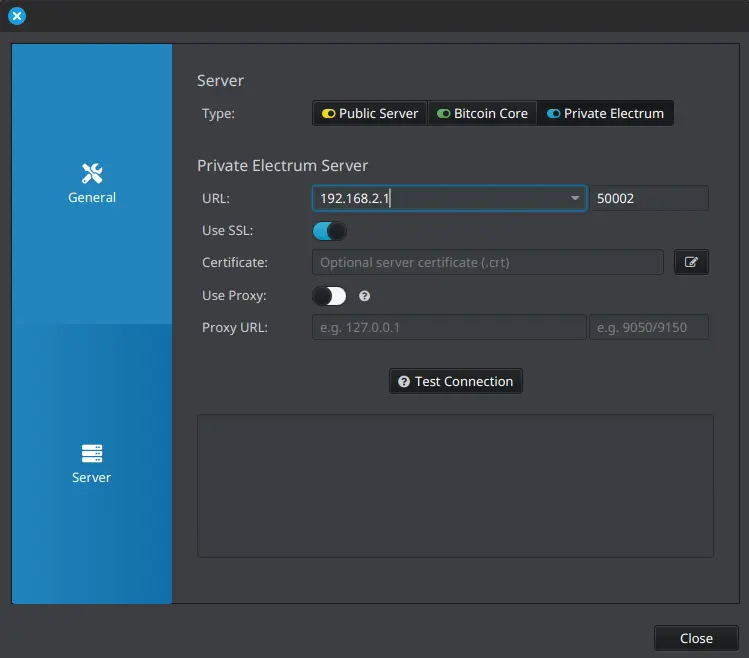
## Connecting from Outside Your Home
When you're away from home, your local IP address won't work. You have two options:
### Option 1: Tor (Recommended)
If your Electrum server has a Tor hidden service configured, use the onion address:
1. In Sparrow, go to **File** → **Preferences** → **Server**
2. Enable **Use Proxy**
3. Set proxy to `127.0.0.1:9150` (Tor Browser) or `127.0.0.1:9050` (Tor daemon)
4. Enter your onion address as the URL (e.g., `abc123xyz.onion`)
5. Port: `50001`
6. SSL: Off (Tor already encrypts)
### Option 2: VPN to Home Network
If you have a VPN configured to your home network, connect to the VPN first, then use your node's local IP address as usual.
## Verifying Your Privacy
Once connected, you can verify you're using your own node:
1. **Check the server indicator:** Should show your IP or onion address, not a public server
2. **Look at the block height:** Should match your node's sync status
3. **Create a new wallet:** Address queries should complete quickly (your server is local)
You're no longer leaking your addresses to random public servers. Every query goes to your own infrastructure.
## Connecting Other Wallets
The same Electrum server can serve multiple wallets:
**Electrum Wallet:**
- Tools → Network → Server
- Enter your server address and port
**BlueWallet (mobile):**
- Settings → Network → Electrum Server
- Enter your server address (use Tor for remote access)
**Nunchuk:**
- Settings → Network Settings
- Configure Electrum server connection
## Troubleshooting
### "Connection refused"
- Is your Electrum server running? Check in Parmanode or via process manager.
- Is Bitcoin Core fully synced? The Electrum server waits for Core.
- Has the Electrum server finished indexing? Initial index takes 12-48 hours.
- Are you using the correct port? Try both 50001 and 50002.
### "Connection timed out"
- Is the IP address correct? Verify your node's address.
- Are you on the same network? Local IPs don't work remotely.
- Is a firewall blocking the connection? Check your node's firewall settings.
### Connection works but wallet shows wrong balance
- Wait for the wallet to fully sync with the server
- Check if the Electrum server has finished indexing
- Try rescanning the wallet (Wallet → Settings → Rescan)
### Tor connection not working
- Is Tor running on your device? Verify the proxy is available.
- Is the onion address correct? Check your node's Tor configuration.
- Is the port correct? Tor connections typically use 50001 (non-SSL).
## Key Takeaways
- **Parmanode users:** Sparrow auto-connects; no manual setup needed
- **Manual setup:** Server IP + port 50002 + SSL enabled
- **Remote access:** Use Tor onion address with proxy configured
- **Blue indicator:** Confirms private connection to your own server
---
## Next Steps
You're done! Your wallet now connects privately to your own node. Every balance check, every transaction broadcast: all verified by your own infrastructure.
→ **Learn more:** [Why Run Your Own Node](https://selfcustodylabs.com/docs/learn/nodes/why-run-node)
→ **Privacy:** [Why Privacy Matters](https://selfcustodylabs.com/docs/learn/privacy/why-privacy-matters)
→ **Back:** [Bitcoin Node Guide](https://selfcustodylabs.com/docs/bitcoin-node/) (complete guide overview)
---
# Libreboot Installation Guide
> Install Libreboot open-source firmware to replace your BIOS. Remove Intel ME backdoors and enhance security for your Bitcoin computer.
Source: https://selfcustodylabs.com/docs/libreboot/
Last updated: 2026-04-14
Publisher: Self Custody Labs (https://selfcustodylabs.com)
---
**Info: What You'll Do**
In this guide, you will:
- Set up external flashing hardware (Raspberry Pi Pico + SOIC8 clip)
- Build Libreboot from source
- Flash Libreboot to your laptop's BIOS chip
- Configure bootloader options
**Time required:** 3-5 hours
**Difficulty:** Advanced
**Estimated cost:** $15-30 (Raspberry Pi Pico + SOIC8 clip + jumper wires)
**Prerequisites:** Supported laptop (ThinkPad recommended), Raspberry Pi Pico, SOIC8 clip
**Tip: Background Reading**
This guide assumes you're building a [Bitcoin Computer](https://selfcustodylabs.com/docs/advanced/bitcoin-computer) or [Air-Gapped Computer](https://selfcustodylabs.com/docs/learn/wallets/air-gapped-wallets). If you're not sure why open-source firmware matters, see those guides first.
## Why Libreboot?
For a Bitcoin-focused laptop, security and privacy are paramount. Libreboot provides:
| Benefit | Description |
|---------|-------------|
| **No backdoors** | Removes Intel ME/AMD PSP surveillance components |
| **Auditable code** | Fully open-source, no hidden proprietary code |
| **Reduced attack surface** | Minimal firmware footprint |
| **Faster boot** | Less bloat means quicker startup |
For Bitcoiners who value sovereignty, Libreboot ensures your laptop runs only transparent, user-controlled software.
## What is Libreboot?
Libreboot is a free, open-source alternative to proprietary BIOS and UEFI firmware. It’s based on Coreboot and removes closed-source code like Intel Management Engine (ME) and AMD Platform Security Processor (PSP), which are potential security risks. Libreboot works on specific Intel, AMD, and ARM-based motherboards, commonly found in older laptops and desktops.
It initializes your hardware (CPU, RAM, storage, etc.) and loads your operating system. Linux and BSD are well-supported, and help is available on the #libreboot channel on Libera IRC.
## How Libreboot Works
Libreboot includes multiple bootloader options:
- **GRUB** – A flexible GNU bootloader for Linux and BSD.
- **SeaBIOS** – A lightweight BIOS-compatible option for legacy software.
- **U-Boot** – A simple UEFI bootloader for ARM and some x86/x86_64 systems.
All these options come bundled, letting you choose the right one when you boot.
---
## Related Guides
**Info: Coreboot vs Libreboot**
Libreboot is based on Coreboot but removes more proprietary blobs. If your hardware isn't supported by Libreboot, check out our **[Coreboot Guide](https://selfcustodylabs.com/docs/coreboot)** for an alternative that supports more devices.
**Tip: Use Cases**
Once you have Libreboot installed, use your laptop as a:
- **[Bitcoin Computer](https://selfcustodylabs.com/docs/advanced/bitcoin-computer)** – For secure transaction creation and broadcasting
- **[Air-Gapped Computer](https://selfcustodylabs.com/docs/learn/wallets/air-gapped-wallets)** – For offline seed generation and signing
---
# Libreboot Hardware Requirements
> Hardware list for flashing Libreboot: supported laptops, Raspberry Pi Pico H programmer, Pomona SOIC8 clip, and required cables.
Source: https://selfcustodylabs.com/docs/libreboot/requirements/
Last updated: 2026-04-15
Publisher: Self Custody Labs (https://selfcustodylabs.com)
---
We created this guide specifically for installing Libreboot on Lenovo ThinkPad models with an SOIC8 (8-pin) BIOS chip. To get started, you'll need the following equipment:
## Laptop
Libreboot supports several Lenovo ThinkPad models, with the **ThinkPad T480s** being the latest and most powerful option. It supports NVMe storage and up to 24GB of RAM, making it an excellent choice.
Here’s the complete list of supported models covered in this guide.
- X Series: X230
- T Series: T420, T430, T440p, T480s, T530
- W Series: W530
## Raspberry Pi Pico H (with pre-soldered headers)
The Raspberry Pi Pico H is an affordable microcontroller that operates at 3.3V logic levels, ensuring safe communication with your BIOS chip without the risk of damage from 5V signals.
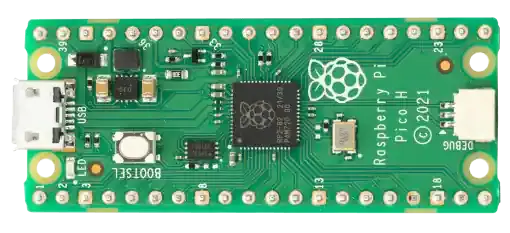
## Pomona 5250 SOIC8 Clip
The Pomona 5250 clip is widely regarded as the best tool for flashing SOIC8 chips, providing a reliable and secure connection during the process.
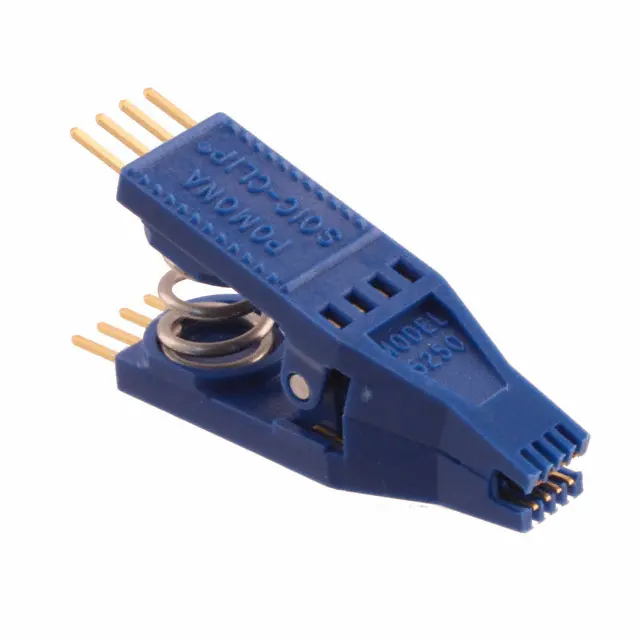
## Female-to-Female Dupont Cables (10cm)
You’ll need 10cm female-to-female Dupont cables to connect your Raspberry Pi Pico to the SOIC8 clip. Longer cables may introduce signal instability, increasing the risk of data errors.
## Micro USB Cable (with Data Transfer Support)
A Micro USB cable is required to connect your Raspberry Pi Pico to your laptop. Make sure the cable supports data transfer, not just charging, to ensure proper communication during the flashing process.
---
# Build Libreboot
> Build a Libreboot ROM from source on Linux: install dependencies, clone the lbmk repository, and run a multi-threaded compile.
Source: https://selfcustodylabs.com/docs/libreboot/build/
Last updated: 2026-07-14
Publisher: Self Custody Labs (https://selfcustodylabs.com)
---
Building Libreboot and the rom for your ThinkPad
## Install Dependencies
Before installing Libreboot, let's gather the necessary dependencies.
```bash
sudo apt install git python-is-python3
```
You will need to set user.name and user.email before proceeding further; otherwise, you won't be able to proceed. If you prefer, you can simply fill them with random values.
```bash
git config --global user.name "Your Name"
git config --global user.email "your.email@example.com"
```
## Enable Multi-threaded Build Mode
Libreboot’s build system uses a single thread by default, but you can change this to use multiple threads. For example, you can run:
```bash
export XBMK_THREADS=$(nproc)
```
This command will make Libreboot's build system use 4 threads, speeding up the build process.
## Build Libreboot
Clone the Libreboot repository
```bash
git clone https://codeberg.org/libreboot/lbmk.git
```
Navigate to the libreboot directory
```bash
cd lbmk
```
Download the necessary dependencies. Depending on your distribution, choose the appropriate command:
```bash
sudo ./mk dependencies arch
sudo ./mk dependencies ubuntu
sudo ./mk dependencies debian
sudo ./mk dependencies fedora
```
---
# Build Libreboot ROM Images
> Generate Libreboot ROM images for your specific laptop model. Compile custom BIOS firmware using the lbmk build system, ready to flash.
Source: https://selfcustodylabs.com/docs/libreboot/roms/
Last updated: 2026-04-15
Publisher: Self Custody Labs (https://selfcustodylabs.com)
---
Generate the roms list
```bash
./mk -b coreboot list
```
Take note of your laptop model and BIOS chip (e.g., `x230_12mb` or `t430_12mb` or `t480s_vfsp_16mb`).
If your model has multiple chips, determine the size of your chip by running:
```bash
sudo dmidecode | grep ROM
```
Build your ROM (this process may take some time):
```bash
./mk -b coreboot
```
Once the ROM has been compiled, navigate to the directory:
```bash
cd lbmk/bin/
```
You'll find a comprehensive list of BIOS options available for flashing into the BIOS chip. Ensure to select the one corresponding to the keyboard configuration of your device.
As example, select SEABIOS and copy it to a easily accessible location:
```bash
cp seabios__libgfxinit_corebootfb.rom /home/$USER
```
---
# Build Flashprog for Libreboot
> Compile Flashprog from the Libreboot build system. Required tool for reading and writing BIOS chips during Libreboot installation.
Source: https://selfcustodylabs.com/docs/libreboot/build-flashprog/
Last updated: 2026-05-23
Publisher: Self Custody Labs (https://selfcustodylabs.com)
---
To build and install Flashprog, follow these steps
Into `~/lbmk` directory, execute the following command to update trees by installing Flashprog directory:
```bash
./mk -b flashprog
```
Navigate into the directory and install Flashprog
```bash
cd src/flashprog
sudo make install
```
Once installation is completed, Flashprog will be accessible system-wide by typing flashprog on your terminal
To verify if your Raspberry Pi Pico is ready for use, execute the following command:
```bash
sudo flashprog -p serprog:dev=/dev/ttyACM0,spispeed=16M
```
If the output consists of several lines beginning with `serprog: ...` and concludes with
```text
No EEPROM/flash device found
Note: flashrom can never write if the flash chip isn't found automatically
```
It indicates that the Raspberry Pi Pico is in proper working condition and ready to be utilized.
---
# Prepare a Raspberry Pi Pico for Libreboot Flashing
> Set up a Raspberry Pi Pico H as an SPI programmer for flashing Libreboot: build the serprog firmware and wire the Pico to your laptop's BIOS chip.
Source: https://selfcustodylabs.com/docs/libreboot/raspberry-pico/
Last updated: 2026-08-02
Publisher: Self Custody Labs (https://selfcustodylabs.com)
---
To flash Libreboot externally you need an SPI programmer. A Raspberry Pi Pico H, loaded with the open-source `serprog` firmware, is one of the cheapest and most reliable options.
This section walks through getting the Pico ready: building and flashing the serprog firmware, then connecting it to the SOIC8 BIOS chip on your laptop.
## In this section
- **[Build Serprog](https://selfcustodylabs.com/docs/libreboot/raspberry-pico/build-serprog)**: compile and flash serprog onto the Pico
- **[Wire the Connection](https://selfcustodylabs.com/docs/libreboot/raspberry-pico/connection)**: connect the Pico to your laptop's BIOS chip with a SOIC8 clip
---
# Build Serprog
> Build serprog firmware for the Raspberry Pi Pico H so it can act as an SPI programmer for flashing Libreboot to a laptop chip.
Source: https://selfcustodylabs.com/docs/libreboot/raspberry-pico/build-serprog/
Last updated: 2026-04-15
Publisher: Self Custody Labs (https://selfcustodylabs.com)
---
Install the required dependencies
```bash
sudo apt install cmake libusb-1.0-0-dev libmbedtls-dev gcc-arm-none-eabi -y
```
## Build serprog firmware from source
To build the pico-serprog firmware from source, navigate to your lbmk folder and run:
```bash
./mk -b pico-serprog
```
This command will automatically compile the firmware for the Raspberry Pi Pico (it will take some time).
Once the build is complete, the firmware files will be located in:
- `bin/serprog_pico/serprog_pico.uf2`
- `bin/serprog_pico/serprog_pico_w.uf2`
Files with `pico2` in the name are specifically for the Pico 2, but they are also compatible.
## Connect the Pico to PC
- Connect the USB cable to your laptop
- Press and hold the BOOTSEL button on your Pico while you plug it in (this forces it into the bootloader mode)
- The Pico will be detected as USB flash drive
## Copy the Firmware
- Drag your `serprog_pico.uf2` into your Pico.
- Your Pico will disconnect, that means it is now ready and can be unplugged.
Type the following command
```bash
sudo dmesg -wH
```
Now plug your Raspberry Pico again and you should get the following output
```text
[ +0.092782] usb 3-7.2: New USB device found, idVendor=cafe, idProduct=4001, bcdDevice= 1.00
[ +0.000010] usb 3-7.2: New USB device strings: Mfr=1, Product=2, SerialNumber=3
[ +0.000003] usb 3-7.2: Product: pico-serprog (pico)
[ +0.000003] usb 3-7.2: Manufacturer: libreboot.org
[ +0.000002] usb 3-7.2: SerialNumber: E661410403213F31
[ +0.010021] cdc_acm 3-7.2:1.0: ttyACM0: USB ACM device
```
Please ensure you take note of the serial port designation (in this instance, ttyACM0) to which your device is connected. This step is crucial as we'll need to verify the readiness of the device for usage following the installation of flashprog.
Now you can unplug the Raspberry Pico
If you want to change the firwmare in the future, you need to press the BOOTSEL button on the board while you plug it in.
---
# Pico-Pomona Clip Connection
> Practical guide: Pico-Pomona Clip Connection. Covers The Bios Chip, PIN Map on Raspberry Pico, Models X230, T420, T430, T440p and T480s.
Source: https://selfcustodylabs.com/docs/libreboot/raspberry-pico/connection/
Last updated: 2026-01-16
Publisher: Self Custody Labs (https://selfcustodylabs.com)
---
To begin flashing the BIOS, you'll need to connect your Pico to the Pomona clip, which will then attach to the BIOS chip on your ThinkPad.
## The Bios Chip
The BIOS chip in your ThinkPad models is an SOIC-8 type with 8 pins.
In these specific models, you’ll likely find two BIOS chips positioned next to each other. Both of these chips will need to be flashed. Don’t worry, though , the process is straightforward and will be explained in detail later in this guide.
**IMPORTANT**: Be sure to identify `pin 1` (which is marked with a small dot) and then count the pins counterclockwise from there.
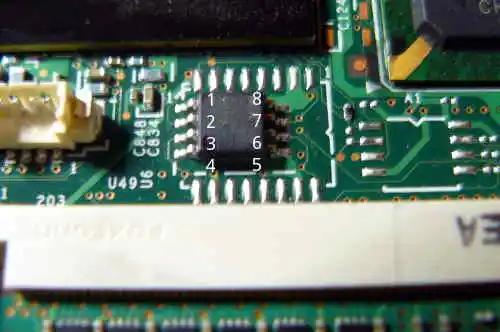
Here are the functions of each pin. You don't necessarily need to understand the purpose of each individual pin. Instead, you simply need to match the corresponding pin on your BIOS chip with the appropriate pin on your Raspberry Pico and connect them using Dupont cables.
- 1 CS
- 2 MISO
- 3 WP (this is NOT going to be used)
- 4 GND
- 5 MOSI
- 6 CLK (this is actually SCK on your Raspberry Pico)
- 7 HOLD (this is NOT going to be used)
- 8 VCC - 3V3 (this is actually 3V3 on your Raspberry Pico)
## PIN Map on Raspberry Pico
The below diagram shows the corresponding pins on the Pico board where the Dupont cables should be connected
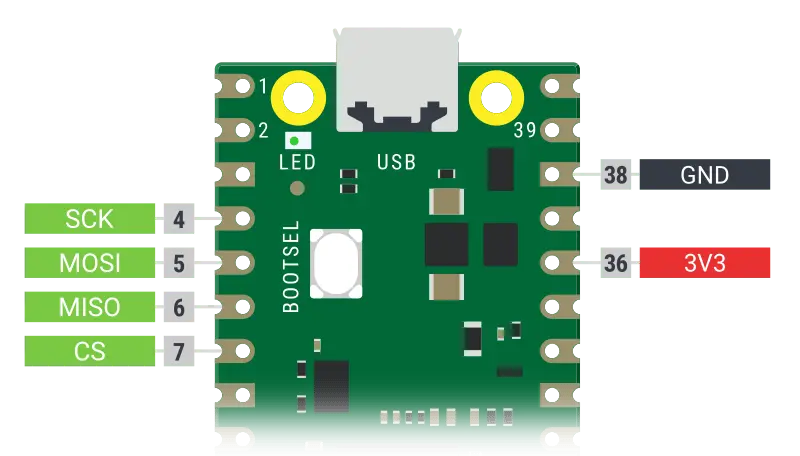
## Models X230, T420, T430, T440p and T480s
For these models, you can start wiring your Dupont cables directly from pin 1 of the BIOS chip , no extra tricks or workarounds are needed.
Once everything is connected properly, your setup should look like this:
## Models T530 and W530
These ThinkPad models can be a bit tricky when it comes to BIOS flashing. They require a few extra tools and a small workaround to make the process reliable.
Both the T530 and W530 have two SOIC-8 flash chips connected to the same SPI bus. They share the data lines (MISO, MOSI, CLK), but each chip has its own Chip Select (CS#) line, which controls which chip is active at any time.
### The Problem
When the Southbridge (the part of the motherboard that controls I/O) isn't powered, the CS# line of the inactive chip is left floating, meaning it's not pulled high or low, so it can randomly activate. This can lead to:
- Flash read/write errors
- Both chips responding at the same time
- Inconsistent BIOS dumps
You’ll notice this if you use a Pomona clip and read the BIOS multiple times: running something like sha1sum on the dumps will give different results each time.
This happens because there are no pull-up resistors on the CS# lines by default. So when the Southbridge is off, the chip you don’t want can still partly interfere with the bus.
### The Solution
To stop the unused chip from interfering, you need to force its CS# pin HIGH (3.3V) so it stays inactive. This makes sure only the chip you want to access is talking on the SPI bus.
### Requirements
Here’s a list of the extra tools required:
- Dupont cable (female-to-female)
- Test Hook Clip Grabber ([link](https://www.ebay.com.au/itm/165822939855))
- AMS1117-3.3V Power Supply Module ([link](https://www.ebay.com.au/itm/134721404746?var=434225565399))
- Universal Adapter with Selectable Output Voltage ([link](https://www.amazon.com.au/GTGUGR-Adjustable-Surveillance-Equipment-Selectable/dp/B0C16PS3D7?crid=27ZZJQOOLYUTJ&dib=eyJ2IjoiMSJ9.l0E7BXv_93x-WhbFrictbFdSMDqTN4lKQlGUgRFl9P7JJ2CjJQn9qU9JDHnROEhdfnq2qYRV_wrET0AOHCBsaU7XdfhhVO2MkUJwNQom_vq5JkyySx_JFrZ8i2Q21_UL_EWp97pTSMbZ4amTQENm1rl0CIiQIxjlYktza7lF-gDH9j1uAxiVlC50vv5w6na8Mig1BZMnIRWPi9PHqnBSbUDjSvja4sd_pYxlN39HA_FNoddFhNvbGHRQCXhpRDmaOWMQNDHZk9omJxiRM_zRDWx_h15KAmfdQizpI810Z8U.mK8NA7joAGhXFlsBW9DYx_0nLgNeyvZXgN0gfO8Dq-g&dib_tag=se&keywords=GTGUGR+2m+Universal+Adapter+Power+Supply+30W+AU+2A%2C100-240V+to+3V%2C4.5V%2C5V%2C6V%2C7.5V%2C9V%2C12V&qid=1743991916&sprefix=gtgugr+2m+universal+adapter+power+supply+30w+au+2a+100-240v+to+3v+4.5v+5v+6v+7.5v+9v+12v%2Caps%2C369&sr=8-1))
### Connection Steps
Here’s how to connect everything:
- Connect the dupont cable to the test hook clip.
- Use the hook clip to grab the CS# pin of the flash chip that’s not being used (the one you’re not flashing).
- Connect the other end of the dupont cable to the VCC (3.3V output) on the AMS1117 power module.
- Connect GND from your Raspberry Pi Pico to the GND of the AMS1117.
- Set the Universal Adapter to 5V output and plug it into the AMS1117 module. The reason for this is that the AMS1117 is a voltage regulator. It needs a higher input of 5V to convert it into the lower 3.3V output that your circuit requires.
- Clip the Pomona to the chip you want to flash and connect it to your flasher (e.g., Raspberry Pi Pico).
- Power on the Universal Adapter. You should see a red LED light up on the AMS1117 module.
- Power on the AMS1117 module. You should see a red LED light up on the module.
Now the inactive chip is fully disabled, and you’re ready to flash the BIOS reliably.
### Setup Photos
Here’s what the setup looks like:
 ## Conclusion
Now you're ready to clip onto the chip and start flashing the BIOS , with stable and consistent reads and writes!
---
# Flash Libreboot to Your Laptop BIOS
> Flash a Libreboot ROM onto your laptop with an external SPI programmer: locate the chips, split the ROM, detect, and write the new firmware.
Source: https://selfcustodylabs.com/docs/libreboot/flashing-bios/
Last updated: 2026-05-23
Publisher: Self Custody Labs (https://selfcustodylabs.com)
---
Now that we have installed Libreboot, set up flashprog, and prepared our Raspberry Pi Pico as an SPI programmer, we are finally ready to flash the BIOS. Before we dive into the steps, I want to emphasize the importance of making a backup copy of your current BIOS. This way, if anything goes wrong during the flashing process, you will have a copy of the original BIOS that you can restore.
## Locate the chip(s)
The following ThinkPad models have a 12MB BIOS, which is split between **two chips** on the motherboard: one with 4MB and the other with 8MB.
- X230 – Accessing the BIOS chips is simple; you only need to remove the keyboard and palm rest (see the photo).
- T440p – The BIOS chips can be accessed from the back of the laptop.
- T420 / T430 / T530 / W530 – Full disassembly of the laptop is required to access the BIOS chips.
**Warning: T480/T480s**
If you're flashing this model, you **DO NOT** need to split the ROM, as it has only one chip. It's easily accessible by simply removing the back cover of the laptop. You’ll only need to flash that single chip.
## Splitting the Rom
For the , you'll need to divide your ROM into two distinct portions prior to flashing. This can be accomplished using the dd command.
```bash
dd if=seabios__libgfxinit_corebootfb.rom of=libreboot_top.rom bs=1M skip=8
dd if=seabios__libgfxinit_corebootfb.rom of=libreboot_bottom.rom bs=1M count=8
```
## Detect the Chip(s)
Now, you need to detect the chip models using flashprog. To ensure accurate detection, follow these steps for each BIOS chip:
- Connect the Raspberry Pico to the Pomona using Dupont cables, as completed in the preceding step.
- Clip the Pomona onto the top BIOS chip firmly
- Plug the Raspberry Pico into the laptop using a USB cable
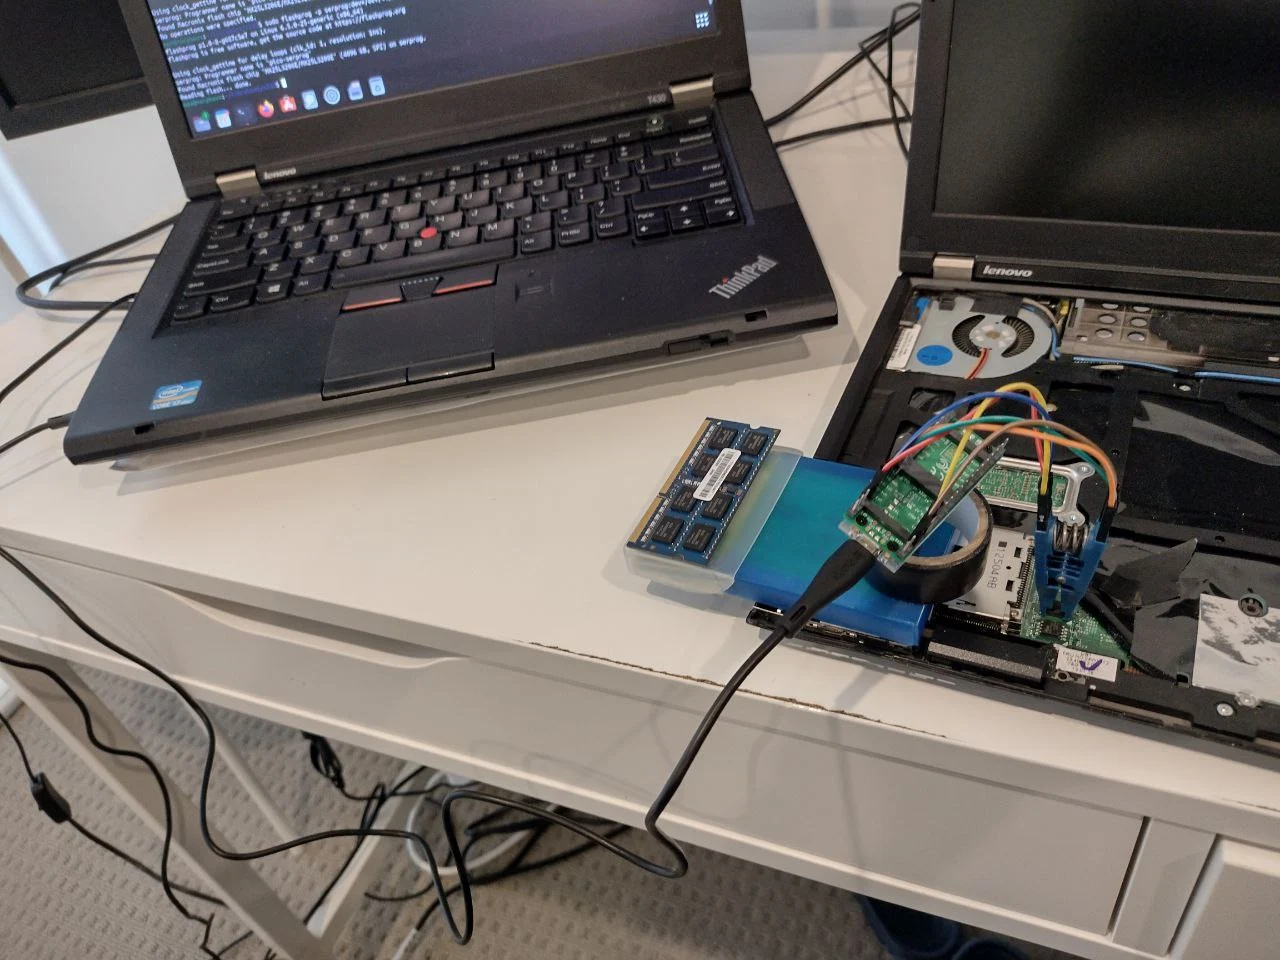
Execute the following command to detect the chip
```bash
sudo flashprog -p serprog:dev=/dev/ttyACM0,spispeed=16M
```
If multiple chips are detected, verify whether the one you previously photographed or one closely resembling it is present. Subsequently, re-run the command, making sure to specify the name of the pertinent chip.
```bash
sudo flashprog -p serprog:dev=/dev/ttyACM0,spispeed=16M -c "MX25L3206E/MX25L3208E"
```
If the Raspberry Pico detects the chip, you may proceed by creating a backup.
## Backup the factory Bios
To create a reliable backup of the BIOS chip(s), it's advisable to perform a triple dump of them
### factory_top.bin
```bash
sudo flashprog -p serprog:dev=/dev/ttyACM0,spispeed=16M -c "MX25L3206E/MX25L3208E" -r factory_top.bin
sudo flashprog -p serprog:dev=/dev/ttyACM0,spispeed=16M -c "MX25L3206E/MX25L3208E" -r factory_top2.bin
sudo flashprog -p serprog:dev=/dev/ttyACM0,spispeed=16M -c "MX25L3206E/MX25L3208E" -r factory_top3.bin
```
Next, use `sha1sum` to compare the dumped BIOS images
```bash
sha1sum factory_top.bin factory_top2.bin factory_top3.bin
```
If the hashes match, you should see something like this:
```bash
6cf9bfc90df1ed01336872cd159a00c101d0a7b0 factory_top.bin
6cf9bfc90df1ed01336872cd159a00c101d0a7b0 factory_top2.bin
6cf9bfc90df1ed01336872cd159a00c101d0a7b0 factory_top3.bin
```
Once you've confirmed that the hashes are the same, you can clean up any temporary dump files:
```bash
rm -fr factory_top2.bin factory_top3.bin
```
### factory_bottom.bin
```bash
sudo flashprog -p serprog:dev=/dev/ttyACM0,spispeed=16M -c "EN25Q64" -r factory_bottom.bin
sudo flashprog -p serprog:dev=/dev/ttyACM0,spispeed=16M -c "EN25Q64" -r factory_bottom2.bin
sudo flashprog -p serprog:dev=/dev/ttyACM0,spispeed=16M -c "EN25Q64" -r factory_bottom3.bin
```
Next, use sha1sum to compare the dumped BIOS images
```bash
sha1sum factory_bottom.bin factory_bottom2.bin factory_bottom3.bin
```
If the hashes match, you should see something like this:
```bash
06347c0988657c5df41fa3a691071d0105b0edba factory_bottom.bin
06347c0988657c5df41fa3a691071d0105b0edba factory_bottom2.bin
06347c0988657c5df41fa3a691071d0105b0edba factory_bottom3.bin
```
Once you've confirmed that the hashes are the same, you can clean up any temporary dump files:
```bash
rm -fr factory_bottom2.bin factory_bottom3.bin
```
## Write the Rom to the Chip
Before writing the BIOS into the chip(s), ensure to remove the CMOS battery as a security precaution.
### libreboot_top.rom
```bash
sudo flashprog -p serprog:dev=/dev/ttyACM0,spispeed=16M -c "MX25L3206E/MX25L3208E" -w libreboot_top.rom
```
To double-check, you can dump the newly flashed BIOS image
```bash
sudo flashprog -p serprog:dev=/dev/ttyACM0,spispeed=16M -c "MX25L3206E/MX25L3208E" -r flashed_top.bin
```
Next, use sha1sum to compare the dumped BIOS image with the original libreboot_top.rom file
```bash
sha1sum libreboot_top.rom flashed_top.bin
```
If the hashes match, you should see something like this:
```bash
42489cdfda9666177cd9abc1876f4dea258f7ab8 libreboot_top.rom
42489cdfda9666177cd9abc1876f4dea258f7ab8 flashed_top.bin
```
Once you've confirmed that the hashes are the same, you can clean up any temporary dump files:
```bash
rm -fr flashed_top.bin
```
### libreboot_bottom.rom
```bash
sudo flashprog -p serprog:dev=/dev/ttyACM0,spispeed=16M -c "EN25Q64" -w libreboot_bottom.rom
```
To double-check, you can dump the newly flashed BIOS image
```bash
sudo flashprog -p serprog:dev=/dev/ttyACM0,spispeed=16M -c "EN25Q64" -r flashed_bottom.bin
```
Next, use sha1sum to compare the dumped BIOS image with the original libreboot_bottom.rom file
```bash
sha1sum libreboot_bottom.rom flashed_bottom.bin
```
If the hashes match, you should see something like this:
```bash
4b9f06ccd2ce11dad757e337829a450a05df7929 libreboot_bottom.rom
4b9f06ccd2ce11dad757e337829a450a05df7929 flashed_bottom.bin
```
Once you've confirmed that the hashes are the same, you can clean up any temporary dump files:
```bash
rm -fr flashed_bottom.bin
```
If everything went well, simply restart your laptop before putting it back together to ensure that Libreboot starts properly.
---
# Update Libreboot Firmware
> Practical guide: Update. Covers Disable security protections before flashing, Flash Chip Size, Read the Current Chip Contents.
Source: https://selfcustodylabs.com/docs/libreboot/update-bios/
Last updated: 2026-01-15
Publisher: Self Custody Labs (https://selfcustodylabs.com)
---
Once Libreboot is already installed, you can update to new releases through internal flashing, without needing to disassemble your laptop again.
## Disable security protections before flashing
Before performing an internal flash, you need to disable the /dev/mem protections. Remember to re-enable them once you’re done.
To check if there are any issues, run:
```bash
sudo flashprog -p internal
```
If you don’t get any errors, you can proceed to the Flash Chip Size part.
If you see an error related to `/dev/mem` access, you should restart your system with the `iomem=relaxed` kernel parameter.
To do this just type:
```bash
sudo nano /etc/default/grub
```
Find the line starting with `GRUB_CMDLINE_LINUX_DEFAULT` and add `iomem=relaxed`:
```bash
GRUB_CMDLINE_LINUX_DEFAULT="quiet splash iomem=relaxed"
```
Save the file and update grub:
```bash
sudo update-grub
```
Reboot the system:
```bash
sudo reboot
```
Additionally, use a kernel that does not have the `CONFIG_STRICT_DEVMEM` option enabled. For more detailed instructions, refer to the original guide on the Libreboot website.
## Flash Chip Size
To determine the size of your boot flash chip, use the following command:
```bash
sudo flashprog -p internal
```
This will display information about your boot flash in the output.
## Read the Current Chip Contents
To read the current contents of the flash chip, run the below command three times:
```bash
sudo flashprog -p internal:laptop=force_I_want_a_brick,boardmismatch=force -r dump.bin
sudo flashprog -p internal:laptop=force_I_want_a_brick,boardmismatch=force -r dump2.bin
sudo flashprog -p internal:laptop=force_I_want_a_brick,boardmismatch=force -r dump3.bin
```
Next, use `sha1sum` to compare the dumped BIOS images
```bash
sha1sum dump.bin dump2.bin dump3.bin
```
If the hashes match, you should see something like this:
```bash
f79eac66c119da200460153019d3d2d5b2c22839 dump.bin
f79eac66c119da200460153019d3d2d5b2c22839 dump2.bin
f79eac66c119da200460153019d3d2d5b2c22839 dump3.bin
```
Once you've confirmed that the hashes are the same, you can clean up any temporary dump files:
```bash
rm -fr dump2.bin dump3.bin
```
## Write the Rom to the Chip
To erase and write a new ROM to the flash chip, run:
```bash
sudo flashprog -p internal:laptop=force_I_want_a_brick,boardmismatch=force -w libreboot.rom
```
Note: The force_I_want_a_brick option disables safety checks in flashprog. This is necessary in some cases due to changes in flashrom and coreboot over time. If you prefer to avoid this option, try the following:
1. Start with -p internal.
2. If that doesn’t work, use -p internal:boardmismatch=force.
3. If it still doesn't work, use -p internal:boardmismatch=force,laptop=force_I_want_a_brick.
As long as you are using the correct ROM for your machine, it is safe to run these commands. These options simply disable safety checks and are not inherently dangerous.
If the flashing is successful, the tool will display "VERIFIED" or indicate that the chip contents are identical to the requested image.
To double-check, you can dump the newly flashed BIOS image by running:
```bash
sudo flashprog -p internal:laptop=force_I_want_a_brick,boardmismatch=force -r new_dump.bin
```
Next, use `sha1sum` to compare the dumped BIOS image with the original Libreboot ROM file
```bash
sha1sum libreboot.rom new_dump.bin
```
If the hashes match, you should see something like this:
```bash
3019da54cea33d2d5b2c228393c009ad20046015 libreboot.rom
3019da54cea33d2d5b2c228393c009ad20046015 new_dump.bin
```
Once you've confirmed that the hashes are the same, you can clean up any temporary dump files:
```bash
rm -fr new_dump.bin
```
Now you can reboot your laptop with the updated bios!
---
# Coreboot Installation Guide
> Install Coreboot open-source firmware for a fast, secure, and transparent boot process. Perfect for Bitcoin nodes and security-focused setups.
Source: https://selfcustodylabs.com/docs/coreboot/
Last updated: 2026-04-14
Publisher: Self Custody Labs (https://selfcustodylabs.com)
---
**Info: What You'll Do**
In this guide, you will:
- Choose between internal and external flashing methods
- Build Coreboot from source for your laptop
- Flash Coreboot to replace your stock BIOS
- Configure your bootloader payload
**Time required:** 2-4 hours
**Difficulty:** Advanced
**Estimated cost:** $0 (internal flash) or $15-30 (external flash hardware)
**Prerequisites:** Supported laptop, Linux system for building
**Tip: Background Reading**
This guide assumes you're building a [Bitcoin Computer](https://selfcustodylabs.com/docs/advanced/bitcoin-computer) or [Air-Gapped Computer](https://selfcustodylabs.com/docs/learn/wallets/air-gapped-wallets). If you're not sure why open-source firmware matters, see those guides first.
## Why Coreboot?
Most computers use proprietary BIOS/UEFI firmware that is closed-source and potentially insecure. Coreboot is a fast, minimal, open-source alternative.
## Conclusion
Now you're ready to clip onto the chip and start flashing the BIOS , with stable and consistent reads and writes!
---
# Flash Libreboot to Your Laptop BIOS
> Flash a Libreboot ROM onto your laptop with an external SPI programmer: locate the chips, split the ROM, detect, and write the new firmware.
Source: https://selfcustodylabs.com/docs/libreboot/flashing-bios/
Last updated: 2026-05-23
Publisher: Self Custody Labs (https://selfcustodylabs.com)
---
Now that we have installed Libreboot, set up flashprog, and prepared our Raspberry Pi Pico as an SPI programmer, we are finally ready to flash the BIOS. Before we dive into the steps, I want to emphasize the importance of making a backup copy of your current BIOS. This way, if anything goes wrong during the flashing process, you will have a copy of the original BIOS that you can restore.
## Locate the chip(s)
The following ThinkPad models have a 12MB BIOS, which is split between **two chips** on the motherboard: one with 4MB and the other with 8MB.
- X230 – Accessing the BIOS chips is simple; you only need to remove the keyboard and palm rest (see the photo).
- T440p – The BIOS chips can be accessed from the back of the laptop.
- T420 / T430 / T530 / W530 – Full disassembly of the laptop is required to access the BIOS chips.

**Warning: T480/T480s**
If you're flashing this model, you **DO NOT** need to split the ROM, as it has only one chip. It's easily accessible by simply removing the back cover of the laptop. You’ll only need to flash that single chip.
## Splitting the Rom
For the , you'll need to divide your ROM into two distinct portions prior to flashing. This can be accomplished using the dd command.
```bash
dd if=seabios__libgfxinit_corebootfb.rom of=libreboot_top.rom bs=1M skip=8
dd if=seabios__libgfxinit_corebootfb.rom of=libreboot_bottom.rom bs=1M count=8
```
## Detect the Chip(s)
Now, you need to detect the chip models using flashprog. To ensure accurate detection, follow these steps for each BIOS chip:
- Connect the Raspberry Pico to the Pomona using Dupont cables, as completed in the preceding step.
- Clip the Pomona onto the top BIOS chip firmly
- Plug the Raspberry Pico into the laptop using a USB cable

Execute the following command to detect the chip
```bash
sudo flashprog -p serprog:dev=/dev/ttyACM0,spispeed=16M
```
If multiple chips are detected, verify whether the one you previously photographed or one closely resembling it is present. Subsequently, re-run the command, making sure to specify the name of the pertinent chip.
```bash
sudo flashprog -p serprog:dev=/dev/ttyACM0,spispeed=16M -c "MX25L3206E/MX25L3208E"
```
If the Raspberry Pico detects the chip, you may proceed by creating a backup.
## Backup the factory Bios
To create a reliable backup of the BIOS chip(s), it's advisable to perform a triple dump of them
### factory_top.bin
```bash
sudo flashprog -p serprog:dev=/dev/ttyACM0,spispeed=16M -c "MX25L3206E/MX25L3208E" -r factory_top.bin
sudo flashprog -p serprog:dev=/dev/ttyACM0,spispeed=16M -c "MX25L3206E/MX25L3208E" -r factory_top2.bin
sudo flashprog -p serprog:dev=/dev/ttyACM0,spispeed=16M -c "MX25L3206E/MX25L3208E" -r factory_top3.bin
```
Next, use `sha1sum` to compare the dumped BIOS images
```bash
sha1sum factory_top.bin factory_top2.bin factory_top3.bin
```
If the hashes match, you should see something like this:
```bash
6cf9bfc90df1ed01336872cd159a00c101d0a7b0 factory_top.bin
6cf9bfc90df1ed01336872cd159a00c101d0a7b0 factory_top2.bin
6cf9bfc90df1ed01336872cd159a00c101d0a7b0 factory_top3.bin
```
Once you've confirmed that the hashes are the same, you can clean up any temporary dump files:
```bash
rm -fr factory_top2.bin factory_top3.bin
```
### factory_bottom.bin
```bash
sudo flashprog -p serprog:dev=/dev/ttyACM0,spispeed=16M -c "EN25Q64" -r factory_bottom.bin
sudo flashprog -p serprog:dev=/dev/ttyACM0,spispeed=16M -c "EN25Q64" -r factory_bottom2.bin
sudo flashprog -p serprog:dev=/dev/ttyACM0,spispeed=16M -c "EN25Q64" -r factory_bottom3.bin
```
Next, use sha1sum to compare the dumped BIOS images
```bash
sha1sum factory_bottom.bin factory_bottom2.bin factory_bottom3.bin
```
If the hashes match, you should see something like this:
```bash
06347c0988657c5df41fa3a691071d0105b0edba factory_bottom.bin
06347c0988657c5df41fa3a691071d0105b0edba factory_bottom2.bin
06347c0988657c5df41fa3a691071d0105b0edba factory_bottom3.bin
```
Once you've confirmed that the hashes are the same, you can clean up any temporary dump files:
```bash
rm -fr factory_bottom2.bin factory_bottom3.bin
```
## Write the Rom to the Chip
Before writing the BIOS into the chip(s), ensure to remove the CMOS battery as a security precaution.
### libreboot_top.rom
```bash
sudo flashprog -p serprog:dev=/dev/ttyACM0,spispeed=16M -c "MX25L3206E/MX25L3208E" -w libreboot_top.rom
```
To double-check, you can dump the newly flashed BIOS image
```bash
sudo flashprog -p serprog:dev=/dev/ttyACM0,spispeed=16M -c "MX25L3206E/MX25L3208E" -r flashed_top.bin
```
Next, use sha1sum to compare the dumped BIOS image with the original libreboot_top.rom file
```bash
sha1sum libreboot_top.rom flashed_top.bin
```
If the hashes match, you should see something like this:
```bash
42489cdfda9666177cd9abc1876f4dea258f7ab8 libreboot_top.rom
42489cdfda9666177cd9abc1876f4dea258f7ab8 flashed_top.bin
```
Once you've confirmed that the hashes are the same, you can clean up any temporary dump files:
```bash
rm -fr flashed_top.bin
```
### libreboot_bottom.rom
```bash
sudo flashprog -p serprog:dev=/dev/ttyACM0,spispeed=16M -c "EN25Q64" -w libreboot_bottom.rom
```
To double-check, you can dump the newly flashed BIOS image
```bash
sudo flashprog -p serprog:dev=/dev/ttyACM0,spispeed=16M -c "EN25Q64" -r flashed_bottom.bin
```
Next, use sha1sum to compare the dumped BIOS image with the original libreboot_bottom.rom file
```bash
sha1sum libreboot_bottom.rom flashed_bottom.bin
```
If the hashes match, you should see something like this:
```bash
4b9f06ccd2ce11dad757e337829a450a05df7929 libreboot_bottom.rom
4b9f06ccd2ce11dad757e337829a450a05df7929 flashed_bottom.bin
```
Once you've confirmed that the hashes are the same, you can clean up any temporary dump files:
```bash
rm -fr flashed_bottom.bin
```
If everything went well, simply restart your laptop before putting it back together to ensure that Libreboot starts properly.
---
# Update Libreboot Firmware
> Practical guide: Update. Covers Disable security protections before flashing, Flash Chip Size, Read the Current Chip Contents.
Source: https://selfcustodylabs.com/docs/libreboot/update-bios/
Last updated: 2026-01-15
Publisher: Self Custody Labs (https://selfcustodylabs.com)
---
Once Libreboot is already installed, you can update to new releases through internal flashing, without needing to disassemble your laptop again.
## Disable security protections before flashing
Before performing an internal flash, you need to disable the /dev/mem protections. Remember to re-enable them once you’re done.
To check if there are any issues, run:
```bash
sudo flashprog -p internal
```
If you don’t get any errors, you can proceed to the Flash Chip Size part.
If you see an error related to `/dev/mem` access, you should restart your system with the `iomem=relaxed` kernel parameter.
To do this just type:
```bash
sudo nano /etc/default/grub
```
Find the line starting with `GRUB_CMDLINE_LINUX_DEFAULT` and add `iomem=relaxed`:
```bash
GRUB_CMDLINE_LINUX_DEFAULT="quiet splash iomem=relaxed"
```
Save the file and update grub:
```bash
sudo update-grub
```
Reboot the system:
```bash
sudo reboot
```
Additionally, use a kernel that does not have the `CONFIG_STRICT_DEVMEM` option enabled. For more detailed instructions, refer to the original guide on the Libreboot website.
## Flash Chip Size
To determine the size of your boot flash chip, use the following command:
```bash
sudo flashprog -p internal
```
This will display information about your boot flash in the output.
## Read the Current Chip Contents
To read the current contents of the flash chip, run the below command three times:
```bash
sudo flashprog -p internal:laptop=force_I_want_a_brick,boardmismatch=force -r dump.bin
sudo flashprog -p internal:laptop=force_I_want_a_brick,boardmismatch=force -r dump2.bin
sudo flashprog -p internal:laptop=force_I_want_a_brick,boardmismatch=force -r dump3.bin
```
Next, use `sha1sum` to compare the dumped BIOS images
```bash
sha1sum dump.bin dump2.bin dump3.bin
```
If the hashes match, you should see something like this:
```bash
f79eac66c119da200460153019d3d2d5b2c22839 dump.bin
f79eac66c119da200460153019d3d2d5b2c22839 dump2.bin
f79eac66c119da200460153019d3d2d5b2c22839 dump3.bin
```
Once you've confirmed that the hashes are the same, you can clean up any temporary dump files:
```bash
rm -fr dump2.bin dump3.bin
```
## Write the Rom to the Chip
To erase and write a new ROM to the flash chip, run:
```bash
sudo flashprog -p internal:laptop=force_I_want_a_brick,boardmismatch=force -w libreboot.rom
```
Note: The force_I_want_a_brick option disables safety checks in flashprog. This is necessary in some cases due to changes in flashrom and coreboot over time. If you prefer to avoid this option, try the following:
1. Start with -p internal.
2. If that doesn’t work, use -p internal:boardmismatch=force.
3. If it still doesn't work, use -p internal:boardmismatch=force,laptop=force_I_want_a_brick.
As long as you are using the correct ROM for your machine, it is safe to run these commands. These options simply disable safety checks and are not inherently dangerous.
If the flashing is successful, the tool will display "VERIFIED" or indicate that the chip contents are identical to the requested image.
To double-check, you can dump the newly flashed BIOS image by running:
```bash
sudo flashprog -p internal:laptop=force_I_want_a_brick,boardmismatch=force -r new_dump.bin
```
Next, use `sha1sum` to compare the dumped BIOS image with the original Libreboot ROM file
```bash
sha1sum libreboot.rom new_dump.bin
```
If the hashes match, you should see something like this:
```bash
3019da54cea33d2d5b2c228393c009ad20046015 libreboot.rom
3019da54cea33d2d5b2c228393c009ad20046015 new_dump.bin
```
Once you've confirmed that the hashes are the same, you can clean up any temporary dump files:
```bash
rm -fr new_dump.bin
```
Now you can reboot your laptop with the updated bios!
---
# Coreboot Installation Guide
> Install Coreboot open-source firmware for a fast, secure, and transparent boot process. Perfect for Bitcoin nodes and security-focused setups.
Source: https://selfcustodylabs.com/docs/coreboot/
Last updated: 2026-04-14
Publisher: Self Custody Labs (https://selfcustodylabs.com)
---
**Info: What You'll Do**
In this guide, you will:
- Choose between internal and external flashing methods
- Build Coreboot from source for your laptop
- Flash Coreboot to replace your stock BIOS
- Configure your bootloader payload
**Time required:** 2-4 hours
**Difficulty:** Advanced
**Estimated cost:** $0 (internal flash) or $15-30 (external flash hardware)
**Prerequisites:** Supported laptop, Linux system for building
**Tip: Background Reading**
This guide assumes you're building a [Bitcoin Computer](https://selfcustodylabs.com/docs/advanced/bitcoin-computer) or [Air-Gapped Computer](https://selfcustodylabs.com/docs/learn/wallets/air-gapped-wallets). If you're not sure why open-source firmware matters, see those guides first.
## Why Coreboot?
Most computers use proprietary BIOS/UEFI firmware that is closed-source and potentially insecure. Coreboot is a fast, minimal, open-source alternative.
| Benefit | Description |
|---------|-------------|
| **Open source** | Fully auditable boot process |
| **Minimal** | Does only what's necessary |
| **Fast** | Quicker boot times |
| **Wide support** | More hardware than Libreboot |
For Bitcoiners running nodes or signing transactions, Coreboot ensures your machine starts with clean, transparent code.
## What is Coreboot?
Coreboot is a free and open-source replacement for traditional BIOS/UEFI. It initializes your hardware just enough to launch a "payload", like GRUB, SeaBIOS, or a Linux kernel. It’s lightweight, secure, and designed to do only what’s necessary, nothing more.
## How Coreboot Works
Coreboot runs in stages. It begins with a tiny bootblock, followed by romstage (which sets up memory), then ramstage (which initializes the rest of the hardware). Finally, it launches the chosen payload. This structure makes the boot process faster, simpler, and easier to audit, perfect for anyone who values system integrity.
---
## Related Guides
**Info: Libreboot Alternative**
For even more freedom, check out **[Libreboot](https://selfcustodylabs.com/docs/libreboot)** – a Coreboot distribution that removes additional proprietary blobs like Intel ME. It supports fewer devices but offers maximum openness.
**Tip: Use Cases**
Once you have Coreboot installed, use your laptop as a:
- **[Bitcoin Computer](https://selfcustodylabs.com/docs/advanced/bitcoin-computer)** – For secure transaction creation and broadcasting
- **[Air-Gapped Computer](https://selfcustodylabs.com/docs/learn/wallets/air-gapped-wallets)** – For offline seed generation and signing
---
# Coreboot Hardware Requirements
> Practical guide: Requirements. Covers Internal Flashing, External Flashing, bitcoin.
Source: https://selfcustodylabs.com/docs/coreboot/requirements/
Last updated: 2026-01-16
Publisher: Self Custody Labs (https://selfcustodylabs.com)
---
Coreboot supports a range of Lenovo ThinkPad models. In most cases, it has to be installed externally, which means opening the laptop and using a hardware flashing tool. However, some models allow internal installation, making the process much simpler since it can be done entirely through software.
Whether you’re flashing internally or externally, you’ll need the following tools:
- A Laptop that is currently supported by Coreboot
- Linux distribution: The operating system used to run the flashing tools and commands.
- Coreboot: The open-source firmware you’ll be installing.
- Flashrom: The utility used to read, write, and erase flash chips (required for flashing Coreboot).
## Internal Flashing
To flash internally, you’ll need a Lenovo ThinkPad from the Ivy Bridge series (one of the models listed below):
|Model|
|-|
|X230|
|X230T|
|T430|
|T430s|
|T530|
|W530|
You’ll also need the following tools:
- CHIPSEC: a security tool for checking if your BIOS is vulnerable to internal flashing
- USB flash drive (Optional): can be used to create a bootable image if you need to downgrade the BIOS
## External Flashing
If you’re flashing the BIOS externally, you’ll need an SPI flasher such as a Raspberry Pi Pico. Depending on the type of BIOS chip (e.g., SOIC or WSON), you’ll also need either a Pomona Clip or Pogo Pins Adapter, connected with Dupont cables to the RPi.

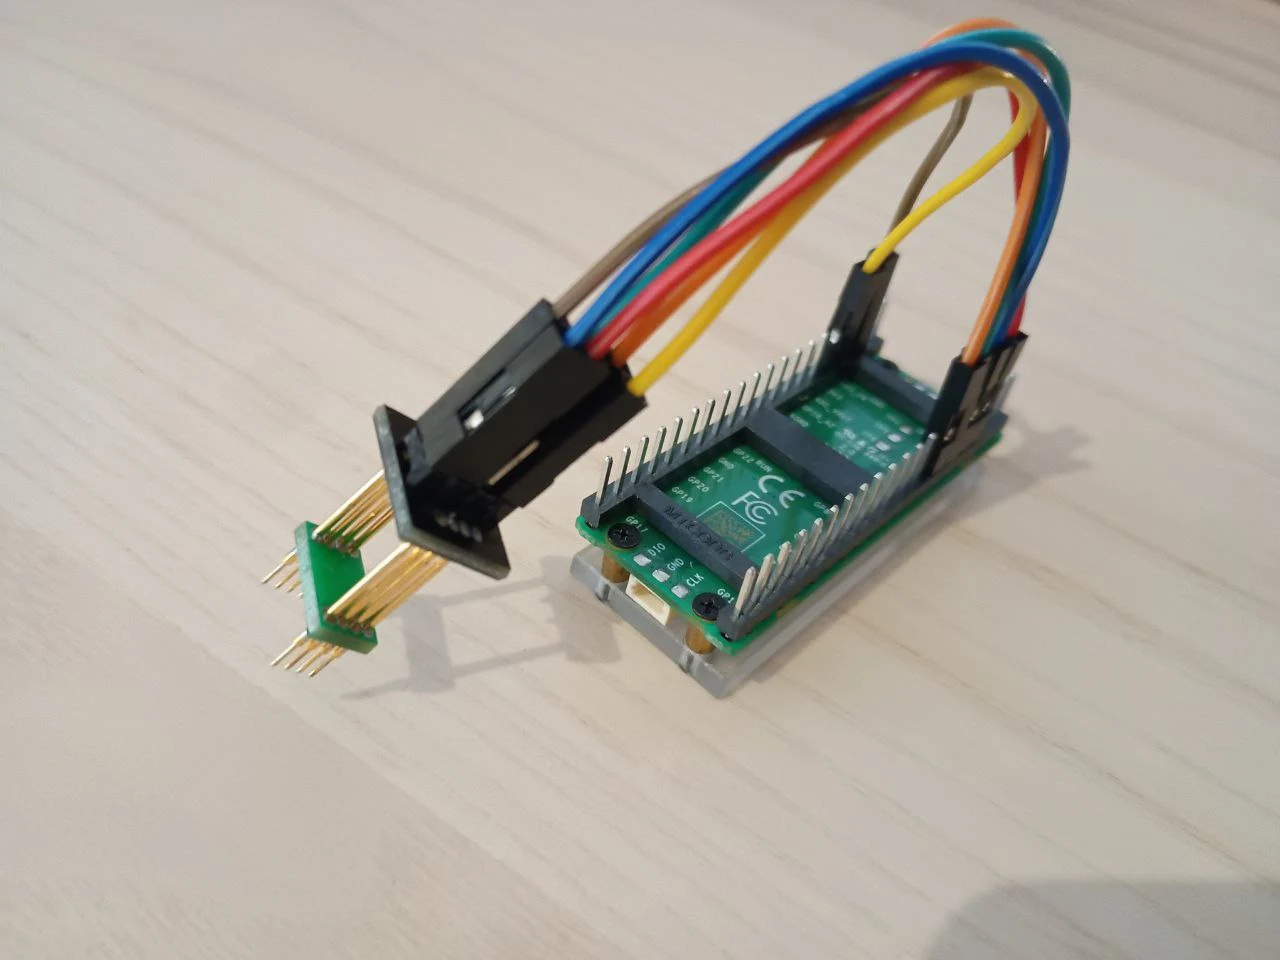 ---
# Build Coreboot
> Practical guide: Build Coreboot. Covers Step 1: Install tools and libraries needed for coreboot, Step 2: Download Coreboot Source Tree, Step 3: Build the.
Source: https://selfcustodylabs.com/docs/coreboot/build/
Last updated: 2026-01-11
Publisher: Self Custody Labs (https://selfcustodylabs.com)
---
Now we will walk through building Coreboot from scratch. We will first install the required tools, then download Coreboot’s source code, build its toolchain, configure it for your mainboard, and finally compile it into a ROM file you can flash.
## Step 1: Install tools and libraries needed for coreboot
Coreboot needs several development tools and libraries to compile successfully.
The packages you need depend on your Linux distribution. Run the command that matches your system:
Debian-based distros (e.g., Ubuntu, Linux Mint):
```bash
sudo apt install -y python-is-python3 bison build-essential curl flex git gnat libncurses-dev libssl-dev libcmocka-dev zlib1g-dev pkgconf libpci-dev flashrom coreboot-utils
```
Arch-based distros (e.g., Manjaro, EndeavourOS):
```bash
sudo pacman -S base-devel curl git gcc-ada ncurses zlib
```
Red Hat-based distros (e.g., Fedora, CentOS, RHEL):
```bash
sudo dnf install git make gcc-gnat flex bison xz bzip2 gcc g++ ncurses-devel wget zlib-devel patch
```
If any package is missing, Coreboot may fail to build, so make sure the installation finishes without errors.
## Step 2: Download Coreboot Source Tree
We will now download Coreboot’s source code from the official repository and move into its directory:
```bash
git clone https://review.coreboot.org/coreboot
cd coreboot
```
This will give you the latest development version of Coreboot.
If you want to build a specific version, you can check out the corresponding branch or tag after cloning.
## Step 3: Build the Coreboot Toolchain
Coreboot uses its own toolchain to ensure that builds are reproducible and work on all supported boards.
You must build this toolchain before compiling Coreboot itself.
First, see which toolchains are available:
```bash
make help_toolchain
```
---
# Build Coreboot
> Practical guide: Build Coreboot. Covers Step 1: Install tools and libraries needed for coreboot, Step 2: Download Coreboot Source Tree, Step 3: Build the.
Source: https://selfcustodylabs.com/docs/coreboot/build/
Last updated: 2026-01-11
Publisher: Self Custody Labs (https://selfcustodylabs.com)
---
Now we will walk through building Coreboot from scratch. We will first install the required tools, then download Coreboot’s source code, build its toolchain, configure it for your mainboard, and finally compile it into a ROM file you can flash.
## Step 1: Install tools and libraries needed for coreboot
Coreboot needs several development tools and libraries to compile successfully.
The packages you need depend on your Linux distribution. Run the command that matches your system:
Debian-based distros (e.g., Ubuntu, Linux Mint):
```bash
sudo apt install -y python-is-python3 bison build-essential curl flex git gnat libncurses-dev libssl-dev libcmocka-dev zlib1g-dev pkgconf libpci-dev flashrom coreboot-utils
```
Arch-based distros (e.g., Manjaro, EndeavourOS):
```bash
sudo pacman -S base-devel curl git gcc-ada ncurses zlib
```
Red Hat-based distros (e.g., Fedora, CentOS, RHEL):
```bash
sudo dnf install git make gcc-gnat flex bison xz bzip2 gcc g++ ncurses-devel wget zlib-devel patch
```
If any package is missing, Coreboot may fail to build, so make sure the installation finishes without errors.
## Step 2: Download Coreboot Source Tree
We will now download Coreboot’s source code from the official repository and move into its directory:
```bash
git clone https://review.coreboot.org/coreboot
cd coreboot
```
This will give you the latest development version of Coreboot.
If you want to build a specific version, you can check out the corresponding branch or tag after cloning.
## Step 3: Build the Coreboot Toolchain
Coreboot uses its own toolchain to ensure that builds are reproducible and work on all supported boards.
You must build this toolchain before compiling Coreboot itself.
First, see which toolchains are available:
```bash
make help_toolchain
```
Output
```text
*** Toolchain targets ***
crossgcc - Build coreboot cross-compilers for all platforms
crossgcc-clean - Remove all built coreboot cross-compilers
iasl - Build coreboot IASL compiler (built by all cross targets)
clang - Build coreboot clang compiler
nasm - Build coreboot nasm
test-toolchain - Reports if toolchain components are out of date
crossgcc-ARCH - Build cross-compiler for specific architecture
ARCH can be "i386", "x64", "arm", "aarch64", "riscv", "ppc64", "nds32le"
Use "make [target] CPUS=#" to build toolchain using multiple cores
Use "make [target] DEST=some/path" to install toolchain there
Use "make [target] BUILDGCC_OPTIONS="-m" to get packages from coreboot mirror"
```
Choose the one that matches your target architecture.
For most x86 systems, including laptops like the ThinkPad T430s, use the i386 toolchain.
Examples:
```bash
make crossgcc-i386 CPUS=$(nproc) # build i386 toolchain
make crossgcc-aarch64 CPUS=$(nproc) # build Aarch64 toolchain
make crossgcc-riscv CPUS=$(nproc) # build RISC-V toolchain
```
**Important notes:**
- The `i386` toolchain works for all x86 and x86_64 boards.
- You can try building with your system’s compiler, but this often causes build errors. The Coreboot toolchain is strongly recommended.
## Step 4: Configure the Build
In this step, we configure Coreboot for your specific computer, in this example, the Lenovo ThinkPad T430s. Coreboot is highly modular, and the configuration determines how it initializes your hardware and what additional software (“payloads”) it will run after startup.
Run the interactive configuration menu:
```bash
make menuconfig
```
This menu lets you select various options such as the motherboard, ROM chip size, and payload.
### Motherboard
Navigate in the menu:
```text
Mainboard --->
Mainboard vendor (Lenovo)
Mainboard model (ThinkPad T430s)
ROM chip size (16384 KB (16 MB))
< Exit >
```
**Note**
Make sure the ROM chip size matches your actual hardware. Using the wrong size may result in a non-working firmware.
### Payload
A payload in Coreboot is a small program that Coreboot loads after it finishes initializing the hardware. Common payloads include:
- **SeaBIOS**: provides a legacy BIOS environment to boot traditional operating systems.
- **GRUB2**: a modern bootloader capable of booting Linux, Windows, and other systems, with more features than SeaBIOS.
Next, select your preferred payload.
#### SeaBIOS
SeaBIOS provides a traditional BIOS interface, making it a simple choice for booting legacy operating systems or when you want a classic BIOS like experience.
```text
Payload --->
Payload to add (SeaBIOS)
SeaBIOS version (1.16.3)
< Exit >
< Exit >
< Yes >
```
#### GRUB2
GRUB2 is a modern, flexible bootloader that can boot Linux, Windows, and other systems. It is more powerful than SeaBIOS but requires some extra configuration.
Install the required dependencies for building the GRUB2 payload:
```bash
sudo apt install automake autoconf autopoint libfreetype6-dev unifont fonts-unifont unifont-bin gawk
```
In the configuration menu:
```text
Payload --->
Payload to add (GRUB2)
GRUB version (2.12)
Extra modules to include in GRUB image (NEW)
[*]Include GRUB2 runtime config file into ROM image (NEW)
< Exit >
< Exit >
< Yes >
```
Add GRUB2 Extra Modules.
Modules extend GRUB’s capabilities, for example supporting USB, LVM, encryption, or different filesystems. For a typical laptop, include:
```text
cryptodisk nativedisk ehci ohci usb usbms usbserial_pl2303 usbserial_ftdi usbserial_usbdebug jpeg all_video hashsum regexp linux part_msdos part_gpt lvm luks gcry_md5 gcry_sha1 gcry_sha256 gcry_sha512 gcry_rsa gcry_rijndael gcry_des search search_fs_file search_fs_uuid configfile probe
```
These modules ensure that GRUB can boot from internal disks, USB sticks, handle encrypted drives, and support multiple filesystems.
Create a basic `grub.cfg` to define the boot behavior and include it in the “Include GRUB2 runtime config file into ROM image” option.
grub.cfg
```text
# Coreboot GRUB2: auto-boot with ESC menu and user instructions
set timeout=2
set timeout_style=hidden
set default=0
# Show instructions
echo "Press ESC to access the boot menu."
echo "Otherwise, the system will boot from the hard drive automatically."
### Primary entry: Boot internal disk ###
menuentry "Boot first disk" {
echo "Booting from the hard drive..."
search --no-floppy --set=root --file /grub/grub.cfg
configfile /grub/grub.cfg
}
### Secondary entry: Boot from USB via ESC ###
menuentry "Boot USB" {
search --no-floppy --removable --file /boot/grub/grub.cfg --set=root
configfile /grub/grub.cfg
}
```
#### (Optional) Save your configuration to a file:
```bash
make savedefconfig
cat defconfig
```
For SeaBIOS, your configuration might include:
```text
CONFIG_VENDOR_LENOVO=y
CONFIG_BOARD_LENOVO_T430S=y
```
For GRUB2, it might look like:
```text
CONFIG_VENDOR_LENOVO=y
CONFIG_BOARD_LENOVO_T430S=y
CONFIG_PAYLOAD_GRUB2=y
CONFIG_GRUB2_EXTRA_MODULES="cryptodisk nativedisk ehci ohci usb usbms usbserial_pl2303 usbserial_ftdi usbserial_usbdebug jpeg all_video hashsum regexp linux part_msdos part_gpt lvm luks gcry_md5 gcry_sha1 gcry_sha256 gcry_sha512 gcry_rsa gcry_rijndael gcry_des search search_fs_file search_fs_uuid configfile probe"
CONFIG_GRUB2_INCLUDE_RUNTIME_CONFIG_FILE=y
```
**Note**
This may vary depending on your Coreboot source version. Do not worry if there are more or fewer lines.
## Step 5: Build Coreboot
With everything set up, you can now build Coreboot:
```bash
make
```
If the build completes successfully, you will see a message like:
```text
Built lenovo/t430s (ThinkPad T430s)
```
The compiled ROM file will be located at `build/coreboot.rom`.
If you want to start fresh and remove all compiled files, run:
```bash
make distclean
```
This will reset the build environment so you can reconfigure and rebuild from scratch.
You now have a Coreboot ROM ready to flash to your device!
---
# Internal Coreboot Flashing
> Flash Coreboot from inside a running system: downgrade your stock BIOS, unlock the Intel Flash Descriptor, and write the new firmware safely.
Source: https://selfcustodylabs.com/docs/coreboot/internal/
Last updated: 2026-08-02
Publisher: Self Custody Labs (https://selfcustodylabs.com)
---
Internal flashing lets you replace your laptop's stock BIOS with Coreboot from inside the running system, without opening the chassis or attaching an external SPI programmer. It only works on machines whose Intel Flash Descriptor region can be unlocked.
This path is faster than external flashing, but the prerequisites are strict: you need the right BIOS version, a writable descriptor region, and a verified ROM image to flash.
## In this section
- **[Downgrade Stock BIOS](https://selfcustodylabs.com/docs/coreboot/internal/downgrading-bios)**: install the BIOS version with an unlocked Intel ME region
- **[Unlock the BIOS Region](https://selfcustodylabs.com/docs/coreboot/internal/unlocking-bios)**: use CHIPSEC to clear the Flash Descriptor write protection
- **[Flash Coreboot](https://selfcustodylabs.com/docs/coreboot/internal/flashing-bios)**: write the new firmware and verify the result
If your laptop does not support internal flashing, see the [external flashing guide](https://selfcustodylabs.com/docs/coreboot/external-flashing) instead.
---
# Downgrading BIOS
> Downgrade your laptop's stock BIOS to a version with an unlocked Intel ME region, a prerequisite for internal Coreboot flashing.
Source: https://selfcustodylabs.com/docs/coreboot/internal/downgrading-bios/
Last updated: 2026-04-15
Publisher: Self Custody Labs (https://selfcustodylabs.com)
---
Before we can flash Coreboot internally on a ThinkPad, we need to make sure the BIOS version is vulnerable enough to be overwritten.
Some newer BIOS versions patch the vulnerabilities that make internal flashing possible, so downgrading may be required.
# Supported BIOS Versions
The table below lists the latest BIOS versions that still allow internal flashing.
If your BIOS is newer than the version shown, you’ll need to downgrade to that version or an earlier one before installing Coreboot.
|Model|BIOS Version|
|-|-|
|X230|2.60|
|X230T|2.58|
|T430|2.64|
|T430s|2.59|
|T530|2.60|
|W530|2.58|
## Why Downgrade is Possible
Lenovo claims their BIOS has “security rollback prevention,” meaning once you update to a newer version, you can’t go back to an older one.
In reality, this restriction is entirely client-side, it’s enforced by Lenovo’s flashing utilities (both the Windows version and the Bootable CD), not the BIOS itself.
If you run the flashing program (winflash.exe or dosflash.exe) directly, you can bypass the block. This requires slightly modifying the Bootable CD image you download from Lenovo.
## Performing Downgrade
We’ll assume your T430s is running a BIOS newer than 2.59. In that case, we’ll downgrade to version 2.59.
### Download the BIOS ISO
Visit the [Lenovo support page for the T430s](https://support.lenovo.com/us/en/downloads/ds029724-bios-update-utility-bootable-cd-for-windows-10-81-8-7-64-bit-81-8-7-32-bit-xp-thinkpad-t430s-t430si) and find the “`Release (BIOS Bootable)`” column.
Download `g7uj13us.iso`, which contains BIOS version 2.59 (you can also choose an even older version if you prefer).
### Extract and Modify the Bootable Image
Extract the El Torito image:
```bash
geteltorito -o ./bios.img g1uj41us.iso
```
Mount the image:
```bash
sudo mount -t vfat ./bios.img /mnt -o loop,offset=16384
```
List the contents:
```bash
ls /mnt
ls /mnt/FLASH
```
Inside `FLASH`, you’ll see a directory such as `G1ET93WW` (the name depends on your model and BIOS version).
Check what’s inside:
```bash
ls /mnt/FLASH/G1ET93WW
```
Look for a `.FL1` file, something like `$01D2000.FL1`.
### Modify the Boot Script
Open `AUTOEXEC.BAT`:
```bash
sudo nano /mnt/AUTOEXEC.BAT
```
You’ll see something like:
```bash
@ECHO OFF
PROMPT $p$g
cd c:\flash
command.com
```
Replace the last line (`command.com`) with this (adjust the path to match your `.FL1` file):
```bash
dosflash.exe /sd /file G1ET93WW\$01D2000.FL1
```
Save and unmount:
```bash
sudo umount /mnt
```
### Write to a USB Drive
Flash the modified image to USB:
```bash
sudo dd if=./bios.img of=/dev/sdX bs=1M
```
(Replace /dev/sdX with your actual USB device).
### Flashing the BIOS
- Enter BIOS settings: Reboot and press `F1`.
- In the Startup tab, set Startup Mode to Legacy (or Both/Legacy First).
- Save and reboot: Press `F10`.
- Connect AC power: Do not attempt flashing on battery power. If the system loses power during flashing, you’ll likely need an external programmer to recover.
- Boot from USB: Press `F12` during startup, choose the USB drive, and the BIOS flashing will begin automatically.
- The process may reboot your laptop several times, do not interrupt it.
- After completion: Enter BIOS again and set Startup Mode back to UEFI (or Both/UEFI First). This is required for the Coreboot vulnerability to be usable.
- Check in your OS: Boot into your operating system and verify that `/sys/firmware/efi` or `/sys/firmware/efivars` exists.
---
# Unlocking BIOS
> Unlock the Intel Flash Descriptor BIOS region with CHIPSEC so Coreboot can be flashed internally without an external SPI programmer.
Source: https://selfcustodylabs.com/docs/coreboot/internal/unlocking-bios/
Last updated: 2026-04-15
Publisher: Self Custody Labs (https://selfcustodylabs.com)
---
Before flashing Coreboot internally, it’s important to understand the security protections built into the BIOS and how older versions can be exploited to bypass them.
## Security Issues
Older factory BIOS versions for these ThinkPad models have multiple security weaknesses, but two of them are especially relevant for installing Coreboot without using an external programmer:
### 1. SMM_BWP and BLE not enabled
In BIOS versions released before 2014, both of these protections (SMM_BWP and BLE) are disabled by default.
**Why it matters:** When disabled, the BIOS can be written from the operating system without triggering extra security checks, making internal flashing possible.
Our testing on multiple T430 and X230 BIOS versions confirmed that SMM_BWP = 1 only appears starting from the update whose changelog says:
```text
(New) Improved the UEFI BIOS security feature.
```
This change effectively blocks normal internal flashing.
### 2. S3 Boot Script vulnerability
This flaw allowed changes to the system’s resume-from-sleep instructions (S3 state). For more info visit this [link](https://support.lenovo.com/eg/ru/product_security/s3_boot_protect)
**Why it matters:** By modifying the boot script, it was possible to disable certain BIOS protections (such as the FLOCKDN bit) after waking from sleep, making the BIOS writable.
This vulnerability was later patched in newer BIOS versions.
## Install CHIPSEC
[CHIPSEC](https://chipsec.github.io/) is a framework for analyzing platform level security of hardware, devices, system firmware, low-level protection mechanisms, and the configuration of various platform components.
It contains a set of modules, including simple tests for hardware protections and correct configuration, tests for vulnerabilities in firmware and platform components, security assessment and fuzzing tools for various platform devices and interfaces, and tools acquiring critical firmware and device artifacts.
To install CHIPSEC on your system follow the below steps.
Install the dependencies:
```bash
sudo apt install build-essential python3-dev python3 python-is-python3 gcc linux-headers-$(uname -r) nasm
```
Clone the CHIPSEC repository on GitHub:
```bash
git clone https://github.com/chipsec/chipsec.git
cd chipsec
```
Build the Driver and Compression Tools
```bash
python setup.py build_ext -i
```
## Examining BIOS Protections (Theory)
On Intel platforms, there are two main mechanisms that protect the BIOS chip from being modified:
1. **BIOS_CNTL Register**
Located in the LPC Interface Bridge Registers (accessible through PCI configuration space at offset 0xDC).
It contains the following important bits:
- **SMM_BWP** (SMM BIOS Write Protect) – If set to 1, the BIOS can only be written from System Management Mode (SMM). Once enabled, it cannot be changed.
- **BLE** (BIOS Lock Enable) – If set to 1, attempting to set BIOSWE to 1 will trigger a System Management Interrupt (SMI). Once enabled, it cannot be changed.
- **BIOSWE** (BIOS Write Enable) – Controls whether the BIOS is writable. This bit is always read/write.
2. SPI Protected Range Registers (**PR0–PR4**)
These are part of the SPI Configuration Registers (addresses from SPIBAR + 0x74 to SPIBAR + 0x84).
Each register defines a protected address range and includes a WP (Write Protect) bit, which determines whether writes are blocked for that range.
3. **FLOCKDN Bit**
Found in the HSFS register (`SPIBAR + 0x04`).
If set to 1, the PR0–PR4 registers are locked and cannot be modified. Once set, it cannot be cleared until a full power cycle reset.
### Requirements for Flashing
For internal BIOS flashing to be possible, we ideally need:
- SMM_BWP = 0
- BIOSWE = 1
- BLE = 0
- FLOCKDN = 0
Or, all SPI Protected Range registers (PRx) should have `WP = 0`.
## Checking Current BIOS Lock Status
The goal here is to see whether your BIOS is locked against internal writes. We do this by inspecting certain chipset registers.
### Step 1: Check the HSFS Register
Run:
```bash
sudo python chipsec_main.py -m common.spi_lock
```
This will display the Hardware Sequencing Flash Status (HSFS) register, located at `SPIBAR + 0x04`.
Output
```text
[x][ =======================================================================
[x][ Module: SPI Flash Controller Configuration Locks
[x][ =======================================================================
[*] HSFS = 0xE009 << Hardware Sequencing Flash Status Register (SPIBAR + 0x4)
[00] FDONE = 1 << Flash Cycle Done
[01] FCERR = 0 << Flash Cycle Error
[02] AEL = 0 << Access Error Log
[03] BERASE = 1 << Block/Sector Erase Size
[05] SCIP = 0 << SPI cycle in progress
[13] FDOPSS = 1 << Flash Descriptor Override Pin-Strap Status
[14] FDV = 1 << Flash Descriptor Valid
[15] FLOCKDN = 1 << Flash Configuration Lock-Down
```
One of the most important bits here is:
**FLOCKDN (bit 15)**: “Flash Configuration Lock-Down.”
- 1 = Locked. You cannot change the SPI Protected Range (PR0–PR4) registers until the next hardware reset.
- 0 = Unlocked. You can edit the PR registers and remove write protection.
If you see:
```text
FLOCKDN = 1
```
It means the SPI configuration is locked. We’ll need to bypass this later if we want to disable write protection.
### Step 2: Check BIOS_CNTL and Protected Ranges (PR0–PR4)
Run:
```bash
sudo python chipsec_main.py -m common.bios_wp
```
Output
```text
[x][ =======================================================================
[x][ Module: BIOS Region Write Protection
[x][ =======================================================================
[*] BC = 0x 8 << BIOS Control (b:d.f 00:31.0 + 0xDC)
[00] BIOSWE = 0 << BIOS Write Enable
[01] BLE = 0 << BIOS Lock Enable
[02] SRC = 2 << SPI Read Configuration
[04] TSS = 0 << Top Swap Status
[05] SMM_BWP = 0 << SMM BIOS Write Protection
[-] BIOS region write protection is disabled!
[*] BIOS Region: Base = 0x00500000, Limit = 0x00BFFFFF
SPI Protected Ranges
------------------------------------------------------------
PRx (offset) | Value | Base | Limit | WP? | RP?
------------------------------------------------------------
PR0 (74) | 00000000 | 00000000 | 00000000 | 0 | 0
PR1 (78) | 8BFF0B40 | 00B40000 | 00BFFFFF | 1 | 0
PR2 (7C) | 8B100B10 | 00B10000 | 00B10FFF | 1 | 0
PR3 (80) | 8ADE0AD0 | 00AD0000 | 00ADEFFF | 1 | 0
PR4 (84) | 8AAF0800 | 00800000 | 00AAFFFF | 1 | 0
```
- **Good:** On older BIOS versions, `SMM_BWP = 0` and `BLE = 0`.
- **Bad:** PR1–PR4 have `WP = 1`, meaning large portions of the BIOS region are write-protected even though BIOS_CNTL itself looks permissive.
### Step 3: Looking at the Raw Registers (Optional)
Another way to examine SPI configuration registers is to dump the raw-mapped SPIBAR register space directly:
```bash
sudo python chipsec_util.py mmio dump SPIBAR
```
This will show:
- The base address of SPIBAR (e.g., `0xFED1F800`)
- All register values, including `0x0004E009` at offset `0x04` (HSFS)
```text
[mmio] MMIO register range [0x00000000FED1F800:0x00000000FED1F800+00000200]:
+00000000: 0BFF0500
+00000004: 0004E009
...
```
### Why This Matters
In theory, to flash the BIOS internally, you’d just clear the WP bits in `PR0–PR4.`
But if `FLOCKDN = 1` in HSFS, the chipset won’t let you change those registers until the next hardware reset (and firmware will usually lock it again at boot).
That’s why the later steps in the guide focus on modifying the S3 boot script, to stop the firmware from setting `FLOCKDN = 1` during resume, so we can remove the `WP` bits.
## Removing Protections (Practice)
Normally, the FLOCKDN bit (which locks the SPI configuration) can only be cleared by a full hardware reset.
This reset happens not only on a full reboot, but also when waking the computer from S3 sleep (suspend to RAM).
When the system wakes from S3, the chipset restores all its settings by running a set of instructions called S3 Boot Scripts.
These scripts are stored in RAM, which means we can edit them before waking, and change what the firmware does during resume.
### Step 1: Dump the S3 Boot Script
Run:
```bash
sudo python chipsec_util.py uefi s3bootscript
```
This lists many entries. Look for one that writes to the HSFS register (`SPIBAR + 0x04`).
If your `SPIBAR` address is `0xFED1F800`, that’s `0xFED1F804` for HSFS.
Output
```text
Entry at offset 0x2B8F (len = 0x17, header len = 0x0):
Data:
02 00 17 02 00 00 00 01 00 00 00 04 f8 d1 fe 00 |
00 00 00 09 e0 04 00 |
Decoded:
Opcode : S3_BOOTSCRIPT_MEM_WRITE (0x0002)
Width : 0x02 (4 bytes)
Address: 0xFED1F804
Count : 0x1
Values : 0x0004E009
```
That `0x0004E009` value sets `FLOCKDN = 1`, which we don’t want.
### Step 2: Back Up Your BIOS Region (Important!)
Before making changes, back up the BIOS region so you can recover if something goes wrong.
To create a reliable backup of the BIOS chip(s), it's advisable to perform a triple dump of them
```bash
sudo flashrom -p internal -r bios_backup.rom --ifd -i bios
sudo flashrom -p internal -r bios_backup2.rom --ifd -i bios
sudo flashrom -p internal -r bios_backup3.rom --ifd -i bios
```
Next, use sha1sum to compare the dumped BIOS images
```bash
sha1sum bios_backup.bin bios_backup2.bin bios_backup3.bin
```
If the hashes match, you should see something like this:
```bash
6cf9bfc90df1ed01336872cd159a00c101d0a7b0 bios_backup.bin
6cf9bfc90df1ed01336872cd159a00c101d0a7b0 bios_backup2.bin
6cf9bfc90df1ed01336872cd159a00c101d0a7b0 bios_backup3.bin
```
Once you've confirmed that the hashes are the same, you can clean up any temporary dump files:
```bash
rm -fr bios_backup2.bin bios_backup3.bin
```
### Step 3: Patch the Boot Script
We’ll modify the script so it writes `0x6009` instead of `0xE009` to HSFS.
This clears bit 15 (`FLOCKDN`), leaving it unlocked after resume.
Run:
```bash
sudo python chipsec_main.py -m tools.uefi.s3script_modify -a replace_op,mmio_wr,0xFED1F804,0x6009,0x2
```
Output
```text
[*] Modifying S3 boot script entry at address 0x00000000DAF49B8F..
[mem] 0x00000000DAF49B8F
[*] Original entry:
2 0 17 2 0 0 0 1 0 0 0 4 f8 d1 fe 0 |
0 0 0 9 e0 4 0 |
[mem] buffer len = 0x17 to PA = 0x00000000DAF49B8F
2 0 17 2 0 0 0 1 0 0 0 4 f8 d1 fe 0 |
0 0 0 9 60 0 0 |
[mem] 0x00000000DAF49B8F
[*] Modified entry:
2 0 17 2 0 0 0 1 0 0 0 4 f8 d1 fe 0 |
0 0 0 9 60 0 0 |
[*] After sleep/resume, check the value of register 0xFED1F804 is 0x6009
[+] PASSED: The script has been modified. Go to sleep..
```
If successful, you’ll see at the end of the logs a “Modified entry” output with the new `0x6009` value:
### Step 4: Apply the Patch by Sleeping and Resuming
- Put your machine into S3 sleep (suspend)
- Wake it back up
- Check if `FLOCKDN` is now 0:
```bash
sudo python chipsec_main.py -m common.spi_lock
```
Output
```text
...
[x][ =======================================================================
[x][ Module: SPI Flash Controller Configuration Locks
[x][ =======================================================================
[*] HSFS = 0x6008 << Hardware Sequencing Flash Status Register (SPIBAR + 0x4)
[00] FDONE = 0 << Flash Cycle Done
[01] FCERR = 0 << Flash Cycle Error
[02] AEL = 0 << Access Error Log
[03] BERASE = 1 << Block/Sector Erase Size
[05] SCIP = 0 << SPI cycle in progress
[13] FDOPSS = 1 << Flash Descriptor Override Pin-Strap Status
[14] FDV = 1 << Flash Descriptor Valid
[15] FLOCKDN = 0 << Flash Configuration Lock-Down
[-] SPI Flash Controller configuration is not locked
[-] FAILED: SPI Flash Controller not locked correctly.
```
If you see:
```text
[15] FLOCKDN = 0 << Flash Configuration Lock-Down
```
...then it’s unlocked.
### Step 5: Remove Write Protection from BIOS Ranges
Now that `FLOCKDN` is cleared, we can disable write protection (WP) on all protected ranges:
```bash
sudo python chipsec_util.py mmio write SPIBAR 0x74 0x4 0x0AAF0800
sudo python chipsec_util.py mmio write SPIBAR 0x78 0x4 0x0ADE0AD0
sudo python chipsec_util.py mmio write SPIBAR 0x7C 0x4 0x0B100B10
sudo python chipsec_util.py mmio write SPIBAR 0x80 0x4 0x0BFF0B40
```
### Step 6: Verify
Check again:
```bash
sudo python chipsec_main.py -m common.bios_wp
```
Output
```text
[x][ =======================================================================
[x][ Module: BIOS Region Write Protection
[x][ =======================================================================
[*] BC = 0x 9 << BIOS Control (b:d.f 00:31.0 + 0xDC)
[00] BIOSWE = 1 << BIOS Write Enable
[01] BLE = 0 << BIOS Lock Enable
[02] SRC = 2 << SPI Read Configuration
[04] TSS = 0 << Top Swap Status
[05] SMM_BWP = 0 << SMM BIOS Write Protection
[-] BIOS region write protection is disabled!
[*] BIOS Region: Base = 0x00500000, Limit = 0x00BFFFFF
SPI Protected Ranges
------------------------------------------------------------
PRx (offset) | Value | Base | Limit | WP? | RP?
------------------------------------------------------------
PR0 (74) | 0AAF0800 | 00800000 | 00AAF000 | 0 | 0
PR1 (78) | 0ADE0AD0 | 00AD0000 | 00ADE000 | 0 | 0
PR2 (7C) | 0B100B10 | 00B10000 | 00B10000 | 0 | 0
PR3 (80) | 0BFF0B40 | 00B40000 | 00BFF000 | 0 | 0
PR4 (84) | 00000000 | 00000000 | 00000000 | 0 | 0
```
If all `WP?` values are now 0, the BIOS region is fully writable.
### Step 7: Flash Internally
You can now flash Coreboot or a modified BIOS:
```bash
sudo flashrom -p internal -w coreboot.rom --ifd -i bios -N
```
**Danger: Important**
Only flash the BIOS region (--ifd -i bios). The FD and ME regions are still locked.
---
# Flash Coreboot to Your Laptop BIOS
> Flash Coreboot from inside a running system after the BIOS region is unlocked. Includes safety checks and verification of the flashed image.
Source: https://selfcustodylabs.com/docs/coreboot/internal/flashing-bios/
Last updated: 2026-04-15
Publisher: Self Custody Labs (https://selfcustodylabs.com)
---
Flashing firmware always carries some risk.
If something goes wrong, your device may fail to boot and will require recovery with an external programmer.
Always make a full backup of your current BIOS before attempting to flash Coreboot.
**Note**
Note that **internal flashing cannot be used to disable Intel ME**, because the ME region is locked and cannot be read or written from the host.
If your goal is to neutralize or disable Intel ME, the only reliable method is to use an **external programmer** to dump, modify, and reflash the entire firmware image (see the External Flashing section).
## Back Up Your Existing BIOS Region
Before doing anything else, make a full backup of your current BIOS.
This is your recovery point if you need to restore the original firmware.
```bash
sudo flashrom -p internal -r factory.rom --ifd -i bios
```
**Warning**
This does not back up the entire firmware, only the BIOS region. The Intel Management Engine and descriptor regions are excluded, so this is not a full recovery image.
## Flash the Coreboot BIOS
Once everything looks correct, flash the prepared Coreboot BIOS region:
```bash
sudo flashrom -p internal -w coreboot.rom --ifd -i bios -N
```
## Verify the Flashed Image
After flashing, always re-read the chip and compare it against the file you wrote.
This ensures the flash was successful and the chip contains exactly what you intended.
Read back the flashed chip:
```bash
sudo flashrom -p internal -r flashed.bin --ifd -i bios
```
You can now choose among 3 distinct verification methods:
### 1. Quick Byte-for-Byte Comparison
This method operates at the raw binary level and checks that the flashed BIOS region matches the extracted BIOS region.
Your compiled coreboot.rom contains more than just the BIOS region, so we must extract only the BIOS part to match the layout of the original firmware.
```bash
dd if=coreboot.rom of=coreboot_bios.rom bs=1 skip=5242880 count=11534336
dd if=flashed.bin of=flashed_bios.bin bs=1 skip=5242880 count=11534336
```
Here:
- skip=5242880 skips the first 5 MB (non-BIOS regions such as Intel ME).
- count=11534336 copies the remaining 11 MB, which is the BIOS region.
Now perform the check:
```bash
cmp -l coreboot_bios.rom flashed_bios.bin | head -n 20
```
If no differences appear, the BIOS region was flashed correctly.
### 2. Compare Build Information Inside CBFS
This method operates at the specific metadata level.
Extract the `build_info` file from each full rom image:
```bash
cbfstool coreboot.rom extract -n build_info -f build_info_expected.rom
cbfstool flashed.bin extract -n build_info -f build_info_actual.rom
```
Compare them:
```bash
diff -u build_info_expected.rom build_info_actual.rom
```
If the output is empty, the `build_info` files match.
### 3. Check CBFS Contents
This method operates at the filesystem content level.
Print the CBFS layout of the Coreboot BIOS:
```bash
cbfstool coreboot.rom print
```
Output
```text
FMAP REGION: COREBOOT
Name Offset Type Size Comp
cbfs_master_header 0x0 cbfs header 32 none
cpu_microcode_blob.bin 0x80 microcode 26624 none
fallback/romstage 0x68c0 stage 92312 none
fallback/ramstage 0x1d1c0 stage 120593 LZMA (255636 decompressed)
config 0x3a940 raw 3332 LZMA (10602 decompressed)
revision 0x3b680 raw 774 none
build_info 0x3b9c0 raw 105 none
fallback/dsdt.aml 0x3ba80 raw 14537 none
vbt.bin 0x3f380 raw 1409 LZMA (4459 decompressed)
cmos_layout.bin 0x3f940 cmos_layout 2060 none
fallback/postcar 0x40180 stage 23488 none
fallback/payload 0x45dc0 simple elf 473556 none
(empty) 0xb97c0 null 202212 none
bootblock 0xeadc0 bootblock 20480 none
```
Print the CBFS layout of the Flashed BIOS:
```bash
cbfstool flashed.bin print
```
Output
```text
FMAP REGION: COREBOOT
Name Offset Type Size Comp
cbfs_master_header 0x0 cbfs header 32 none
cpu_microcode_blob.bin 0x80 microcode 26624 none
fallback/romstage 0x68c0 stage 92312 none
fallback/ramstage 0x1d1c0 stage 120593 LZMA (255636 decompressed)
config 0x3a940 raw 3332 LZMA (10602 decompressed)
revision 0x3b680 raw 774 none
build_info 0x3b9c0 raw 105 none
fallback/dsdt.aml 0x3ba80 raw 14537 none
vbt.bin 0x3f380 raw 1409 LZMA (4459 decompressed)
cmos_layout.bin 0x3f940 cmos_layout 2060 none
fallback/postcar 0x40180 stage 23488 none
fallback/payload 0x45dc0 simple elf 473556 none
(empty) 0xb97c0 null 202212 none
bootblock 0xeadc0 bootblock 20480 none
```
Compare it with the intended Coreboot image:
```bash
cbfstool coreboot.rom print > cbfs_expected.txt
cbfstool flashed.bin print > cbfs_actual.txt
diff -u cbfs_expected.txt cbfs_actual.txt
```
### Conclusion
If all comparisons match, your new Coreboot firmware has been flashed correctly and is ready to boot.
---
# External Flashing
> Practical guide: External Flashing. Covers Detect the Chip, Backup the Factory Bios, Neutralize Intel ME.
Source: https://selfcustodylabs.com/docs/coreboot/external-flashing/
Last updated: 2026-01-16
Publisher: Self Custody Labs (https://selfcustodylabs.com)
---
External flashing is sometimes necessary instead of internal flashing. The main reasons are:
- **Neutralizing Intel ME**: Internal flashing can’t access the ME region on stock firmware, so an external flash is required the first time if you want to disable or neutralize Intel ME.
- **Recovery**: If an internal flash fails and the laptop no longer boots, an external programmer is the only way to restore the system.
- **Hardware restrictions**: Some motherboards simply don’t allow internal flashing at all, so external flashing is the only option.
## Detect the Chip
Now, you need to detect the chip model using flashrom. To ensure accurate detection, follow these steps for the BIOS chip:
- Prepare your Raspberry Pi Pico with Serprog as [explained](https://selfcustodylabs.com/docs/libreboot/raspberry-pico/build-serprog) in the Libreboot guide
- Based on your BIOS Chip type (`SOIC` or `WSON`) Connect the Raspberry Pico to your Pomona Clip (1st photo) or Pogo Pin Adapter (2nd photo) using Dupont cables, as [explained](https://selfcustodylabs.com/docs/libreboot/raspberry-pico/connection) in Libreboot guide.
- Attach the clip firmly onto the BIOS chip, ensuring proper contact with all pins
- Plug the Raspberry Pico into the laptop using a USB cable
Execute the following command to detect the chip
```bash
sudo flashrom -p serprog:dev=/dev/ttyACM0,spispeed=16M
```
If multiple chips are detected, identify the correct BIOS chip based on prior photos or markings. Subsequently, re-run the command, making sure to specify the name of the pertinent chip.
```bash
sudo flashrom -p serprog:dev=/dev/ttyACM0,spispeed=16M -c "W25Q128.V"
```
If the Raspberry Pico detects the chip, you may proceed by creating a backup.
## Backup the Factory Bios
**Note**
If you are coming from a unsuccessful internal flashing, you can skip this part as there is no point to dump a bios that does not work.
To create a reliable backup of the BIOS chip(s), it's advisable to perform a triple dump of them
```bash
sudo flashrom -p serprog:dev=/dev/ttyACM0,spispeed=16M -c "W25Q128.V" -r factory.bin
sudo flashrom -p serprog:dev=/dev/ttyACM0,spispeed=16M -c "W25Q128.V" -r factory2.bin
sudo flashrom -p serprog:dev=/dev/ttyACM0,spispeed=16M -c "W25Q128.V" -r factory3.bin
```
Next, use `sha1sum` to compare the dumped BIOS images
```bash
sha1sum factory.bin factory2.bin factory3.bin
```
If the hashes match, you should see something like this:
```bash
6cf9bfc90df1ed01336872cd159a00c101d0a7b0 factory.bin
6cf9bfc90df1ed01336872cd159a00c101d0a7b0 factory2.bin
6cf9bfc90df1ed01336872cd159a00c101d0a7b0 factory3.bin
```
Once you've confirmed that the hashes are the same, you can clean up any temporary dump files:
```bash
rm -fr factory2.bin factory3.bin
```
## Neutralize Intel ME
Check if the dumped image has the correct structure by using `ifdtool`:
```bash
cd coreboot/util/ifdtool
make
./ifdtool -d factory.bin
```
It should print a long output, including the section related to Intel ME:
Output
```text
Warning: No platform specified. Output may be incomplete
File t430s_full_dump_coreboot.bin is 16777216 bytes
PCH Revision: 6 series Cougar Point
FLMAP0: 0x03040003
NR: 3
FRBA: 0x40
NC: 1
FCBA: 0x30
FLMAP1: 0x12100206
ISL: 0x12
FPSBA: 0x100
NM: 2
FMBA: 0x60
FLMAP2: 0x00210120
PSL: 0x2101
FMSBA: 0x200
FLUMAP1: 0x000018df
Intel ME VSCC Table Length (VTL): 24
Intel ME VSCC Table Base Address (VTBA): 0x000df0
ME VSCC table:
JID0: 0x001620c2
SPI Component Vendor ID: 0xc2
SPI Component Device ID 0: 0x20
SPI Component Device ID 1: 0x16
VSCC0: 0x20052005
Lower Erase Opcode: 0x20
Lower Write Enable on Write Status: 0x50
Lower Write Status Required: No
Lower Write Granularity: 64 bytes
Lower Block / Sector Erase Size: 4KB
Upper Erase Opcode: 0x20
Upper Write Enable on Write Status: 0x50
Upper Write Status Required: No
Upper Write Granularity: 64 bytes
Upper Block / Sector Erase Size: 4KB
JID1: 0x001720c2
SPI Component Vendor ID: 0xc2
SPI Component Device ID 0: 0x20
SPI Component Device ID 1: 0x17
VSCC1: 0x20052005
Lower Erase Opcode: 0x20
Lower Write Enable on Write Status: 0x50
Lower Write Status Required: No
Lower Write Granularity: 64 bytes
Lower Block / Sector Erase Size: 4KB
Upper Erase Opcode: 0x20
Upper Write Enable on Write Status: 0x50
Upper Write Status Required: No
Upper Write Granularity: 64 bytes
Upper Block / Sector Erase Size: 4KB
JID2: 0x001820c2
SPI Component Vendor ID: 0xc2
SPI Component Device ID 0: 0x20
SPI Component Device ID 1: 0x18
VSCC2: 0x20052005
Lower Erase Opcode: 0x20
Lower Write Enable on Write Status: 0x50
Lower Write Status Required: No
Lower Write Granularity: 64 bytes
Lower Block / Sector Erase Size: 4KB
Upper Erase Opcode: 0x20
Upper Write Enable on Write Status: 0x50
Upper Write Status Required: No
Upper Write Granularity: 64 bytes
Upper Block / Sector Erase Size: 4KB
JID3: 0x001640ef
SPI Component Vendor ID: 0xef
SPI Component Device ID 0: 0x40
SPI Component Device ID 1: 0x16
VSCC3: 0x20052005
Lower Erase Opcode: 0x20
Lower Write Enable on Write Status: 0x50
Lower Write Status Required: No
Lower Write Granularity: 64 bytes
Lower Block / Sector Erase Size: 4KB
Upper Erase Opcode: 0x20
Upper Write Enable on Write Status: 0x50
Upper Write Status Required: No
Upper Write Granularity: 64 bytes
Upper Block / Sector Erase Size: 4KB
JID4: 0x001740ef
SPI Component Vendor ID: 0xef
SPI Component Device ID 0: 0x40
SPI Component Device ID 1: 0x17
VSCC4: 0x20052005
Lower Erase Opcode: 0x20
Lower Write Enable on Write Status: 0x50
Lower Write Status Required: No
Lower Write Granularity: 64 bytes
Lower Block / Sector Erase Size: 4KB
Upper Erase Opcode: 0x20
Upper Write Enable on Write Status: 0x50
Upper Write Status Required: No
Upper Write Granularity: 64 bytes
Upper Block / Sector Erase Size: 4KB
JID5: 0x001840ef
SPI Component Vendor ID: 0xef
SPI Component Device ID 0: 0x40
SPI Component Device ID 1: 0x18
VSCC5: 0x20052005
Lower Erase Opcode: 0x20
Lower Write Enable on Write Status: 0x50
Lower Write Status Required: No
Lower Write Granularity: 64 bytes
Lower Block / Sector Erase Size: 4KB
Upper Erase Opcode: 0x20
Upper Write Enable on Write Status: 0x50
Upper Write Status Required: No
Upper Write Granularity: 64 bytes
Upper Block / Sector Erase Size: 4KB
JID6: 0x0016ba20
SPI Component Vendor ID: 0x20
SPI Component Device ID 0: 0xba
SPI Component Device ID 1: 0x16
VSCC6: 0x20052005
Lower Erase Opcode: 0x20
Lower Write Enable on Write Status: 0x50
Lower Write Status Required: No
Lower Write Granularity: 64 bytes
Lower Block / Sector Erase Size: 4KB
Upper Erase Opcode: 0x20
Upper Write Enable on Write Status: 0x50
Upper Write Status Required: No
Upper Write Granularity: 64 bytes
Upper Block / Sector Erase Size: 4KB
JID7: 0x0017ba20
SPI Component Vendor ID: 0x20
SPI Component Device ID 0: 0xba
SPI Component Device ID 1: 0x17
VSCC7: 0x20052005
Lower Erase Opcode: 0x20
Lower Write Enable on Write Status: 0x50
Lower Write Status Required: No
Lower Write Granularity: 64 bytes
Lower Block / Sector Erase Size: 4KB
Upper Erase Opcode: 0x20
Upper Write Enable on Write Status: 0x50
Upper Write Status Required: No
Upper Write Granularity: 64 bytes
Upper Block / Sector Erase Size: 4KB
OEM Section:
00: 47 31 52 4e 31 36 57 57 ff 38 2e 31 2e 34 30 2e
10: 31 34 31 36 ff 31 36 4d 42 ff 53 49 47 4e 45 44
20: ff ff ff ff ff ff ff ff ff ff ff ff ff ff ff ff
30: ff ff ff ff ff ff ff ff ff ff ff ff ff ff ff ff
Found Region Section
FLREG0: 0x00000000
Flash Region 0 (Flash Descriptor): 00000000 - 00000fff
FLREG1: 0x0fff0500
Flash Region 1 (BIOS): 00500000 - 00ffffff
FLREG2: 0x04ff0003
Flash Region 2 (Intel ME): 00003000 - 004fffff
FLREG3: 0x00020001
Flash Region 3 (GbE): 00001000 - 00002fff
FLREG4: 0x00001fff
Flash Region 4 (Platform Data): 00fff000 - 00000fff (unused)
Found Component Section
FLCOMP 0x4990001d
Dual Output Fast Read Support: supported
Read ID/Read Status Clock Frequency: 33MHz
Write/Erase Clock Frequency: 33MHz
Fast Read Clock Frequency: 50MHz
Fast Read Support: supported
Read Clock Frequency: 20MHz
Component 2 Density: 4MB
Component 1 Density: 16MB
FLILL 0x00000000
Invalid Instruction 3: 0x00
Invalid Instruction 2: 0x00
Invalid Instruction 1: 0x00
Invalid Instruction 0: 0x00
FLPB 0x00000000
Flash Partition Boundary Address: 0x000000
Found PCH Strap Section
PCHSTRP0 : 0x4810d782
PCHSTRP1 : 0x0000010f
PCHSTRP2 : 0x00000000
PCHSTRP3 : 0x00000000
PCHSTRP4 : 0x00c8e102
PCHSTRP5 : 0x00000000
PCHSTRP6 : 0x00000000
PCHSTRP7 : 0x00000000
PCHSTRP8 : 0x00000000
PCHSTRP9 : 0x30000b8c
PCHSTRP10 : 0x00410044
PCHSTRP11 : 0x99000097
PCHSTRP12 : 0x00000000
PCHSTRP13 : 0x00000000
PCHSTRP14 : 0x00000000
PCHSTRP15 : 0x0000437e
PCHSTRP16 : 0x00000000
PCHSTRP17 : 0x00000002
AltMeDisable bit is not set
Found Master Section
FLMSTR1: 0x0a0b0000 (Host CPU/BIOS)
Platform Data Region Write Access: disabled
GbE Region Write Access: enabled
Intel ME Region Write Access: disabled
Host CPU/BIOS Region Write Access: enabled
Flash Descriptor Write Access: disabled
Platform Data Region Read Access: disabled
GbE Region Read Access: enabled
Intel ME Region Read Access: disabled
Host CPU/BIOS Region Read Access: enabled
Flash Descriptor Read Access: enabled
Requester ID: 0x0000
FLMSTR2: 0x0c0d0000 (Intel ME)
Platform Data Region Write Access: disabled
GbE Region Write Access: enabled
Intel ME Region Write Access: enabled
Host CPU/BIOS Region Write Access: disabled
Flash Descriptor Write Access: disabled
Platform Data Region Read Access: disabled
GbE Region Read Access: enabled
Intel ME Region Read Access: enabled
Host CPU/BIOS Region Read Access: disabled
Flash Descriptor Read Access: enabled
Requester ID: 0x0000
FLMSTR3: 0x08080118 (GbE)
Platform Data Region Write Access: disabled
GbE Region Write Access: enabled
Intel ME Region Write Access: disabled
Host CPU/BIOS Region Write Access: disabled
Flash Descriptor Write Access: disabled
Platform Data Region Read Access: disabled
GbE Region Read Access: enabled
Intel ME Region Read Access: disabled
Host CPU/BIOS Region Read Access: disabled
Flash Descriptor Read Access: disabled
Requester ID: 0x0118
Found Processor Strap Section
????: 0x00000000
????: 0xffffffff
????: 0xffffffff
????: 0xffffffff
????: 0xffffffff
????: 0xffffffff
????: 0xffffffff
????: 0xffffffff
```
Now to check if the dumped ME image is valid just run:
```bash
python me_cleaner.py -c factory.bin
```
You should get an output like the one below:
Output
```text
Full image detected
The ME/TXE region goes from 0x3000 to 0x500000
Found FPT header at 0x3010
Found 23 partition(s)
Found FTPR header: FTPR partition spans from 0x180000 to 0x24a000
ME/TXE firmware version 8.1.40.1416
Public key match: Intel ME, firmware versions 7.x.x.x, 8.x.x.x
The AltMeDisable bit is NOT SET
Checking the FTPR RSA signature... VALID
```
Apply `me_cleaner`
To neutralize Intel ME you can just use `me_cleaner` on it:
```bash
python me_cleaner.py -S -O factory_me_neutralized.bin factory.bin
```
You should get an output like the one below:
Output
```text
Full image detected
The ME/TXE region goes from 0x3000 to 0x500000
Found FPT header at 0x3010
Found 23 partition(s)
Found FTPR header: FTPR partition spans from 0x180000 to 0x24a000
ME/TXE firmware version 8.1.40.1416
Public key match: Intel ME, firmware versions 7.x.x.x, 8.x.x.x
The AltMeDisable bit is NOT SET
Reading partitions list...
???? (0x000003c0 - 0x000000400, 0x00000040 total bytes): removed
FOVD (0x00000400 - 0x000001000, 0x00000c00 total bytes): removed
MDES (0x00001000 - 0x000002000, 0x00001000 total bytes): removed
FCRS (0x00002000 - 0x000003000, 0x00001000 total bytes): removed
EFFS (0x00003000 - 0x0000df000, 0x000dc000 total bytes): removed
BIAL (NVRAM partition, no data, 0x0000add0 total bytes): nothing to remove
BIEL (NVRAM partition, no data, 0x00003000 total bytes): nothing to remove
BIIS (NVRAM partition, no data, 0x00036000 total bytes): nothing to remove
NVCL (NVRAM partition, no data, 0x00010511 total bytes): nothing to remove
NVCM (NVRAM partition, no data, 0x0000493f total bytes): nothing to remove
NVCP (NVRAM partition, no data, 0x0000a553 total bytes): nothing to remove
NVJC (NVRAM partition, no data, 0x00004000 total bytes): nothing to remove
NVKR (NVRAM partition, no data, 0x0001257d total bytes): nothing to remove
NVOS (NVRAM partition, no data, 0x00034af5 total bytes): nothing to remove
NVSH (NVRAM partition, no data, 0x00007609 total bytes): nothing to remove
NVTD (NVRAM partition, no data, 0x00001eac total bytes): nothing to remove
PLDM (NVRAM partition, no data, 0x0000a000 total bytes): nothing to remove
GLUT (0x000df000 - 0x0000e3000, 0x00004000 total bytes): removed
LOCL (0x000e3000 - 0x0000e7000, 0x00004000 total bytes): removed
WCOD (0x000e7000 - 0x000140000, 0x00059000 total bytes): removed
MDMV (0x00140000 - 0x000180000, 0x00040000 total bytes): removed
FTPR (0x00180000 - 0x00024a000, 0x000ca000 total bytes): NOT removed
NFTP (0x0024a000 - 0x0004a4000, 0x0025a000 total bytes): removed
Removing partition entries in FPT...
Removing EFFS presence flag...
Correcting checksum (0x2f)...
Reading FTPR modules list...
UPDATE (LZMA , 0x1cc507 - 0x1cc6c5 ): removed
ROMP (Huffman, fragmented data, ~2 KiB ): NOT removed, essential
BUP (Huffman, fragmented data, ~56 KiB ): NOT removed, essential
KERNEL (Huffman, fragmented data, ~135 KiB ): removed
POLICY (Huffman, fragmented data, ~91 KiB ): removed
HOSTCOMM (LZMA , 0x1cc6c5 - 0x1d349f ): removed
RSA (LZMA , 0x1d349f - 0x1d86f5 ): removed
CLS (LZMA , 0x1d86f5 - 0x1dde8a ): removed
TDT (LZMA , 0x1dde8a - 0x1e4580 ): removed
FTCS (Huffman, fragmented data, ~18 KiB ): removed
ClsPriv (LZMA , 0x1e4580 - 0x1e4961 ): removed
SESSMGR (LZMA , 0x1e4961 - 0x1f328b ): removed
The ME minimum size should be 1667072 bytes (0x197000 bytes)
The ME region can be reduced up to:
00003000:00199fff me
Setting the AltMeDisable bit in PCHSTRP10 to disable Intel ME...
Checking the FTPR RSA signature... VALID
Done! Good luck!
```
## Flash the Neutralized Intel ME
Now flash the full factory image with the neutralized Intel ME:
```bash
sudo flashrom -p serprog:dev=/dev/ttyACM0,spispeed=16M -c "W25Q128.V" -w factory_me_neutralized.bin
```
To double-check, you can dump the newly flashed image
```bash
sudo flashrom -p serprog:dev=/dev/ttyACM0,spispeed=16M -c "W25Q128.V" -r flashed.bin
```
Next, use sha1sum to compare the dumped BIOS image with the original libreboot_bottom.rom file
```bash
sha1sum factory_me_neutralized.bin flashed.bin
```
If the hashes match, you should see something like this:
```bash
4b9f06ccd2ce11dad757e337829a450a05df7929 factory_me_neutralized.bin
4b9f06ccd2ce11dad757e337829a450a05df7929 flashed.bin
```
Once you've confirmed that the hashes are the same, you can clean up any temporary dump files:
```bash
rm -fr flashed.bin
```
## Flash the Coreboot BIOS Region
Before flashing the BIOS, remove the CMOS battery. Some laptops use CMOS/EC settings to protect the SPI chip, and removing the battery also adds a layer of safety.
**Note**
If you’ve already flashed Coreboot internally, you can skip this section as you’re all set and ready to go.
Make sure the writing protection is disabled:
```bash
sudo flashrom -p serprog:dev=/dev/ttyACM0,spispeed=16M -c "W25Q128.V" --wp-disable
```
You will get the below output:
```text
Disabled hardware protection
```
Now flash ONLY the BIOS region from your Coreboot image by doing:
```bash
sudo flashrom -p serprog:dev=/dev/ttyACM0,spispeed=16M -c "W25Q128.V" -w coreboot.rom --ifd -i bios -N
```
Finally, [verify](https://selfcustodylabs.com/docs/coreboot/internal/flashing-bios#verify-the-flashed-image) the flashed bios region.
## Verify Intel ME Neutralization
To check whether Intel ME has been successfully neutralized, you can use `intelmetool`:
```bash
cd coreboot/util/intelmetool
make
sudo ./intelmetool -m
```
The output you want to see should look similar to this:
Output
```text
Bad news, you have a `QM77 Express Chipset LPC Controller` so you have ME hardware on board and you can't control or disable it, continuing...
MEI found: [8086:1e3a] 7 Series/C216 Chipset Family MEI Controller #1
ME Status : 0x1c020191
ME Status 2 : 0x120a0150
ME: FW Partition Table : OK
ME: Bringup Loader Failure : NO
ME: Firmware Init Complete : NO
ME: Manufacturing Mode : YES
ME: Boot Options Present : NO
ME: Update In Progress : NO
ME: Current Working State : Initializing
ME: Current Operation State : Bring up
ME: Current Operation Mode : Debug
ME: Error Code : No Error
ME: Progress Phase : BUP Phase
ME: Power Management Event : Clean global reset
ME: Progress Phase State : Check to see if straps say ME DISABLED
ME: Extend SHA-256: f9acfe9c2b5b199d321a1580417f5c4334d710175ad70bdaf4350eb1bef276fe
ME: failed to become ready
ME: failed to become ready
ME: GET FW VERSION message failed
```
In this output, Intel ME remains in the initializing state and fails to become fully ready. This is exactly what you expect when ME has been neutralized: the hardware is present, but the ME firmware is disabled and cannot initialize.
---
# Build a Nostr Signing Device (NSD)
> Build your own Nostr Signing Device to keep your private key secure. Hardware-based signing for Nostr using LILYGO T-Display and Horse extension.
Source: https://selfcustodylabs.com/docs/nostr-signing-device/
Last updated: 2026-01-14
Publisher: Self Custody Labs (https://selfcustodylabs.com)
---
**Note: Bonus Project**
This guide is a bonus project for Bitcoiners interested in Nostr. The same security principles that apply to Bitcoin private keys - keeping them offline and isolated - apply to your Nostr identity.
**Info: What You'll Do**
In this guide, you will:
- Set up Arduino IDE for ESP32 development
- Flash firmware to a LILYGO T-Display
- Install the Horse browser extension
- Connect to Nostr clients securely
**Time required:** 1-2 hours
**Difficulty:** Intermediate
**Estimated cost:** $10-15 (LILYGO T-Display)
**Prerequisites:** LILYGO T-Display, USB cable, Chrome-based browser
## Why Use a Hardware Signing Device?
A Nostr Signing Device (NSD) keeps your private key isolated from your computer:
| Without NSD | With NSD |
|-------------|----------|
| Private key stored in browser/software | Private key stored on hardware device |
| Exposed to malware, keyloggers | Isolated from computer threats |
| Key could be extracted | Key never leaves device |
The NSD signs messages directly on the device - your private key never touches your computer.
## How It Works
```
NSD (signs messages) --> Horse Extension --> Nostr Client
```
**Components:**
- **LILYGO T-Display** - The physical signing device
- **Horse Extension** - Browser extension that connects NSD to clients
- **Nostr Client** - Where you interact with Nostr (e.g., Coracle)
## What You'll Need
| Component | Description | Source |
|-----------|-------------|--------|
| LILYGO T-Display 1.14 | The signing hardware | [AliExpress](https://www.aliexpress.com/item/33048962331.html) |
| USB Cable | To connect and flash | Usually included |
| Arduino IDE | To build and upload firmware | Free download |
| Horse Extension | Browser bridge | Chrome Web Store |
Let's proceed with the setup.
---
# Arduino IDE Setup for NSD
> Install and configure Arduino IDE to flash your Nostr Signing Device. Download the legacy version and set up ESP32 board support.
Source: https://selfcustodylabs.com/docs/nostr-signing-device/arduino-ide/
Last updated: 2026-04-14
Publisher: Self Custody Labs (https://selfcustodylabs.com)
---
## Download the Arduino IDE
Visit the [Arduino Website](https://www.arduino.cc/en/software/) and download the [Legacy Arduino IDE 1.8.19](https://downloads.arduino.cc/arduino-1.8.19-linux64.tar.xz)
## Extract the downloaded file
Open a terminal and run:
```bash
tar -xvf arduino-1.8.19-linux64.tar.xz
```
## Navigate to the extracted folder
```bash
cd arduino-1.8.19
```
## Install Arduino IDE
Run the installation script:
```bash
sudo sh install.sh
```
You should see the following output:
```bash
Adding desktop shortcut, menu item and file associations for Arduino IDE...
.
.
done!
```
## Accessing Arduino IDE
A new Arduino icon will be created.
To add Arduino to your panel (Linux Mint):
- Click the `Menu` button (bottom left).
- Type `Arduino` in the search bar.
- When the Arduino icon appears, right-click it and select `Add to Panel`.
Now you can easily access Arduino IDE from your panel!
---
# ESP32 Board Support Setup
> Add ESP32 board support to Arduino IDE so you can compile and flash firmware for the LILYGO T-Display module used by the Nostr Signing Device.
Source: https://selfcustodylabs.com/docs/nostr-signing-device/esp32-module/
Last updated: 2026-04-15
Publisher: Self Custody Labs (https://selfcustodylabs.com)
---
These steps are based on the [here](https://docs.espressif.com/projects/arduino-esp32/en/latest/installing.html#before-installing)
## Add ESP32 Board URL
- Open Arduino IDE Application
- Go to `File → Preferences`.
- In the `Additional Boards Manager` URLs field, add the following link:
```bash
https://espressif.github.io/arduino-esp32/package_esp32_index.json
```
## Install the ESP32 Platform
- Open `Tools → Board → Board Manager`.
- In the search bar, type `esp32`.
- Click on the result named **esp32** (by Espressif Systems), then click the Install button in the bottom-right corner.
- The installation may take some time as it downloads all necessary files.
## Select the Correct Board
Once installed, go to `Tools → Board → ESP32 Arduino` and select **TTGO LoRa32-OLED**.
## Restart Arduino IDE
Now your ESP32 board is ready to use
---
# Prepare the NSD Firmware
> Clone the NSD repository and flash the firmware to your LILYGO device. Step-by-step instructions to prepare your Nostr Signing Device.
Source: https://selfcustodylabs.com/docs/nostr-signing-device/setup/
Last updated: 2026-04-14
Publisher: Self Custody Labs (https://selfcustodylabs.com)
---
## Clone the GitHub repository:
Open a terminal and run:
```bash
git clone https://github.com/lnbits/nostr-signing-device.git
```
## Copy Required Libraries
Navigate to the `libraries` folder:
```bash
cd nostr-signing-device/libraries
```
Copy all the files in this folder and paste them into the `Arduino/libraries` directory (which should be empty if you just installed Arduino).
```bash
cp -r . ~/Arduino/libraries
```
## Connect Your Nostr Signing Device (NSD)
Plug in your device via USB.
## Upload the Firmware Using Arduino IDE
- Open Arduino IDE.
- Go to `Tools → Port` and select the correct serial port (e.g., `/dev/ttyACM0`).
- Click `File → Open`, then select `snsd.ino` from the `nostr-signing-device/snsd/` folder.
- Click the Upload button (right-facing arrow in the toolbar).
## Verify Installation
If the upload completes without errors, your NSD is ready! You should see the LNbits welcome screen on the display.
---
# Install Horse Browser Extension
> Install the Horse Chromium browser extension to connect your Nostr Signing Device to web clients and sign Nostr events from your browser.
Source: https://selfcustodylabs.com/docs/nostr-signing-device/horse-extension/
Last updated: 2026-04-15
Publisher: Self Custody Labs (https://selfcustodylabs.com)
---
This works only with Chromium Browser
## Clone the repository:
Open a terminal and run:
```bash
git clone https://github.com/lnbits/horse.git
```
## Navigate to the project folder:
```bash
cd horse
```
## Install dependencies
Run the following command (the `--force` flag is required to ensure successful installation):
```bash
npm install --force
```
## Build the extension:
```bash
npm run build
```
## Load the extension in your browser
- Open Chromium.
- Type `chrome://extensions/` in the address bar and press Enter.
- Enable `Developer mode` (toggle in the top right corner).
- Click `Load unpacked` (top left).
- Select the `horse/extension` folder.
Once installed, the Horse extension should appear among your extensions.
You're now ready to securely sign offline transactions with your NSD and dive into the world of Nostr!
---
# Connect NSD to Nostr Clients
> Connect your Nostr Signing Device to clients like Coracle and NoStrudel. Final step to start using your hardware-secured Nostr identity.
Source: https://selfcustodylabs.com/docs/nostr-signing-device/client-connect/
Last updated: 2026-01-12
Publisher: Self Custody Labs (https://selfcustodylabs.com)
---
Now that you’ve set up your NSD (Nostr Signing Device) and the browser extension, the last step is to connect to your favorite Nostr client. Make sure to choose one that supports the browser extension we connected the NSD to.
So far, I’ve tested the NSD and the Horse extension with the following Nostr clients:
- [Coracle](https://coracle.social/)
- [NoStrudel](https://nostrudel.ninja/)
Some other clients, like Snort, may show errors. I haven’t figured out the cause yet, so I recommend sticking to the ones above for now.
You can try other web clients (like the more popular [Primal](https://primal.net/)), but keep in mind that many of them don’t support the Horse extension or external signing devices. Instead, they ask you to enter your private key (`nsec`) to log in, which is against the whole point of using a signing device to keep your private key offline.
Once you're logged in, make sure to add your preferred relays. And in general, for every action (like posting or reacting), you'll be prompted to sign it using your signing device before it’s propagated to the network.
Congratulations, you're now fully sovereign on Nostr!
---
# SeedSigner: Our Favourite Bitcoin Signing Device
> Why SeedSigner is the Self Custody Labs favourite signing solution: stateless, air-gapped, fully verifiable, and built by you from commodity parts.
Source: https://selfcustodylabs.com/docs/seedsigner/
Last updated: 2026-08-21
Publisher: Self Custody Labs (https://selfcustodylabs.com)
---
SeedSigner is a Bitcoin signing device you build yourself from about $50 of off-the-shelf Raspberry Pi parts. It is the Self Custody Labs favourite signing solution, and this section explains why, how to [build one](https://selfcustodylabs.com/docs/seedsigner/build-guide/), and how to [use it](https://selfcustodylabs.com/docs/seedsigner/using-seedsigner/).
**Warning: Not for everyone**
Our favourite does not mean our recommendation for most people. SeedSigner adds layers of complication that a beginner should not take on: you assemble the hardware, verify and flash the software, and manage your seed backup entirely on your own. If you are setting up self-custody for the first time, start with the [hardware wallet setup guide](https://selfcustodylabs.com/docs/wallet-setup/hardware-wallet/) and a device from our [comparison page](https://selfcustodylabs.com/docs/reference/hardware-wallet-comparison/). Come back when the workflow below sounds appealing rather than intimidating.
**Info: What You'll Do in This Guide**
- Understand the stateless security model and its trade-offs
- Source parts and assemble the device
- Verify and flash SeedSigner OS
- Generate a seed with dice, back it up as a SeedQR, and sign with Sparrow
**Time required:** 1-2 hours build, plus practice
**Difficulty:** Intermediate to advanced
**Estimated cost:** $50-80 in parts
**Prerequisites:** comfort with basic command-line verification and DIY assembly
## Why It's Our Favourite
The [2026 Coldcard entropy incident](https://selfcustodylabs.com/docs/learn/wallets/coldcard-entropy-incident/) reshaped how this site evaluates signing devices: what matters is not what a vendor promises, but what you can verify yourself. SeedSigner is the most complete answer to that standard we know of.
**Stateless by design.** SeedSigner never stores your seed. The seed exists in RAM only during a signing session and vanishes at power-off. There is no flash memory to extract, no PIN to brute-force, and nothing for a thief to find on the device.
**No vendor RNG to trust.** You supply the entropy yourself, typically with [dice rolls](https://selfcustodylabs.com/docs/learn/keys/random/), and you can re-derive the resulting seed independently to prove the device honored your input. The exact failure that cost Coldcard users $116M is structurally impossible: there is no vendor seed generation to silently go wrong.
**No wallet-specific supply chain.** A hardware wallet ships to you from one vendor and can be intercepted or backdoored in transit. SeedSigner is assembled from generic Raspberry Pi components that were never labeled "bitcoin device" anywhere in their supply chain, running software you verify and flash yourself.
**Fully open and community-built.** Every line of code is open source, the project is maintained by a community rather than a company with a sales target, and releases are signed so you can verify what you flash. The current release (v0.8.7, July 2026) supports taproot, multisig, message signing, and 22 languages.
**True QR air gap.** The device communicates with your wallet software exclusively through QR codes in both directions. No USB, no Bluetooth, no SD card shuffling. The recommended Raspberry Pi Zero v1.3 has no WiFi or Bluetooth hardware at all.
## The Honest Trade-Offs
Every one of these is the flip side of a strength. Weigh them seriously:
| Trade-off | What it means for you |
|-----------|----------------------|
| No secure element | The device runs a general-purpose Linux stack; its security comes from statelessness and the air gap, not a hardened chip |
| You are the backup | The device stores nothing, so your [seed backup](https://selfcustodylabs.com/docs/learn/keys/seed/) (steel plate, SeedQR) is the single thing keeping your funds recoverable |
| Slower sessions | Loading the seed and scanning animated QR codes takes minutes, not seconds; this is a vault workflow, not a daily spender |
| Camera exposure | The SeedQR workflow puts your seed in front of a camera; do it in a private space away from windows, webcams, and phones |
| DIY responsibility | A mistake in verification or assembly is yours to catch; nobody ships you a warranty |
For a deeper look at how SeedSigner compares to a full air-gapped computer, see [air-gapped wallets](https://selfcustodylabs.com/docs/learn/wallets/air-gapped-wallets/).
## Where It Fits Best
- **As a multisig key.** SeedSigner is an outstanding quorum member in a [multisig setup](https://selfcustodylabs.com/docs/learn/wallets/multisig/): a key with no vendor, no supply chain, and no stored state diversifies beautifully against your other devices.
- **As the vault for patient savings.** The slow, deliberate workflow is a feature when you sign a few times a year.
- **As a learning instrument.** Nothing teaches how Bitcoin signing actually works like holding the entire process in your own hands.
Ready? Start with the [build guide](https://selfcustodylabs.com/docs/seedsigner/build-guide/).
---
# Build Your Own SeedSigner
> Source the Raspberry Pi parts, verify and flash SeedSigner OS, and assemble an air-gapped Bitcoin signing device for about $50 in parts.
Source: https://selfcustodylabs.com/docs/seedsigner/build-guide/
Last updated: 2026-08-21
Publisher: Self Custody Labs (https://selfcustodylabs.com)
---
This guide takes you from a parts list to a working, verified SeedSigner. Budget an hour or two the first time; none of the steps are hard, but several reward care.
**Tip: Why build it yourself**
The build is not a cost-saving compromise; it is the point. Generic parts mean there is no bitcoin-specific supply chain to intercept, and flashing software you verified yourself means there is no vendor you have to believe. If you would rather buy a pre-assembled unit (such as a SeedSigner+ kit), you are re-introducing a supply chain; buy only from a reputable builder, and still flash and verify the OS image yourself.
## Parts List
| Part | Notes | Approx. price |
|------|-------|---------------|
| Raspberry Pi Zero v1.3 | The recommended board: it has **no WiFi or Bluetooth hardware at all** | $10-15 |
| WaveShare 1.3" LCD HAT | 240x240 screen with joystick and buttons | $15-20 |
| Pi Zero camera module (OV5647) | Must include a Zero-sized ribbon cable | $10-15 |
| MicroSD card (4GB+) | Any decent brand; the OS is tiny | $5-8 |
| Case (optional) | Community designs exist to 3D print, or buy one | $0-15 |
**On the board choice:** SeedSigner OS also runs on the Pi Zero W, Pi Zero 2 W, Pi 2B, Pi 3B, and Pi 4B. The Zero v1.3 remains our recommendation because its air gap is physical: there is no radio to switch off and nothing to misconfigure. If you use a board with WiFi/Bluetooth (like the faster Zero 2 W), understand that you are trusting software to keep the radios off; SeedSigner OS never enables them, but absent hardware beats disabled hardware.
**Sourcing:** buy parts from general electronics retailers (the official [seedsigner.com](https://seedsigner.com) site maintains a current parts list with links). Spreading purchases across ordinary retailers is exactly what makes the supply-chain story boring, which is what you want.
## Download and Verify SeedSigner OS
Never flash an image you have not verified. This is the one step where skipping ahead defeats the purpose of the whole device.
1. Download the latest release image from the official GitHub repository ([github.com/SeedSigner/seedsigner/releases](https://github.com/SeedSigner/seedsigner/releases), v0.8.7 as of August 2026). Pick the file matching your board, e.g. `seedsigner_os.0.8.7.pi0.img` for the Pi Zero v1.3.
2. Download the accompanying SHA256 hash file and its GPG signature from the same release page.
3. Import the SeedSigner release signing key and check its fingerprint against at least one independent source (the project website, a maintainer's profile):
```bash
gpg --keyserver keyserver.ubuntu.com --recv-keys
gpg --fingerprint
```
4. Verify the signature and the image hash:
```bash
gpg --verify seedsigner_os.0.8.7.sha256.sig seedsigner_os.0.8.7.sha256
sha256sum --check seedsigner_os.0.8.7.sha256 --ignore-missing
```
Both commands must succeed: a good signature from the key you checked, and an `OK` for your image file. If either fails, stop and re-download from the official repository.
**Info: Reproducible builds**
SeedSigner OS builds are reproducible: with the project's build system you can compile the image from source on your own machine and get a byte-identical result. You do not have to go that far, but the fact that anyone can is what keeps the published images honest.
## Flash the MicroSD Card
Use any flashing tool you trust. With plain `dd` on Linux (double-check the target device name with `lsblk` first; `dd` overwrites without asking):
```bash
sudo dd if=seedsigner_os.0.8.7.pi0.img of=/dev/sdX bs=4M status=progress conv=fsync
```
Raspberry Pi Imager or balenaEtcher work too; if you use Raspberry Pi Imager, choose "Use custom image" and do not let it apply any OS customization.
## Assemble the Device
1. **Connect the camera.** Lift the retaining clip on the Pi Zero's camera connector, insert the ribbon cable with the contacts facing the board, and press the clip closed. The Zero's connector is smaller than a full-size Pi's, which is why the Zero-specific ribbon matters.
2. **Seat the LCD HAT.** Press the WaveShare HAT onto the Pi's 40-pin GPIO header. If your Pi Zero came without a soldered header, you will need to solder one (or buy the "WH" variant with the header pre-installed).
3. **Insert the flashed microSD card** and close up the case if you have one.
4. **Power it** from any USB power source: a phone charger or a power bank is fine. SeedSigner has no battery and needs none; power off between sessions is the security model working as intended.
First boot takes under a minute and lands on the SeedSigner home screen. The device never needs, and never asks for, a network connection.
## Sanity Checks Before Real Funds
- Power-cycle the device and confirm it remembers nothing: no seeds should survive a reboot.
- Generate a throwaway test seed, load it into a hot wallet, and run one full sign-and-broadcast cycle on a small amount you can afford to lose.
- Practice the full [usage workflow](https://selfcustodylabs.com/docs/seedsigner/using-seedsigner/), including restoring your backup, before trusting it with savings. The [backup verification guide](https://selfcustodylabs.com/docs/wallet-setup/backup-verification/) applies here in full.
---
# Using SeedSigner: Seeds, SeedQR, and Signing
> Generate a seed with dice on your SeedSigner, back it up as a SeedQR, and sign transactions with Sparrow over an air-gapped QR workflow.
Source: https://selfcustodylabs.com/docs/seedsigner/using-seedsigner/
Last updated: 2026-08-21
Publisher: Self Custody Labs (https://selfcustodylabs.com)
---
Your SeedSigner is built and verified. This page covers the full working loop: create a seed from your own entropy, back it up, connect a watch-only wallet, and sign transactions over QR codes.
**Danger: The device stores nothing; you store everything**
SeedSigner is stateless. Every seed you use exists only while the device is powered, which means your physical backup is the only durable copy of your keys. Treat the backup steps below as the main event, not an afterthought.
## Generate a Seed with Dice
From the home screen, choose **Tools → New seed → Dice rolls**, then roll a physical die 99 times (for 24 words) or 50 times (for 12), entering each roll. Two habits make this trustworthy:
1. **Use a casino-grade die or several ordinary dice mixed**, rolled with a cup. The point is entropy nobody else influenced; see [our randomness guide](https://selfcustodylabs.com/docs/learn/keys/random/) for why this matters more than any device feature after 2026.
2. **Verify the derivation.** Write down the rolls, then re-derive the seed from the same rolls on a second device or offline tool and confirm the words match. This single check proves no device in the chain invented its own "randomness". The comparison page's [entropy table](https://selfcustodylabs.com/docs/reference/hardware-wallet-comparison/#entropy-who-lets-you-verify) shows how rare that verifiability is.
Add a [passphrase](https://selfcustodylabs.com/docs/learn/keys/passphrase/) if the funds warrant it; SeedSigner supports entering one at load time, and it is never part of the stored backup.
## Back It Up: Words and SeedQR
Record the seed words on paper first, then transfer to steel for anything long-term. Then let SeedSigner render the seed as a **SeedQR**: a compact QR encoding of the seed words you can etch or punch into metal.
The payoff comes at every future session: instead of typing 24 words on a joystick, you point the camera at your SeedQR and the seed loads in seconds. The cost is that anyone who photographs that QR has your seed.
**SeedQR handling rules:**
- Scan and display it only in a private room, away from windows, webcams, and phones.
- Store it with the same physical security as the written words; it *is* the words.
- If the wallet has a passphrase, the SeedQR alone stays insufficient to spend, which is a good reason to use one.
Before depositing anything, run the [backup verification drill](https://selfcustodylabs.com/docs/wallet-setup/backup-verification/): wipe (power-cycle) the device, restore purely from your backup, and confirm the wallet derives the same addresses.
## Connect Sparrow as Watch-Only
Sparrow Wallet on your desktop tracks balances and builds transactions; SeedSigner only signs. To pair them:
1. On SeedSigner: load your seed, then **Export xpub** and choose the script type (native segwit for a first wallet).
2. In Sparrow: **File → New Wallet**, keystore type **Airgapped Hardware Wallet → SeedSigner**, and scan the animated QR from the device's screen with your webcam (or import the xpub file if you prefer).
3. Sparrow now knows your [xpub](https://selfcustodylabs.com/docs/learn/keys/xpub/), so it can watch funds and generate receive addresses, but it holds no key material.
Verify a receive address on both screens before first use: display the address QR in Sparrow, scan it with SeedSigner's **Address Explorer**, and confirm the device agrees the address belongs to your seed.
## Sign a Transaction
The signing loop is the same every time:
1. **Build** the transaction in Sparrow and click through to the QR display; Sparrow shows the unsigned transaction (PSBT) as an animated QR.
2. **Scan** it with SeedSigner's camera (seed loaded).
3. **Review on the device screen**: amount, destination address, fee, and change. The device screen is the truth; if it disagrees with Sparrow, trust the device and investigate.
4. **Approve**, and SeedSigner displays the signed PSBT as an animated QR.
5. **Scan back** into Sparrow with your webcam and broadcast.
Nothing but QR codes crossed the gap in either direction. When you power off, the device forgets the seed and the whole session.
## SeedSigner in a Multisig
SeedSigner shines as one key in a [multisig quorum](https://selfcustodylabs.com/docs/learn/wallets/multisig/): it contributes a key with no vendor, no supply chain, and no stored state, which is exactly the diversity multisig is for. Register the multisig descriptor on the device (SeedSigner can persist it to the microSD as a non-secret convenience, or verify it each session) so the device can confirm change addresses really belong to your quorum. The [multisig hardware setup guide](https://selfcustodylabs.com/docs/learn/wallets/multisig/hardware-setup/) walks through the full configuration.
SeedSigner also signs plain text messages (**Tools → Sign message**, via QR), useful for proving address ownership without moving funds.